Pie Crust Recipe Without a Food Processor: Golden Crust, Timeless Method
To make pie crust without a food processor, start by chilling your butter and cutting it into small cubes. Toss cold butter with flour using your fingers or a pastry blender until the mixture resembles coarse crumbs, leaving small butter pieces for flakiness.
Gradually add ice-cold water, mixing gently until dough clumps without becoming sticky. Wrap and chill it to relax gluten and firm the fat. You’ll find tips on rolling, handling, and storage next to perfect your flaky crust.
Key Takeaways
- Use cold, cubed butter and all-purpose flour, mixing gently with fingers or a pastry blender until coarse crumbs form for flakiness.
- Gradually add ice-cold water, stirring lightly until dough forms large clumps without becoming sticky.
- Chill dough wrapped in plastic wrap for at least 30 minutes to relax gluten and firm the fat for a tender crust.
- Roll dough on a floured, cool surface using minimal pressure, folding three times to create flaky layers without overworking.
- Store leftover dough tightly wrapped in the refrigerator for up to 3 days or freeze for 2 months, thawing overnight in the fridge.
Ingredients Needed for Pie Crust
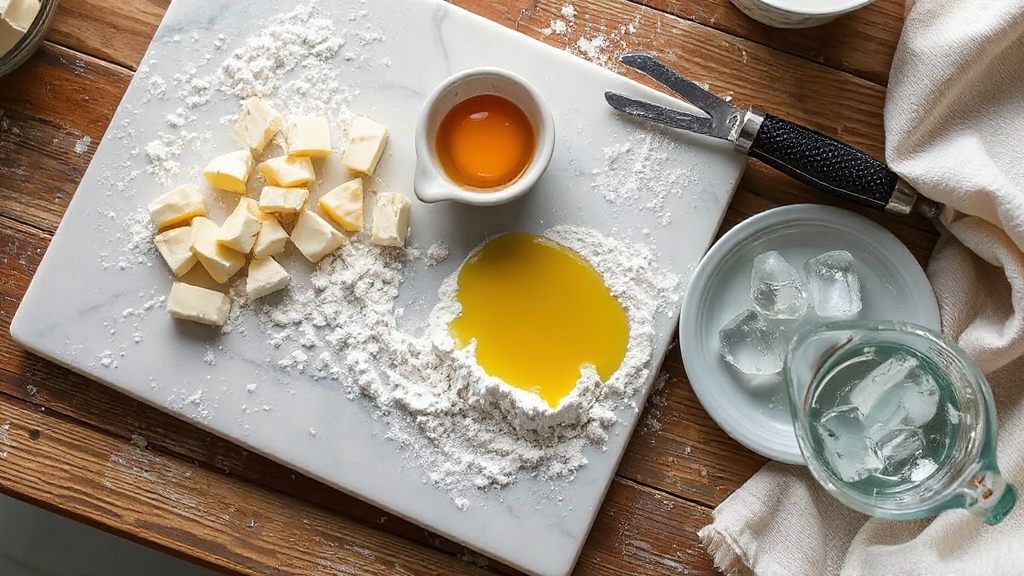
When preparing a pie crust, you’ll need a few essential ingredients that vary slightly depending on the type of crust you want to make. Start with all-purpose flour, which provides structure and a neutral flavor.
For fat, choose between vegetable shortening, butter, or a combination—each affects texture differently. Use cold water to bind the dough without melting the fat, which is vital for maintaining flakiness. Add salt to enhance flavor subtly. Sugar is optional and adds a mild sweetness, making it ideal for sweet pies.
If you’re after a flaky crust, prioritize cold butter and shortening combined with ice water. For simple or all-purpose crusts, stick to flour, butter or shortening, cold water, and salt, adjusting sugar based on your pie’s filling.
These ingredients form the foundation of your crust without needing a food processor. It is important to collect all necessary ingredients before starting to ensure a smooth preparation process.
Choosing the Right Butter and Flour
Selecting the right butter and flour plays a crucial role in crafting a pie crust that balances flavor, texture, and structure. Choose high-quality European-style butter for its rich flavor and higher fat content, which creates flaky layers through steam generated by its water content.
Using butter combined with lard or vodka can further enhance both flavor and texture, resulting in a flakier and more tender crust. Additionally, incorporating cold ingredients during preparation helps maintain the dough’s ideal consistency and flakiness.
For the flour, all-purpose flour offers the best balance of strength and tenderness. You can opt for pastry flour if you prefer a more tender crust due to its lower protein content. Always pick a reputable brand to guarantee consistency. Keep both butter and flour cold and handle them minimally to prevent toughening the dough and to maintain flakiness and tenderness.
Preparing Your Workspace and Tools
With the right butter and flour chosen, set up your workspace to support precise and efficient dough handling. Start by cleaning the surface thoroughly and lightly dusting it with flour to prevent sticking. Arrange your tools—rolling pin, pastry brush, and measuring cups—within easy reach.
Work in a well-lit, cool area to keep dough temperature *ideal*. Keep flour lightly sprinkled on your rolling pin and hands to maintain smooth handling. Minimizing temperature fluctuations is important because it helps maintain yeast activity in the dough. Minimize distractions and clear your workspace for ample rolling space. Remember to use cold butter chilled until mixing to help achieve a flaky pie crust.
| Aspect | Key Tip |
|---|---|
| Cleanliness | Clear clutter, sanitize surface |
| Flour Dusting | Light, even dusting prevents stick |
| Tool Placement | Arrange tools within arm’s reach |
| Lighting | Use bright, natural or artificial light |
| Temperature Control | Keep workspace cool, ingredients chilled |
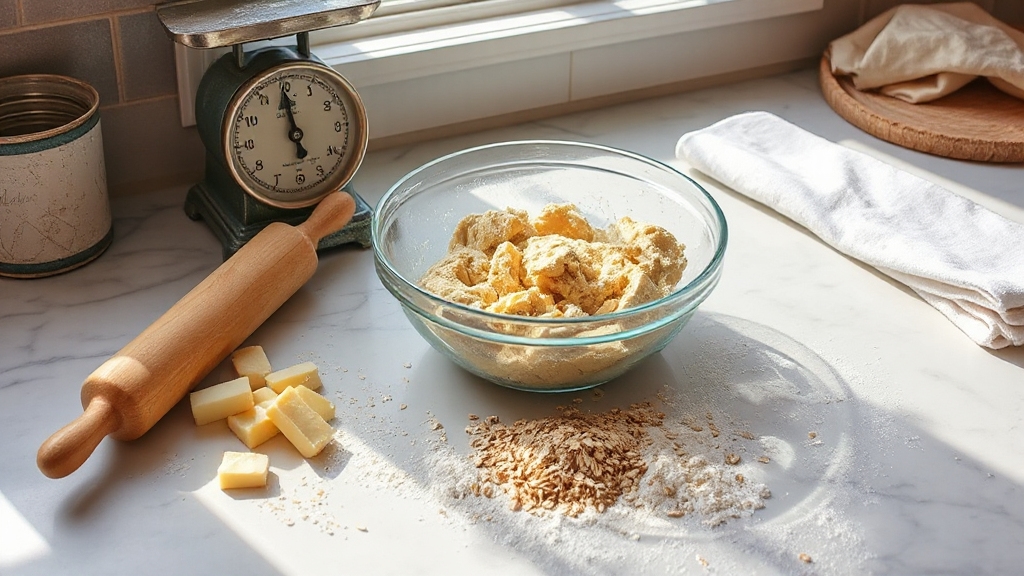
Mixing Flour and Butter by Hand
Although mixing flour and butter by hand requires patience, it gives you complete control over the dough’s texture. Start with cold, cubed butter about the size of small peas. Coat each butter piece evenly with flour to prevent clumping and guarantee distribution.
Using very cold butter is essential for flaky crusts and helps create the desired texture. For best results, consider measuring ingredients with a digital baking scale to ensure precision.
Use your fingers or a pastry blender to work the butter into the flour gently, stopping when the mixture resembles coarse meal with visible butter bits. Avoid overmixing to keep the dough flaky.
Follow these steps:
- Cut butter into small, uniform pieces.
- Coat butter pieces thoroughly with flour.
- Use gentle, consistent motions to blend ingredients.
- Stop mixing once coarse, crumbly texture with visible butter is achieved.
How to Add Water for Perfect Dough?
Because the right amount of water is essential, you should add it gradually and carefully when making pie dough. Start with about two-thirds of the total water, using ice-cold water to keep butter solid and dough flaky.
Add water slowly, mixing gently until the dough forms large clumps but isn’t sticky. Adjust based on humidity and flour type—more water in dry air, less in humidity.
Stop once the dough clumps together and feels cohesive. Using a scale improves consistency over measuring in cups, which helps maintain the correct water-to-flour ratio for precise dough hydration.
Maintaining a consistent temperature during mixing can also influence the dough’s texture and ease of handling, similar to controlling fermentation temperatures in bread making.
| Condition | Adjustment |
|---|---|
| Dry Climate | Add slightly more water |
| Humid Climate | Use less water |
| Whole Wheat | Increase water slightly |
| All-Purpose Flour | Standard water amount |
This careful approach prevents tough or crumbly dough, ensuring perfect texture. Understanding and managing hydration is just as crucial in pie dough as in sourdough starter fermentation for optimal results.
Techniques for Resting and Chilling the Dough
You need to rest your dough for at least 20–30 minutes in the refrigerator to let the fat firm up and gluten relax. This process improves flakiness and rollability. Proper resting also allows the flour to fully hydrate, which enhances dough pliability and prevents cracking by relaxing gluten strands. Additionally, maintaining a consistent temperature during resting helps develop gluten strength for better texture.
After rolling, chill the dough again for 15–30 minutes to prevent shrinking and maintain shape during baking.
These timed rests directly affect your crust’s texture, making it tender, flaky, and easier to handle.
Importance of Resting
How long you rest your pie dough directly impacts its texture and workability. Resting allows gluten proteins to relax, reducing toughness and making the dough easier to roll without tearing. It also promotes flavor development through enzymatic activity. This technique is similar to how proper gluten development is crucial in sourdough bread dough preparation.
To rest your dough effectively:
- Cover it with plastic wrap to retain moisture and prevent drying.
- Place it in a cool, draft-free environment to maintain consistent temperature.
- Allow at least 30 minutes to enable gluten relaxation and enzymatic processes. During this time, active enzymatic breakdown of starches into sugars occurs, feeding yeast and enhancing dough texture through enzymatic processes.
- Optionally, gently fold or turn the dough during resting to ensure even fermentation.
This process helps prevent shrinkage, supports a tender, flaky crust, and makes the dough more pliable for shaping. Proper resting sets the foundation for a perfect pie crust without a food processor.
Chilling Duration Tips
While chilling your pie dough might seem straightforward, mastering the timing and techniques can substantially enhance your crust’s texture and workability.
After mixing, divide the dough into disks and wrap them tightly to prevent drying. Chill for at least 30 minutes—this hardens the fat for easier rolling and reduces cracking. For best results, chill dough for 24 hours to ensure even cooling from the inside out; shorter chilling times can cause uneven temperature and make rolling difficult.
You can refrigerate up to three days or freeze wrapped in foil for up to two months; always chill at least 30 minutes before freezing. Maintaining consistent dough temperature during chilling supports gluten development critical for optimal texture.
After rolling, chill the dough briefly again to help it keep its shape during baking. Avoid over-chilling, as it can toughen the dough. Keep the dough cold throughout handling to relax gluten and maintain firmness.
When using frozen dough, thaw slowly in the fridge overnight for best results.
Effects on Texture
Because resting and chilling directly influence gluten development and fat consistency, mastering these techniques is essential for achieving a tender, flaky pie crust.
Resting relaxes gluten, preventing toughness and reducing shrinkage, while chilling firms the fat, maintaining layers that create flakiness. Proper chilling results in a tender, flaky crust by allowing the fat to remain cold and solid.
To optimize texture, follow these steps:
- Rest the dough for at least 30 minutes to allow gluten to relax and water to hydrate flour evenly.
- Chill the dough thoroughly, keeping the fat solid to prevent premature melting during baking.
- Handle the dough gently to avoid overworking, which toughens the crust and disrupts layers.
- Roll out rested, chilled dough carefully to prevent tearing and ensure a consistent, flaky texture throughout.
Rolling Out the Dough Without Sticking
When rolling out your pie dough, you’ll want to make certain your surface is well-prepared to prevent sticking and maintain the dough’s texture. Start by dusting your work surface heavily with low-protein flour or roll the dough between wax paper sheets for easy handling. Keep your rolling surface cool to avoid softening the dough.
This technique is similar to how parchment paper is used to ensure easy handling and removal in baking. Handle the dough gently, and if it becomes too soft, chill it briefly before continuing. Lightly dust the dough with flour when transferring it to avoid sticking. Additionally, using a mixture of butter and flour on the pan before adding the crust can help prevent the pie from sticking during baking.
Tips to Achieve a Flaky Pie Crust
To achieve a flaky pie crust, you’ll need to focus on keeping your ingredients cold and handling the dough gently to create distinct layers. Start with cold butter cut into pea-sized pieces and use ice water to bind the dough. Avoid overmixing to preserve the butter chunks that form flaky pockets during baking.
Refrigerating butter and shortening before use helps maintain these cold fats, which is essential for flakiness. Temperature control is crucial since warmer conditions accelerate dough fermentation, similar to how sourdough requires precise fermentation monitoring to maintain structure.
When rolling, fold the dough three times to create multiple layers, a technique called lamination.
Follow these tips:
- Keep all ingredients and tools chilled to maintain dough temperature.
- Handle dough minimally to prevent warming and gluten overdevelopment.
- Roll out dough evenly to ensure consistent baking.
- Fold and roll the dough carefully to build layered structure enhancing flakiness.
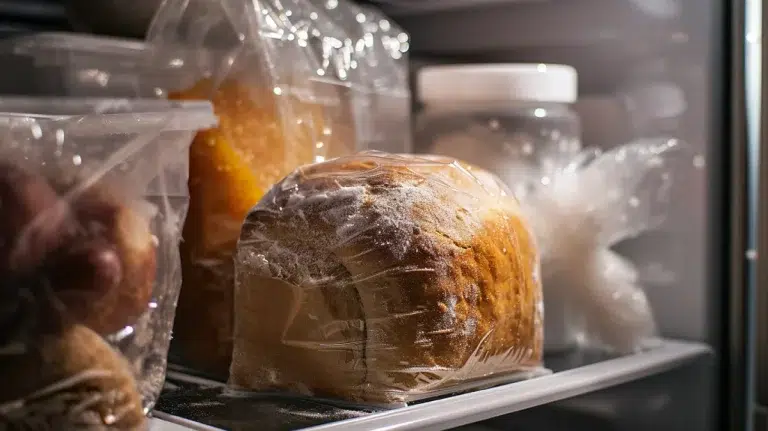
Storing and Freezing Pie Dough Properly
You should refrigerate pie dough for up to three days before baking to maintain its texture and prevent spoilage.
When freezing, wrap dough discs tightly in plastic wrap, then place them in an airtight container or freezer bag to avoid freezer burn.
Thaw frozen dough overnight in the refrigerator to preserve its consistency and flavor.
For best results, allow the dough to rest in the fridge for at least 1 hour before rolling out to ensure even chilling.
Refrigeration Guidelines
Although pie dough is best used fresh, proper refrigeration can extend its usability while maintaining texture and flavor. Keep your dough tightly wrapped in plastic wrap or aluminum foil to prevent drying and odor absorption. Store it at 35-40°F (1.5-4°C) to slow bacterial growth without freezing the dough.
Use refrigerated dough within 2 to 3 days for best results. Choosing the right storage method is crucial to preserve the dough’s texture and moisture.
Follow these refrigeration guidelines:
- Shape dough into disks before wrapping for easier handling.
- Label with the date to track freshness and avoid spoilage.
- Avoid loosely covering dough to prevent hardening or off-flavors.
- Let dough warm to room temperature before rolling to avoid cracking. Additionally, refrigerating the dough overnight or up to 3 days can improve flavor and texture.
Freezing and Thawing Tips
Extending the life of your pie dough beyond refrigeration involves proper freezing techniques that preserve texture and flavor. Shape your dough into discs or balls, wrap tightly in plastic wrap or foil, then double-bag in airtight containers or freezer bags. Label each package with the date and dough type. Using recipes high in fat and low in liquid is recommended to withstand freeze-thaw cycles and maintain dough quality.
Store dough discs in the coldest part of the freezer for up to three months. For pre-shaped crusts, freeze rolled-out dough in pie pans, stacking with wax paper between layers.
When thawing, unwrap dough and refrigerate overnight—never thaw at room temperature to prevent bacterial growth. Handle thawed dough gently to maintain flakiness. Avoid storing near strong odors and check for freezer burn before use.
Frequently Asked Questions
Can I Substitute Shortening for Butter in Pie Crust?
Yes, you can substitute shortening for butter in pie crust at a 1:1 ratio. Expect a more tender, less flaky texture since shortening lacks water content that creates steam and layers.
Shortening dough holds its shape better and is easier to handle, especially if you’re new to baking. Keep the shortening cold, cut it into the flour well, and refrigerate the dough before baking for best results.
How Do I Fix a Crumbly Dough That Won’t Hold Together?
If your dough’s crumbly and won’t hold, sprinkle cold water in small amounts, then gently press it together—avoid over-kneading.
Wrap it in plastic wrap and let it rest in the fridge for at least 30 minutes to let moisture redistribute.
When rolling, use minimal extra flour to prevent drying.
These steps help hydrate and bind your dough, making it easier to handle without breaking apart.
What’s the Best Way to Prevent the Crust From Shrinking During Baking?
To prevent your crust from shrinking, start by chilling the dough thoroughly before rolling it out.
Avoid overworking it to limit gluten development.
Roll evenly and let the crust rest in the fridge for at least 30 minutes.
When baking, use pie weights to keep the crust flat and bake at a moderate temperature around 350°F.
Also, press the edges gently and avoid glass pans to make certain of even heat and stability.
Can I Make Pie Crust Dough Ahead and Keep It in the Fridge Overnight?
Ever wonder how to make rolling out dough easier the next day? Yes, you can make pie crust dough ahead and keep it in the fridge overnight. Just wrap it tightly in plastic wrap to prevent drying and odors.
Chilling relaxes the gluten, making the dough more pliable and less likely to shrink during baking. Before rolling, let it sit at room temperature for a few minutes for best results.
How Do I Blind Bake a Pie Crust Without a Food Processor?
To blind bake your pie crust, preheat your oven to 375°F (190°C).
Line the shaped dough with foil or parchment paper, then fill it with pie weights or crumpled parchment paper to prevent shrinking.
Bake for 40-50 minutes, then carefully remove the weights and foil.
Return the crust to the oven for an additional 5 minutes to crisp the base.
Let it cool before adding your filling.
Tender, Flaky and Full of Heart—Your Pie Awaits
Making pie crust without a food processor is like tending a garden by hand—each fold and pinch nurtures the dough’s flaky promise. By carefully mixing butter and flour, adding just enough water, and resting the dough properly, you cultivate a crust that rises golden and tender.
With patience and the right techniques, you’ll transform simple ingredients into a masterpiece, ready to cradle your favorite filling and delight every bite with flaky perfection.