Kitchenaid Mixer Sourdough Bread Recipes: From Starter to Crust
Using a KitchenAid mixer to create sourdough bread makes the process a breeze. You’ll mix essentials like flour, water, salt, and a lively sourdough starter, letting the mixer do the heavy lifting.
As you knead the dough, you’ll build strength and structure, ensuring a perfect rise. With precise baking techniques, like controlling fermentation times and scoring the dough, you’ll end up with a crusty, flavorful loaf.
Plus, you can experiment with variations, from whole wheat to jalapeño-cheddar. The result?
A crusty loaf with a tender crumb. Curious about tips for flawless sourdough? There’s more to explore.
Key Takeaways
- Use a KitchenAid mixer with a dough hook for efficient mixing and kneading of sourdough ingredients.
- Ensure your sourdough starter is healthy and ready by checking for bubbling and performing the float test.
- Follow the recommended mixing and kneading techniques for optimal gluten development and dough consistency.
- Preheat your oven and Dutch oven to 500°F before baking for the best crust and rise.
Homemade Sourdough Bread Recipe
To create a delicious homemade sourdough bread, you’ll need to gather a few essential ingredients and master the mixing and kneading techniques.
Once you’ve got the basics down, you’ll discover helpful baking tips that can elevate your loaf to bakery-quality perfection.
Let’s explore these key points to guarantee your sourdough journey is both enjoyable and rewarding!
Essential Ingredients
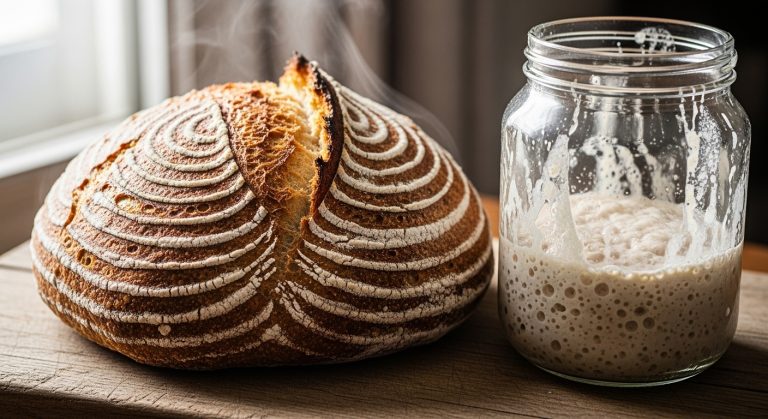
Homemade sourdough bread relies on four essential ingredients that work together to create a flavorful, crusty loaf. Each component plays a crucial role in the baking process, guaranteeing your bread rises beautifully and tastes delicious.
| Ingredient | Amount | Purpose |
|---|---|---|
| Sourdough Starter | 100g | Acts as a natural leavening agent |
| Bread Flour | 450g | Provides structure and aids gluten development |
| Water | 275g | Hydrates ingredients, ideal at room temperature |
| Salt | 10g | Enhances flavor and regulates yeast activity |
Your sourdough starter is a living culture filled with wild yeast and bacteria that ferments your dough. The bread flour, packed with higher protein, guarantees robust gluten development, giving your bread its signature chewiness. Water is crucial for mixing, and using room temperature water can optimize fermentation. Finally, salt not only brings out the flavors but also strengthens the gluten structure, making your loaf hold its shape. Together, these ingredients make the magic happen, turning simple components into a warm, crusty masterpiece. Happy baking!
Sourdough Starter Readiness
To make the best sourdough, you need to guarantee your starter is truly ready.
You’ll want to look for signs like it doubling in size and bubbling with excitement, and don’t forget the float test to confirm it’s good to go.
Keeping a consistent feeding schedule is essential so your starter stays healthy and strong for that perfect rise in your dough.
Checking Starter Float Test
The float test is a simple yet effective way to determine if your sourdough starter is ready for baking. This straightforward method helps you gauge the yeast activity and overall health of your starter, ensuring it’s primed to leaven your dough.
To perform the float test, take a small scoop of your starter and gently drop it into a glass of water. Observe what happens:
| Result | Indication | Next Steps |
|---|---|---|
| Floats | Well-aerated, ready for baking | Use in your dough recipe |
| Sinks | Needs more time to ferment | Wait a few hours and test again |
| Doubled in size | Healthy starter, ample bubbles present | Confirm it’s ready before testing |
A properly fed sourdough starter should have doubled in size and be filled with bubbles. If it floats, it indicates sufficient yeast activity, signaling that it’s time to bake. If it sinks, give it some extra time to develop that delightful airy texture. Regularly checking your starter with the float test will help you achieve excellent results in your sourdough baking adventures.
Signs of Healthy Starter
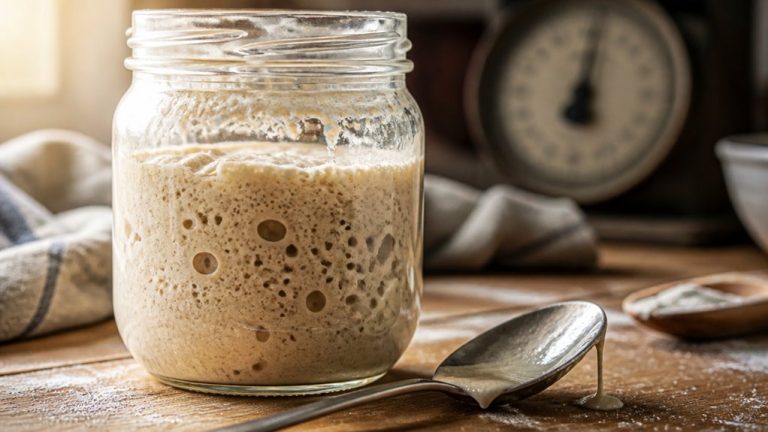
A healthy sourdough starter exhibits consistent bubbling and doubles in size within 6-8 hours after feeding, indicating it’s ready for baking. You’ll notice the surface covered with tiny bubbles, a sure sign of active fermentation. These bubbles are created by the yeast working hard, producing carbon dioxide as they feast on the flour.
When you take a whiff, a pleasant, slightly tangy aroma should greet you, enhancing your anticipation for the delicious bread ahead. If the smell turns foul, that’s a red flag—your starter might be spoiled.
To check if it’s ready to use, perform the float test: drop a small spoonful of the starter into a glass of water. If it floats, congratulations! Your starter is primed for baking.
Feeding Schedule Importance
Maintaining a consistent feeding schedule for your sourdough starter keeps the yeast lively and ready to create that perfect loaf of bread. Ideally, it would help if you fed your starter every 12 hours at room temperature, especially before baking. This rhythm guarantees your sourdough starter stays active and healthy, promoting ideal fermentation.
If you’re storing it in the refrigerator, remember to feed it at least once a week. When you’re ready to bake, take the starter out, allow it to come to room temperature, and give it a good feeding.
To check if it’s ready for baking, perform the float test: drop a small piece of your starter into a glass of water. If it floats, congratulations! Your starter is adequately fed and primed for action.
Keep an eye on the volume and bubble formation; these are great indicators of your starter’s health. A bubbly, risen starter means it’s at its peak, while a flat or sluggish one may need more frequent feedings.
Stick to this feeding schedule, and you’ll guarantee your sourdough starter is always ready to rise to the occasion.
Kneading the Dough with a KitchenAid mixer
Kneading sourdough with a KitchenAid mixer transforms the way you develop gluten, making the process quicker and more efficient than traditional hand kneading methods. Start by using the dough hook in your stand mixer bowl on low speed; this helps you create a shaggy dough.
Once that initial texture forms, crank it up to medium speed, allowing for effective kneading and ideal gluten development. As you mix, keep an eye on the dough’s consistency. If it sticks to the sides of the bowl, don’t hesitate to scrape it down for an even texture.
Remember, while the mixer can save time, it’s crucial to avoid over-kneading. Too much mixing can lead to a tough dough, so perform the windowpane test to verify the gluten is developing properly.
The beauty of using a KitchenAid for kneading sourdough lies in its ability to handle high hydration doughs with ease. With just 3-7 minutes of kneading, you’ll achieve the perfect dough consistency, setting you up for a successful baking experience.
Baking Process
To achieve that perfect loaf of sourdough, start by preheating your oven to a scorching 500°F (260°C) with a Dutch oven inside, ensuring ideal heat retention for baking.
While your oven heats up, prepare your dough by scoring it with a sharp blade. This vital step allows for controlled expansion during baking, promoting a beautiful crust and enhancing oven spring.
Once the oven reaches temperature, carefully place the scored dough into the hot Dutch oven. Cover it and bake for 50 minutes. During this time, the steam trapped inside will work wonders, helping the bread rise and develop that desirable crust.
After 50 minutes, remove the lid and let the dough bake for an additional 5-10 minutes. Watch closely as the crust turns golden brown and crispy.
When the baking is complete, transfer your loaf to a wire rack. Allow it to cool for at least one hour before slicing. This waiting period is essential; it prevents the interior from becoming gummy and enhances the flavor of your beautifully baked sourdough.
Here’s a quick reference table for your baking journey:
| Technique | Purpose | Timing |
|---|---|---|
| Stretch and Folds | Build strength | During mixing |
| Bulk Ferment | Develop flavor | 5-8 hours |
| Cold Fermentation | Enhance crust/flavor | 5-36 hours |
Sourdough Variations
Exploring the world of sourdough variations opens up a delightful domain of flavors and textures, allowing you to craft everything from soft hamburger buns to hearty whole wheat loaves.
With your trusty sourdough starter and stand mixer, you can easily make sourdough that suits any occasion. Here are some exciting variations to try:
- Easy Sourdough Hamburger Buns: This recipe for stand mixer sourdough bread yields soft, fluffy buns perfect for your favorite burgers, baked in just 20-25 minutes at 375°F.
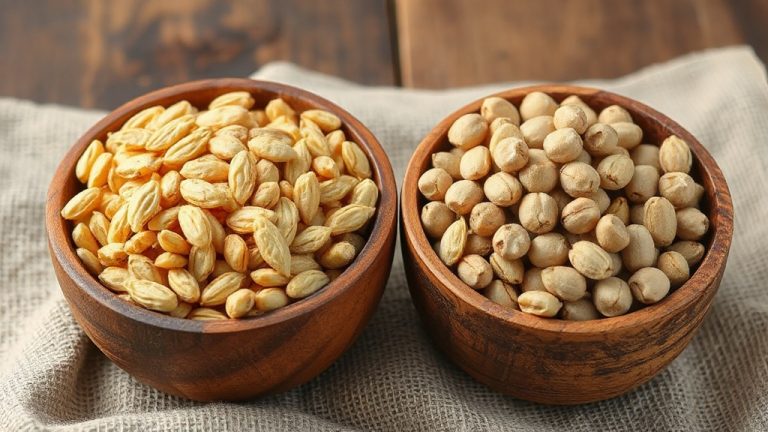
- 100% Whole Wheat Sourdough Bread: Packed with fiber, this hearty loaf requires higher hydration, baking for 40-45 minutes at 425°F, making it a nutritious choice.
- Sourdough Irish Soda Bread: For a quick and dense option, this bread uses baking soda and buttermilk, baked for 30-35 minutes at 425°F, offering a unique flavor.
- Jalapeño-Cheddar Sourdough Bread: Spice things up with fresh jalapeños and cheddar, creating a cheesy, flavorful bread that’s perfect for snacks or sandwiches, baked for 30-35 minutes at 400°F.
With these variations, you can fill your bread bowl with excitement!
Stand Mixer Overview
Using a stand mixer, like a KitchenAid, can greatly streamline your sourdough preparation, making the mixing and kneading process effortless and efficient.
These powerful stand mixers come equipped with a dough hook, which is specifically designed to knead dough effectively, saving you time and energy. In just 3-7 minutes, your KitchenAid Stand Mixer can achieve an even consistency and develop gluten more efficiently than traditional hand kneading.
One of the major advantages of using a stand mixer is the reduction in manual effort, making it perfect for anyone with limited hand strength or arthritis. You can easily accommodate various batch sizes in the mixing bowl, allowing you to prepare larger quantities of sourdough while ensuring consistent results every time.
While mixing, just remember to keep an eye on the dough consistency to prevent overheating, which can disrupt fermentation.
With a stand mixer, you can enjoy the art of sourdough baking without the physical strain, letting you focus on perfecting your recipes and enjoying the delicious outcomes. Embrace the efficiency and ease that a stand mixer brings to your sourdough preparation.
Equipment and Tips
Choosing the right equipment and following some helpful tips can elevate your sourdough bread-making experience, making it both enjoyable and rewarding.
Using a KitchenAid Stand Mixer with a dough hook is the perfect way to mix and knead your dough efficiently with minimal effort.
Here are some key tips to enhance your sourdough journey:
- Speed Settings: Start mixing on speed 1, then switch to speed 2 for kneading. This helps achieve ideal dough consistency without causing it to ball up around the hook.
- Bowl Size: Consider using the KitchenAid Bread Bowl if your recipe uses larger amounts of starter. It guarantees even mixing and accommodates bigger batches.
- Dough Consistency: Regularly monitor your dough while mixing and kneading to avoid over-kneading, which can negatively affect the texture.
- Cleaning Tips: If you find sticky dough clinging to the attachments, soak the bowl and dough hook in cold water before washing; it makes cleanup much easier.
With these tips in hand, you’re on your way to mastering making sourdough with your KitchenAid mixer!
Special Offers and Recommendations
Looking to elevate your sourdough game? Don’t miss out on the chance to save 15% on KitchenAid UK products with the discount code ELAINE15, perfect for upgrading your baking arsenal before the holiday season. Whether you’re a beginner or a seasoned baker, this offer—valid until December 31, 2023—provides a fantastic opportunity to invest in a stand mixer that makes preparing sourdough bread a breeze.
Check out the table below to see some must-have KitchenAid products that can enhance your baking experience:
| Product | Features |
|---|---|
| KitchenAid Stand Mixer | Versatile for different batch sizes |
| KitchenAid Bread Bowl | Perfect for making sourdough starter |
| KitchenAid Attachments | Ideal for various recipes and videos |
| KitchenAid Baking Set | Complete set for all your bread-making needs |
Frequently Asked Questions
Can I Make Sourdough in My Kitchenaid Mixer?
Yes, you can make delicious sourdough in your KitchenAid mixer! Just use the dough hook, mix at low speed initially, then increase to medium for perfect gluten development. Monitor your dough to avoid over-kneading. Enjoy!
What Setting Do You Use on Kitchenaid for Bread Dough?
When making bread dough in your KitchenAid, start on speed 1 to mix ingredients. Then, switch to speed 2 for kneading; this helps develop the gluten structure for a smooth, elastic texture.
What Is the Secret to Good Sourdough Bread?
Secrets to sensational sourdough start with a strong starter, proper hydration, and perfect temperature. Knead just right, score before baking and watch for that wonderful rise. You’ll create a crusty, chewy masterpiece every time!
Is Kitchenaid Mixer Good for Making Bread?
Yes, a KitchenAid mixer’s powerful motor and dough hook make it excellent for bread making. You’ll save time and effort while achieving consistent kneading, ensuring your dough develops properly for delicious, homemade bread every time.
Time to Put Your KitchenAid to the Test: Start Baking
Now that you’ve explored the world of sourdough bread with your KitchenAid mixer, it’s time to put your newfound knowledge to the test.
Remember, ‘practice makes perfect.’ With each loaf you bake, you’ll refine your technique and discover your unique flavor preferences.
So, roll up your sleeves, embrace the process, and savor the delightful aroma wafting through your kitchen.
Soon, thanks to your creativity and a little patience, you’ll be sharing your delicious creations with family and friends.