Why Is My Sourdough Crust So Hard: Thin Crust, Soft Center
A hard sourdough crust usually results from a few key factors. High baking temperatures or excessive baking time can toughen the exterior, while low hydration doughs yield denser crusts.
Fermentation also plays a significant role; over-fermented dough may become tough, while under-fermentation can lead to collapse. Additionally, using a highly active starter can create a thick crust.
Proper scoring before baking allows for better expansion, and cooling methods matter, too. Wrapping your loaf too soon can trap moisture, spoiling that perfect texture.
Adjusting these factors could enhance your crust; there’s plenty more to explore to perfect your sourdough.
Key Takeaways
- High baking temperatures without adjustments can lead to a tough crust; aim for a preheat of 475-490°F for best results.
- Over-fermentation can cause excessive moisture loss, resulting in a hard outer layer; monitor dough rise carefully.
- Insufficient steam during baking can harden the crust; use a Dutch oven or steam pan for optimal moisture retention.
- Excessive surface flour can create uneven browning and hardness; brush off any excess before placing in the oven.
- Improper cooling techniques, such as wrapping warm loaves, can trap moisture and lead to a soft crust instead of a hard one.
Factors Influencing Crust Hardness
When it comes to crafting the perfect sourdough loaf, understanding the factors influencing crust hardness can make all the difference in your baking journey.
One key element is baking time and temperature. If you don’t adjust your bake time for high-hydration doughs, you might end up with a soft crust that turns hard as it cools. Conversely, baking at excessively high temperatures without reducing them can lead to an overly hard crust. Consider starting with high heat and then lowering the temperature for a gentler finish.
Another vital factor is fermentation. Longer fermentation times create a more aerated protein structure, resulting in a thinner, softer crust. However, overproofing can lead to hard crusts, so timing is essential.
Your starter’s activity also plays a role; a highly active starter can ferment dough too quickly, thickening your crust. Proper fermentation is key to dough stability and affects moisture retention, contributing to crust texture.
Lastly, don’t overlook cooling and handling techniques. Wrapping your bread in a damp cloth or allowing it to cool in the oven with the door ajar can help maintain that coveted softness.
Hydration Levels and Crust Texture
When you consider hydration levels in sourdough, you’re really looking at how the moisture content affects your crust’s texture. Higher hydration typically gives you a thinner, crispier crust, while lower hydration creates a denser, thicker exterior.
Balancing this moisture can make all the difference in achieving the perfect loaf that meets your taste preferences. Choosing the right hydration level is influenced by flour type, as different flours absorb water differently, which can significantly impact your crust’s outcome.
Sometimes, incorporating psyllium husk can help improve the dough’s elasticity, allowing for better moisture retention and a more desirable crust.
Impact of Hydration Levels
Understanding the impact of hydration levels on sourdough crust texture is essential for any baker aiming to achieve the perfect loaf. The hydration of your dough considerably influences the final product’s crust characteristics, texture, and crumb structure. Let’s break it down:
| Hydration Level | Crust Characteristics |
|---|---|
| Low (60%-65%) | Thick, hard, chewy, and dense |
| Medium (65%-75%) | Balanced thickness, soft, slightly chewy |
| High (75% and up) | Thinner, crisper, lighter, and airier |
| Flour Type | Wholemeal requires higher hydration |
| Handling | High hydration is sticky and challenging |
Low hydration doughs yield a stiffer structure, resulting in a thicker and harder crust. As you increase hydration, the crust becomes more balanced, softer, and slightly chewy. High hydration levels produce a thinner, crisper crust, giving your loaf an airy and open crumb structure.
Baking experience shows that experimenting with varying hydration levels can greatly enhance your sourdough baking results. Additionally, understanding how sourdough fermentation affects moisture retention can further refine your baking techniques.
Balancing Moisture Content
Achieving the perfect sourdough crust involves carefully balancing moisture content to enhance texture and flavor. If you’re struggling with a hard crust, consider these essential factors that influence moisture and overall crust quality.
- Adjust Baking Time: Verify your loaf bakes adequately. Longer baking times allow excess moisture to escape, helping achieve that desired crispy crust. Avoid underbaking, which can keep moisture in and result in a soft crust.
- Fermentation Factors: Pay attention to fermentation times. While longer fermentation can create a thinner, softer crust, over-fermentation may toughen your bread. Aim for balanced fermentation to maintain moisture and structure; proper timing of the second ferment is essential for optimal oven spring, which favors thinner crusts.
- Cooling Techniques: How you cool your bread matters. Wrapping it in a damp cloth can soften the crust, while rapid cooling on a rack helps keep it crisp.
- Ingredient and Handling Factors: Higher hydration levels yield softer crusts, so adjust your water accordingly. Also, be mindful of kneading; over-kneading can create excessive gluten, leading to tough textures.
Baking Techniques to Consider
Mastering a few key baking techniques is important to creating the perfect sourdough crust you’ve been dreaming of.
First, pay attention to your oven temperature. Preheat your oven to a high temperature, around 475-490°F. This helps achieve a crispy, thin crust, as lower temperatures can lead to a thicker, hard crust. Additionally, starting the bake at 500°F and lowering to 450°F can further enhance your crust quality.
Using steam is another significant factor. Adding a pan of boiling water to the oven or using a Dutch oven can help maintain moisture and promote oven spring, contributing to a lighter crust.
Shaping your dough properly also makes a difference. Verify you shape your bread evenly, and don’t forget to score it. Scoring allows for even expansion during baking, preventing that tough crust you want to avoid.
Finally, cooling your bread correctly is critical. Place it on a rack to cool without wrapping it, as this maintains a crispy exterior. If you wrap the bread while cooling, it can soften the crust too much.
Ingredient Choices Affecting Crust
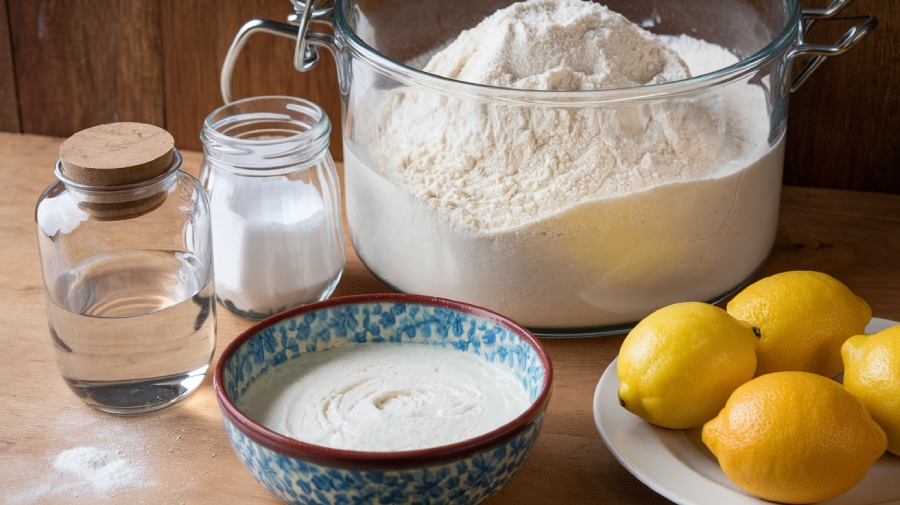
When you’re crafting your sourdough, the choice of ingredients plays a vital role in determining your crust’s texture. Incorporating fats like olive oil can soften the crust, while the type of flour you choose can either enhance or toughen it.
Reducing excess surface flour is equally important, as it helps prevent dehydration and promotes a more tender crust. Additionally, dough hydration levels significantly influence how crispy the crust will be. Achieving a target hydration level of 70% can enhance the overall crumb and flavor, especially when using low-gluten flours.
Fats and Crust Texture
Incorporating fats into your sourdough recipe greatly influences the crust’s texture and overall flavor. Fats like butter, lard, or oil can make a significant difference in creating that perfect crust. They not only add tenderness but also inhibit gluten development, which can result in a more delicate texture.
Here are some key points to contemplate:
- Fat Types: Butter gives a rich flavor, while lard creates a flaky texture due to its high water content. Vegetable oils yield a crispy crust.
- Balance is Key: Too little fat can lead to a hard, dense crust, whereas too much can make it greasy and crumbly.
- Experimentation: Finding the ideal fat percentage is essential and may vary depending on the bread type you’re working with.
- Gluten Disruption: Fats disrupt gluten strands, leading to tenderness. However, overmixing can negate this benefit, so be mindful during your mixing process. Additionally, understanding dough kneading capability can help you achieve the desired texture and consistency in your sourdough.
Flour Type Differences
The choice of flour in your sourdough recipe can dramatically shape the character of your bread’s crust. Different flours bring unique properties that influence not just flavor but also texture. For instance, using emmer flour typically yields a softer crust compared to the robust crusts produced by whole wheat or bread flour. If you opt for a blend of flours, like rye mixed with white, you’ll discover varied textures that can elevate your sourdough experience.
Additionally, using whole grains can enhance both the flavor profile and nutritional content of your bread. Hydration levels also play a vital role. Higher hydration doughs can lead to softer crusts, and the type of flour you choose can affect how much water the dough can absorb. Active starter maintenance is essential for developing the right texture and ensuring the dough rises properly during fermentation.
Traditional sourdough, made with just flour, water, and salt, will present a different crust than enriched loaves that incorporate fats or sugars. Understanding how flour types interact with fermentation can help you achieve the desired crust. Remember, the flour you select isn’t just a filler; it’s a key player in your baking journey, impacting everything from crust thickness to chewiness.
Surface Flour Reduction
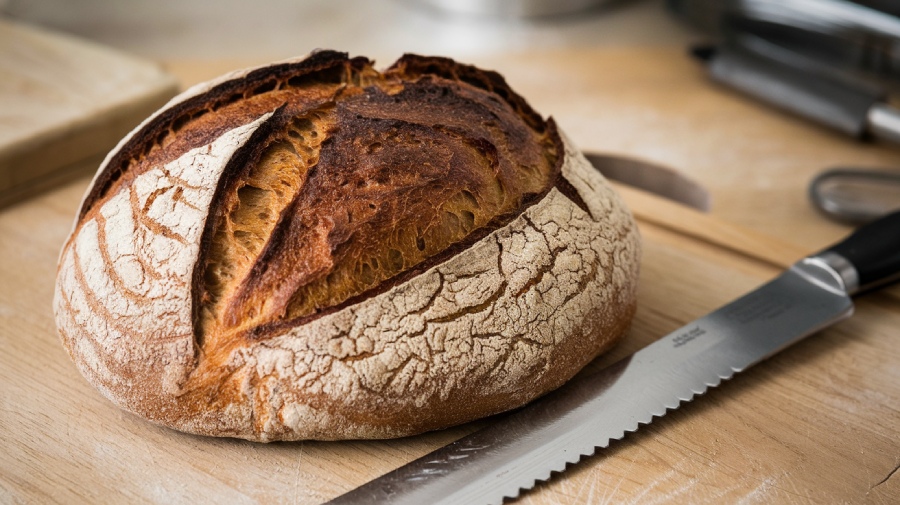
As you prepare your sourdough, the amount of surface flour you use can greatly influence the final crust.
Managing surface flour is essential for achieving a balanced crust texture. Excess flour can lead to a crust that’s overly crunchy, hard, and unevenly browned. By reducing the surface flour, you’ll enhance the crust’s natural moisture and improve chewiness.
Here are some effective surface flour reduction techniques:
- Gently brush off excess flour from the dough surface before baking.
- Use a minimal amount of flour to dust your dough surface.
- Implement a “no-flour” or “low-flour” handling approach to keep things light.
- Utilize a bench scraper or dough whisk to remove excess flour efficiently.
Additionally, using a digital scale to measure flour can help ensure you’re not overdoing it with surface flour.
Fermentation’s Role in Crust Quality
Fermentation plays an essential role in determining the quality of your sourdough crust, influencing everything from texture to thickness. If you over-ferment, moisture can build up in the crust, leading to a soft texture once it cools. On the flip side, under-fermentation can also yield a soft crust since not enough moisture gets removed during baking.
When you allow longer fermentation times, the protein structure becomes more aerated, resulting in a thinner, potentially softer crust. Additionally, incorporating higher hydration levels can enhance the overall crust quality as moisture is retained during fermentation and baking. The cold-proofing process can also help in developing a more controlled fermentation environment, which ultimately affects crust quality.
The second fermentation is vital for achieving the right balance in crust thickness and texture. While longer fermentation often leads to a better oven spring and thinner crust, excessive fermentation can create a crust that’s uncomfortably thick and hard. Proper fermentation guarantees adequate moisture escape, preventing that soggy aftermath.
Hydration levels also play a part; higher hydration can result in a softer crust, while lower levels may yield a harder one.
Importance of Gluten Development
Achieving the perfect sourdough crust hinges not only on fermentation but also considerably on gluten development. A well-developed gluten structure is essential for maintaining the integrity of your bread. If gluten is underdeveloped, you might end up with a soft crust that collapses upon cooling.
Here are some key techniques to guarantee ideal gluten development:
- Stretch and Fold: Regularly perform stretch and folds during the dough preparation. This enhances gluten strength and elasticity.
- Time Management: Give your dough sufficient time to develop gluten. Rushing this process could lead to a lack of structure and insufficient gluten development, which often results in a poor rise.
- Window Pane Test: After stretching and folding, check for the window pane effect. If you can stretch the dough thin without tearing, you’ve got good gluten development.
- Temperature Control: Maintain an ideal temperature during fermentation. Warmer temperatures promote better gluten formation, which is particularly important for achieving a hard crust in rustic European bread.
Cooling Methods for Softening Crust
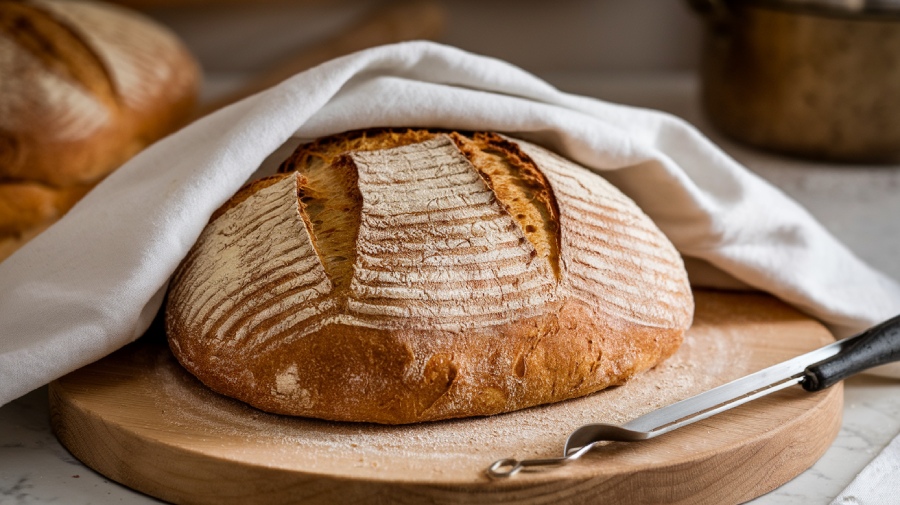
Cooling your sourdough properly is essential for achieving the desired crust texture, and there are several effective methods to guarantee a softer crust. One simple technique is to wrap your warm loaf in a damp tea towel right after baking. This helps trap moisture, giving your crust a more tender bite.
If you want to take it a step further, place the wrapped loaf in a sealed container for about an hour. The trapped steam will work wonders in softening that crust.
Another effective method involves cooling your loaf on a rack while it’s still wrapped in a damp cloth. This allows for even moisture distribution while preventing the bottom from becoming soggy.
Additionally, consider focusing on higher hydration levels in your dough; this can naturally lead to a softer crust. Remember, maintaining steam in the oven during baking also plays a vital role. Using a Dutch oven during the baking process can enhance steam retention, contributing to a beautifully textured crust.
Ensure you have enough steam to set the stage for a beautifully textured crust.
Impact of Scoring Techniques
The art of scoring your sourdough loaf can dramatically influence its crust hardness. Proper scoring techniques can help you achieve a lighter, more inviting crust. When you score, you control the bread’s expansion and allow for even gas release, which prevents unpredictable breaks and enhances the final crust texture.
To enjoy the benefits of effective scoring, keep these tips in mind:
- Use Shallow, Angled Cuts: This helps promote a softer crust while allowing for proper expansion.
- Make Multiple, Evenly Spaced Scores: This method aids in uniform gas release and crust development.
- Utilize a Sharp Blade: A lame or a sharp knife guarantees clean cuts, preventing damage to the dough.
- Score Right Before Baking: Timing is vital; scoring too early can lead to undesired results.
Additionally, scoring at a 30-45-degree angle ensures optimal expansion and a more appealing crust.
Avoid common mistakes like scoring too deeply or using a dull tool.
Environmental Conditions to Monitor
Consider oven conditions; a higher temperature can yield a crispy crust, while lower temperatures might harden it. Don’t forget about steam—its absence can lead to a tough crust, so create steam in your oven for a softer result. Preheating your oven and baking stone is vital, too.
Next, monitor fermentation conditions. If you under or over-ferment your dough, you might end up with a crust that’s either collapsed or too tough. Make sure your starter is mature and well-maintained to support proper gluten development.
Cooling conditions matter as well. Allow your bread to cool on a wire rack to prevent moisture buildup, and avoid wrapping it too soon, or you’ll risk a soggy crust.
Frequently Asked Questions
Can Using Different Types of Flour Change Crust Hardness?
Different types of flour can drastically change your bread’s crust hardness.
If you use bread flour, you’ll get a chewier, firmer crust due to its higher protein content.
On the other hand, all-purpose flour yields a softer crust.
Whole wheat flour adds density and texture, while rye flour creates a tougher crust.
Experimenting with these flours and adjusting hydration can help you achieve the perfect crust you desire!
How Does Altitude Affect Sourdough Crust Texture?
Envision this: you’ve just pulled a beautiful loaf from the oven, but the crust’s a mystery.
At high altitude, lower pressure makes your dough rise faster, but it can lead to a tougher crust. Water evaporates quickly, leaving your bread dry.
To combat this, you need to increase hydration, adjust bake times, and even tweak oven temperatures.
What Tools Are Best for Monitoring Oven Temperature?
To monitor oven temperature effectively, you should consider using digital thermometers for precision, or dial thermometers for quick visual checks.
Probe thermometers are great for large ovens, while infrared ones measure surface temperatures. Smart thermometers can connect to your devices for real-time updates.
Look for features like accuracy, response time, and durability to guarantee reliable readings.
Brands like Taylor and ThermoWorks offer excellent options to enhance your baking experience.
Can I Rescue a Loaf With a Hard Crust?
Absolutely, you can rescue that rugged loaf!
Wrap it in a damp cloth to create a cozy, cloud-like environment that softens the crust. Spritz it with water to add moisture, or brush it with buttery bliss before baking.
Cooling it in a sealed container keeps steam trapped, working wonders on texture. Delaying slicing lets the moisture settle, transforming your once-hard crust into a delightful, delicious treat.
Enjoy your baking adventure!
How Does the Age of My Starter Influence Crust Texture?
The age of your starter doesn’t directly influence the crust texture of your sourdough. Instead, it’s the health of your starter that plays an essential role.
If you keep your starter well-fed and cared for, it’ll perform better, regardless of age.
Additionally, factors like the type of flour you use and the fermentation time significantly impact the final crust.
Perfectly Balanced Sourdough Crusts
So, if your sourdough crust‘s stubbornly hard, don’t despair! You can achieve that perfect balance of crunch and tenderness by tweaking hydration levels, refining your baking techniques, and paying attention to ingredient choices.
Think of your bread as a canvas—every adjustment you make paints a different masterpiece. With a bit of practice and patience, you’ll find that elusive soft crust waiting for you, ready to be savored with each delightful bite.

