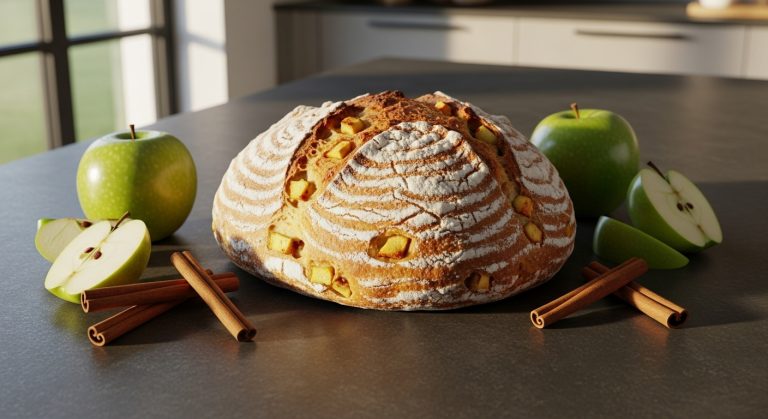
How to Make Gluten Free Sourdough Bread: Starter to Slice
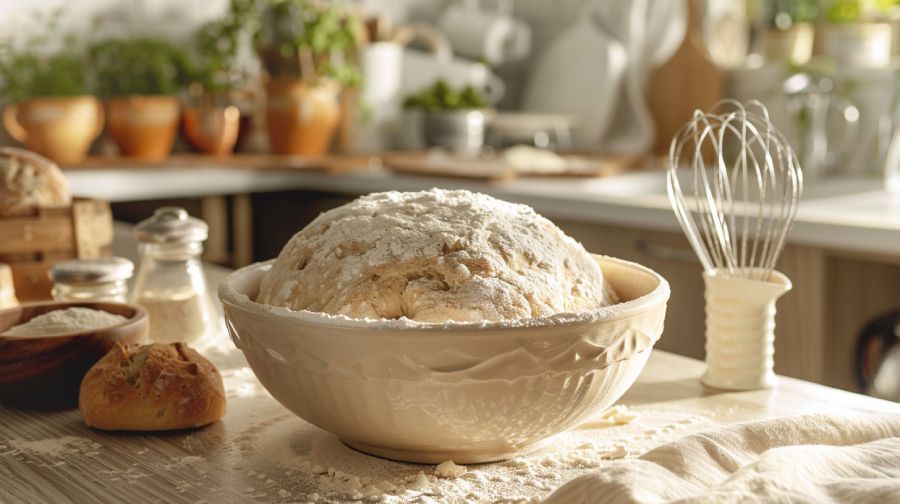
To make gluten-free sourdough bread, start by crafting a sourdough starter using high-quality gluten-free flour and water. After about a week of feeding, your starter should bubble and rise. Mix this active starter with water, gluten-free flour, and psyllium husk for structure. Let the dough rest to hydrate and ferment for several hours.
Shape the dough in banneton baskets and refrigerate overnight to enhance flavor. Preheat a Dutch oven and bake your bread to achieve a crispy crust. Once cooled, slice your loaf and enjoy. There’s much more to explore to perfect your artisan bread experience.
Key Takeaways
- Use a high-quality gluten-free flour blend, like Bob’s Red Mill 1:1, which includes xanthan gum for binding.
- Create a gluten-free sourdough starter by mixing equal parts flour and water, feeding it regularly for at least 7 days.
- Incorporate psyllium husk into the dough for elasticity, mimicking gluten’s properties for a better texture.
- Allow for proper fermentation with a bulk rise of 6-10 hours and a second proofing in the refrigerator for 12 hours.
Key Ingredients
To achieve the perfect gluten-free sourdough bread, you’ll need a carefully selected blend of key ingredients that work together to create flavor and structure.
Start with a high-quality gluten-free flour blend, like Bob’s Red Mill 1:1 Gluten Free Baking Flour, which includes xanthan gum for binding. This flour blend will form the base of your dough, ensuring it has the right consistency.
Next, you’ll require a gluten-free sourdough starter crafted from the same flour blend. This starter is vital for developing the desired rise and rich flavor in your bread. Make sure to feed it regularly to keep it active and bubbly.
Incorporate psyllium husk into your mixture; it acts as a gluten substitute, providing the necessary elasticity and structure that gluten-free flours typically lack. This ingredient is essential for achieving that perfect chewy texture.
Don’t forget to enhance the flavor of your bread by adding fine sea salt, which also helps with seasoning.
For ideal hydration, use bottled or filtered water, keeping in mind that city water should be boiled and cooled before use.
With these ingredients, you’re well on your way to baking delicious gluten-free sourdough bread.
Essential Baking Equipment
Equipping your kitchen with the right baking tools is fundamental for crafting exceptional gluten-free sourdough bread. Start with a digital kitchen scale; it’s imperative for accurately measuring your gluten-free flour and other ingredients by weight. This precision guarantees consistency in your bread-making process, which is crucial for achieving the perfect loaf.
Next, consider a stand mixer. While it simplifies the mixing of dough, you can also use a Danish dough whisk or a wooden spoon for hand mixing. Both methods can effectively create a cohesive mixture, so choose what feels best for you.
For the baking phase, a 5.5 Quart Dutch Oven is ideal. It traps heat and steam, resulting in a crispy crust and excellent oven spring.
When it’s time to proof your dough, Banneton baskets are your best friend. These baskets help maintain the dough’s shape while leaving a beautiful pattern on the crust.
Lastly, keep parchment paper handy for easy transfers to the baking vessel and quick cleanup afterward.
With these fundamental tools, you’re well on your way to baking perfect gluten-free sourdough bread!
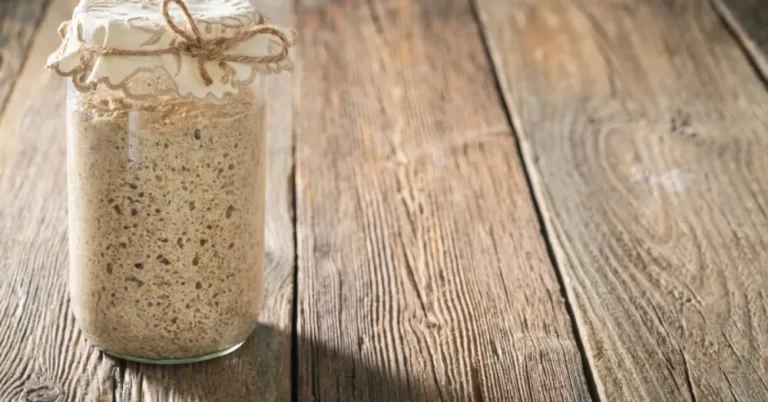
Preparing the Gluten-Free Starter
Preparing your gluten-free sourdough starter involves mixing equal parts gluten-free flour and spring water, setting the stage for a lively fermentation process.
In a clean container, combine ½ cup of gluten-free flour with ½ cup of spring water. Stir until well blended, then cover the container loosely with a cloth to allow air circulation. Let it sit at room temperature for 24 hours.
On Day 2, feed your gluten-free sourdough starter by adding another ½ cup of gluten-free flour and ½ cup of spring water in the morning and again in the evening. Keep it at room temperature to encourage fermentation.
By Day 3, you should see bubbles forming and detect a slightly tangy smell, indicating that fermentation is taking place.
From Days 4 to 7, maintain this feeding schedule. Your starter should become increasingly active, with visible bubbles and a stronger sour aroma.
A fully developed gluten-free sourdough starter will double in size within 4-6 hours of feeding and will emit a pleasant tangy scent, signaling that it’s ready for baking. Enjoy the process, and watch your starter come to life!
Mixing the Dough
Begin by mixing ½ cup of your active gluten-free sourdough starter with 2 tablespoons and 2 teaspoons of spring water in a mixing bowl until well combined. This forms the foundation of your dough.
In a separate bowl, combine the dry ingredients to create a balanced mixture.
- Mix 1⅓ cups of gluten-free flour blend (preferably with xanthan gum).
- Add ½ tablespoon of sugar to enhance flavor.
- Include ¾ teaspoon of salt for structure.
- If using psyllium husk, make certain you mix it with water before adding.
Next, gradually incorporate the dry ingredients into your wet mixture. Stir until a cohesive and slightly sticky dough forms, which should take about 5 minutes of mixing.
Pay attention to the texture; it should be pliable yet firm. If you’ve added psyllium husk, you’ll notice improved elasticity.
Once you’ve mixed the dough, allow it to rest for 30 minutes. This resting period is vital as it helps hydrate the gluten-free flour and develop flavors.
After this, you’re ready to move on to the fermentation and proofing process.
Fermentation and Proofing Process
Allow the mixed dough to rise at room temperature for 6 to 10 hours, letting it develop its flavor and texture as it ferments. This bulk fermentation phase is vital, as it allows the dough to rise and create the necessary air pockets for a light loaf.
During this time, make sure you cover the dough properly to prevent it from drying out.
After the initial rise, it’s time for the second proofing. Place the dough in the refrigerator for an additional 12 hours. This proofing time not only enhances the sour flavor but also improves the overall texture. Monitor the dough closely; it should double in size, signaling that fermentation has been successful.
Using a mature sourdough starter, ideally at least two weeks old, greatly contributes to this process. A well-fed starter helps produce a better rise and complex flavors in your gluten-free bread.
Baking Techniques for Gluten-Free Bread
Mastering the baking techniques for gluten-free sourdough bread is fundamental for achieving a perfect rise and crust that rivals traditional loaves. Here’s how to guarantee your bread turns out beautifully every time:
- Use a digital kitchen scale: Accurate measurements are essential in gluten-free baking. Precise ingredient ratios help you achieve the right texture and rise.
- Incorporate psyllium husk: This ingredient mimics gluten’s elasticity and binding properties, critical for that chewy texture in your gluten-free sourdough.
- Preheat the oven: Preheat your Dutch oven to 500°F for 30 minutes before baking. This traps steam, creating a crunchy crust and promoting oven spring.
- Allow for bulk fermentation: Let your dough ferment for 6-10 hours, covering it to retain moisture. This step is fundamental for developing flavor and structure in your gluten-free bread.
Don’t forget to cool the baked bread on a wire rack for at least 6 hours before slicing. This allows the texture to set, preventing gumminess from excess moisture.
Implement these baking techniques, and you’ll savor the delicious results!
Tips for Optimal Rise
Focus on three key factors: starter maturity, fermentation time, and proofing techniques to achieve the best rise in your gluten-free sourdough bread.
A well-fed, mature starter sets the foundation for successful fermentation while managing the bulk and second proofing times guarantees ideal dough expansion.
Starter Maturity Importance
A gluten-free sourdough starter needs to be at least two weeks old for ideal rise, with a one-month-old starter providing even better results in flavor and texture. Confirming your starter reaches the right level of maturity is essential for a successful gluten-free sourdough recipe.
Here’s how to determine if your active starter is ready for baking:
- Age: Make certain your starter is at least two weeks old, preferably a month, to guarantee robust fermentation.
- Doubling Size: Feed your starter and monitor it; it should double in size within 4-6 hours after feeding, indicating it’s mature.
- Aroma and Bubbles: Look for a tangy aroma and visible bubbles, which signify healthy fermentation and sufficient wild yeast.
- Regular Feeding: Feed your starter regularly with equal parts flour and water, but avoid feeding right before baking to enhance the sour flavor.
Fermentation Time Management
Effective fermentation time management is essential for achieving the perfect rise in your gluten-free sourdough bread, ensuring both flavor and texture are enhanced.
Start by allowing your dough to undergo bulk fermentation for 6 to 10 hours at room temperature. This timeframe is vital for the gluten-free starter to activate and make the dough rise adequately before shaping.
Keep an eye on your dough during this phase. You should look for visible signs, like it doubling in size, which indicates proper fermentation. If you’re after a tangier flavor, consider extending this bulk fermentation time; longer ferments can boost the sourness in your final loaf.
After shaping, refrigerate the dough for an additional 12 hours. This slower fermentation process not only develops enhanced flavor but also contributes to a better texture.
To promote active yeast and bacteria growth in your gluten-free starter and dough, maintain a warm environment where temperatures hover between 75°F to 85°F.
Proper Proofing Techniques
Proper proofing techniques are vital for achieving an ideal rise in your gluten-free sourdough bread, guaranteeing that the dough develops the right texture and flavor before baking.
Here are some tips to help you master the art of proofing:
- Bulk Fermentation Timing: Allow your dough to rise for 6-10 hours during bulk fermentation. This time is essential for flavor development and achieving a proper rise.
- Room Temperature Rise: Keep the dough in a warm, draft-free area, ideally between 75-80°F. This temperature range promotes peak yeast activity and fermentation.
- Visual Indicators for Readiness: Look for the dough to double in size and develop bubbles. These signs indicate that fermentation has occurred properly.
- Second Proofing Duration: After shaping, refrigerate the dough for 12 hours for the second proof. This step enhances the sour flavor and improves the bread’s structure.
Be cautious not to overproof your dough, as this can lead to a collapse in structure.
Once the dough has risen adequately, it’s time to shape and bake.
Following these proofing techniques will guarantee a delightful gluten-free sourdough loaf!
Understanding Flavor Development
Flavor development in gluten-free sourdough bread hinges on the fermentation process, where longer times yield a tangier taste from the increased activity of wild yeast and bacteria.
To achieve a rich flavor profile, start with a mature sourdough starter, ideally at least one month old. This starter enhances the depth and complexity of your bread.
When selecting your gluten-free flours, consider options like brown rice and sorghum. These flours impart distinct flavors that meld beautifully with the sour notes from fermentation.
Additionally, adding ingredients like psyllium husk not only improves texture but also contributes a subtle nutty flavor, enriching your final loaf.
Don’t overlook the proofing stage. Refrigerating the dough overnight allows the flavors to meld and develop further, intensifying the sourness. This step is essential for achieving a well-rounded taste.
Troubleshooting Common Issues
When you encounter issues with your gluten-free sourdough bread, identifying the specific problem can help you make the necessary adjustments for a successful bake. Here are some common issues you might face and how to troubleshoot them:
- Dense Texture: This often results from excess flour or inadequate rising. Confirm you measure your ingredients accurately and allow sufficient fermentation time for better results.
- Gummy Interior: If your bread has a gummy texture, it may be undercooked or underproofed. Verify that the bread reaches an internal temperature of at least 210°F for doneness.
- Dark Crust with Gummy Inside: If the crust is dark but the interior remains gummy, try extending the baking time or adjusting the flour-to-water ratio to improve the texture.
- Poor Dough Rising: If your sourdough isn’t rising well, check the liveliness of your starter and adjust the fermentation time. Proper salt measurement, around 6 grams, can also enhance dough rise and flavor, impacting the overall structure of the bread.
Frequently Asked Questions
Can Sourdough Be Gluten-Free?
Yes, sourdough can be gluten-free! You’ll need a gluten-free sourdough starter and flours like brown rice or sorghum. The fermentation process creates a tangy flavor and chewy texture, similar to traditional sourdough. Enjoy!
Can You Convert Sourdough Starter to Gluten-Free?
Yes, you can convert your sourdough starter to gluten-free by gradually replacing wheat flour with gluten-free flour. Feed it a gluten-free blend every 12 hours, watching for bubbles and a tangy aroma to guarantee success.
Why Won’t My Gluten-Free Sourdough Bread Rise?
If your gluten-free sourdough bread isn’t rising, check your starter’s age, hydration level, fermentation temperature, mixing technique, and proofing time. Each factor plays a vital role in achieving that perfect rise.
How Do You Remove Gluten From Sourdough?
You’ll need to use gluten-free flour instead of wheat to remove gluten from sourdough. Make certain all tools are gluten-free, and consider adding binding agents like psyllium husk for better texture and structure in your bread.
The Art of Bread-Making: Your Journey to the Perfect Gluten-Free Loaf
Now that you’ve mastered gluten-free sourdough, you can enjoy the delightful aroma wafting through your kitchen like a warm hug from a bygone era.
Remember, each loaf tells a story of patience and creativity, so don’t hesitate to experiment and find your perfect loaf.
With practice, you’ll transform simple ingredients into a delicious creation that rivals any bakery.
Share your successes and challenges with fellow bakers—after all, we’re all in this together, just like the pioneers of bread-making.