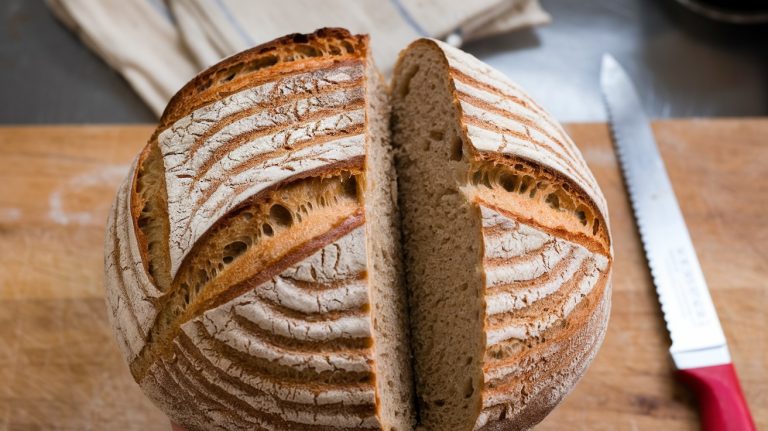
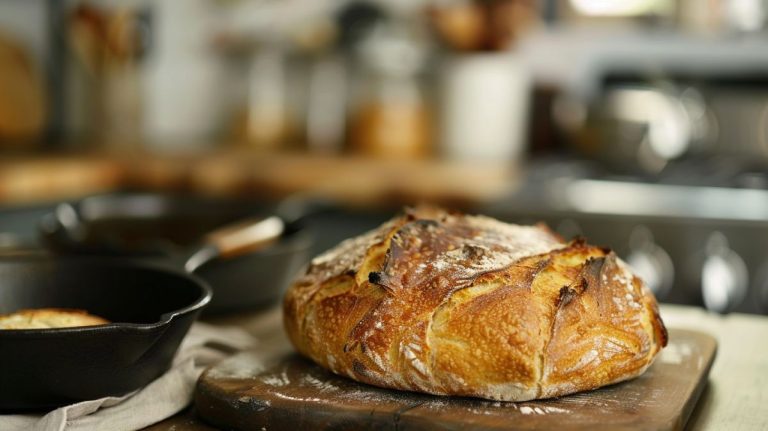
Sourdough Bread Not Rising: Why Patience Delivers the Best Results
If your sourdough bread isn’t rising, your starter might not be mature or active enough—ensure it doubles within 4-7 hours after feeding and shows vigorous bubbling. Also, control dough temperature between 75°F and 80°F to optimize yeast and bacterial fermentation.
Use high-protein flour with proper hydration (70–75%) to build a strong gluten network. Managing fermentation timing and gentle dough handling are key. Explore these factors closely to improve your loaf’s rise and texture.
Key Takeaways
- Ensure your starter is mature, active, and doubles in volume within 4-7 hours after feeding to guarantee strong leavening power.
- Maintain dough temperature between 75°F and 80°F to optimize yeast and bacterial fermentation for proper rise.
- Adjust hydration to 70-75% with high-protein flour to develop strong gluten networks that support gas retention and oven spring.
- Avoid under- or over-proofing by monitoring dough volume increase (1.5 to 2 times) and texture rather than relying on fixed times.
- Use gentle folding and proper gluten development techniques during bulk fermentation to strengthen dough structure and improve rise.
Starter Activity and Maturity
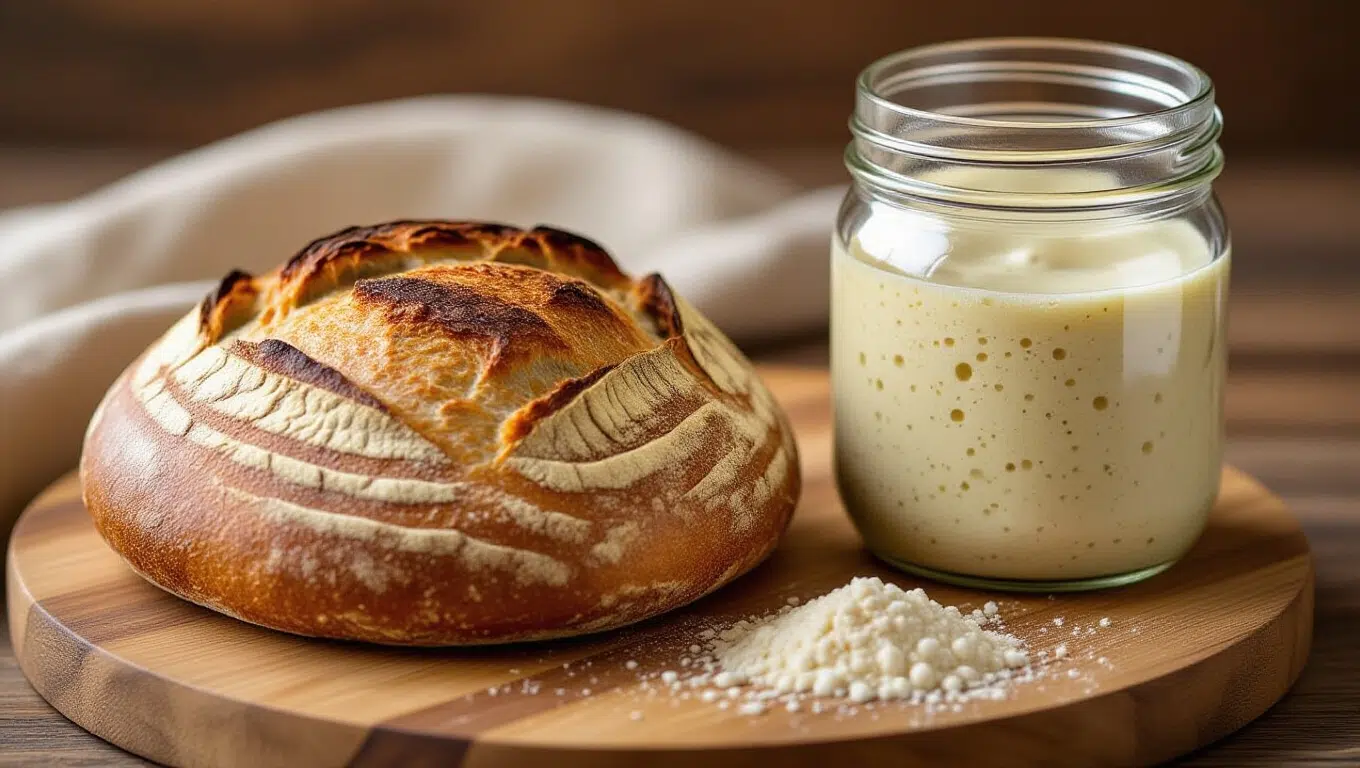
Because the maturity and activity of your sourdough starter directly determine your bread’s rise, understanding its development timeline and indicators is essential. Your starter typically matures after at least four weeks, allowing yeast and bacterial communities to stabilize.
Maturity and activity of your sourdough starter are key to a successful bread rise.
During the initial 10 days, expect fluctuations in rise and aroma. Consistent doubling in volume within 4 to 7 hours at 74°F across three days signals readiness.
Mature starters exhibit a pancake batter consistency, which is crucial for maximum bubble retention. They also emit a strong sour aroma indicative of healthy fermentation.
Measure activity by volume increase within six hours post-feeding and observe vigorous bubbling and a pleasant tang. The use of higher protein flours can further promote better rise by enhancing yeast activity.
Factors like temperature, hydration, flour quality, and feeding schedule directly impact microbial balance and starter stability. These factors, in turn, influence your starter’s ability to leaven dough effectively. Additionally, understanding dough hydration and fermentation timing helps optimize starter performance and bread rise.
Optimizing Fermentation and Proofing Times
While fermentation and proofing times vary depending on temperature, hydration, and dough composition, maximizing these stages is essential for achieving ideal oven spring and crumb structure. Aim for bulk fermentation to increase dough volume by 1.5 to 2 times; under-proofing results in insufficient gas and poor rise, while over-proofing weakens gluten structure.
It is important to distinguish between bulk fermentation and proofing, as the latter occurs after shaping and is crucial for final dough development final fermentation. Utilizing a sourdough bread mix can simplify the process and improve consistency during these stages.
Final proofing typically lasts 1 to 4 hours at 23–26°C or overnight at 4°C. Use cold retardation to develop flavor and strengthen dough, but ensure gluten can retain gas during extended proofing.
Control hydration carefully—higher hydration speeds fermentation but risks collapse. Handle dough gently during shaping and proofing to preserve gas bubbles. Adjust proofing times by manipulating dough temperature and monitor volume increase rather than relying on fixed timing for consistent, ideal fermentation outcomes.
Managing Dough Temperature for Best Rise

When you manage dough temperature within the ideal range of 75°F to 80°F (24-27°C), you maximize yeast and bacterial activity essential for proper fermentation and rise. Yeasts thrive near 80°F, efficiently producing CO2, while lactic acid bacteria operate best slightly higher, around 89°F.
Maintaining dough around 75-78°F balances these activities, preventing excessive sourness and ensuring a strong gluten structure. Use water below 100°F when mixing to avoid killing yeast. Adjust water temperature based on flour and ambient temperatures to reach your Desired Dough Temperature (DDT), ideally 75-78°F.
During proofing, keep dough in a stable 74-80°F environment to avoid slow fermentation or overproofing. Consistent temperature control during mixing and proofing yields predictable rises, optimal oven spring, and a well-developed crumb.
Selecting the Right Flour and Hydration Level
You need to choose flour with 11-13% protein to develop strong gluten networks that trap gas effectively during fermentation. Flours such as Churchill Bread Flour, which contains 12.8% protein and is rich in gluten, are ideal for supporting dough expansion and gas retention.
Adjust hydration carefully, as higher-protein flours absorb more water and require 70-75% hydration for ideal dough elasticity and crumb structure. Balancing water content with your flour type prevents slack or dense dough, which directly impacts your sourdough’s rise and texture.
Using a flour with a higher protein content helps produce chewier, well-shaped loaves with better dough structure. Additionally, experimenting with flour blends can enhance both flavor and texture, contributing to a better rise.
Flour Protein Content
Because the protein content of flour directly determines gluten formation, selecting the right flour is essential for achieving ideal sourdough rise and texture. Flours with 11-13% protein, like bread flour from hard spring wheat, produce strong gluten networks that trap fermentation gases effectively, promoting superior rise and an open crumb.
This protein level also supports extended fermentation times, enhancing flavor complexity and dough strength. Additionally, different types of sourdough breads, such as white-flour sourdough, typically rely on these strong gluten networks to create their characteristic airy pockets and soft texture.
Lower-protein flours, such as all-purpose (8-12%) or pastry flour (8-10%), yield weaker gluten, resulting in denser loaves with limited oven spring.
Keep in mind whole grain flours, despite high protein levels, contain bran that disrupts gluten, weakening the network.
You should adjust hydration accordingly, since high-protein flours absorb more water to maintain dough elasticity and extensibility.
Understanding your flour’s exact protein percentage allows precise hydration and fermentation modifications, which is critical to optimizing rise and texture in sourdough bread.
Hydration Impact on Texture
Flour protein content sets the foundation for gluten development, but hydration fine-tunes the dough’s handling properties and final texture. You must select hydration levels in accordance with your flour’s absorption capacity to achieve desired crumb structure.
Low hydration (50%-60%) produces firm, easy-to-shape dough yielding a tight, dense crumb with thicker crusts, ideal for structured breads. Proper storage of flour in vacuum-sealed jars can preserve its quality and prevent spoilage over time.
Medium hydration (60%-70%) balances dough extensibility and crumb openness, creating moderate air pockets.
High hydration (above 75%) results in sticky, challenging dough but generates an open, airy crumb with large holes typical of artisan sourdoughs, along with thinner, crisper crusts.
Adjusting hydration also controls fermentation speed and flavor complexity. Understanding hydration as the ratio of water to flour helps bakers maintain consistent dough texture and baking behavior. Matching hydration precisely to your flour type and baking goals optimizes dough strength and final bread quality, preventing issues like poor rise or dense texture.
Balancing Water and Flour
When selecting the right flour for sourdough, understanding its protein content and water absorption is essential to achieving ideal hydration and dough performance. Bread flour, with its 12–13% protein, forms strong gluten networks that trap fermentation gases, promoting optimal rise.
Its higher protein content is advantageous because it provides the necessary gluten strength to support the dough structure during fermentation and baking higher protein. Proper fermentation also improves the dough’s nutritional profile and digestibility through fermentation benefits.
Whole wheat and Kamut flours absorb more water due to bran and germ content but can disrupt gluten structure, requiring careful hydration adjustments.
Rye flour, low in gluten but rich in enzymes, boosts starter activity but weakens dough strength if overused. Managing starter health and avoiding contamination is key to maintaining effective fermentation and rise.
You should balance flour blends—combining bread flour with small amounts of whole wheat or rye—to enhance flavor without sacrificing rise.
Adjust hydration to match your flour’s absorption capacity; too little water limits gluten development, while excess weakens dough.
Precise flour selection and hydration control are critical to resolving poor sourdough rising issues.
Enhancing Gluten Development and Dough Handling

To guarantee your sourdough rises properly, you need to focus on strengthening the gluten network through effective dough handling techniques.
Incorporate methods like autolyse, folding during bulk fermentation, and timed salt addition to optimize gluten alignment and elasticity.
Handling the dough gently but purposefully will improve gas retention and structure, preventing flat or dense loaves.
Using a digital thermometer can help ensure your dough and baking environment are at optimal temperatures for gluten development and fermentation.
Strengthening Gluten Network
Although gluten development initiates rapidly upon hydration, you must actively strengthen the gluten network through targeted mixing and resting techniques to achieve ideal dough performance.
Begin with thorough initial mixing—typically 5 to 8 minutes—to ensure even hydration and partial gluten formation. This process allows the glutenin and gliadin proteins to begin bonding and forming a cohesive network. Follow this with controlled mechanical actions such as stretch-and-fold or slap-and-fold during bulk fermentation to align and link glutenin and gliadin proteins effectively. Incorporating psyllium husk can also help mimic gluten properties and improve dough elasticity in gluten-free baking.
Incorporate an autolyse period before mixing to facilitate enzymatic bonding and improve extensibility without overworking the dough. Use strong flour varieties and maintain excellent hydration to support robust gluten frameworks.
Avoid premature addition of fats or sugars, which inhibit protein hydration. By balancing mechanical manipulation and rest, you enhance gluten elasticity and gas retention, preventing dough collapse and ensuring excellent rise during proofing and baking.
Proper Dough Handling
Mastering proper dough handling reliably enhances gluten development and guarantees ideal gas retention throughout fermentation.
Use the folding technique to strengthen gluten without bursting yeast bubbles: wet your hands, pull a dough section, fold it over itself in three directions, and rotate the bowl each time. Rest the dough between folds for 30 minutes to several hours to optimize gluten and yeast activity.
Repeat folding two to four times during bulk fermentation for improved dough strength and rise. This method aligns with the recommended practice during bulk fermentation to build dough strength effectively. Proper hydration around 66% is crucial during this process to enhance gluten formation and dough texture.
When shaping, create surface tension by folding dough sections over the center and rotating to form a tight outer skin, trapping gases for better oven spring and uniform crumb.
Handle dough gently to preserve air pockets, flour lightly to prevent sticking, and avoid overmixing, which degrades gluten and reduces gas retention. The windowpane test can be used as a visual guideline to assess if gluten development is sufficient after handling.
Identifying Signs of Under and Over Fermentation
When you examine your sourdough dough and finished loaf closely, identifying signs of under or over fermentation becomes a critical skill for achieving ideal texture and flavor.
Under fermented dough shows uneven crumb with dense patches, cracked scoring, and a gummy interior, producing a small, heavy loaf despite initial oven spring. The dough surface appears rough and lacks a developed gluten network, often sticking to hands.
Additionally, lack of bubbles or minimal air pockets in the dough can be a clear sign of under fermentation. Using a proofing basket can help improve dough structure and fermentation by ensuring proper airflow and shape retention.
Under fermented dough results in dense, gummy crumb and cracked scoring, yielding a small, heavy loaf with rough texture.
Conversely, over fermented dough is stringy, watery, and tears easily, with a flat loaf shape and compressed crumb. Score marks fail to bloom, crust thickens but resists browning, and the aroma turns pungently sour with off-putting “corn” notes.
Proper fermentation yields doubled dough volume, smooth, tacky texture, visible gas bubbles, and a balanced sour aroma—key indicators you should monitor for ideal bread quality.
Additional Tips and Troubleshooting Strategies
Because a sourdough loaf’s rise depends on multiple interconnected factors, addressing common pitfalls requires a thorough approach. First, verify your starter is vigorous by confirming it doubles after feeding, exhibits bubbles, passes the float test, and maintains a spongy texture. If your starter shows signs of insufficient activity, consider adjusting feeding schedules or ambient temperature to enhance its strength.
Next, optimize gluten development through adequate kneading, using high-protein flour, and controlling hydration to prevent slack dough. Maintain fermentation temperatures between 75°F–80°F and avoid over-proofing by monitoring rise times carefully.
Score the dough properly just before baking to allow controlled expansion and use baking stones or Dutch ovens to sustain heat and steam. Troubleshoot by adjusting bulk fermentation to fix uneven crumb, reducing hydration if dough slackens, and maintaining starter vigor consistently.
Frequently Asked Questions
Can Water Quality Affect Sourdough Bread Rising?
Yes, water quality directly influences sourdough rising. If you use hard water with excessive minerals, gluten tightens and yeast ferments too quickly, reducing rise.
Soft water lacks essential nutrients, impairing fermentation.
Water pH also matters; alkaline water inhibits enzymatic activity, slowing fermentation, while slightly acidic water optimizes yeast growth.
Additionally, chlorine in tap water can hinder microbial activity.
To guarantee proper rising, you should use water with balanced mineral content, appropriate pH, and minimal chlorine.
Does Altitude Impact Sourdough Fermentation Times?
Altitude gently nudges your sourdough’s fermentation pace, making it dance faster due to decreased atmospheric pressure. You’ll notice yeast activity accelerates, shortening fermentation times and risking over-proofing if you’re not careful.
To maintain control, reduce starter quantities or shorten fermentation periods. Adjust hydration to counteract drier air, and consider cooler water to slow yeast. These precise tweaks help you master sourdough fermentation in elevated environments with confident, consistent results.
How Does Salt Type Influence Yeast Activity in Sourdough?
You should know that different salt types affect yeast activity distinctly in sourdough. Pure sodium chloride strongly inhibits yeast by exerting osmotic pressure, slowing fermentation and CO2 production.
Sea salt, with lower sodium content, still strengthens gluten but inhibits yeast less, allowing a more balanced fermentation. Your choice of salt impacts dough rheology, gas retention, and rise, so selecting the right salt type helps you control fermentation dynamics effectively.
Can Using Whole Grain Flour Cause Poor Rise?
Imagine trying to build a strong net with twigs instead of flexible threads—that’s what happens when you use whole grain flour. Its bran and germ act like sharp shards, slicing through your gluten strands and weakening the dough’s structure.
This leads to a denser crumb and limited rise. You’ll need higher hydration, gentle handling, and adjusted fermentation times to counterbalance these effects and achieve ideal loaf volume.
Is It Necessary to Discard Starter Discard Regularly?
Yes, you need to discard your sourdough starter regularly to maintain its health and activity. Without discard, the starter grows excessively, depletes its food supply, and accumulates acidity, which disrupts microbial balance.
This leads to sluggish fermentation and poor rising power. Regular discard refreshes the culture with fresh flour and water, ensuring consistent yeast and bacteria vitality essential for effective fermentation and ideal bread rise.
Final Rise: Trust the Process for Perfect Sourdough
Remember, patience is a virtue—especially with sourdough. Ensuring your starter is active and mature, maintaining ideal fermentation times, controlling dough temperature, and selecting appropriate flour and hydration are all critical.
Focus on gluten development and recognize fermentation signs to troubleshoot effectively. By mastering these factors, you’ll consistently achieve a proper rise. Don’t rush the process; your attention to detail will yield the best, most reliable sourdough results every time.