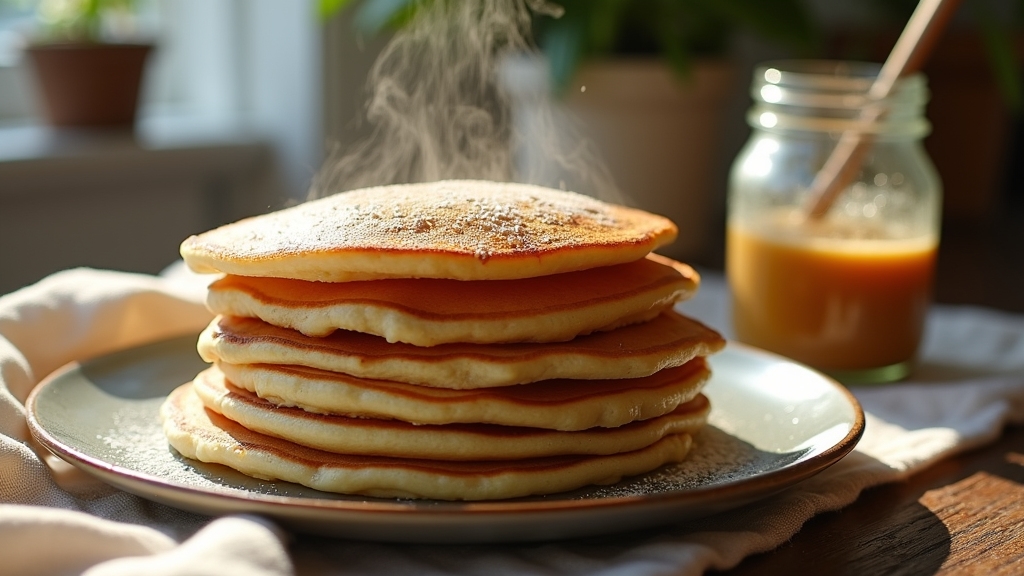
Overnight Sourdough Pancake Recipe: Fluffy & Tangy
To make overnight sourdough pancakes, start by mixing your bubbly sourdough starter with flour, eggs, milk, baking soda, and a touch of sweetener for balanced flavor.
Let the batter ferment at room temperature for 8-12 hours to develop tangy depth and fluffy texture.
In the morning, gently fold in melted butter, then cook on a preheated griddle until golden and bubbly.
These pancakes offer a tender, airy bite that’s worth the wait. Stick around to uncover tips for perfect flipping and flavor twists.
Key Takeaways
- Mix 1-2 cups active sourdough starter with flour, eggs, milk, baking soda, baking powder, and sweetener for a thick, bubbly batter.
- Rest the batter covered at room temperature for 8-12 hours or refrigerated up to 24 hours for fermentation.
- Preheat a cast iron skillet to 350-370°F and cook pancakes until edges set and bubbles pop, about 4 minutes per side.
- Flip pancakes gently when the bottom is golden and the center springs back to maintain fluffiness.
- Add flavor variations like blueberries, cinnamon, or vanilla to customize your overnight sourdough pancake batter.
Complete Ingredient Breakdown for Overnight Sourdough Pancakes
| Ingredient Category | Ingredient | Amount | Purpose |
|---|---|---|---|
| Sourdough Base | Active or discard sourdough starter | 1-2 cups | Provides tangy flavor and fermentation base |
| Protein & Structure | Large eggs | 2 | Adds richness and structure to batter |
| Liquid Component | Milk or dairy alternative | 1 cup | Creates tender texture and proper consistency |
| Sweetener | Honey or maple syrup | 1-2 tablespoons | Enhances sweetness and promotes browning |
| Fat Component | Melted butter or oil | 3-4 tablespoons | Provides moisture and improves texture |
| Flour Base | All-purpose flour | 1-2 cups | Creates structure and body for pancakes |
| Leavening Agents | Baking soda | ½-1 teaspoon | Triggers instant rise and fluffy texture |
| Leavening Agents | Baking powder | ½ teaspoon | Enhances lift and lightness |
| Seasoning | Salt | ¼-½ teaspoon | Balances flavors throughout |
| Flavor Enhancer | Vanilla extract | 1 teaspoon | Adds aromatic sweetness |
Ingredients Needed for Sourdough Pancakes
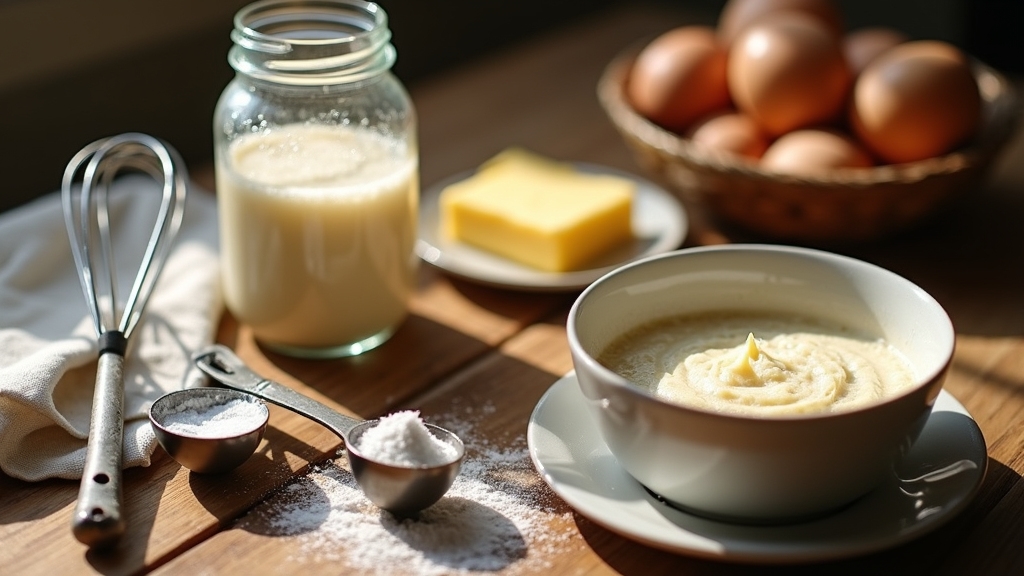
To whip up delicious sourdough pancakes, you’ll need a mix of wet and dry ingredients that work together to create that perfect fluffy texture and tangy flavor.
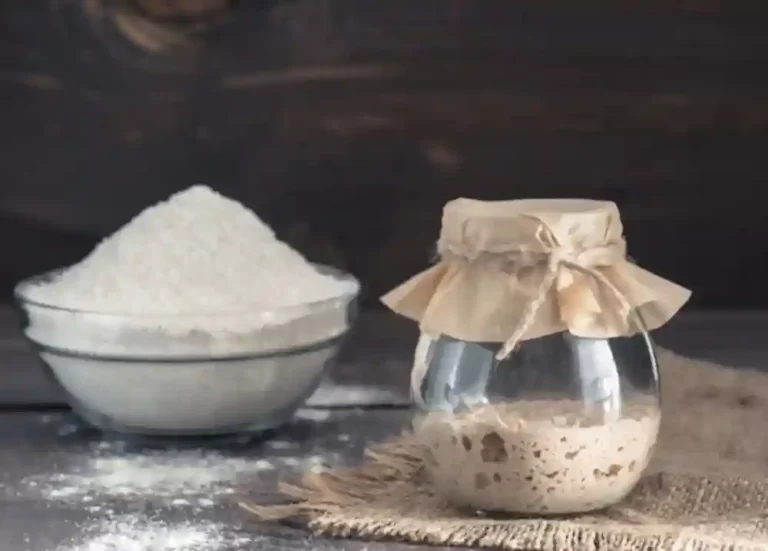
Start with 1 to 2 cups of active or discard sourdough starter as your base. It’s the heart of fermentation and taste. For best results, use a fed sourdough starter that is active and bubbly, which can be taken directly from the fridge if it was fed and allowed to ferment before refrigeration.
Add 2 eggs for structure and richness, plus 1 cup of milk or a dairy alternative to keep the batter tender.
For sweetness and browning, include a drizzle of honey or a tablespoon or two of maple syrup.
Don’t forget 2 to 4 tablespoons of oil or melted butter to enhance moisture and frying texture.
On the dry side, combine 1 to 2 cups of all-purpose flour, a pinch of salt, and leavening agents like baking soda and baking powder for that fluffy rise.
Optional touches like vanilla or whole wheat flour can add lovely depth.
Preparing the Sourdough Batter
With your ingredients ready, mixing the sourdough batter becomes an enjoyable step where science and flavor come alive.
Start by whisking your dry ingredients: flour, baking soda, baking powder, salt, and sugar in a large bowl for even distribution.
Whisk your dry ingredients together thoroughly to ensure an even blend before adding the wet components.
Next, gently fold in the wet ingredients: sourdough starter, eggs, milk, and oil. Remember, a few lumps are perfect; they keep the batter airy and tender. Using both baking powder and baking soda is crucial because they provide the fluffiness and lightness that define perfect sourdough pancakes.
Here’s your quick guide:
- Combine dry ingredients thoroughly before adding wet.
- Fold wet into dry gently to preserve aeration.
- Add baking soda last, just before cooking, to activate leavening.
Aim for a thick, pourable batter. If it feels too thick after resting, thin it out with milk, tablespoon by tablespoon.
Tips for Overnight Fermentation
Although fermentation might seem like a hands-off process, paying attention to timing and temperature can make all the difference in your sourdough pancake batter’s flavor and texture.
Aim for 8 to 12 hours at room temperature, letting your batter double in volume and become bubbly. This signals perfect fermentation.
If your kitchen is cooler, extend fermentation up to 24 hours in the fridge, then bring it back to room temp before cooking. Using a fed sourdough starter that is bubbly and passes the float test will ensure the best results.
Cover the batter with plastic wrap or a damp cloth to keep moisture while allowing gases to escape.
Resist stirring during fermentation to preserve those precious air bubbles.
Remember, proper fermentation develops tangy flavor, light aeration, and fluffier pancakes, so don’t rush it.
Watch for bubbles and volume to know when your batter’s ready!
Adding Final Ingredients to the Batter
Once your sourdough batter has fermented overnight and developed that perfect tang and airy texture, it’s time to gently fold in the final ingredients that’ll transform it into fluffy, flavorful pancakes. Using a tare function on your kitchen scale can help measure these ingredients precisely for consistent results.
Start by whisking in 1–2 large eggs and 3–4 tablespoons of melted butter or oil to add richness and moisture.
Next, sprinkle in ½ to 1 teaspoon of baking soda along with ¼ to ½ teaspoon of salt to spark that instant rise and balance flavors.
Finally, stir in a teaspoon of vanilla extract or a tablespoon of honey to enhance sweetness and aroma.
For the best cooking results, be sure to use a preheated cast iron or skillet, lightly greased with butter, which helps achieve an even golden-brown crust.
Remember to mix gently but thoroughly; this preserves the airy bubbles formed overnight, ensuring your pancakes come out tender and light every time!
Achieving the Perfect Pancake Consistency
To nail the perfect pancake, you’ll want your batter to be thick enough to pour but not runny—kind of like the consistency of heavy cream. Using quality ingredients similar to those found in artisan sourdough mixes can enhance flavor and texture.
It’s important to be gentle when mixing; this helps keep those precious air bubbles intact. You definitely want to avoid over-stirring because that can make your pancakes tough, and nobody wants that! Over-mixing develops gluten, which leads to a denser, chewier texture that’s less enjoyable.
Now, if your batter feels a bit off, don’t hesitate to adjust the liquid ratio. You want it to flow slowly and hold its shape on the griddle. So, just tweak it until you get that perfect texture.
Ideal Batter Thickness
Getting your sourdough pancake batter to the ideal thickness is key to achieving those fluffy, tender stacks you crave.
Your batter should be thick, bubbly, and pourable, dripping slowly in stretchy ribbons instead of plopping. This balance ensures lightness and proper rise. If it’s too thick, you’ll get dense pancakes; too thin, and they turn crepe-like. Adjusting hydration based on flour types can help maintain this perfect consistency.
Here’s how to nail it:
- Check the batter drape. If it runs off the spoon in slow ribbons, you’re spot on.
- Adjust gradually: add flour by tablespoons if too thin or a splash of liquid if too thick.
- Look for bubbles on the surface; they signal perfect fermentation and aeration.
For best fluffiness, combine baking powder and baking soda in your batter to enhance rise and texture.
Mastering this thickness sets you up for pancakes that hold shape but stay tender and airy.
Mixing Techniques
Although mixing sourdough pancake batter might seem straightforward, mastering the technique is essential for achieving that perfect fluffy texture you want.
Start by whisking your wet ingredients thoroughly to incorporate air. This initial step helps set the stage for better gluten development as the batter rests.
Then gently fold in the dry flour to avoid overdeveloping gluten. Over-mixing after adding flour can toughen your pancakes and deflate the precious air bubbles you worked to create.
Whip your egg whites separately and fold them in carefully to trap even more air, ensuring a tender crumb and great rise.
Let your batter rest for 10–30 minutes so the gluten can relax and the flour hydrates, boosting texture. This resting period also improves the structure and tenderness of the pancakes by allowing proper hydration and relaxation.
Use a spatula or wooden spoon to fold gently, and add melted fats last to keep the batter light and tender.
Adjusting Liquid Ratio
When you adjust the liquid ratio in your sourdough pancake batter, you hold the key to revealing the perfect texture.
Too little liquid makes dense, doughy pancakes; too much yields thin, crepe-like results. Your goal is a thick, bubbly batter that pours slowly in stretchy ribbons. Using a container with measurement markings can help you track your liquid additions more precisely.
Here’s how to nail it:
- Start with 1/3 cup milk or water, adding a tablespoon at a time to avoid over-thinning.
- Watch the batter’s flow; it should hold air bubbles and stretch when poured, not plop.
- Adjust liquid based on your starter’s hydration. Lower hydration starters need more liquid for balance.
Letting the batter sit for at least 5 minutes before cooking helps enhance aeration and fluffiness, making it easier to achieve the ideal consistency.
Cooking Techniques for Fluffy Pancakes
When you’re making pancakes, it’s super important to keep your griddle at a steady medium heat—think around 350 to 370°F. This way, you can cook those pancakes evenly without the risk of burning them.
Now, keep an eye out for those little bubbles forming and popping on the surface. That’s your cue! Flip them gently just as the edges start to set.
Using a preheated cast iron skillet with plenty of coconut oil can really enhance the flavor and create crispy edges.
Timing your flip just right really helps lock in that fluffy texture you’re going for. Happy cooking!
Griddle Temperature Control
Because controlling your griddle’s temperature is key to fluffy pancakes, you’ll want to aim for a steady 350°F to 375°F. This sweet spot ensures your pancakes rise perfectly with a golden-brown exterior.
Here’s how to keep your griddle in check:
- Preheat your griddle for 5 to 15 minutes to eliminate hot spots and create even heat across the surface.
- Use an infrared thermometer to check temperature accuracy, adjusting heat gradually to avoid sudden spikes.
- Opt for an electric griddle with adjustable settings for consistent temperature control and uniform cooking. Electric models allow precise, instant temperature adjustments, which help maintain the ideal cooking environment.
Keep your griddle clean and dry before heating to get the most accurate readings.
With steady heat, your sourdough pancakes will cook evenly, avoiding burnt bottoms or raw middles.
This makes each bite irresistibly fluffy.
Flipping Timing Tips
Although flipping pancakes might seem straightforward, mastering the perfect timing can make all the difference in achieving that coveted fluffy texture.
You want to wait until bubbles pop and leave holes, edges set, and the bottom turns golden brown. Press the center gently—it should spring back, showing it’s ready. Typically, this process takes about 4 minutes on the first side before flipping. Using a warm cooking surface helps activate the batter for an even rise.
Flip with a wide spatula and a smooth wrist motion to keep your pancakes intact.
| Indicator | What It Means |
|---|---|
| Bubbles popped | Ready to flip |
| Edges set | Pancake firming |
| Golden bottom | Perfectly cooked base |
| Center springs back | Cooked inside |
| Smooth flip motion | Preserves fluffiness |
Nail this timing, and your sourdough pancakes will be irresistibly light and tender every time.
Flavor Variations and Add-Ins
When you explore flavor variations and add-ins for overnight sourdough pancakes, you open up a world of delicious possibilities that can transform your breakfast routine. The flexibility of this recipe allows you to adjust resting time to achieve a milder or more pronounced sourdough flavor, depending on your preference overnight fermentation.
You can play with liquids like buttermilk or kefir to add tang and probiotic benefits. Sweeten the batter with honey or maple syrup for subtle floral and caramel notes. Texture and flavor deepen with simple add-ins like melted butter, vanilla extract, or a pinch of salt.
Here are three tasty ideas to try:
- Fold fresh blueberries and a dash of cinnamon into the batter for fruity warmth.
- Mix chopped pecans and orange zest for crunch and a bright twist.
- Add chocolate chips with a sprinkle of nutmeg for a cozy, dessert-like treat.
Experiment and make your pancakes uniquely yours!
Benefits of Using Sourdough Starter in Pancakes
If you want pancakes that not only taste great but also offer real health benefits, using a sourdough starter is a game-changer.
The natural fermentation reduces phytic acid, revealing essential minerals like calcium and iron for better absorption. This means your body gets more nutrients from each bite.
Plus, sourdough’s slow fermentation breaks down proteins and starches, making your pancakes easier to digest and gentler on your tummy. This is perfect if you’re sensitive to gluten. It also supports overall gut health through its natural fermentation process.
You’ll also enjoy more stable blood sugar levels thanks to its lower glycemic index, which helps with weight management and energy balance.
On top of that, sourdough acts as a natural leavening agent, giving your pancakes a fluffy texture without chemical additives.
It’s nutrition and flavor working together beautifully.
Frequently Asked Questions
Can I Freeze Overnight Sourdough Pancake Batter for Later Use?
Yes, you can freeze overnight sourdough pancake batter for later use!
Just make sure to freeze it before adding baking powder or soda, which work best fresh after thawing.
Store the batter in airtight bags or containers, remove excess air, and freeze in portions for easy thawing.
When ready, thaw it overnight in the fridge, add your leaveners and finishing touches, then cook.
You’ll still get fluffy, tasty pancakes with minimal fuss!
How Do I Store Leftover Cooked Sourdough Pancakes?
You might worry leftover pancakes get soggy, but storing them right keeps them fresh.
Pop your cooled sourdough pancakes into an airtight container, separating layers with parchment paper to avoid sticking.
Refrigerate for up to 5 days, or freeze for months.
When you’re ready, reheat in a toaster or skillet to bring back that perfect crispness.
This way, your pancakes stay delicious and ready whenever you want.
What Is the Best Way to Reheat Sourdough Pancakes Without Drying Them Out?
The best way to reheat sourdough pancakes without drying them out is to use your oven at 350ºF, wrapped tightly in foil to lock in moisture.
If you’re in a hurry, microwave them on a microwave-safe plate with a damp paper towel, heating in short bursts and checking often.
Avoid overheating to keep them soft and fluffy.
Adding a tiny dab of butter before reheating can also help maintain that delicious, moist texture.
Can I Use Whole Wheat Flour Instead of All-Purpose Flour?
Yes, you can definitely use whole wheat flour instead of all-purpose flour!
Just keep in mind whole wheat makes pancakes denser and heartier. To keep them fluffy, try mixing whole wheat with all-purpose flour or use finely milled white whole wheat.
You’ll want to add a bit more liquid since whole wheat absorbs more moisture.
This swap boosts fiber and nutrients, giving your pancakes a rich, nutty flavor that’s both tasty and wholesome!
How Do I Adjust the Recipe for Gluten-Free Sourdough Pancakes?
Imagine Sarah swapped all-purpose flour for a blend of buckwheat and tapioca starch in her sourdough pancakes.
To adjust for gluten-free, you’ll want to replace wheat flour with gluten-free options like sorghum or almond flour. Use a gluten-free starter and add binders like eggs or flaxseed.
Also, toss in baking soda with an acid for fluffiness.
Don’t forget plant-based milk and a touch of oil for moisture and richness.
Wake Up to Fluffy Sourdough Pancake Perfection
By letting your batter rest overnight, you’re setting the stage for pancakes that rise like a charm and burst with tangy goodness.
With a bit of patience and these tips, you’ll flip fluffy, golden discs that melt in your mouth every time.
Remember, good things come to those who wait, so embrace the slow magic of sourdough and enjoy breakfast that feels like a warm hug on a plate.