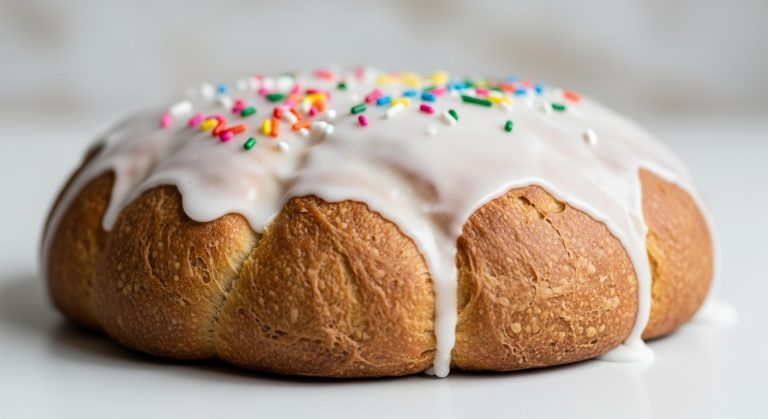
How to Feed Sourdough Starter Without a Scale?
You can feed your sourdough starter without a scale by using volume measurements like cups and spoons. Stick to a consistent scooping method with stainless steel tools for accuracy.
Start with a 1:1:1 ratio—¼ cup starter, ¼ cup water, and slightly less than ½ cup flour. Mix until it’s a thick pancake batter texture. Adjust with more flour or water if needed. Keep exploring for deeper insights on perfecting your starter.
Key Takeaways
- Use volume measurements like ¼ cup starter, ¼ cup water, and slightly less than ½ cup flour for feeding.
- Maintain a 1:1:1 ratio by volume, adjusting flour slightly due to density differences.
- Aim for a thick pancake batter consistency, adding water or flour as needed.
- Feed every 12-24 hours at room temperature, discarding most starter before adding new mix.
- Check for bubbles and volume increase within 4-12 hours to ensure starter activity.
Volume Measurements for Sourdough Starter
How can you feed your sourdough starter accurately without a scale?
While weight measurements in grams are ideal for precision, you can use volume with some care.
Although weighing in grams ensures accuracy, using volume measurements can work if approached with caution and consistency.
Volume isn’t as consistent—flour’s weight varies wildly based on how you scoop it, ranging from 90g to 150g per cup.
Water and flour densities differ too, so equal volumes don’t mean equal weights.
To make it work, stick to a consistent method.
Use the same measuring cups and scooping technique every time. For better accuracy and durability, opt for stainless steel options that feature engraved markings for reliable readings.
Try a rough guide like ¼ cup starter, ¼ cup water, and slightly less than ½ cup flour.
Adjust the mix to a thick pancake batter texture if needed.
Remember that feeding ratios, like 1:1:1, can still guide your volume approach.
Choosing the Right Ratios for Feeding
While feeding your sourdough starter without a scale can be less precise, you can still achieve great results by mastering volume-based ratios.
These ratios, expressed as starter:flour:water, guide how much of each you mix.
Start with a 1:1:1 ratio using equal parts by volume, like ¼ cup each, adjusting flour to roughly double the volume due to its lower density.
Consider your baking schedule, ambient temperature, and flavor preference when choosing ratios.
Opt for a low 1:1:1 ratio for quick peaking within 4-6 hours, or a higher 1:4:4 for slower fermentation over 7-12 hours.
To further enhance starter health, try incorporating a 1:2:2 ratio for optimal yeast growth and reduced acidity.
Warmer temps speed things up, so increase ratios; cooler temps allow lower ones.
Match the ratio to your timeline for best results.
Experimenting with different ratios can help you control the fermentation speed and adapt to your specific needs.
Achieving the Perfect Starter Consistency
As you work on feeding your sourdough starter without a scale, getting the right consistency is key to its performance.
Aim for a thick pancake batter texture—think warm peanut butter or plain yogurt.
It should be thick but pourable, and remember, thicker is better since it’ll loosen as it ferments.
Watch for visual cues: a just-fed starter looks dense, while a ripe one turns bubbly, foamy, and slightly domed.
Adjust based on flour type, as whole grain absorbs more water than all-purpose.
If it’s too thick, add a bit more water; if too thin, mix in extra flour. For instance, if your starter is overly runny, consider using a 1:2:2 ratio to help achieve a thicker texture.
Focus on activity over exact texture—bubbles and rise matter most.
Keep tweaking until you’ve got that perfect balance.
Using filtered water is recommended to avoid chlorine interference with the yeast’s activity.
Step-by-Step Feeding Process
Dive right into feeding your sourdough starter with a straightforward process that doesn’t require a scale. Proper feeding through this method can lead to an open crumb structure in your baked goods. First, discard most of your starter, leaving about 1/4 to 1/2 cup in the jar. Next, add 1/2 cup of unbleached all-purpose or bread flour. Then, pour in 1/2 cup of lukewarm, dechlorinated water.
Mix the water with the starter first, then blend in the flour until smooth, scraping down the jar sides. Adjust consistency if needed—add flour if too thin, water if too thick. Feed every 12-24 hours at room temperature or weekly if refrigerated, resting it 2 hours post-feeding before chilling. This method offers freedom from measuring tools, allowing a faster and more intuitive feeding process. Check this quick guide:
| Step | Action |
|---|---|
| 1. Discard | Leave 1/4 to 1/2 cup starter |
| 2. Add Flour | Mix in 1/2 cup flour |
| 3. Add Water | Pour 1/2 cup lukewarm water |
| 4. Mix | Stir until smooth, adjust consistency |
Monitoring Signs of a Healthy Starter
Now that you’ve got the feeding process down, it’s time to keep an eye on your sourdough starter’s health.
Look for a bubbly appearance with air pockets throughout and foam on top, showing active fermentation within hours after feeding.
Keep an eye out for a lively sourdough starter—bubbly with air pockets and foam on top, signaling active fermentation soon after feeding.
Smell it—expect a pleasant, tangy aroma like yogurt or mild vinegar, though a pungent note from whole grains is fine.
Avoid foul or rotten odors.
Check if it doubles in size within 4-12 hours post-feeding, then falls naturally.
Its texture should mimic thick pancake batter, feeling spongy and elastic when stirred.
Make sure there’s no mold, just a beige or white color, and note that “hooch” liquid means it’s hungry. Additionally, you can perform a float test by dropping a small amount into water to check for active yeast.
Keep it warm, around 74-80°F, for consistent activity.
Regular maintenance ensures that your starter provides a reliable rise for every loaf you bake.
Adjusting Based on Starter Behavior
As you observe your sourdough starter’s activity, pay close attention to how quickly it rises and falls after feeding to gauge its vigor.
If it’s sluggish or too runny, tweak the feeding ratios—try increasing flour relative to water, like a 1:2:1 mix of starter to flour to water, to balance its texture. Additionally, for a sluggish starter, increasing feeding frequency every 8-12 hours can help stimulate activity and restore balance.
Adjust based on what you see, using rough volume estimates like 1/4 cup starter to ½
Remember that consistency in feeding times can help train your starter for a more predictable rise, ensuring better baking results over time with regular maintenance.
Observing Starter Activity
Keeping a close eye on your sourdough starter’s behavior is key to understanding its needs and adjusting your feeding routine.
Look for bubbles throughout, not just on top, as they signal fermentation activity.
Notice if your starter doubles or triples in volume within 4-12 hours after feeding—mark the jar to track this rise.
A domed or wavy surface and airy, web-like texture indicate peak activity.
Smell also tells a story: a pleasant, yeasty, or fruity aroma means it’s active, while a sharp, vinegary, or acetone scent signals hunger.
Watch for consistent rise and fall patterns in a mature starter. Keep in mind that environmental factors like temperature and humidity can impact your starter’s performance.
If it’s runny or lacks aroma, it might be inactive or young.
Trust these visual and olfactory cues to guide you.
Additionally, a healthy starter should float in water during a test, indicating sufficient carbon dioxide from fermentation.
Modifying Feeding Ratios
How there, sourdough enthusiasts! How can you fine-tune your sourdough starter to match your baking needs?
Adjusting feeding ratios lets you control fermentation speed, flavor, and consistency without a scale.
For faster fermentation, use a lower ratio like 1:1:1 (starter:water:flour by volume) to peak in 3-6 hours for same-day baking.
Need a slower rise? Opt for a higher ratio, such as 1:4:4, ideal for overnight fermentation.
Adapt to temperature too—warmer rooms speed things up, so increase the ratio or reduce water for a stiffer mix.
In cooler spots, lower the ratio or use lukewarm water.
If your starter’s too sour, feed with a higher ratio to dilute acidity. To further reduce sourness, try incorporating all-purpose flour for a milder flavor profile.
Remember, maintaining a consistency similar to thick pancake batter ensures your starter is in the right hydration range for optimal results.
Troubleshooting Common Feeding Issues
Ever wonder why your sourdough starter isn’t performing as expected? If it’s sluggish or not rising, you’ve likely got an incorrect feeding ratio. Ensure your starter is kept at an optimal temperature to promote better rising.
Keep just a tablespoon of starter and feed it a larger amount—like 1/4 cup water and about 1/3 cup plus a tablespoon of flour—for a thick pancake batter consistency.
Feed twice daily if needed, and wait up to 24 hours for results. Insufficient food ratios can often cause these issues, leading to a starter that struggles to rise.
Seeing hooch, that liquid layer? Stir it back in for flavor; it means your starter’s hungry.
Prevent it by feeding more often or using slightly less water.
If odors turn foul with pink streaks or mold, discard it.
For consistency issues, adjust water or flour to maintain that ideal thick batter texture.
Tips for Maintaining a Thriving Starter
Keep a close eye on your sourdough starter’s activity by checking for bubbles and volume increase after feeding to gauge its health.
If it’s sluggish, adjust your feeding ratios by adding a bit more flour and water to boost fermentation. For optimal growth, choose all-purpose flour due to its reliable protein content.
Stick to a consistent routine, and tweak the amounts until you see steady, active growth.
Remember that using filtered or purified water can significantly improve your starter’s vitality by avoiding harmful additives like chlorine.
Monitor Starter Activity
Wondering what signs show your sourdough starter is thriving? Look for bubbles throughout and on the surface, signaling active fermentation.
Your starter should double or triple in volume after feeding—mark the jar with a rubber band to track rise.
Notice its texture; it’ll turn spongy, airy, or mousse-like, akin to thick pancake batter.
Smell it too—a healthy starter gives off a pleasant sour, yeasty, or tangy aroma.
If it smells like alcohol or vinegar, it’s hungry and needs attention.
Keep it in the ideal 75-82°F (24-28°C) range for consistent activity.
Too cold, and it slows; too hot, and it over-ferments.
Watch for peak and fall patterns to understand its rhythm, ensuring a vibrant, active starter.
Adjust Feeding Ratios
Since maintaining a sourdough starter without a scale can be tricky, you’ll need to rely on visual cues and simple approximations to adjust feeding ratios.
Start by eyeballing equal parts of starter, flour, and water for a basic 1:1:1 mix, using about 1/2 cup flour and 1/3 cup warm water as a guide.
Aim for a thick pancake batter consistency; if it’s too thick, add water, and if too runny, add flour.
Adjust based on your schedule and environment. Remember that regular feeding helps maintain ecosystem balance for a healthy starter.
Use higher ratios like 1:5:5 for slower fermentation and sourer flavor, or stick to lower ratios for quicker peaking and milder taste.
Factor in temperature—reduce starter in warmth, increase food in cold—and tweak hydration for different flours.
Frequently Asked Questions
Can I Use Any Container for My Starter?
Hey, wondering if you can use any container for your sourdough starter?
You can, but it’s gotta be non-reactive—stick to glass, ceramic, or food-grade plastic.
Avoid metals like copper or aluminum since they react with the starter’s acidity.
Pick a container with a wide mouth and straight sides for easy mixing and cleaning.
Make sure it’s big enough for the starter to double without overflowing.
Keep it clean!
How Often Should I Clean the Container?
Hark, ye olde baker, let’s talk about how often you should clean your sourdough starter container.
Don’t fret over daily scrubbing; it’s unnecessary.
Clean only when it’s super crusty or hard to use—every few weeks if you’re diligent with scraping.
Use a spatula to tidy the sides after feeding, and wipe the rim.
If mold appears, ditch it all and start afresh in a spotless jar.
Keep baking!
Does Altitude Affect My Starter’S Activity?
Hey, let’s talk about how altitude affects your sourdough starter’s activity.
You’ll notice that at higher elevations, lower air pressure makes gases expand faster, speeding up fermentation.
Your starter might peak quicker, even in cooler temps.
Keep an eye on it to avoid over-fermentation.
Adjust by feeding at a higher ratio or tweaking hydration if the air’s dry.
Watch its rise and fall cycle closely!
Can I Refrigerate My Starter Long-Term?
Yes, you can refrigerate your starter long-term to slow its activity and reduce maintenance.
Keep it in a clean, airtight glass jar at the back of the fridge for stable, cold temps.
It’ll last 2-3 weeks without feeding, or longer with periodic feeds every 1-2 months. Mature starters handle this better.
Watch for hooch or mold—stir in hooch, but discard if mold appears. Stay vigilant!
What Flours Work Best for Starters?
Hey, when choosing flours for your sourdough starter, go for whole grain options like rye or whole wheat.
They’re packed with nutrients and microbes, speeding up fermentation and adding tangy, nutty flavors.
Rye’s especially powerful for quick maturity.
You can also mix with refined flours like all-purpose or bread flour for balance and dough strength.
Try a 50/50 blend of rye and bread flour for best results!
Nurture Your Starter, No Scale Needed
Hey there, you’ve now got the know-how to feed your sourdough starter without a scale, keeping it as lively as a bubbling brook. Stick to these volume tricks and ratios, and watch your starter thrive like a well-tended garden.
Keep an eye on its behavior, tweak as needed, and troubleshoot any hiccups. With these practical tips, you’ll nurture a robust starter that’s ready to bake up a storm.