Dairy and Gluten Free Bread Recipe You’ll Love
You’ll blend gluten-free flours like sorghum and tapioca with xanthan gum and binders such as egg whites or psyllium husk for structure and moisture.
Activate yeast in warm water with honey, then proof the batter at 75–80°F until it rises about 30%.
Bake at 350°F for 30–40 minutes, checking for an internal temperature of 205–210°F.
Cool in the pan briefly, then on a rack to keep crumb integrity.
There’s much more to perfect this allergen-friendly loaf.
Key Takeaways
- Use gluten-free flours like sorghum, almond, or buckwheat, and add xanthan gum for elasticity if your blend lacks it.
- Replace dairy with oils (olive or sunflower) and non-dairy milk to maintain moisture and texture.
- Activate yeast in warm water (100–110°F) with honey, then proof batter in a warm (75–80°F), draft-free environment until it rises 30%.
- Combine 2–3 egg whites or vegan alternatives like psyllium husk as binders to provide structure and moisture.
- Bake at 350°F for 30–40 minutes until the internal temperature reaches 205–210°F, then cool on a wire rack to prevent sogginess.
Dairy and Gluten Free Bread Recipe Ingredients and Steps
| Category | Key Detail | Why It Matters |
|---|---|---|
| Flour Base | Gluten-free flour blend, 2 to 2.5 cups | Builds the loaf’s structure. |
| Binder | Xanthan gum, 1 tsp if needed | Helps replace gluten’s elasticity. |
| Leavening | Yeast, 2.25 tsp | Gives the bread its rise. |
| Moisture | Egg whites, 2 to 3 and oil, 1/4 cup | Adds softness and stability. |
| Sweetener | Honey or sugar, 2 to 4 tbsp | Feeds yeast and improves browning. |
| Liquid | Warm water, 100 to 110°F | Activates yeast properly. |
| Proofing | 75 to 80°F for 30 to 40 minutes | Supports a strong rise. |
| Baking | 350°F for 30 to 40 minutes | Bakes the loaf evenly. |
| Doneness | Internal temp: 205 to 210°F | Confirms the bread is fully baked. |
| Cooling | Cool in pan, then on rack | Helps keep the crumb light and soft. |
Key Ingredients for Dairy and Gluten-Free Bread

When making dairy and gluten-free bread, selecting the right ingredients is crucial to achieving the proper texture and rise.
You’ll start with 2 to 2.5 cups of gluten-free all-purpose flour, ensuring it’s a blend that may or may not already contain xanthan gum.
Add 1 teaspoon only if needed. Use 2.25 teaspoons of instant or rapid-rise yeast to promote effective leavening.
Incorporate 1 teaspoon of gluten-free baking powder to aid in structure. For moisture and binding, mix 2 to 3 large egg whites at room temperature with ¼ cup oil and 2 to 4 tablespoons of honey or sugar to activate yeast and enhance browning.
Warm water is essential for yeast activation, so keep it around 100-110°F for ideal fermentation. Using filtered water can help avoid chlorine inhibition, which supports better yeast growth and fermentation.
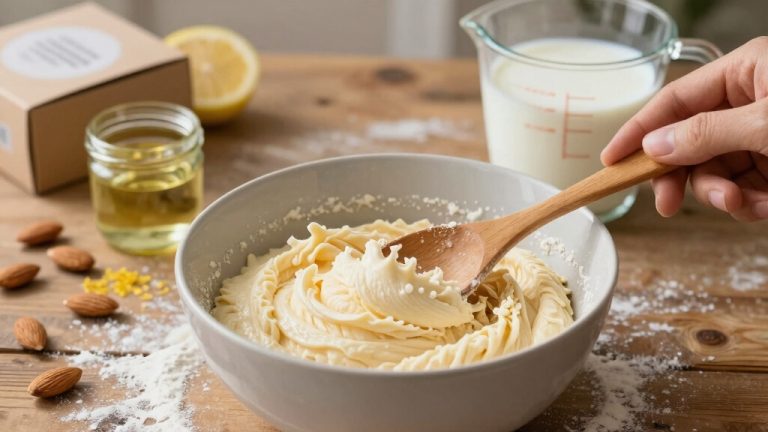
How to Prepare Your Batter for the Best Rise?
Although gluten-free batters differ from traditional doughs, you’ll want to achieve a consistency similar to thick cake batter to guarantee peak rise and texture.
Start by thoroughly whisking your dry ingredients—flour, xanthan gum, baking powder, yeast, and sugar—to assure even distribution.
Activate yeast in warm water with honey for prime fermentation. Combine wet ingredients—egg whites, oil, and vinegar—into the dry mix, aiming for a batter that’s thick yet pourable.
This consistency traps gas bubbles effectively, leading to better volume and crumb structure.
Using a fed starter can improve fermentation activity and enhance the rise and flavor of gluten-free bread batters.
| Step | Purpose | Key Detail |
|---|---|---|
| Whisk dry mix | Even ingredient spread | Prevents clumping |
| Activate yeast | Start fermentation | Warm water, 10 min activation |
| Mix wet & dry | Form batter consistency | Thick, like cake batter |
| Pour & rest | Prepare for proofing | Use greased pan |
Tips for Proofing Dairy and Gluten-Free Bread
When you’re ready to proof your dairy and gluten-free bread, find a nice warm spot—ideally around 75-80°F. This is the sweet spot for activating the yeast and getting that perfect rise.
To keep everything nice and cozy, cover your batter tightly with some sprayed plastic wrap and then throw a towel over it. This helps retain moisture without making it too soggy.
Now, keep an eye on it! You’re looking for about a 30-40 minute rise. You’ll know it’s time to bake when the batter has increased by about 30%. Happy baking!
Remember, maintaining the right temperature and moisture levels during proofing is essential to encourage yeast activity and optimal rise.
Ideal Proofing Temperature
Since gluten-free bread relies heavily on yeast activation and batter consistency rather than traditional dough elasticity, maintaining an ideal proofing temperature is crucial for achieving proper rise and texture.
You should aim for a stable environment between 75°F and 85°F (24°C–29°C). Temperatures below this slow yeast activity, while higher heat risks killing the yeast or causing uneven rise.
Monitor closely to avoid overproofing, which weakens structure.
| Temperature (°F) | Yeast Activity | Effect on Bread |
|---|---|---|
| Below 70 | Slow fermentation | Dense crumb, poor rise |
| 75-85 | Prime fermentation | Good rise, light texture |
| 90-95 | Rapid fermentation | Risk of overproofing |
| Above 100 | Yeast killed | No rise, dense bread |
| Room temperature | Variable | Unpredictable proofing time |
Maintain consistent warmth for best results. Proper proofing temperature also supports the development of a healthy starter activity, which is essential for flavor and texture.
Covering Techniques During Proof
Consistently covering your gluten-free, dairy-free bread batter during proofing creates a controlled, humid environment essential for peak yeast activity and moisture retention.
Use a layer of lightly sprayed plastic wrap directly on the batter’s surface to prevent drying and crust formation, which can inhibit rise.
Then, drape a clean kitchen towel over the pan to insulate and maintain steady warmth.
This dual-layer method balances moisture without causing condensation to drip into the batter, which could alter texture.
Avoid airtight lids that trap excess water vapor, risking sogginess.
Proper coverage also minimizes exposure to drafts, ensuring consistent fermentation.
For even better control over temperature and humidity during proofing, consider using a bread proofing box designed to optimize fermentation conditions.
Timing and Visual Cues
Maintaining proper coverage during proofing sets the stage for accurately gauging when your dairy and gluten-free bread has risen enough.
You’ll notice the batter should increase about 30% in volume, a vital visual cue to proceed to baking. Avoid rushing proofing; under or over-proofing alters crumb and texture.
Use timing as a guideline, typically 30–40 minutes, but rely on visual cues primarily. Gently press the batter surface; a slight indentation that slowly springs back signals readiness.
It’s also important to proof your dough in a warm, draft-free spot to ensure consistent rising and avoid temperature fluctuations that can affect yeast activity.
| Cue | Description |
|---|---|
| Volume Increase | ~30% rise from original |
| Surface Texture | Smooth, slightly puffy |
| Indentation Test | Indentation springs back |
| Time Frame | 30–40 minutes typical |
| Environmental Temp | Warm, draft-free spot |
Trust these cues for consistent, well-proofed bread.
Baking Times and Temperatures for Perfect Bread
To get started on your gluten-free bread, you’ll want to set your oven to a steady 350°F. This helps ensure that the heat distributes evenly, which is super important for gluten-free baking.
Now, when it comes to baking time, you’re looking at about 30 to 40 minutes. However, don’t just set a timer and walk away! Keep an eye on the internal temperature, aiming for between 205°F and 210°F. This little check will make sure your bread is cooked through properly.
For best results, allow the bread to cool on a wire rack to prevent sogginess and preserve the crumb integrity.
Optimal Oven Temperature
When baking dairy and gluten-free bread, setting the oven to the ideal temperature is essential for achieving the right texture and crumb. You want a precise balance: too hot, and the crust burns before the interior cooks; too cool, and the bread turns dense or gummy.
Aim for 350°F, which is optimal for gluten-free flours to gelatinize and proteins to set.
Consider these key points:
- Preheat thoroughly to guarantee even heat distribution, avoiding undercooked centers.
- Position your loaf on the middle rack to promote uniform browning and airflow.
- Use an oven thermometer to verify accuracy; many ovens run hotter or cooler than the dial indicates.
Controlling temperature precisely helps your bread rise properly while developing a golden, resilient crust. Additionally, baking at precise temperatures ensures that gluten-free doughs, like the gluten-free flour blend used in soda crackers, achieve the desired texture without becoming too dry or undercooked.
Ideal Baking Duration
Although oven temperature sets the stage, the ideal baking duration ultimately determines your gluten-free, dairy-free bread’s texture and crumb.
You’ll want to bake at 350°F for 30 to 40 minutes, monitoring closely for a golden-brown crust. Internal temperature is critical; aim for 205-210°F to assure full doneness without drying.
Underbaking leaves a gummy, dense crumb, while overbaking risks a dry, crumbly loaf. Use an instant-read thermometer inserted into the center for accuracy.
Position your loaf on the middle oven rack to promote even heat distribution. If you use a Pullman pan, expect slightly longer baking times due to denser shape.
Allow the bread to cool in the pan for 15 minutes before removing, then cool completely on a rack to stabilize structure and moisture.
For best results, consider the benefits of freezing bread, which can improve texture and flavor retention when done properly, thanks to resistant starch formation.
How to Cool and Store Dairy and Gluten-Free Bread?
After baking, allow your dairy and gluten-free bread to cool in the pan for about 15 minutes to set its structure and prevent collapse.
Let your dairy and gluten-free bread cool in the pan for 15 minutes to firm up and avoid collapsing.
Then, transfer it to a wire rack to cool completely. This step is essential to avoid sogginess by letting moisture escape evenly.
For best storage:
- Wrap the cooled bread tightly in plastic wrap or place it in an airtight container to maintain moisture without causing condensation.
- Store at room temperature for up to 3 days. Refrigerate only if you expect longer storage, though refrigeration may dry the bread.
- For extended freshness, slice and freeze the bread in resealable bags. Thaw slices as needed to preserve texture.
Following these steps preserves your bread’s crumb and flavor while preventing staleness or mold growth. Using airtight containers for storage can further help maintain freshness by preventing moisture loss and contamination.
Variations to Customize Your Dairy and Gluten-Free Bread
Since dietary needs and taste preferences vary widely, customizing your dairy and gluten-free bread recipe guarantees it fits your specific requirements without sacrificing texture or flavor.
You can adjust flour blends: combine sorghum, buckwheat, or tapioca for a savory profile or almond and coconut flours for paleo versions.
Swap egg whites with psyllium husk or flax eggs for egg-free or vegan adaptations, ensuring proper binding.
For sweetness, vary honey, maple syrup, or sugar quantities to balance taste.
Oils like olive or sunflower control moisture and crumb softness, while non-dairy milks replace dairy without altering texture.
You can also experiment with proofing times and loaf pans, like Pullman for uniform slices.
Each variation requires precise measurement and attention to batter consistency to maintain rise and crumb structure.
Troubleshooting Common Issues With Dairy and Gluten-Free Bread
When your dairy and gluten-free bread doesn’t turn out as expected, pinpointing the cause quickly helps you adjust and improve the next batch. Common problems often arise from ingredient ratios, proofing environment, or baking time. Here’s how to troubleshoot:
Identifying issues in dairy and gluten-free bread helps you refine your recipe for better results each time.
- Dense or gummy texture: Check your flour measurements; too much flour or underproofing reduces rise. Make certain your yeast is active by proofing in warm water with honey for 10 minutes.
- Bread doesn’t brown or is pale: Verify oven temperature with an accurate thermometer. Underbaking or low heat prevents Maillard reaction and crust development.
- Crumb falls apart or is dry: Too little oil or egg whites weakens structure. Avoid overbaking, which dries out the bread. Adjust ingredient ratios and monitor baking time closely.
Why This Dairy and Gluten-Free Bread Recipe Works for Allergies?
Understanding the common challenges in dairy and gluten-free baking helps you appreciate why this recipe is specifically designed to accommodate allergies without compromising texture or flavor.
It balances gluten-free flours with xanthan gum to mimic gluten’s elasticity. Egg whites provide structure and moisture. The recipe excludes dairy, replacing butter with oil and non-dairy liquids, preventing allergic reactions and maintaining softness.
| Allergy Concern | Recipe Solution |
|---|---|
| Gluten Sensitivity | Gluten-free flour blend, xanthan gum |
| Dairy Allergy | Oil and non-dairy milk substitutes |
| Egg Allergy* | Egg whites for binding (can use psyllium husk alternative) |
This formula guarantees allergen-free ingredients deliver a reliable rise, tender crumb, and rich flavor without triggering sensitivities.
*Egg-free option available with psyllium husk.
Frequently Asked Questions
Can I Freeze This Dairy and Gluten-Free Bread After Baking?
Yes, you can freeze this dairy and gluten-free bread after baking.
Make sure it’s completely cooled to prevent moisture buildup. Slice it before freezing for easier use.
Wrap the bread tightly in plastic wrap or aluminum foil. Then place it in a freezer-safe bag to avoid freezer burn.
When ready to use, thaw at room temperature or toast slices directly. Proper freezing preserves freshness and texture effectively.
What Is the Best Flour Blend for a Nut-Free Version?
For a nut-free flour blend, you should combine rice flour, tapioca starch, and potato starch. This trio offers a balanced texture and good binding without nuts.
Typically, use about 50% rice flour, 25% tapioca starch, and 25% potato starch by weight. You can also add a small amount of xanthan gum for elasticity.
This blend mimics gluten’s structure, ensuring your bread rises well and has a soft crumb.
How Do I Make This Bread Vegan Without Eggs?
Making your bread vegan without eggs is like replacing a key puzzle piece with psyllium husk powder, which acts as a powerful binder.
Use about 1 tablespoon of psyllium husk mixed with 3 tablespoons of water to replace each egg.
This creates a gel that holds the batter together, mimicking eggs’ structure.
Adjust moisture slightly since psyllium thickens the batter.
Combine with your usual ingredients, proof, and bake as normal for a reliable, egg-free loaf.
Can I Use Honey Alternatives for Sweetening?
Yes, you can use honey alternatives like maple syrup, agave nectar, or brown rice syrup to sweeten your bread.
These substitutes provide similar moisture and sweetness, though their flavor profiles differ slightly.
Adjust the quantity to match honey’s sweetness, usually on a 1:1 ratio.
Keep in mind that liquid sweeteners may slightly affect batter consistency. You might need to tweak water or oil amounts to maintain the right thick cake batter texture.
What Is the Shelf Life of Homemade Dairy and Gluten-Free Bread?
You won’t find your homemade dairy and gluten-free bread winning any longevity contests. It usually lasts about 2 to 3 days at room temperature before it starts drying out or getting stale.
To extend freshness, store it in an airtight container or a sealed bag. Refrigeration can help but might dry it faster, so freezing sliced portions is your best bet for keeping that perfect texture and flavor for weeks.
Final Tips for Soft, Sliceable Dairy and Gluten Free Bread
Now that you’ve mastered this dairy and gluten-free bread recipe, you’ll find it rises as reliably as a well-tuned engine.
By understanding ingredient roles, proofing, and baking nuances, you’re equipped to troubleshoot and customize confidently.
Store it properly to maintain freshness, and don’t hesitate to experiment with variations.
This precise approach guarantees every loaf meets your dietary needs without sacrificing taste or texture.
Your allergy-friendly baking just got a solid foundation.