Cold Proof Sourdough Recipe: Easy Artisan Loaf
Cold proofing your sourdough elevates the flavor and texture of your bread.
By placing shaped dough in the fridge for 12 to 48 hours, you slow fermentation, enhancing the complexity and developing that signature tang.
Use high-protein bread flour for strong gluten, and watch for visual cues to determine readiness.
After proofing, bake directly from the fridge for a delightful crust.
Keep exploring to discover tips and techniques that will further refine your baking.
Key Takeaways
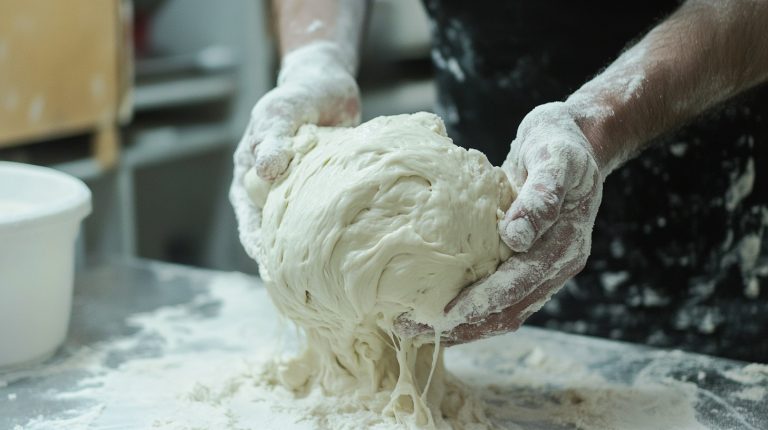
- Mix high-protein bread flour, active sourdough starter, fine sea salt, and water; allow bulk fermentation for several hours at room temperature.
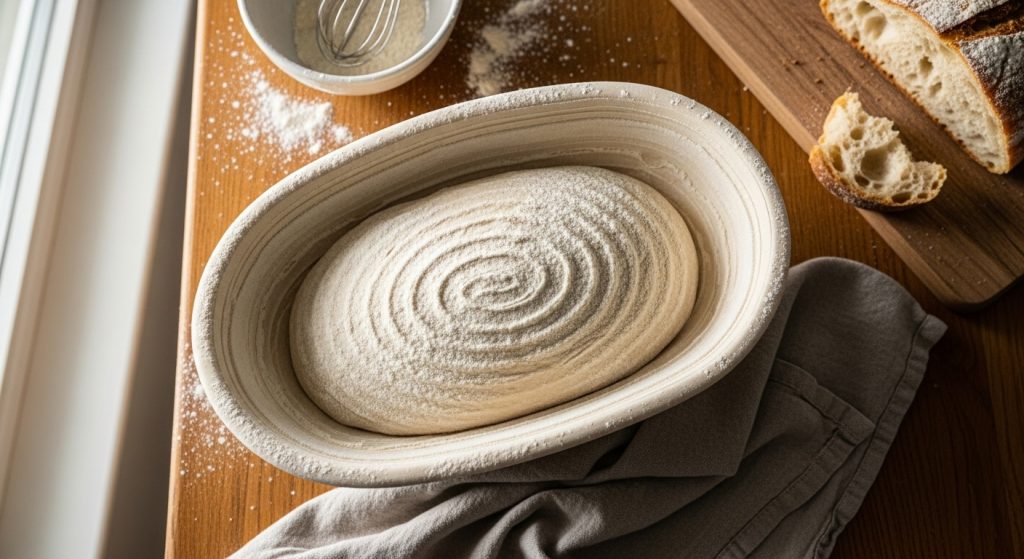
- Shape the dough and place it into a food-safe container or proofing basket, covering it loosely to retain moisture.
- Cold proof the shaped dough in the refrigerator for 12-48 hours, allowing for flavor development and improved texture.
- Perform the poke test to check readiness; a slow rebound indicates the dough is ready to bake.
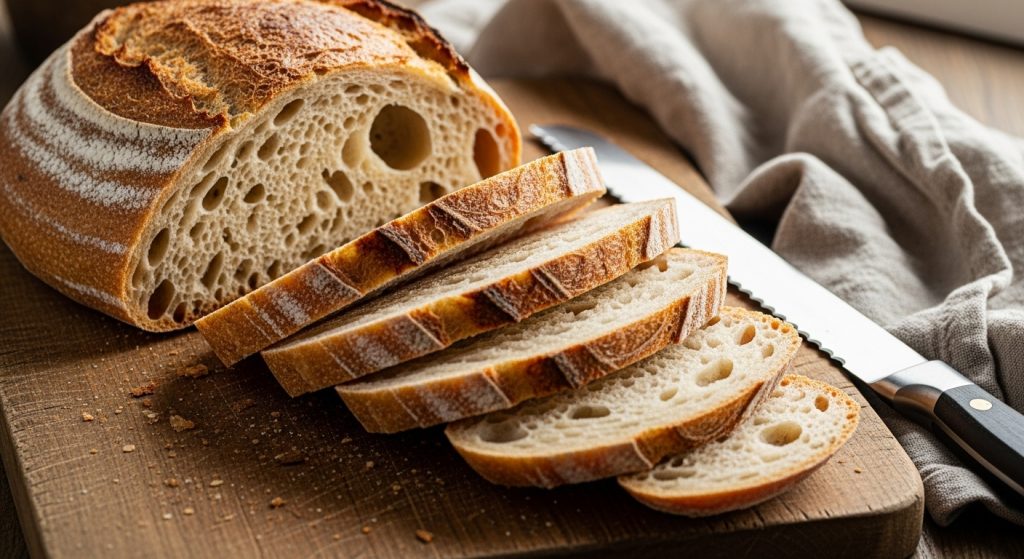
- Preheat the Dutch oven, score the dough, and bake covered for 25-30 minutes at 500°F (260°C), then uncover for 10-25 minutes for a crusty finish.
Step-by-Step Cold Proof Sourdough Recipe Table
| Stage | Ingredients & Tools | Measurements | Action | Key Tips |
|---|---|---|---|---|
| Mix Dough | Bread flour, water, active starter, sea salt | 500 g flour, 350 g water, 100 g starter, 10 g salt | Mix until combined | Use high-protein flour for strong gluten |
| Bulk Fermentation | Dough in covered bowl | 4–6 hours at room temp | Stretch & fold every 30–60 min | Look for 30–50% rise before shaping |
| Shaping | Dough scraper, banneton or bowl | 1 full dough | Shape into tight round/oval | Keep surface taut to hold gas |
| Cold Proofing | Proofing basket + fridge | 12–48 hours at 35–40°F (2–4°C) | Refrigerate shaped dough | Longer cold proof = deeper flavor |
| Readiness Check | Dough + finger poke test | N/A | Gently press surface | Slow rebound = perfectly proofed |
| Baking | Dutch oven, razor or lame | Bake at 500°F (260°C) | 25–30 min covered, 10–25 min uncovered | Bake straight from fridge for best crust |
| Cooling | Wire rack | Entire loaf | Cool completely | Prevents soggy crust, enhances crispiness |
Cold Proofing Overview
Have you ever wondered how bakers achieve that incredible depth of flavor in sourdough? The secret often lies in cold proofing, a technique where you place shaped dough in the refrigerator to slow fermentation.
This final rise allows lactic acid bacteria to thrive while yeast activity slows down. At around 37°F (3°C), the yeast becomes mostly dormant, enhancing flavor complexity and texture as sugars and starches break down gradually.
This process also leads to extended fermentation which supports the development of distinct sourdough flavors. Additionally, the use of high-protein bread flour during the dough preparation helps promote gluten development, contributing to the overall structure of the bread.
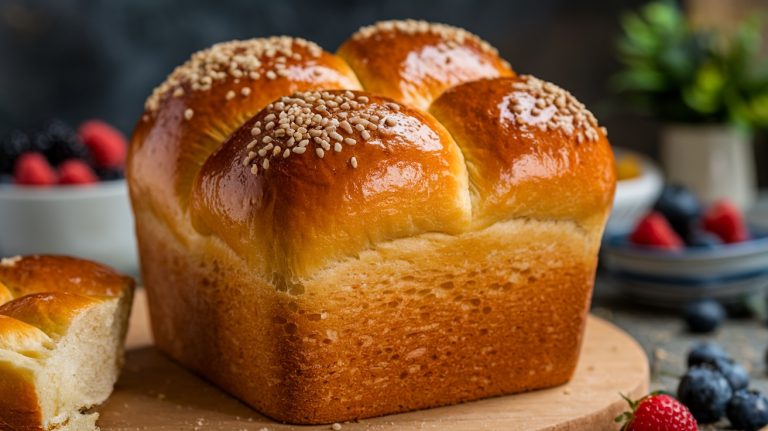
With this process, you gain flexibility in your baking schedule, enabling overnight or multi-day proofing. The result? A beautifully chewy crust and an airy crumb that’s hard to resist.
Cold proofing is your key to elevating sourdough from good to extraordinary, giving it that signature tang and depth you crave.
Benefits of Cold Proofing for Sourdough
Cold proofing transforms your sourdough into a masterpiece of flavor and texture.
As the fermentation slows, the yeast and bacteria work their magic. This process creates a rich, complex taste that’ll have your taste buds dancing. Additionally, optimal cold ferment time allows for enhanced flavor complexity, leading to a more enjoyable eating experience. During this phase, the dough also benefits from cold ingredients and minimal handling, which support the development of its structure.
You’ll also notice an improved dough structure.
This results in a beautifully airy crumb and a crispy crust that simply can’t be beat.
Flavor Complexity Enhancement
What makes cold proofing such a game-changer for sourdough flavor? By slowing down yeast activity, you give lactic acid bacteria the chance to break down starches and sugars more effectively, enhancing the depth of your bread’s flavor.
This prolonged fermentation creates a richer, complex profile, with increased tanginess from lactic and acetic acids. You’ll notice how the sour notes intensify and harmonize, avoiding the blandness of quick rises.
Additionally, cold proofing allows for flexible baking schedules without the risk of over-fermentation, making it easier to manage your baking process. The cold environment also cultivates unique aromatic compounds, enriching the bread’s bouquet.
Plus, you can fine-tune the sourness by adjusting the proofing duration, allowing for precision measurement that can significantly impact the final flavor profile.
Improved Dough Texture
An improved dough texture is one of the standout benefits of cold proofing sourdough. When you let your dough rest in the fridge, it undergoes a transformation that enhances its structure and feel.
Cold temperatures slow yeast activity, allowing gluten to develop evenly. This results in a strong and elastic dough. Cold proofing allows the dough to rest while enhancing flavor and preventing over proofing. Additionally, this technique aligns with regular monitoring to ensure your sourdough starter remains strong and active.
Chilled dough becomes stiffer, making it easier to shape and transfer without losing gas bubbles.
The extended fermentation produces a lighter, more open crumb, giving your bread an airy texture.
With this method, you’ll notice less stickiness and a more manageable dough. This leads to a beautifully crafted loaf that not only looks impressive but also delivers a delightful bite.
Enjoy the process and savor the results!
Ingredients Needed for Cold Proof Sourdough
When diving into the world of cold proof sourdough, you’ll discover that the right ingredients make all the difference in achieving that perfect loaf.
Start with bread flour for its higher protein content, which provides essential gluten strength. You can also incorporate whole wheat flour to enhance flavor and fermentation. Using high-quality flour options is key to improving your bread’s taste and texture.
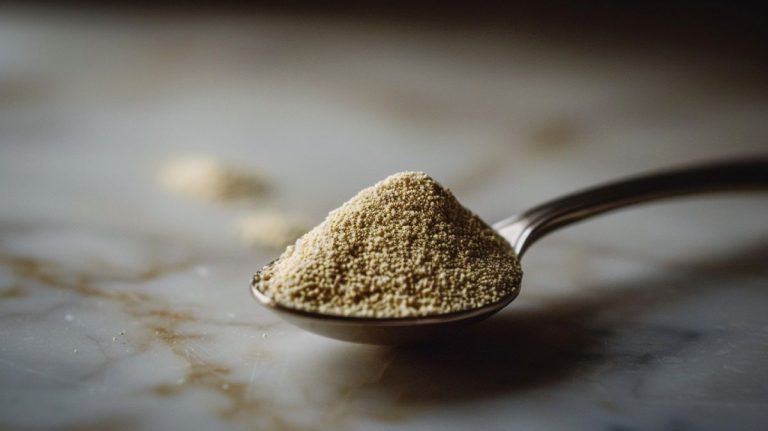
An active sourdough starter at 100% hydration is crucial—mix it with flour and filtered water in equal parts for your levain. Naturally leavened cold-proof artisan white sourdough bread requires simple ingredients to achieve its distinctive qualities.
Don’t forget about fine sea salt, which regulates fermentation and improves flavor.
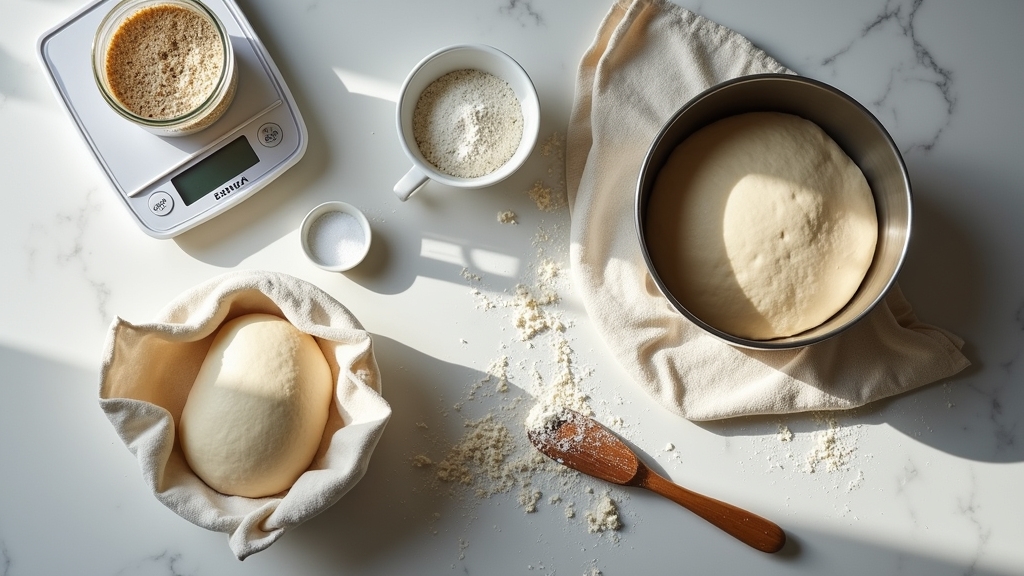
Finally, precision is key, so invest in a digital kitchen scale to ensure accurate measurements.
With these ingredients, you’re well on your way to crafting a delicious sourdough masterpiece!
The Cold Proofing Process
The key lies in temperature control and proper container use.
Follow these steps to get it right:
- Keep your refrigerator between 35°F and 40°F. This balance allows for slow fermentation while enhancing flavor complexity. A sourdough starter that is well-fed and active will also contribute to a more robust flavor during the cold proofing process. Additionally, incorporating high-quality flours can further improve the texture of your dough.
- Use food-safe containers that provide enough room for expansion. Loosely cover them to prevent drying while allowing gas exchange.
- Monitor your dough for visual and tactile cues. It should spring back slowly when poked, indicating it’s ready for the next step.
Timing Your Cold Proof
Timing your cold proof is essential for achieving the perfect sourdough.
It’s all about finding that sweet spot, usually between 8 to 48 hours, depending on your fridge temperature and dough characteristics. Proper proofing allows the dough to develop complex flavors while maintaining an ideal texture. Keep an eye on how your dough behaves, as stainless steel surfaces can support yeast activity during fermentation. Monitoring its rise and texture will guide you to the ideal proof duration.
Ideal Cold Proof Duration
What’s the secret to achieving the perfect cold proof duration for your sourdough? It’s all about timing.
Finding that sweet spot can elevate your bread’s flavor and texture. Here’s a quick guide to help you:
- 12-18 hours: This is a great starting point. It balances flavor development with practicality for home bakers.
- 24-48 hours: If you’re after deeper sourness and improved crumb structure, try extending your cold proof. Monitor carefully to avoid over-proofing.
- 5 hours minimum: Even a short cold proof can enhance your dough’s characteristics. So, don’t hesitate to experiment! Additionally, proper gluten development during the cold proof can significantly impact the final texture of your bread.
Scheduling for Flexibility
Mastering the art of cold proofing opens the door to a flexible baking schedule that fits your lifestyle. You can easily break down the dough-making process into manageable steps across several days.
For instance, mix and bulk ferment your dough one day. Then, shape and cold proof it overnight. Adjusting your starter percentage lets you extend fermentation time, giving you even more leeway. Remember, cooling your dough stabilizes fermentation, allowing you to ferment anywhere from 18 to 24 hours without sacrificing quality.
This is particularly effective when using cold temperatures below 55F/12C that can slow down the fermentation process significantly. Using stainless steel bowls for mixing can also enhance the quality of your sourdough.
By aligning your starter feeding with your baking goals, you’ll ensure a lively culture and consistent results.
This personalized schedule reduces stress and enhances your baking experience, making fresh bread a delightful reality.
Monitoring Dough Behavior
How can you guarantee your dough is ready for baking after a cold proof? Monitoring its behavior is key. Use these indicators to judge readiness:
- Poke Test: Gently press your dough. If it springs back quickly, it needs more time. A slow or partial rebound means it’s ready; no rebound suggests overproofing. A properly controlled slicing technique can help maintain the integrity of your dough during preparation.
- Visual Cues: Watch for an increase in volume and tiny bubbles forming on the surface. These signs indicate active fermentation during the cold proof.
- Texture: Your dough should feel soft and extensible. A slight thin skin is normal; it helps with scoring before baking.
Handling and Covering Dough
When it comes to handling and covering dough during cold proofing, ensuring the right conditions can make all the difference in your sourdough’s final outcome.
Use a food-safe container or a well-dusted proofing basket that allows for expansion. Cover the dough loosely with plastic wrap, a plastic bag, or a shower cap to keep it moist and prevent skin formation.
Choose a food-safe container or proofing basket, and cover the dough loosely with plastic to retain moisture and prevent drying.
While a moist cloth is an option, plastic does a better job at retaining moisture. Be cautious of your refrigerator’s environment; airflow and humidity can affect dough hydration.
After proofing, let the dough rest at room temperature for about an hour before baking. Remember, avoid over-handling the cold dough to maintain its structure and texture.
Tips for Successful Cold Proofing
What can you do to ensure your cold proofing experience is both successful and rewarding? Follow these tips to maximize flavor and texture in your sourdough:
- Temperature Control: Start with dough at room temperature. Aim for a fridge temperature between 38°F and 42°F. This balances fermentation activity, which is crucial since cold temperatures slow fermentation in your dough.
- Timing Is Key: Aim for an 8 to 16-hour cold proof. Don’t hesitate to extend up to 48 hours for deeper flavors.
- Handle with Care: Maintain proper hydration to prevent dryness. A slight surface skin during proofing can help with shaping and scoring.
Baking From the Fridge
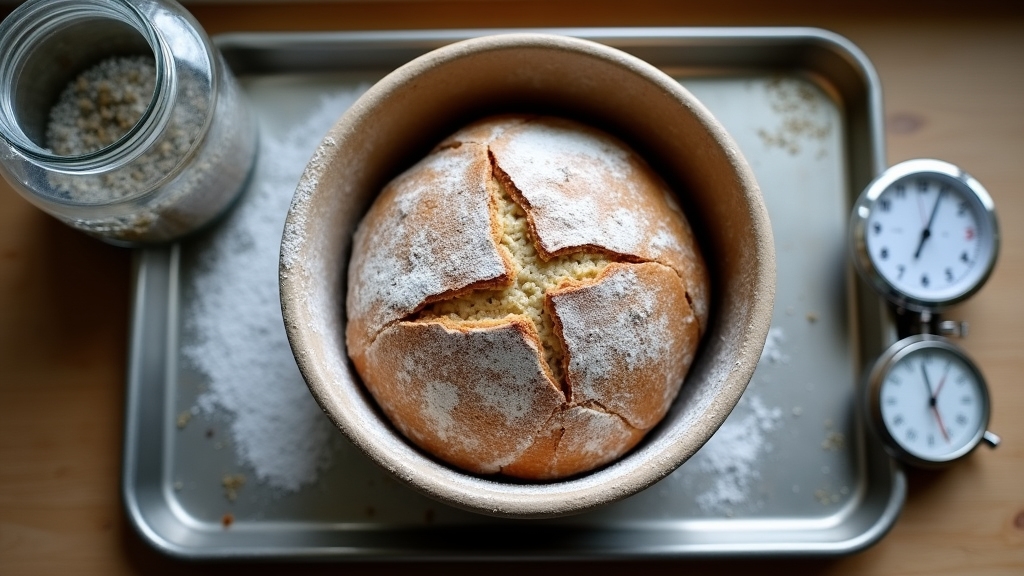
Ready to transform your cold-proofed sourdough into a delicious loaf?
Start by gently removing the dough from the banneton, loosening the edges before flipping it onto parchment paper.
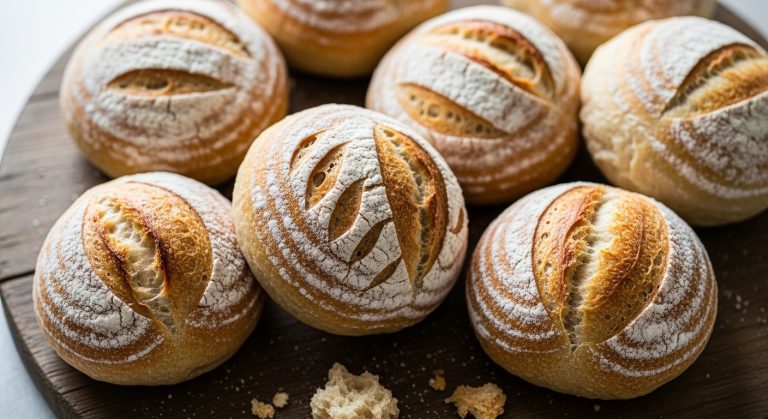
Next, score the surface with a razor blade or bread lame to encourage controlled expansion during baking.
Preheat your Dutch oven to around 500°F (260°C) while you prepare your dough for its big moment.
Carefully transfer the dough into the hot Dutch oven using the parchment, and cover it for the first 25-30 minutes to achieve that perfect oven spring.
After removing the lid, bake for an additional 10-25 minutes until the crust is beautifully golden.
Cool the loaf on a wire rack to keep that crust crispy.
Remember, cold overnight refrigerator proofing is a tried and true method for sourdough that allows for more flavor development!
Enjoy your masterpiece!
Troubleshooting Common Issues
As you embark on your sourdough journey, encountering issues along the way is almost inevitable.
Don’t worry; troubleshooting can help you achieve that perfect loaf. Here are three common problems and solutions:
1. Uneven Crumb Structure: This often results from under fermentation. Ensure you’re developing your gluten properly with techniques like stretch and fold.
Additionally, extend your bulk fermentation time to improve the crumb.
2. Dough Deflation After Scoring: If your dough collapses, it may be over-proofed.
Maintain proper cold storage temperatures and reduce proofing times to avoid this issue.
3. Dense, Gummy Loaf: This usually indicates under-proofing.
Keep your starter active and consider warmer proofing spots to boost fermentation.
With these tips, you’ll be on your way to mastering sourdough!
Frequently Asked Questions
Can I Use Any Type of Flour for Cold Proofing?
You can’t just grab any flour off the shelf for cold proofing! Each type has its quirks.
For instance, bread flour gives you that sturdy structure, while whole wheat adds flavor but needs more water.
If you throw in some rye, expect a unique taste.
So, consider your flour carefully to achieve that perfect balance of texture and flavor.
It’s all about knowing what each flour brings to the table!
How Do I Know if My Dough Is Overproofed?
You’ll know your dough is overproofed if it feels sticky and wet, rather than tacky.
Check for large bubbles on the surface and a saggy appearance instead of a smooth, rounded look.
When you perform the poke test, it won’t spring back, leaving a dent.
If it spreads out and loses shape when removed from the basket, or bakes flat with a pale crust, those are clear signs of overproofing.
Can I Freeze Dough Instead of Cold Proofing?
Yes, you can freeze dough instead of cold proofing, but don’t expect the same results.
Imagine pulling a loaf from the freezer, its surface glistening, yet the crumb may be tighter and less airy.
While freezing offers convenience, it can compromise flavor and texture.
To maintain quality, freeze dough after bulk proofing and thaw it carefully, adjusting proofing time.
Embrace the process, and experiment to find what works best for you!
What Is the Ideal Hydration Level for Cold Proof Sourdough?
The ideal hydration level for cold proof sourdough is typically between 65% and 75%.
This range balances manageability and flavor development, giving you that perfect crumb structure.
Higher hydration can create a more open crumb, but it’s stickier and harder to shape.
On the other hand, lower hydration yields a denser texture.
Experiment within this range to discover what suits your taste and handling preferences best, enhancing your sourdough experience.
How Does Cold Proofing Affect Gluten Development?
Cold proofing transforms your dough into a masterpiece of texture and strength.
As it chills, gluten develops slowly, creating a chewier, more elastic structure.
You’ll notice better gas retention, leading to a delightful crumb.
However, timing’s essential; too long can weaken your dough.
Balance is key—aim for 12 to 18 hours of cold proofing to nurture the gluten while avoiding degradation.
Your bread will thank you with a perfect rise and texture!
Unlock Bold Flavor with Cold Proofing Magic
With cold proofing, you’re not just baking sourdough; you’re creating an artisan masterpiece that even the gods would envy!
Imagine pulling a loaf from the oven, its crust crackling like a symphony of delight, the aroma weaving through your home like a warm embrace.
You’ve harnessed the magic of time and temperature, transforming simple ingredients into a culinary wonder.
So go ahead, let your dough chill in the fridge and prepare for a bread experience that’ll make you feel like a baking wizard.