How to Make San Francisco Sourdough Bread?
To create classic San Francisco sourdough bread, you’ll need to commit to a four-day process. Craft a sourdough starter with 126g bread flour, 83g water, and 24g rye culture.
After 9 hours at room temperature, refrigerate for 34 hours. Feed it weekly to maintain a 233g total.
Mix this with 204g water, then gradually add 126g bread flour to form a shaggy dough. Shape, rise, and retard dough over the next few days.
Perform precise shaping and proofing before baking at 235°C. As you master these steps, you’ll reveal the secrets of this tangy, chewy masterpiece.
Key Takeaways
- Combine 126g bread flour, 83g water, and 24g rye culture to create the sourdough starter.
- Feed the starter weekly to maintain a total weight of around 233g to ensure consistency.
- Knead dough on a floured surface for 8-10 minutes to achieve smooth and elastic consistency.
- Perform stretch and folds every 30 minutes during the first rise to develop structure and flavor.
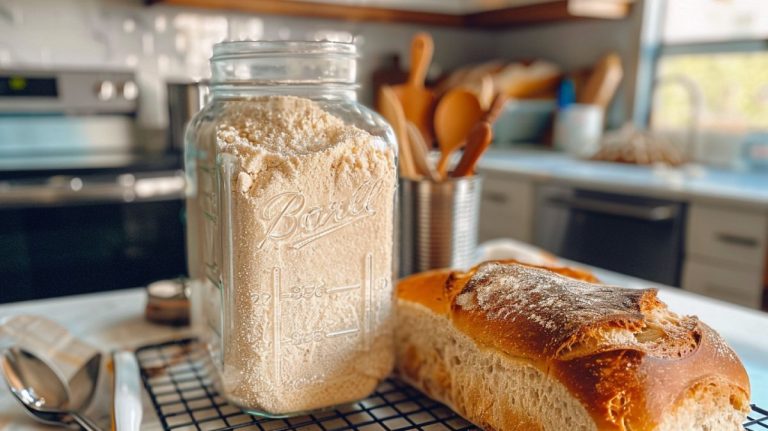
Creating the Sourdough Starter
To create a sourdough starter, you must combine the right ingredients and provide ideal conditions for fermentation.
For a San Francisco-style sourdough, combine 126g of bread flour, 83g of water, and 24g of rye culture. Allow the mixture to sit at room temperature for at least 9 hours before refrigerating it for 34 hours to develop flavor.
Rye flour is recommended as it enhances flavor development and is less susceptible to spoilage.
Feed your starter weekly to maintain freshness, aiming for a total weight of around 233 grams for baking.
Keep the starter at room temperature for no more than 19 hours to prevent overfermentation, which can negatively impact the taste and texture of your bread.
Mixing the Dough
Create the dough by combining your active sourdough starter with 204g of water in a large mixing bowl. This creates a moist environment for the wild yeast to thrive.
Gradually add 126g of bread flour, mixing until a shaggy dough forms, ensuring all flour is hydrated for proper gluten development. You can add additional flour up to 3 3/4 cups if needed.
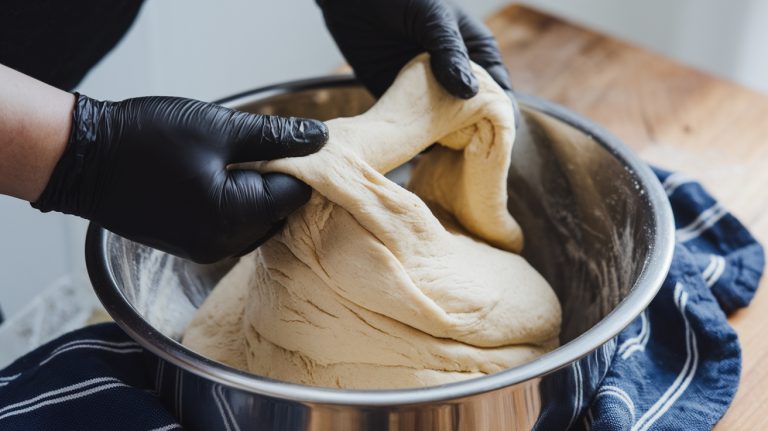
Knead the dough on a floured surface for about 8-10 minutes until it becomes smooth and elastic. This stage is essential for achieving the desired texture in your final sourdough bread.
Initially, let the dough rest for 30 minutes to undergo an autolyse phase, enhancing gluten formation and flavor development.
First Rise and Shaping
Once the dough has rested, it’s time to let it rise and undergo initial shaping, an essential stage in developing the structure and flavor of your sourdough bread.
Mix the dough with your sourdough starter and allow it to rise for about 1 to 1.5 hours until it has doubled in size, indicating the first rise is complete.
During this rise, perform a series of stretches and folds every 30 minutes to develop the gluten structure and improve the dough’s strength.
Once the dough has risen adequately, turn it out onto a floured surface, gently deflate it, and shape it into a tight ball or batard, ensuring surface tension is created.
Place the shaped dough seam side up in a well-floured proofing basket to help maintain its shape during the second rise.
Second Rise and Retardation
The shaped dough, having acquired surface tension and structure, will now undergo the second rise, a crucial phase in sourdough bread baking where the dough expands to its final size and develops a more nuanced flavor prior to baking.
During this second rise, also known as proofing, the dough will typically double in size over 2 to 4 hours.
To determine readiness, perform the poke test: if the dough springs back slowly, it’s ready; a quick spring means it needs more time.
If you wish to enhance the flavor further, consider retardation – placing the shaped dough in the refrigerator for up to 12 hours to slow fermentation.
Before baking, make sure the dough comes to room temperature for about 30 minutes for best results.
Final Shaping and Proofing
Now that your dough has finished its second rise, it’s time to move on to final shaping and proofing.
Here, you’ll shape your dough into its final form, give it a rinse, and finish the crust before letting it rise one last time.
As you prepare for the final rise, pay close attention to the shape and finish to guarantee your sourdough turns out just right.
Final Shaping Steps
Gently turn the dough onto a floured surface and perform a final stretch and fold to build tension. This guarantees the dough is well-prepared for the final shape.
Shape the dough into a tight ball or batard, making sure the top surface is smooth and taut for better oven spring.
Place the shaped dough top side down into a well-floured proofing basket or bowl to prevent sticking during the final proofing stage.
Cover the shaped dough with a damp cloth or plastic wrap to retain moisture while it proofs for an additional 2.5 to 3 hours.
Test readiness by performing the finger poke test, checking that it springs back slowly when poked, indicating it’s ready for baking.
Pre-Proof Rinsing
You should lightly mist the dough with water just before shaping to maintain hydration and prevent sticking during the final shaping process, promoting an even rise and smooth crust.
This pre-proof rinsing guarantees that your dough remains hydrated, which in turn enhances surface tension and contributes to a more evenly risen loaf.
After rinsing, gently stretch and fold the dough to maintain gas bubbles, letting it rest for 20-30 minutes before shaping.
Place the shaped dough in well-floured proofing baskets, seam-side up for round loaves or seam-side down for batards, to prevent sticking and guarantee proper fermentation.
Once the dough passes the poke test, it’s ready for baking, indicating that the fermentation is complete and the bread is ready to be baked.
Crust Finishing
To take control over crust development, start by placing the pre-proofed dough onto a lightly floured surface and occasionally perform a final stretch and fold, ensuring it holds a tight shape before its final proofing. For a San Francisco Sourdough recipe, this step is vital.
Turn the shaped dough seam side up for round loaves or seam side down for batards in a well-floured proofing basket.
Allow the dough to proof for 2 to 4 hours at room temperature or opt for an overnight cold proof for improved crust development and flavor.
Check the dough’s readiness by performing the poke test.
Just before baking, score the dough with a sharp blade to control expansion and create a beautiful crust pattern.
Baking and Cooling
Now that your sourdough is shaped and proofed, you’ll need to preheat your oven to 235°C (455°F) and create steam by adding a metal tray filled with hot water.
Then, bake your sourdough for about 45 minutes, removing the steam tray halfway through to allow the crust to develop fully.
Afterward, check for doneness by ensuring the internal temperature reaches 190°F (88°C).
Final Baking Temperature
Set your oven to 235°C (455°F), and make certain your heavy, heat-retaining Dutch oven with a lid is well-heated to enhance crust formation.
- Preheat the oven and Dutch oven to guarantee even heat distribution.
- Slash the top of the sourdough loaf to allow for controlled expansion.
- Bake the loaf for 45 minutes, initially at the high temperature for ideal crust formation and steam generation, then reduce the heat to prevent burning.
Baking and Cooling Steps
Preheat your Dutch oven to 235°C (455°F) by placing it in the oven to confirm even heat distribution before gently placing the sourdough loaf inside.
Confirm the steam pan is positioned correctly by placing a metal tray filled with hot water on the bottom rack. This will help achieve a crunchy crust.
Bake for a total of 45 minutes: start at the high temperature for the first 10 minutes, then reduce it for the remaining time.
Use a thermometer to verify that the internal temperature reaches 190°F (88°C).
After baking, allow the loaves to cool completely on a wire rack for at least an hour to prevent a gummy texture and enhance flavor development.
Frequently Asked Questions
What Flour to Use for a San Francisco Sourdough Starter?
For your San Francisco sourdough starter, use high-protein bread flour for better gluten development and rise. Alternatively, add rye flour for faster fermentation and enhanced sour flavor.
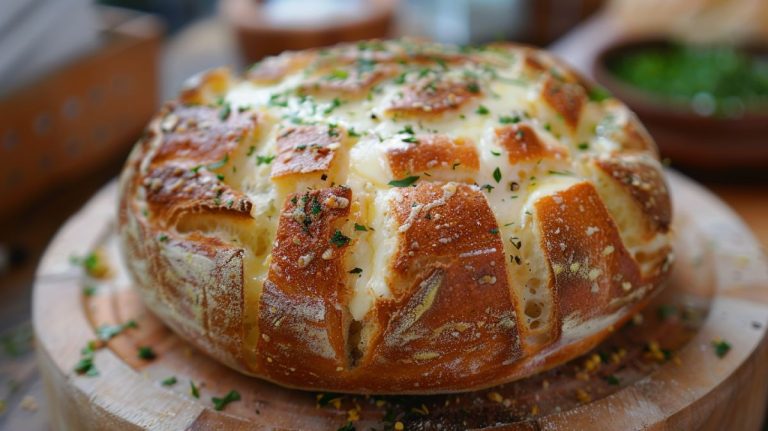
What Makes San Francisco Sourdough Bread Different?
To create your unique San Francisco sourdough, you’re aiming for the tangy flavor and chewy crust. This arises from the local Lactobacillus sanfranciscensis and a two-step fermentation process.
How Do You Start San Francisco Sourdough?
To start San Francisco sourdough, create a starter by mixing 126g bread flour, 83g water, and 24g rye culture. Ferment at room temperature for 9 hours, then refrigerate for 34 hours, maintaining it with weekly feedings.
Is San Francisco Sourdough Bread Good for You?
Yes, San Francisco sourdough bread is a healthy option. It improves digestive efficiency with better nutrient absorption, offers probiotics from the fermentation process, and reduces phytic acid for enhanced mineral absorption.
Journey to Perfect San Francisco Sourdough
Imagine a medieval alchemist transmuting base dough into a golden, transcendent bread as you toil in your kitchen.
The fruits of your patience will unfold like a time-lapse film: three days, precise techniques, and a dash of resilience.