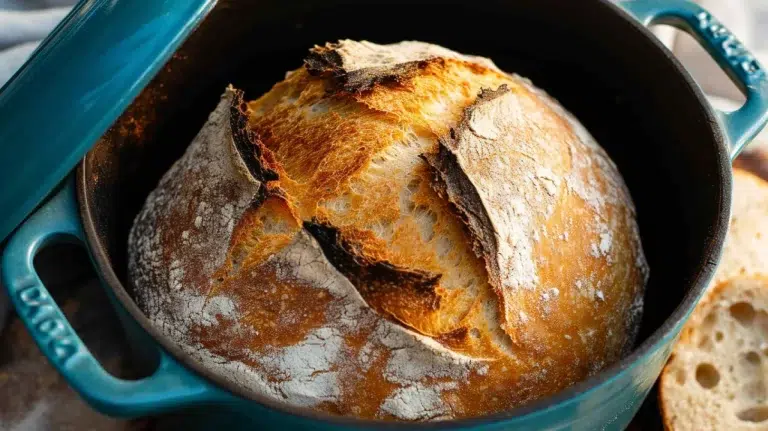
Can You Overproof Sourdough? Signs, Fixes & Tips
Yes, you can overproof sourdough, which means fermentation has gone too far, weakening gluten and causing the dough to collapse.
You’ll notice sticky, balloon-like dough that deflates easily and doesn’t spring back when poked.
Overproofed dough results in dense, flat loaves with poor oven spring and pale crusts.
To avoid this, control temperature, timing, and starter ratios carefully.
If you want to understand how to detect, prevent, and even salvage overproofed dough, keep exploring these key insights.
Key Takeaways
- Overproofing sourdough occurs when fermentation passes optimal rise, causing gluten weakening and dough collapse.
- Signs include sticky, overly relaxed dough with indentations that don’t spring back after poking.
- Overproofed sourdough results in dense, flat loaves with pale crusts and minimal oven spring.
- Temperature, time, and yeast activity drive overproofing; controlling proofing conditions helps prevent it.
- Overproofed dough can be gently reshaped or repurposed into focaccia, bread pudding, or croutons.
Complete Guide to Preventing and Fixing Overproofed Sourdough
| Category | What to Do | Key Detail | Why It Matters |
|---|---|---|---|
| Starter Ratio | Use 0.75:2:3 (starter:water:flour) for long proofs | Ideal for proofs over 12 hours | Slows fermentation so dough doesn’t peak too early |
| Proofing Temperature | Keep dough at 74–78°F (23–25°C) during fermentation | Aim for 70°F (21°C) or less for cold proofing | Prevents yeast from producing excessive gas too fast |
| Bulk Fermentation Timing | End bulk proof when dough doubles in volume | Do NOT rely strictly on clock time | Overproofing often starts when you ignore visual cues |
| The Poke Test | Press a floured finger ½ inch into dough | Dough should spring back slowly but fully | No spring-back = overproofed; instant spring-back = underproofed |
| Aliquot Jar Monitoring | Fill a small jar with a portion of dough, mark the level | Check every 30 minutes | Gives an accurate, real-time view of fermentation progress |
| Stretch & Fold | Perform 2–3 sets during bulk fermentation | Space sets 30–45 minutes apart | Strengthens the gluten network and prevents structural collapse |
| Rescuing Overproofed Dough | Reshape gently, bake as focaccia or in a loaf pan | Increase oven temp by 25°F (15°C) | Quick crust formation traps remaining gas for better oven spring |
| High Hydration Doughs | Reduce proofing time by 10–20% vs. standard recipes | Use volume and feel cues, not fixed times | Wet doughs weaken gluten faster, accelerating overproofing risk |
| High Altitude Baking | Shorten proofing times and cool the environment | Lower air pressure speeds up fermentation | Dough rises faster at elevation, raising overproofing risk |
| Wild Starter vs. Commercial Yeast | With wild starter, monitor closely and avoid warm rooms | Wild yeast is less predictable than commercial yeast | Microbial activity varies, making timing harder to control |
What Is Overproofing in Sourdough?
Understanding overproofing in sourdough starts with recognizing when your dough ferments beyond its best point.
When this happens, the dough expands too much, weakening its gluten structure and causing it to collapse.
You’ll notice a sticky, balloon-like dough that deflates easily when moved.
Overproofed dough often lacks oven spring, showing minimal rise during baking.
The poke test helps: if the indentation doesn’t spring back, your dough is overproofed.
This condition can occur during bulk fermentation, final proof, or both.
It leads to flat loaves with dense texture and a closed crumb, sometimes mimicking underproofed bread, especially with low-protein flours.
While the bread remains edible, you’ll face reduced volume, weaker crust, and a stronger sour flavor from extended fermentation.
Visual signs such as pale crusts and irregular crumb can help you identify overproofed sourdough early.
Why Does Overproofing Happen?
Because sourdough fermentation depends heavily on temperature, time, and yeast activity, overproofing happens when these factors push the dough beyond its ideal rise.
Sourdough overproofing occurs when temperature, time, and yeast activity push the dough past its optimal rise.
When dough ferments too long or at too warm a temperature, yeast produces excessive gas, causing the gluten network to weaken and collapse.
This structural breakdown leads to dough that can no longer hold its shape or trap gas effectively.
Overproofing often occurs during bulk fermentation or the final proof when you don’t monitor volume or timing closely.
It’s common in warm seasons or when you use a high starter ratio without adjusting proofing conditions.
If you don’t control these variables, your dough will expand past the point of peak fermentation.
This results in a fragile, over-relaxed structure that compromises your loaf’s texture and rise.
Maintaining an optimal dough temperature of 74 to 78°F (23 to 25°C) during fermentation is crucial to prevent overproofing and ensure proper yeast and bacterial activity.
How to Spot Overproofed Dough?
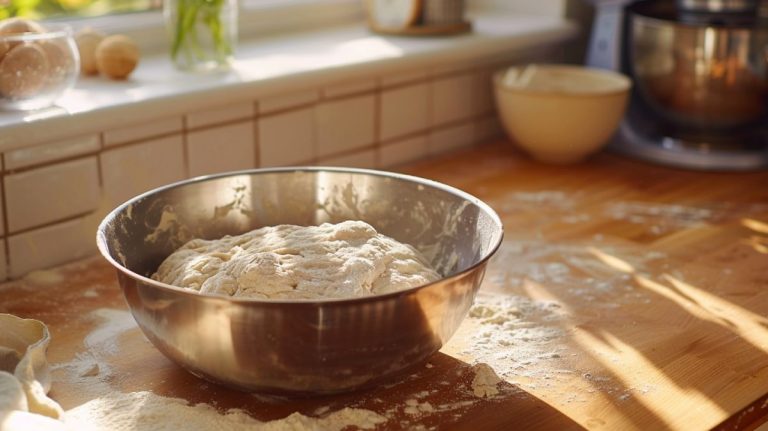
Once your dough has passed its ideal fermentation point, you’ll notice specific physical signs that reveal overproofing. The dough feels sticky and balloon-like, often deflating easily when you transfer it.
It looks smooth and overly relaxed, lacking the tension needed to hold shape. When you perform the poke test, the indentation won’t spring back, signaling lost elasticity.
You might also see the dough’s volume exceeding 1.5 to 2 times its original size during bulk fermentation. In the oven, overproofed dough shows minimal oven spring, producing flat loaves with dense crumb structures.
Being able to identify these signs quickly helps you avoid baking bread with compromised texture and shape. So keep a close eye on your dough’s feel and appearance throughout fermentation. Managing proofing time properly is critical, as both underproofing and overproofing can lead to gumminess and poor texture.
How to Prevent Overproofing?
To keep your dough from going overboard during fermentation, adjust your starter ratio to about 0.75:2:3 for proofs lasting over 12 hours.
Proof at cooler temperatures to slow fermentation. Monitor with an aliquot jar, and perform periodic stretch-and-folds during bulk to maintain structure. Always end bulk when dough volume doubles, not strictly by time.
A consistent feeding schedule and maintaining a healthy starter hydration can also help control fermentation activity.
| Method | Purpose | Tip |
|---|---|---|
| Starter Ratio | Control fermentation speed | Use 0.75:2:3 for long proofs |
| Cooler Proofing | Slow yeast activity | Aim for 70°F (21°C) or less |
| Aliquot Jar | Visual volume monitoring | Check every 30 minutes |
| Stretch-and-Fold | Strengthen gluten network | Perform 2-3 times during bulk |
These steps help you prevent overproofing and produce peak sourdough texture.
How to Rescue Overproofed Dough?
If you find yourself with overproofed dough, don’t worry! Just remember to handle it gently when you’re shaping it. You want to keep whatever structure is left, so be kind to it.
Now, when it comes to baking, try cranking up the oven temperature a bit. A hotter oven helps set that crust quickly, which can prevent any potential collapse.
And hey, if shaping doesn’t go as planned, you can always think outside the box! Why not spread it out as focaccia? You can still enjoy your bread, just in a different form!
Also, recognizing the signs of over fermentation early can help you adjust your process for better results next time.
Gentle Shaping Techniques
Handle overproofed dough with extra care during shaping to preserve its fragile gas structure. Use light, deliberate movements to avoid excessive deflation.
Avoid adding flour, which can alter texture unpredictably. Instead, gently fold and tuck the dough into shape, maintaining surface tension without compressing it.
| Step | Action | Tip |
|---|---|---|
| 1. Prepare | Lightly flour surface | Use minimal flour to prevent stickiness |
| 2. Lift dough | Support from below | Avoid stretching or tearing |
| 3. Fold edges | Gently tuck inward | Maintain air pockets |
| 4. Shape round | Use cupped hands | Apply gentle pressure only |
| 5. Rest | Cover and proof briefly | Prevent drying out |
This method helps keep your dough intact, optimizing oven spring despite overproofing. Using gentle folding methods like the coil fold technique can further protect the dough’s delicate gluten network during handling.
Baking Temperature Adjustments
When baking overproofed sourdough, adjusting your oven temperature plays a pivotal role in salvaging the loaf’s structure and crust. Overproofed dough has weakened gluten, so setting the right heat helps create a quick crust that traps gases for better oven spring.
Here’s how to adjust:
- Preheat your oven higher than usual, around 475°F (245°C), to promote rapid crust formation.
- Use a Dutch oven or baking stone to maintain intense, even heat, supporting faster oven spring.
- Consider lowering the temperature to 425°F (220°C) after the first 15 minutes to avoid burning while ensuring the crumb sets well.
- Additionally, creating a steamy environment during baking helps delay crust setting, allowing the dough to expand more fully even when overproofed.
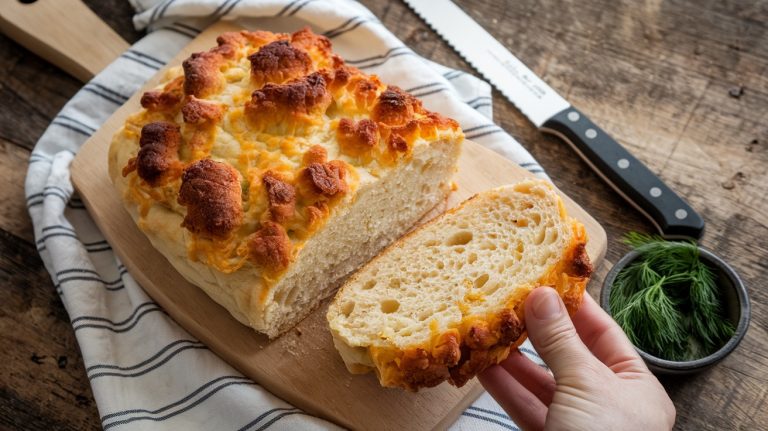
Alternative Serving Ideas
Don’t toss overproofed sourdough just yet. You can still turn it into a delicious dish with a few creative tweaks.
If your dough has lost structure, consider baking it as a rustic focaccia. Press it gently into a well-oiled pan, drizzle with olive oil, herbs, and coarse salt, then bake until golden.
This method sidesteps shaping challenges and highlights tangy flavors from extended fermentation. Alternatively, slice slightly underbaked dough thinly and toast for crunchy croutons or bruschetta bases.
You can also repurpose dense, flat loaves into bread pudding or savory strata, where texture matters less. These ideas help you avoid waste and enjoy the complexity overproofing imparts, turning what seems like a mistake into a tasty opportunity.
To improve texture and flavor, allow the dough to rest after gently deflating it before baking, as this shorter proofing time can enhance the final product.
Effects of Overproofing on Your Bread
When you overproof your sourdough, you’re in for a few surprises. First off, you might notice a significant drop in volume. That nice, airy bread you were hoping for? Say goodbye to that!
Instead, you’ll end up with a denser crumb that just doesn’t have that light, open texture we all love.
And let’s talk flavor. With that extra fermentation time, the taste sharpens quite a bit. You might find the sourness more pronounced than you’d like. It’s like your bread decided to throw a little extra tang into the mix!
Oh, and don’t forget about the crust. When you overproof, it tends to weaken. So instead of a beautifully baked loaf, you might get something that’s a bit flat and less appealing. Not exactly the outcome you were going for, right?
To avoid this, it’s important to monitor your dough closely and use techniques like folds every 15 minutes to strengthen the dough and control fermentation.
Volume And Texture
Overproofing drastically reduces your bread’s volume and alters its texture, leaving you with a dense, flat loaf. When the dough ferments beyond its ideal point, the gluten network weakens and gas escapes.
This causes structural collapse, resulting in a loaf that struggles to rise during baking and feels heavy.
Here’s what you’ll notice:
- Minimal oven spring: Your bread won’t expand much in the oven.
- Dense crumb: Instead of open, airy holes, the crumb becomes tight and compact.
- Flat shape: The loaf spreads out rather than rising tall due to lost gas tension.
Understanding these volume and texture changes helps you identify overproofing early. This way, you can adjust your process for better results next time. Proper scoring with a sharp blade can help control expansion and improve the final loaf appearance despite proofing challenges.
Flavor And Crust
Flavor complexity and crust texture shift noticeably as fermentation extends beyond the ideal window. When you overproof your sourdough, the extended fermentation boosts acidity, intensifying sour notes that some find appealing but others may consider overpowering.
At the same time, the crust weakens due to gluten breakdown and excess gas loss, resulting in a thinner, less crispy exterior. You’ll notice your crust may lack that satisfying crunch and can appear pale or fragile.
This happens because overproofed dough loses surface tension, hindering oven spring and crust development. While the flavor deepens, the compromised crust and denser crumb often detract from the overall eating experience.
To maintain balanced flavor and a robust crust, you need to carefully time your proofs to avoid going beyond peak fermentation.
Frequently Asked Questions
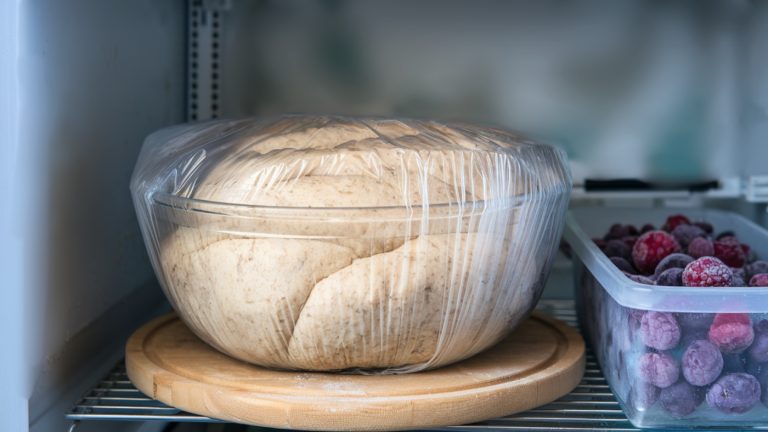
Can Overproofed Sourdough Be Frozen Before Baking?
You can freeze overproofed sourdough before baking, but it’s not ideal.
Overproofed dough is fragile and has lost strength, so freezing may worsen its structure.
If you freeze it, handle it gently to avoid deflation and thaw it slowly in the fridge.
Baking after freezing might yield denser bread with less oven spring.
For best results, try to catch the dough before it’s overproofed to freeze or bake.
Does Altitude Affect Sourdough Overproofing Risks?
Yes, altitude affects sourdough overproofing risks. At higher elevations, lower air pressure speeds fermentation, causing your dough to rise faster and increasing overproofing chances.
You’ll need to shorten proofing times and monitor volume closely. Cooler proofing temperatures help slow fermentation. Adjusting hydration and baking temperature may also be necessary.
Stay vigilant with the poke test and volume cues to avoid dough collapse and maintain your bread’s structure and flavor.
How Does Hydration Level Impact Overproofing Chances?
Higher hydration speeds fermentation, so you’re more likely to overproof your dough if you don’t watch it closely.
Wet doughs weaken gluten structure faster, causing quicker gas loss and collapse.
To manage this, reduce proofing times or proof at cooler temperatures when working with high hydration.
Lower hydration doughs ferment slower, giving you a bit more leeway.
Always rely on volume and feel cues instead of fixed times to avoid overproofing.
Can Overproofing Change the Nutritional Value of Sourdough?
Imagine a medieval alchemist tinkering with sourdough. Overproofing doesn’t drastically change its nutritional value.
You might notice a slight increase in organic acids and some breakdown of starches. This can make minerals more bioavailable.
However, the core macros—proteins, carbs, fats—stay mostly the same.
Is Overproofing More Common With Commercial Yeast or Wild Starter?
You’ll find overproofing is more common with wild starter because its fermentation is less predictable and slower to control than commercial yeast.
Wild starter’s complex microbial activity can accelerate or decelerate unpredictably, especially in warm conditions.
Commercial yeast tends to act faster and more consistently, so you can better time your proofs.
To avoid overproofing with wild starter, monitor volume and texture closely rather than relying on fixed proof times.
Don’t Let Overproofed Sourdough Go to Waste: Try This
You can definitely overproof sourdough, and when you do, it’s like your dough’s blown its chance to shine.
But don’t worry—spotting it early and adjusting your timing is key. Keep a close eye on your dough’s texture and rise to avoid that overproofed trap.
If it happens, you can often still rescue it with a few smart moves. Mastering proofing times will make your sourdough sing every time.