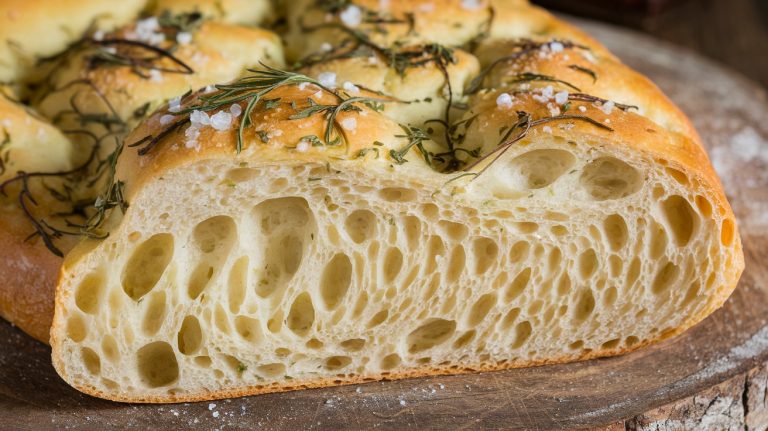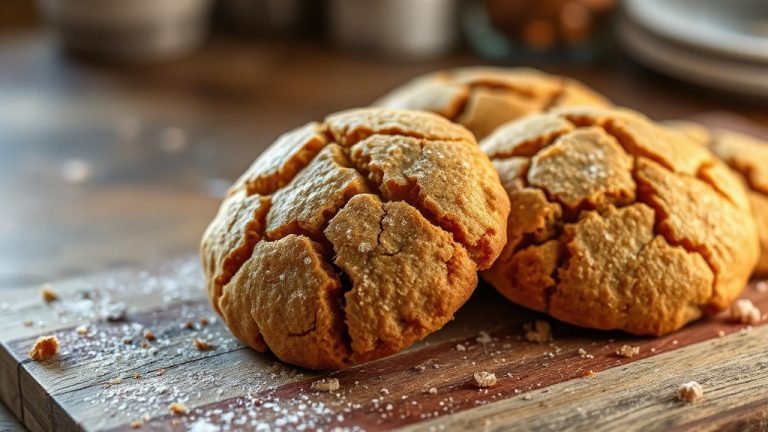
Asiago Sourdough Bread Recipe: A Masterpiece of Flavor and Tradition
Ready to bake Asiago sourdough bread? Start with 3 ½ to 5 cups of high-quality bread flour, ½ cup active sourdough starter, and ¾ to 2 cups freshly grated aged Asiago for that sharp, nutty kick.
Mix until shaggy, knead until smooth, and let it ferment 8–14 hours at 74°F–78°F. Shape into a boule, proof, then bake at 450°F–500°F for 40–45 minutes. Stick around to uncover deeper flavor secrets.
Key Takeaways
- Use 3 ½ to 5 cups high-quality bread flour and ½ cup active sourdough starter for the dough.
- Incorporate ¾ to 2 cups freshly grated Asiago cheese for a nutty, sharp flavor.
- Allow bulk fermentation for 8 to 14 hours at 74°F to 78°F for optimal rise.
- Bake at 450°F–500°F for 40–45 minutes with steam for a crisp crust.
- Store in a cool, dry place to maintain freshness and texture.
Gathering Your Ingredients
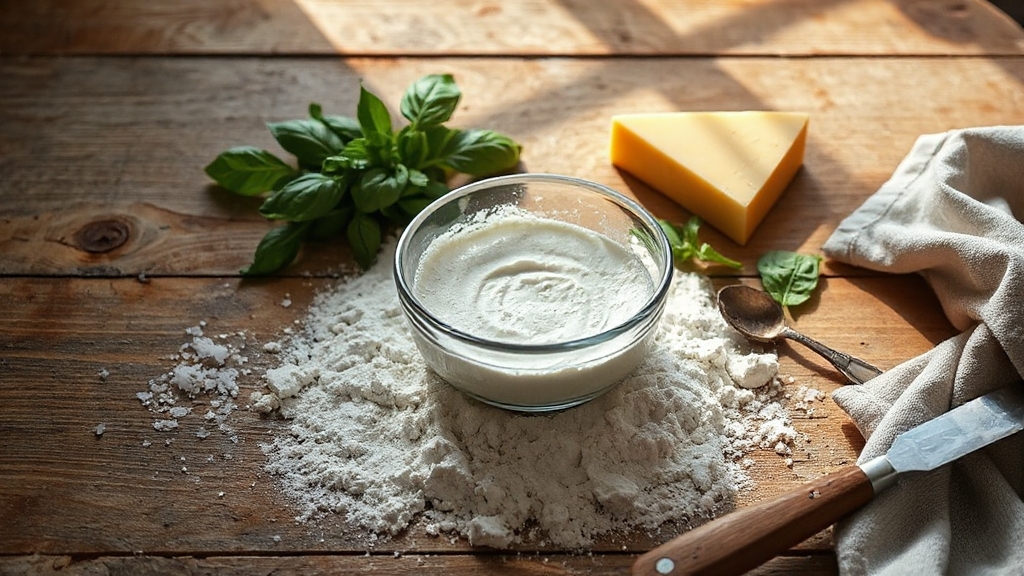
As you begin crafting your Asiago Sourdough Bread, gathering the right ingredients is your first essential step. Embark with high-quality, unbleached bread flour—3 ½ to 5 cups—for its superior gluten strength. Add a touch of rye or whole grain flour if you’re craving complex flavors. For precise measurements, using a digital baking scale ensures consistency in your dough.
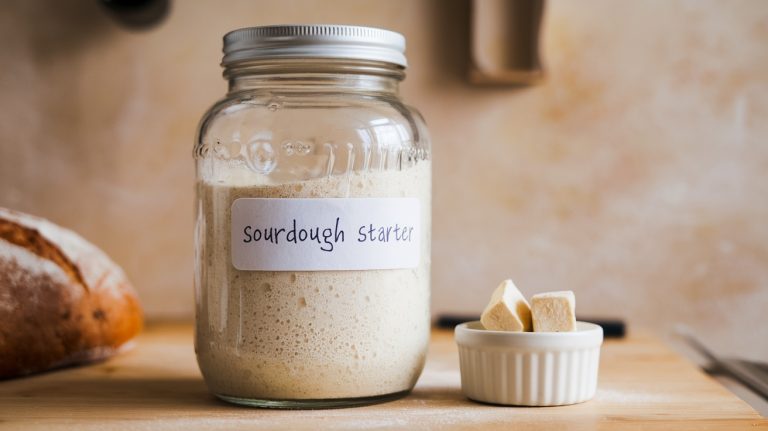
Your active sourdough starter, about ½ cup, must be fed and bubbly; make sure it’s doubled in size for peak fermentation. Don’t skimp on the star—freshly grated Asiago cheese, ¾ to 2 cups, for that nutty, sharp bite. Aged Asiago will provide a sharper flavor profile as it matures, enhancing the overall taste of your bread.
Use warm water at 110°F, around 1 ½ to 2 cups, to boost yeast activity. Finally, grab kosher salt, a pinch of sugar or honey, and optional seasonings to elevate your loaf’s character.
Mixing and Kneading the Dough
Now that you’ve gathered your ingredients, plunge into the heart of crafting your Asiago Sourdough Bread by mixing and kneading the dough. Start by combining your starter, flour, and water in a mixing bowl using a Danish dough whisk or hands until no dry flour remains. Expect a shaggy, sticky mass—that’s normal!
Cover the bowl briefly, then dive into kneading. Use a stand mixer with a dough hook at low speed, ramping up to medium for 8–10 minutes until it’s smooth and elastic. By hand, pinch and fold with wet hands to build strength. If it sticks, grease your hands or use a scraper.
Remember, proper hydration is crucial for achieving the desired dough consistency. As with other sourdough mixes, slight variations in water content can impact yeast activity levels and the final texture.
Fermentation and Bulk Rise
As you commence the fermentation journey for your Asiago Sourdough Bread, nail the initial timing by letting the dough bulk ferment for 8 to 14 hours. Adjust this timing based on temperature and how sour you want that tangy kick.
Keep a sharp eye on the rise, aiming for a 75% volume increase, and watch for bubbles and a jiggle when you shake the bowl to confirm fermentation’s rocking along. Additionally, consider how hydration levels can impact the dough’s texture and fermentation speed.
You’ve gotta maintain the right environment—74°F to 78°F is ideal—so your yeast thrives and gluten develops just right. Remember, sourdough fermentation can vary widely depending on factors like starter size.
Initial Fermentation Timing
While beginning on your Asiago sourdough bread journey, you’ll find that initial fermentation timing during the bulk rise is a critical step to master. This phase, lasting 6 to 12 hours, sets the foundation for your bread’s flavor and texture.
Keep your dough in an excellent environment of 68-70°F (20-21°C) to guarantee steady fermentation. Warmer temps speed things up, while cooler ones slow it down, so adjust accordingly. Utilizing the stretching and folding technique during bulk fermentation can further enhance gluten development and dough strength.
After mixing, let your dough rest for 30-45 minutes before starting stretch and folds. Monitoring the dough’s progress during this time can help you adjust fermentation based on visual cues like bubble formation and slight rise.
Plan for a 9-11 hour bulk rise under ideal conditions to develop those complex, tangy notes unique to Asiago sourdough.
Bulk Rise Monitoring
After mastering the initial fermentation timing, plunge into the critical art of bulk rise monitoring for your Asiago sourdough bread. This stage defines your loaf’s flavor and structure, so stay sharp!
Keep an eye on temperature—warmer conditions speed things up, while cooler ones slow fermentation. Aim for a 25% rise as a key indicator, and use an aliquot jar to track progress precisely.
Inspect visually for bubbles and expansion, and note the dough’s growing elasticity. Measure dough temperature regularly, and handle it gently to preserve its natural rise. Remember that ideal temperatures for bulk fermentation are typically between 74 to 76°F (ideal temperature range) to ensure optimal flavor development. For gluten-free variations, consider a slightly warmer range to encourage yeast and bacteria growth during this crucial stage.
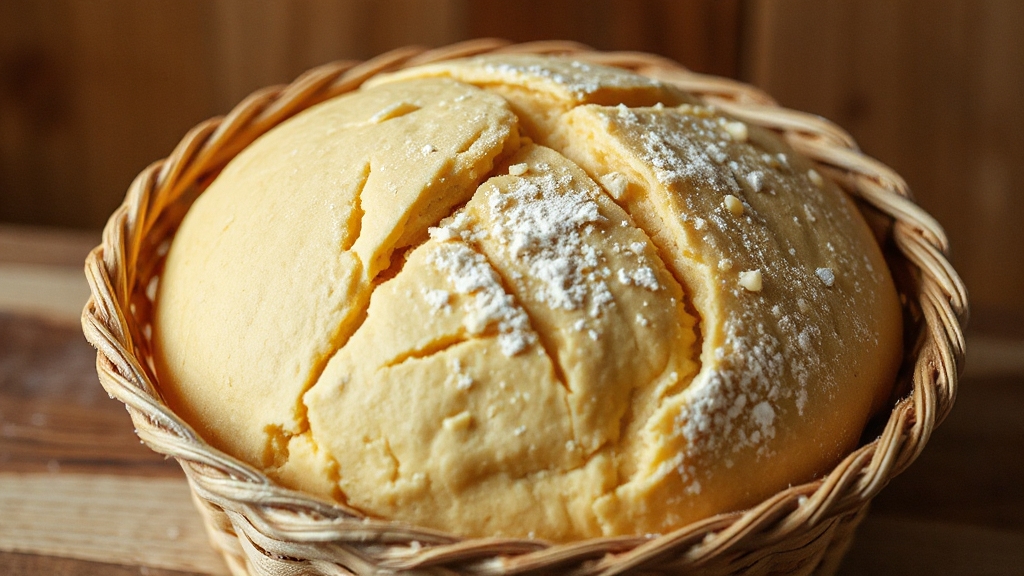
Shaping and Final Proofing
Once you’ve completed bulk fermentation, it’s time to transform your Asiago sourdough into a beautifully structured loaf through shaping and final proofing.
Start by gently flattening the dough into a ½-inch oval, stretching and folding edges to the center for surface tension. Let it rest 30 minutes to relax the gluten, then shape into a tight boule or batard using a bench scraper, sealing the seam underneath with circular motions.
During this process, ensure minimal flour on the bench to achieve optimal surface tension. If you’re concerned about overproofing, remember that maintaining ideal conditions can prevent issues like collapsed dough.
Transfer it seam-side up into a floured banneton with quick, confident moves. Cover and proof at 70°F for about an hour, or opt for a 12-72 hour cold proof for deeper flavor. Be mindful of the fermentation environment, as ambient temperature and hydration can impact results, much like with ideal fridge temperature.
Test readiness with a slow spring-back poke—your loaf’s structure depends on this meticulous care!
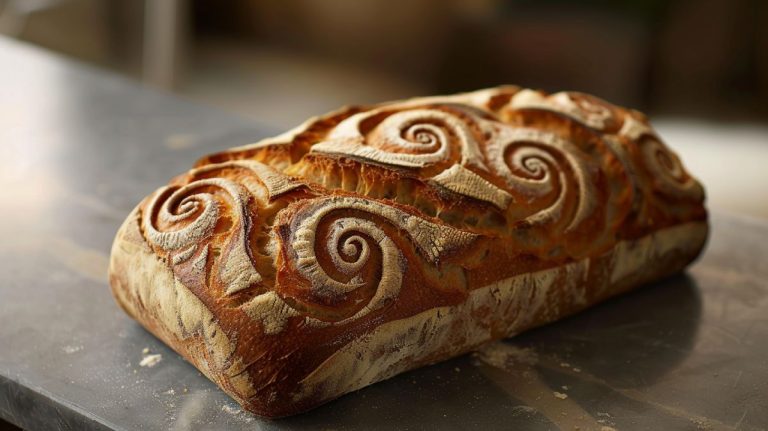
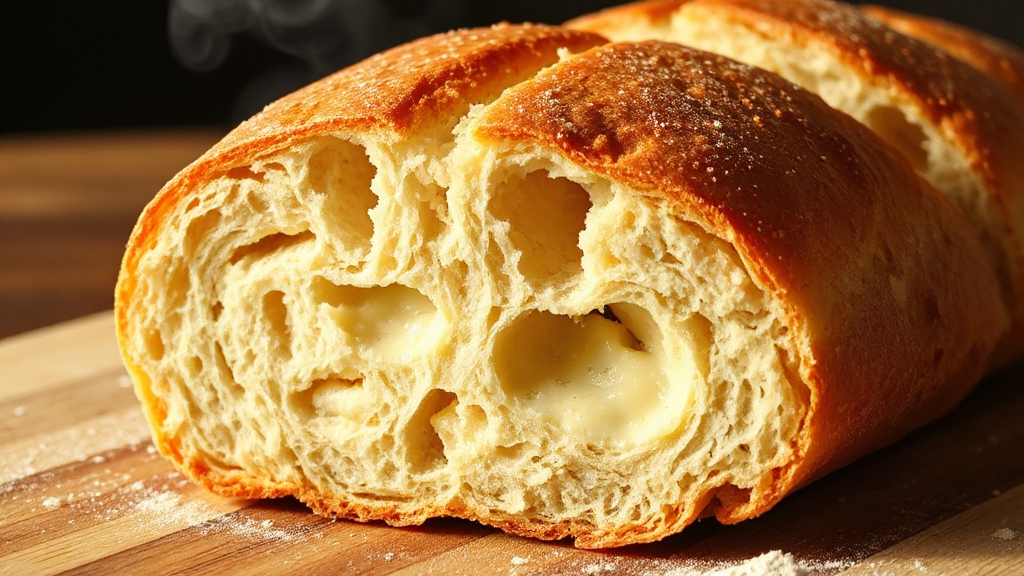
Baking the Perfect Loaf

As you set out on baking the perfect Asiago sourdough loaf, preheat your oven to a blazing 450°F-500°F, ensuring it’s ready to deliver that coveted crusty exterior. Place a Dutch oven or baking stone inside to heat up, and set a pan of water for steam—crucial for that golden, crisp crust. Using a powerful stand mixer can make kneading your dough much easier and more consistent.
Score your dough with a sharp lame or razor blade to guide expansion and avoid cracks. For optimal results, ensure your dough has doubled in size during fermentation before shaping.
Bake for 40-45 minutes, maintaining steam for the first 10 minutes to lock in moisture and boost the Maillard reaction. Watch that crust harden and turn golden!
Once done, cool your loaf on a wire rack to prevent sogginess. Trust me, you’re crafting a masterpiece with every bake.
Tips for Flavor Variations
Now that you’ve mastered baking the perfect Asiago sourdough loaf, let’s explore ways to elevate its flavor with exciting variations. Immerse yourself in cheese swaps like sharp Parmesan or creamy white cheddar, blending them with Asiago for a complex Italian profile. Add hot honey for a sweet-spicy kick, or fold in rosemary for piney freshness.
Mix in caramelized onion jam for a sweet-savory punch, and don’t shy away from walnuts for earthy crunch. Consider incorporating these add-ins during the stretch and fold phase to ensure even distribution throughout the dough. For longer storage of your flavorful creations, try vacuum sealing the bread to maintain freshness over time with proper air removal.
Experiment with these passionate pairings to ignite your senses:
| Flavor Add-In | Emotion Evoked | Why It Works |
|---|---|---|
| Hot Honey | Fiery Excitement | Contrasts tangy cheese |
| Rosemary | Nostalgic Comfort | Enhances nutty Asiago |
| Caramelized Onion Jam | Warm Satisfaction | Sweet-savory depth |
| Walnuts | Rustic Joy | Crunchy, earthy balance |
| Parmesan | Bold Confidence | Deepens savory complexity |
Frequently Asked Questions
How Do I Store Asiago Sourdough Bread?
Keep it at room temperature in an airtight container for 3-4 days, and don’t cut it until you’re ready to eat.
Avoid refrigeration—it dries out the loaf!
For longer storage, freeze it after wrapping tightly in plastic or foil, and it’ll last up to 2 months. Thaw at room temp, and you’re good to go!
Can I Freeze the Dough Before Baking?
Imagine you’re prepping for a big family gathering and want fresh bread without the last-minute rush. Can you freeze the dough before baking? Absolutely!
Freeze it after shaping for the best results—wrap it tightly in plastic or use a banneton with parchment. Thaw it slowly for 8-24 hours, then proof and bake.
You’ll get that irresistible, freshly baked aroma with a slightly tighter crumb. Try it; you’ll love the convenience!
What if My Starter Isn’T Active?
Check for bubbles, rise, or a tangy smell—if they’re missing, it’s time to revive it.
Discard most of the old stuff, keep just a spoonful, and feed it equal parts fresh flour and water.
Use whole grain flour for a nutrient boost, adjust to a thick batter consistency, and keep it warm at 70-75°F.
Feed every 12-24 hours ‘til it doubles consistently!
How Do I Reheat Leftover Bread?
You’ve gotta try the oven method for the best results!
Preheat your oven to 325°F, wrap that bread in foil to keep it moist, and pop it on a rack for 5-10 minutes. It’ll come out warm and fresh, just like day one.
Don’t rush—let it cool a bit before digging in. Trust me, you’ll taste the difference!
Can I Make This Gluten-Free?
Imagine a friend, Sarah, who’s celiac but craves that tangy, chewy loaf. You’ve got this!
Immerse yourself in gluten-free flours like a custom blend with xanthan gum for structure. Adjust hydration levels since these flours absorb differently.
Use a gluten-free sourdough starter and extend fermentation time for flavor. With passion and precision, you’ll craft a loaf Sarah will adore. Go for it!
Golden Crust, Cheesy Soul: The Asiago Sourdough
You’ve crafted a masterpiece with this asiago sourdough bread! Revel in the joy of creating, the thrill of kneading, and the magic of rising. Savor the crust’s crackle, the cheese’s tang, and the warmth of each slice.
Share this labor of love, this triumph of flavor, this gift of tradition. Bake with heart, eat with passion, and let every bite remind you—you’re a true artisan of the hearth.