How to Toast Frozen Bread in Air Fryer With Perfect Browning?
To toast frozen bread in your air fryer, place slices flat in a single layer with space between for hot air to circulate.
Set the temperature between 350°F and 380°F, adjusting based on thickness. Thinner slices take 3–5 minutes, while thicker ones may take up to 10.
Flip halfway to ensure even browning and crispness. For cheese-topped or dense bread, lower the heat and add time to avoid burning.
Keep an eye on golden, crispy edges signaling perfection. Want tips to master every slice?
Key Takeaways
- Place frozen bread slices in a single layer with space between each for proper hot air circulation; no thawing needed.
- Preheat the air fryer to 350°F for gentle toasting or 375°F–400°F for a crunchier texture.
- Toast thin slices for 3–5 minutes, medium slices for 5–7 minutes, flipping halfway for even browning.
- Avoid overcrowding or stacking slices; toast in batches if necessary to prevent soggy or uneven results.
- Use a light coat of oil or a perforated silicone liner to enhance crispiness and ease cleanup.
Ingredients & Cooking Guide to Toast Frozen Bread in Air Fryer
| Item | Details |
|---|---|
| Recipe Type | Quick air fryer toast from frozen bread |
| Prep Time | 1–3 minutes |
| Cook Time | 3–10 minutes, depending on slice thickness |
| Total Time | 4–13 minutes |
| Servings | 1–4 slices, depending on basket size |
| Difficulty | Easy |
| Cooking Method | Air Frying |
| Best Temperature | 350°F–380°F for most bread; 325°F–350°F for cheese-topped slices |
| Best For | Frozen sandwich bread, Texas toast, artisan slices, flavored bread |
| Ingredients | Frozen bread slices Optional: light oil spray, butter, or toppings |
| Equipment | Air fryer Tongs or spatula Optional: perforated liner |
| Key Technique | Arrange in a single layer, leave space between slices, and flip halfway |
| Texture Goal | Golden-brown, crispy edges, warm center |
How To Prepare Frozen Bread For Air Frying?

Preparing frozen bread for air frying starts with arranging your slices properly to guarantee even cooking.
First, place the frozen slices directly into the air fryer basket; no need to thaw! Spread them out in a single layer, leaving space between each one so hot air can circulate freely.
Place frozen bread slices in a single layer with space between for even, crispy air frying.
This spacing helps every slice brown evenly and become perfectly crisp. If your basket is small, work in batches rather than overcrowding it.
A quick preheat of about three minutes warms the air fryer, setting the stage for consistent results. Avoid stacking or overlapping slices, as that traps moisture and leads to uneven toasting.
Using a single-layer arrangement ensures proper airflow and prevents soggy spots for the best texture.
With your frozen bread laid out thoughtfully, you’re ready to move on to the next step: selecting the right temperature and timing to achieve that golden, crunchy finish.
Best Temperature Settings For Toasting Frozen Bread
Once you’ve arranged your frozen bread slices in a single layer and preheated your air fryer, the next step is picking the right temperature to get that perfect golden crust.
Aim for a range between 350°F and 400°F. Lower temps around 350°F give gentle, even toasting, while higher temps near 400°F crisp faster with a darker finish. Adjust based on your bread type and desired crunch.
| Temperature | Result | Use Case |
|---|---|---|
| 350°F | Even browning | Standard slices |
| 360°F-380°F | Balanced crispness | Thicker bread |
| 375°F-400°F | Darker, crunchier | Quick toasting |
| 325°F | Light crisp | Delicate or thin slices |
| 350°F | Safe starting point | Most frozen bread types |
Choose wisely to match your bread’s thickness and texture preference.
Cooking Times For Different Frozen Bread Thicknesses
When you’re toasting thin frozen bread slices, you’ll want to start with about 3 to 5 minutes at 350°F. Just keep an eye on them—nobody likes burnt toast, right? You’re aiming for that perfect golden crisp.
Now, if you’re dealing with thicker cuts, like Texas toast, you’ll need a bit more time. Expect to toast those for around 7 to 10 minutes to achieve that ideal crunch and warm center. And hey, if you’re craving some extra crunch, feel free to add a minute or two! Just remember to flip them halfway to ensure even browning.
For best results, preheat your air fryer to 350°F for a few minutes to ensure even toasting right from the start, which helps achieve that desirable golden crust.
Thin Slices Timing
Start by recognizing that thin frozen bread slices toast faster and more evenly than thicker cuts in an air fryer.
You’ll want to set the temperature around 350°F (175°C) and cook these slices for about 3 to 5 minutes.
Because they’re slim, the hot air quickly crisps the edges while warming the center, creating a perfectly golden surface.
Be sure to arrange the slices in a single layer with space between them to guarantee even air circulation.
Halfway through, flip them over to promote uniform browning.
Keep an eye on the toast near the end; thin bread can shift from golden to burnt in seconds.
With this timing, you’ll enjoy crisp, delicious toast straight from your air fryer in no time.
For easier cleanup and to prevent sticking, consider using silicone-coated parchment paper liners designed for air fryers.
Thick Bread Duration
Thick frozen bread slices demand a bit more patience and attention in the air fryer, typically requiring 7 to 10 minutes at around 350°F (175°C) to reach that perfect golden crisp.
You’ll want to place the slices in a single layer, ensuring hot air can circulate evenly around each piece. Halfway through cooking, flip them to promote uniform browning on both sides.
As the crust transforms into a deep, warm gold and the inside heats through, you’ll notice the satisfying crunch develop.
Keep a close eye near the end to avoid over-toasting, since thick bread can darken quickly.
This method works especially well with hearty slices like Texas toast or artisan loaves, giving you a crisp exterior and tender, steamy center every time.
For best results, preheat your air fryer to 350°F before toasting to ensure even cooking and a crispy finish.
Adjusting For Texture
Mastering the perfect toast means tailoring your air fryer timing to the thickness of your frozen bread slices. Thin slices crisp up quickly, usually in 3 to 5 minutes at 350°F, delivering a light crunch with a warm center.
Thicker slices, like Texas toast, need closer to 7 to 10 minutes to develop that satisfying golden crust without leaving the inside cold. Adjusting the time guarantees you get the texture you crave: crispy outside, tender inside.
Thin slices: Start with 3-5 minutes, flip halfway for even browning.
Medium slices: Aim for 5-7 minutes, keeping a close eye near the end.
Thick slices: Toast 7-10 minutes, possibly extending by 1-2 minutes for extra crunch.
Keep checking to avoid over-toasting and enjoy your ideal texture every time! Using the air fryer at consistent temperatures like 350°F ensures even cooking and prevents burning, similar to temperature strategies used for other frozen foods like broccoli.
How To Arrange Frozen Bread Slices In The Air Fryer?
When you’re getting ready to toast those frozen bread slices in the air fryer, the first thing you want to do is lay them out in a single layer. It’s super important to give each slice enough space around it so that hot air can circulate freely.
You really want to avoid overcrowding the basket. If you cram too many slices in there, you might end up with some soggy spots and uneven toasting, which is definitely not what we’re aiming for!
For best results, remember to flip the slices halfway through the cooking time to ensure even browning on both sides, especially when toasting frozen bread.
Single Layer Placement
Arrange your frozen bread slices in a single layer inside the air fryer basket to guarantee each piece gets even exposure to the circulating hot air.
This setup assures every slice crisps perfectly without soggy spots or uneven browning.
When you place your bread, make certain the slices aren’t stacked or overlapping.
Air needs to flow freely around each one for the best results.
Lay slices flat, not angled, so the heat hits every surface evenly.
Leave a small gap between each slice to allow hot air to circulate effortlessly.
Use the basket’s full width but avoid crowding to maintain consistent toasting.
For best results, preheat the air fryer to the recommended temperature and timing before placing your bread slices in.
Avoid Overcrowding Basket
Although it might be tempting to fit as many frozen bread slices as possible into your air fryer basket, overcrowding can seriously hinder even cooking.
When slices are stacked or packed too tightly, hot air can’t circulate freely around each piece, leaving some soggy or unevenly toasted.
Instead, arrange your frozen bread in a single layer with a little space between each slice.
You’ll notice the difference as every slice crisps up beautifully on all sides.
If your basket can’t hold them all without crowding, toast in batches.
This simple step guarantees consistent golden edges and a perfectly crisp texture.
Additionally, avoiding overcrowding helps prevent the formation of hotter spots that can burn food or grease, increasing smoke production.
Should You Flip Frozen Bread While Air Frying?
Frequently, flipping frozen bread halfway through air frying makes a noticeable difference in achieving an evenly golden and crisp toast. When you flip the slices, you expose both sides directly to the hot circulating air, preventing one side from becoming soggy or undercooked.
This simple step helps you get that perfect crunch and color all around. Here’s why flipping matters:
It promotes uniform browning on both sides.
It prevents uneven cooking caused by air fryer hot spots.
It guarantees the bread crisps up without burning one side.
Using a silicone liner can further enhance even cooking by improving heat circulation and preventing sticking.
How To Get Even Browning And Crispness On Frozen Bread?
To achieve that perfect golden crust on your frozen bread, start by arranging the slices in a single layer.
Make sure to leave some space between each piece—this allows hot air to circulate freely.
Oh, and don’t forget to flip the bread halfway through cooking! This little trick helps both sides brown evenly and get that nice crispiness just right.
For best results, use a perforated liner to maintain airflow and prevent sogginess during toasting.
Basket Arrangement Tips
When you arrange frozen bread slices properly in the air fryer basket, you set yourself up for perfectly even browning and crispness every time.
The key is giving each slice enough breathing room so hot air circulates freely around every edge. Avoid stacking or overcrowding, which traps moisture and causes soggy spots.
Instead, place the slices in a single layer with a little gap between them. Lay slices flat, not overlapping, for balanced heat exposure.
Use the basket’s full surface but keep slices spaced evenly. Toast in batches if needed, so each piece crisps uniformly.
Following these tips means your toast comes out golden and crispy, not unevenly cooked or damp. Proper basket arrangement turns your air fryer into the ultimate toast master!
Flip Timing Benefits
Although air fryers do a great job circulating hot air, flipping your frozen bread halfway through cooking guarantees both sides get that perfect golden crispiness.
When you flip, you expose the other side to direct heat, preventing soggy patches and uneven browning. This simple step transforms your toast into a beautifully crisp masterpiece, with a warm, soft center.
| Benefit | Why It Matters |
|---|---|
| Even Browning | Both sides get that golden glow |
| Consistent Crisp | Prevents sogginess |
| Enhanced Texture | Crunchy outside, soft inside |
| Faster Cooking | Heat reaches all areas equally |
| Visual Appeal | Perfectly toasted looking bread |
Flip your bread around halfway, and enjoy toast that’s as delicious as it looks!
Toasting Cheese Or Thick Frozen Bread: Time And Temperature Adjustments
Adjusting time and temperature becomes essential when you’re toasting cheese-topped or thick frozen bread in an air fryer. These variations demand a bit more attention than plain slices. Cheese melts and browns quickly, while thick bread needs extra heat to warm through without burning.
Start by lowering the temperature slightly and extending the cooking time to allow thorough heating.
Try these adjustments for perfect results:
Set temperature around 325°F to 350°F to prevent cheese from burning. Toast thick slices for 7 to 10 minutes, flipping halfway to guarantee even heat. Add 1 to 2 minutes extra if the bread feels dense or the cheese isn’t bubbly.
With these tweaks, your cheese melts beautifully and thick bread toasts evenly, crisp on the outside and warm inside.
Signs Your Frozen Bread Is Perfectly Toasted
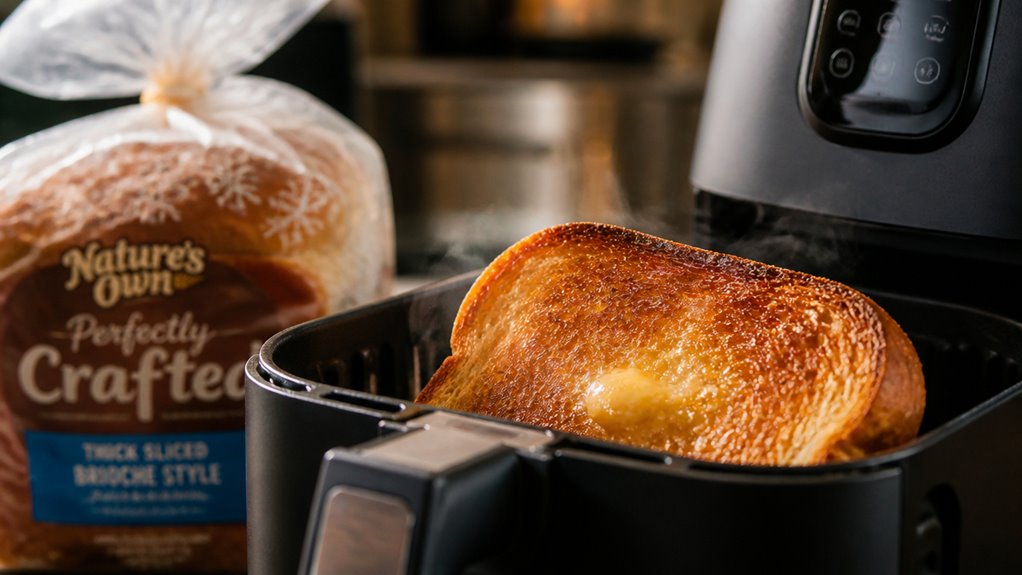
You’ll often notice your frozen bread is perfectly toasted when it boasts a golden-brown exterior that’s crisp to the touch, while the inside feels warm and tender.
The color should be evenly distributed, with no pale or burnt spots, signaling that your air fryer’s heat circulated just right.
When you gently tap the surface, it should produce a satisfying crunch, indicating the crust has formed beautifully.
Peek inside to see the softness retained—no cold, doughy centers here.
The aroma will be rich and inviting, hinting at that freshly toasted goodness.
If your bread meets these signs, you’ve nailed the perfect balance of texture and warmth, making it ready to enjoy immediately with your favorite toppings or spreads.
Troubleshooting Frozen Bread Air Frying Issues
When your frozen bread doesn’t toast up just right, it’s often due to a few common hiccups that can be easily fixed.
Maybe your toast ends up soggy, uneven, or burnt. First, check how you arrange the slices; crowding blocks hot air, leaving some spots underdone.
Next, your temperature might be off. Too high can burn edges while leaving the center cold, while too low won’t crisp properly.
Finally, timing is key; thicker slices need more minutes, thinner less.
Arrange bread in a single layer with space around each slice for even airflow.
Set the air fryer between 350°F and 380°F depending on bread thickness. Flip slices halfway through cooking to promote uniform browning.
With these tweaks, your toast will come out golden and crisp every time!
Using Oil Or Spray For Better Frozen Bread Toasting
For a crispier, more evenly browned toast, lightly spraying or brushing your frozen bread with oil can make a noticeable difference.
Lightly oiling frozen bread before toasting boosts crispiness and ensures an even, golden-brown finish.
The oil helps the heat distribute more evenly across the surface, creating a golden, crunchy crust that’s hard to beat.
Use a neutral oil like canola or avocado for a subtle finish, or olive oil if you want a hint of richness.
A quick spray or a thin brush coat also prevents sticking, making flipping easier halfway through cooking.
Just don’t overdo it; a light layer is enough to enhance texture without sogginess.
This simple step transforms plain frozen slices into irresistibly crispy, visually appealing toast, perfect for your air fryer routine.
Frequently Asked Questions
Can I Air Fry Frozen Bread Without Preheating the Air Fryer?
Yes, you can air fry frozen bread without preheating, but expect a slightly longer toasting time.
Just place your frozen slices in a single layer inside the basket. Set the temperature around 350°F and add a minute or two to the usual cooking time.
This method still gives you crispy, golden toast, but the air fryer will take a moment to reach temperature.
Patience pays off with evenly toasted bread.
Is It Safe to Reheat Previously Air-Fried Frozen Bread?
Yes, it’s safe to reheat previously air-fried frozen bread.
Just pop it back into the air fryer at around 350°F for 2-3 minutes to refresh that crispy texture without drying it out.
Keep an eye on it to avoid burning, and flip halfway if needed.
Reheating this way brings back the warmth and crunch, making your bread taste like it just came out of the fryer again.
How Do Air Fryer Brands Affect Frozen Bread Toasting Results?
Imagine using a steam-powered toaster instead of your air fryer. Brand differences can feel just as dramatic!
Your air fryer’s size, wattage, and fan speed all affect how evenly and quickly your frozen bread crisps.
Some models heat faster, creating darker toast, while others need more time or flipping.
You’ll notice texture and browning vary, so you’ll want to experiment with times and temps to perfect your ideal toast every time.
Can I Use Flavored Frozen Bread in the Air Fryer?
Yes, you can definitely use flavored frozen bread in the air fryer! Imagine those herby, garlic, or cinnamon swirled slices crisping up perfectly, releasing their aromas as they toast.
Just place them in a single layer, set your air fryer between 350°F and 375°F, and toast for 4 to 7 minutes, flipping halfway. Keep an eye on browning since flavored breads can caramelize faster.
The result? Crunchy, flavorful toast with a warm, inviting scent.
What Is the Best Way to Store Leftover Toasted Frozen Bread?
Don’t just toss your leftover toasted frozen bread in some sad, lonely corner of the fridge like yesterday’s bad decisions.
Instead, wrap each slice in foil or parchment to keep that crispy charm intact.
Then stash them in an airtight container or zip-lock bag.
Pop them back in the freezer if you want to keep them fresh longer.
When you reheat, they’ll thank you with crunch and warmth, like a toast resurrection!
Make Every Slice Better With Your Air Fryer Skills
Now that you’ve mastered toasting frozen bread in your air fryer, you’re just moments away from crispy, golden perfection that could rival a five-star bakery!
With the right temperature, timing, and a little flipping, every slice will come out irresistibly crunchy on the outside and soft inside.
Don’t forget to experiment with oils or cheese for that extra flavor boost.
Get ready to enjoy breakfast like never before: fast, easy, and absolutely delicious!