How to Use a Power Air Fryer Efficiently: Best Practices and Tricks
To use your Power Air Fryer, first place it on a stable, heat-resistant surface and preheat it to the desired temperature.
Securely insert the basket or crisper trays, ensuring proper placement in grooves to promote even airflow.
Use the control panel to select presets or manually adjust temperature and time in precise increments.
Rotate food halfway for uniform cooking, avoid overcrowding, and verify internal temperatures for safety.
Following these steps guarantees peak performance, with advanced tips available to maximize your air frying experience.
Key Takeaways
- Place the air fryer on a stable, heat-resistant surface and preheat to the recommended temperature before cooking.
- Insert the cooking basket or trays securely in the grooves to ensure stability and proper airflow.
- Select a preset or manually adjust temperature and time based on your recipe and food type.
- Avoid overcrowding trays and rotate food halfway through cooking for even crisping and browning.
- Verify food is cooked to safe internal temperatures and clean accessories after each use.
Key Steps and Accessories for Using a Power Air Fryer
| Step/Accessory | Description | Benefits | Pro Tips |
|---|---|---|---|
| Preheat the Air Fryer | Heat the appliance to the recommended temperature before adding food. | Ensures even cooking and stable temperature for consistent results. | Preheat for 3-5 minutes; use the burn-off cycle for first use to eliminate odors. |
| Insert Basket or Crisper Trays | Place cooking basket or trays securely in the designated grooves inside the fryer. | Promotes optimal airflow and prevents uneven cooking or accidents. | Ensure baskets slide fully onto the back lip for stability; use multi-level trays for larger batches. |
| Use Control Panel and Preset Functions | Select presets or manually adjust temperature/time to suit your recipe. | Simplifies cooking with consistent results and less guesswork. | Fine-tune presets if needed; rotate food mid-cycle for even crisping. |
| Adjust Temperature and Time | Tweak settings in small increments based on food type and thickness. | Achieves perfect texture and doneness without overcooking. | Adjust temperature by 5°F and time by 1-minute increments; monitor progress closely. |
| Rotate and Avoid Overcrowding | Turn food halfway through cooking and avoid packing the basket too tightly. | Ensures uniform heat exposure and crispy, evenly cooked results. | Leave at least a one-inch gap between food items or trays for airflow. |
| Clean and Maintain Accessories | Wash removable baskets and trays after each use; wipe down interior/exterior. | Prevents bacterial buildup and maintains appliance longevity and performance. | Unplug and cool before cleaning; avoid abrasive materials on heating elements. |
Prepare Your Power Air Fryer for First Use

Before you start cooking with your Power Air Fryer, you need to prepare it properly to guarantee peak performance and safety.
Proper preparation of your Power Air Fryer ensures optimal performance and safe cooking every time.
First, read the owner’s manual thoroughly; it contains essential operational and safety details.
Place the unit on a stable, heat-resistant surface, ensuring adequate ventilation space around it.
Inspect the power cord and plug for any damage before connecting to a power source.
Wash all removable accessories with warm, soapy water and dry them completely.
Wipe the interior and exterior surfaces with a clean, damp cloth to remove manufacturing residues.
Finally, perform a burn-off cycle by running the unit at 300°F for five minutes without food.
This step eliminates any residual odors or coatings and conditions the appliance for best use.
For optimal cooking results, ensure your air fryer supports AirAdvantage technology to promote even hot air circulation.
Set Up and Secure the Power Air Fryer Basket and Accessories
To set up and secure the Power Air Fryer basket and accessories, ensure each component is properly positioned and locked in place for safe and efficient operation.
Start by placing the cooking basket or crisper trays into the designated grooves inside the fryer, guaranteeing they slide fully onto the back lip for stability.
When attaching the basket handle, open the latch, compress the handle, insert it between the basket slots, then release and close the latch firmly.
Confirm the handle locks securely before lifting or moving the basket.
For crisper trays, position them closer to the top heating element for peak crisping and use multiple shelf levels if cooking larger batches.
Proper seating prevents uneven cooking and guarantees safety during operation.
Using accessories with 360-degree airflow designs helps ensure even crisping and prevents soggy or unevenly cooked food.
Use Power Air Fryer Controls and Preset Functions
To get started, just press the power button to turn on your air fryer. It’s super easy!
Once it’s activated, you can adjust the temperature and time to fit your recipe perfectly.
And if you’re cooking something common, why not take advantage of the preset functions? They’re designed to give you consistent results without all the fuss of manual adjustments.
Just select your food type, and let the air fryer do its thing!
Many models feature AirCrisp® technology to ensure even hot air circulation and crispy textures with less fat than traditional frying.
Power Button Operation
Activate the Power Air Fryer by pressing the power button. This initiates the cooking process and enables access to temperature, timer, and preset functions.
This button serves as the primary control to power the unit on or off, guaranteeing the system is ready for input adjustments. After activation, you can precisely set your cooking parameters.
To effectively operate the power button:
- Press once to turn the unit on; the display will illuminate.
- Press again to power off and reset all settings.
- Use the button to exit any preset mode and return to manual control.
- Hold the button briefly to enter standby mode without fully powering down.
Mastering this control guarantees efficient and safe operation of your air fryer. Understanding the importance of convection and airflow design can help optimize your cooking results.
Preset Function Usage
Although manual adjustments offer full control, using the preset functions simplifies cooking by automatically setting ideal temperature and time for common foods.
To use presets, power on the air fryer and select the desired food category from the control panel. The unit will immediately display the programmed temperature and cooking time optimized for that item.
You can start cooking directly or fine-tune settings if needed. Presets cover items like French fries, steaks, and chops, ensuring consistent results without guesswork.
They reduce preparation errors and eliminate the need for constant monitoring. Always verify that accessories are correctly installed before selecting a preset.
For best results, rotate or reposition food mid-cycle when prompted. Using preset functions streamlines your cooking process with precision and repeatability.
Additionally, many air fryers incorporate adjustable heat and fan speed controls within presets to maintain optimal crispiness without drying out your food.
Adjust Temperature and Time for Perfect Results
When you’re cooking, it’s all about getting that temperature just right. Try adjusting it in 5°F increments. This way, you can really fine-tune your cooking based on the recipe you’re following.
And let’s not forget about time! Setting the right cooking time is crucial. If you go too long or too short, it can really mess with the texture and doneness of your food. So, keep an eye on that clock!
Balancing both time and heat is key. It ensures your food cooks evenly and helps achieve that perfect crisp without burning. Happy cooking!
For best results, always preheat your air fryer to stabilize temperature before cooking.
Temperature Adjustment Tips
When adjusting temperature and time settings on your Power Air Fryer, consider the type and thickness of the food to guarantee best possible results. Thicker cuts need lower temperatures and longer cook times, while thinner items cook faster at higher heat.
Here are key temperature adjustment tips:
- Lower temperature by 10-15°F for delicate foods like fish to prevent overcooking.
- Increase by 5-10°F for dense items such as potatoes to guarantee thorough cooking.
- Use preset functions as baseline guides, then fine-tune based on doneness and texture.
- Adjust temperature in 5°F increments for precise control, avoiding drastic changes that disrupt cooking balance.
For consistent moisture and crispiness, consider using devices with Steam & Crisp modes that balance steam delivery with air frying.
Setting Precise Cooking Time
Since precise cooking times vary widely depending on food type and thickness, you need to adjust the timer carefully to achieve ideal results.
Start by referencing recommended cooking times from the manual or preset modes and modify based on your food’s density and size.
Use the timer controls to set increments accurately, typically in one-minute steps, to avoid overcooking or undercooking.
Monitor progress, especially on initial attempts, and fine-tune the duration for subsequent uses.
Remember, thicker cuts or denser foods require longer cooking times, while thinner or smaller items need less.
Always allow a few minutes’ margin for carryover cooking after the timer ends.
Many modern air fryers feature multi-stage cooking technology to optimize browning and juiciness during the cooking process.
Balancing Time and Heat
Mastering the balance between temperature and cooking time is essential for achieving peak texture and doneness in your Power Air Fryer.
Adjusting these parameters carefully guarantees your food cooks evenly without drying out or burning.
To optimize results, consider these key points:
- Increase temperature for shorter cooking times to achieve crispiness quickly. Watch closely to prevent burning.
- Lower temperature with longer cooking times for thicker cuts or delicate items. This ensures thorough cooking without overbrowning.
- Use preset functions as starting points, then fine-tune time or heat based on food type and quantity.
- Rotate or reposition food mid-cycle to promote even heat distribution and consistent texture.
Additionally, flipping food at the midpoint of cooking time helps prevent soggy spots and promotes even browning.
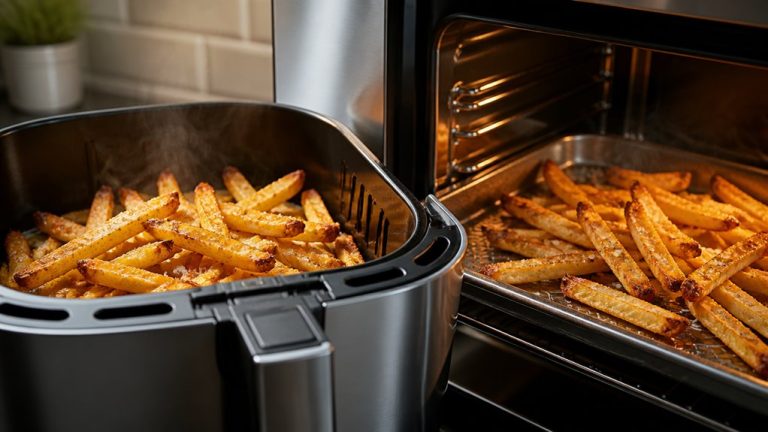
Cook With Power Air Fryer Crisper Trays and Multi-Level Shelves
Although air frying excels with single-layer cooking, using crisper trays and multi-level shelves maximizes your Power Air Fryer’s capacity and efficiency.
Slide crisper trays into the side grooves and rest them securely on the back lip to guarantee stability during cooking.
Position trays closer to the top heating element to accelerate crisping and enhance texture.
When cooking multiple trays, use the designated shelf levels to evenly distribute airflow and heat.
For prime results, rotate crisper trays midway through the cycle to promote uniform cooking.
Avoid overcrowding trays to prevent uneven heat exposure.
By leveraging these accessory placements, you’ll increase batch size without compromising cooking quality.
This makes your Power Air Fryer more versatile and effective for a variety of dishes.
Ensure there is at least a one-inch gap between trays to maintain proper airflow and consistent crisping.
Follow Best Practices for Even Cooking and Food Safety
To ensure even cooking and maintain food safety, regularly rotate or reposition food items during the cooking cycle. This guarantees uniform heat exposure and prevents undercooked spots.
Additionally, follow these best practices:
- Preheat the air fryer to the recommended temperature before adding food.
- Avoid overcrowding the basket or trays to allow for optimal air circulation.
- Use a food thermometer to verify internal temperatures meet safety standards, such as 165°F for poultry.
- Clean removable parts thoroughly after each use to prevent bacterial buildup.
Frequently Asked Questions
Can I Use Aluminum Foil or Parchment Paper in the Air Fryer?
Yes, you can use aluminum foil or parchment paper in the air fryer, but only when you guarantee proper airflow.
Place the foil or paper securely under the food or in the basket, avoiding covering the entire basket or blocking vents.
Use parchment paper designed for high heat and never let it fly around, as it could contact the heating element and cause a fire.
Always check your air fryer’s manual for specific guidelines.
How Do I Clean the Heating Element Safely?
You’ll want to clean the heating element only when the air fryer is completely unplugged and cooled down to avoid shocks or burns.
Gently wipe the element with a damp cloth or soft brush to remove grease or debris. Don’t soak it or use abrasive materials.
This careful cleaning preserves performance and prevents smoke during cooking.
Always avoid direct water contact, ensuring the element stays dry before your next use.
Is It Safe to Leave the Air Fryer Unattended While Cooking?
No, you shouldn’t leave the air fryer unattended while it’s cooking. Although the unit has safety features, continuous monitoring helps you catch any malfunctions, food overcooking, or smoke early.
Always place it on a stable, heat-resistant surface with proper ventilation and keep the area clear. Stay nearby to adjust settings or stop the cycle if needed, ensuring safe operation and preventing potential hazards.
Can I Cook Frozen Foods Without Thawing First?
You can cook frozen foods without thawing first. For instance, a user cooked frozen French fries directly in the crisper tray, adjusting time slightly longer to guarantee even crisping.
Just slide the tray into the grooves near the top heating element for faster cooking. Be sure to monitor progress early on and rotate or reposition food mid-cycle to achieve uniform results.
Avoid undercooked spots by following preset guidance when available.
How Do I Prevent Smoke During Cooking?
To prevent smoke during cooking, avoid overcrowding the basket or trays. This restricts airflow and causes grease buildup.
Clean the unit and accessories regularly, especially removing excess oil or food residue. Use preset temperatures recommended for your food type to avoid overheating.
Place crisper trays properly to guarantee even heat distribution and rotate food mid-cycle. If smoke appears, reduce cooking temperature slightly and monitor to maintain peak performance.
Start Cooking Smarter: Put Your Knowledge of Using a Power Air Fryer Into Action
By properly preparing your power air fryer, positioning its parts perfectly, and precisely programming its presets, you’ll produce powerful, palatable plates every time.
Adjusting the appliance’s air temperature and timing guarantees peak outcomes. Using crisper trays and clever multi-level shelves maximizes meal mastery.
Following firm food safety and flawless flipping fosters fabulous, evenly cooked fare.
With focused familiarity, you can fully harness your fryer’s features for fast, flavorful feasts.