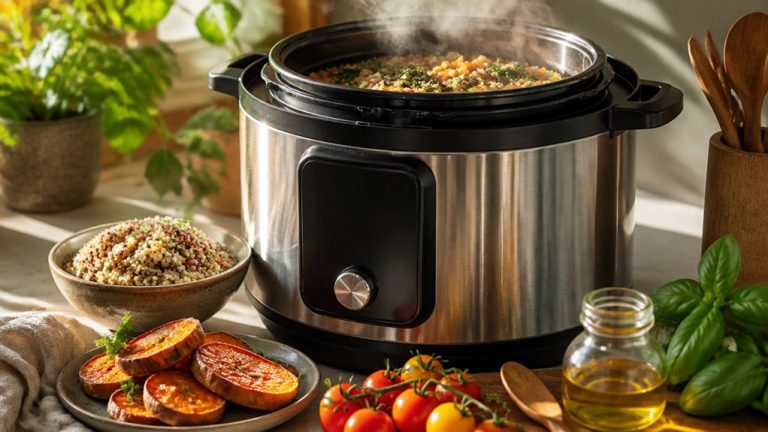

How to Use Instapot Air Fryer: Essential Tips for Perfect Results
Start by washing all removable parts and securely placing the stainless steel inner pot in the base. For air frying, remove any liquids, preheat the Air Fryer Lid to 400°F, and evenly arrange food in the basket without overcrowding.
Flip or shake food every 5–10 minutes to ensure even crisping. When combining with pressure cooking, add the required liquid, seal the lid correctly, and release pressure before swapping lids. Preheat again afterward.
Explore precise timings and safety checks to maximize results.
Key Takeaways
- Preheat the Air Fryer Lid to 400°F before adding food for optimal crispiness and even cooking.
- Use the stainless steel inner pot without any added liquid to prevent steaming during air frying.
- Place food evenly in the basket, avoid overcrowding, and rotate or flip every 5–10 minutes for uniform browning.
- After pressure cooking, remove all liquid from the inner pot before switching to air frying.
- Always confirm the sealing ring and steam release button are properly positioned to ensure safe, efficient operation.
Key Steps and Tips for How to Use Instapot Air Fryer
| Step | Action | Best Practice / Tip | Reason / Benefit |
|---|---|---|---|
| 1 | Wash Removable Parts | Clean all removable parts with warm, soapy water before first use | Ensures hygiene and optimal appliance performance |
| 2 | Place Stainless Steel Inner Pot | Securely position the inner pot inside the cooker base | Prevents damage and guarantees even heat distribution |
| 3 | Preheat Air Fryer Lid | Preheat to 400°F before adding food | Achieves optimal crispiness and even cooking |
| 4 | Arrange Food Evenly | Place food in basket without overcrowding | Ensures adequate hot air circulation for uniform crisping |
| 5 | Rotate or Flip Food | Shake or flip every 5–10 minutes during air frying | Prevents uneven browning and promotes consistent texture |
| 6 | Drain Liquids After Pressure Cooking | Remove all residual water before switching to air frying | Avoids steaming that hinders crisping and flavor |
| 7 | Check Safety Components | Confirm sealing ring, float valve, and steam release are properly set | Guarantees safe operation and efficient cooking |
Set Up Your Instant Pot Air Fryer

Before you use your Instant Pot Air Fryer for the first time, thoroughly wash all removable parts with warm, soapy water and dry them completely.
Thoroughly clean and dry all removable parts before first use of your Instant Pot Air Fryer.
Next, place the stainless steel inner pot securely into the base unit. Add exactly three cups of water to the pot for the mandatory water test.
Attach the pressure cooker lid, making certain the steam release button is in the “up” position. Set the cooker to Pressure Cook mode for 5 minutes to verify functionality.
After completing the test, unplug the base before connecting the Air Fryer Lid’s power cord to a 120 V outlet.
Position the Air Fryer Lid on the cooker base, aligning the arrows, then turn to lock it firmly.
This setup guarantees safety and peak performance for your Instant Pot Air Fryer.
For optimal cooking results, it is recommended to allow the air fryer to complete a preheat cycle before adding food.
How to Air Fry Like a Pro With Your Instant Pot?
With the Instant Pot Air Fryer properly set up and tested, you’re ready to master air frying techniques that maximize flavor and texture.
Start by preheating the Air Fryer Lid to 400°F for peak crispiness. Always use the stainless steel inner pot without any added liquid to avoid steaming instead of frying.
Place food evenly in the air fryer basket and rotate or flip it every 5–10 minutes for uniform browning. Monitor cooking times closely, typically 10–15 minutes for chicken, adjusting based on thickness and desired crispiness.
Use the control panel’s temperature and timer adjustments precisely to tailor results. Avoid overcrowding to guarantee adequate hot air circulation.
For best results, take advantage of the 360° hot air circulation technology to ensure even cooking and a crispy texture.
How to Pressure Cook and Air Fry With Your Instant Pot?
Alright, let’s dive into how to use your Instant Pot for both pressure cooking and air frying.
First things first, you’ll want to start by pressure cooking your food. Make sure you have the stainless steel inner pot in place, and don’t forget to securely lock the pressure cooker lid. Also, double-check that the steam release is set correctly. Once your pressure cooking is complete, it’s time for a little release action! Just let all the pressure out, remove the lid, and if there’s any leftover liquid, drain it.
Now here comes the fun part! Grab your Air Fryer Lid and attach it for that perfect crispiness. While you’re air frying, remember to mix or rotate your food a bit. This helps everything cook evenly! And keep an eye on the temperature and cooking time to get that ideal texture and doneness you’re after.
Using a pressure cooker with a wire rack can help ensure even heat distribution and prevent burning when cooking inside your Instant Pot.
Pressure Cooking Basics
Although pressure cooking and air frying are distinct cooking methods, mastering both with your Instant Pot enhances versatility and efficiency in meal preparation.
To pressure cook, first confirm the stainless steel inner pot is clean and properly seated in the base. Add the required liquid, typically at least one cup, to generate steam.
Secure the pressure cooker lid, making sure the steam release valve is set to “Sealing.” Select the “Pressure Cook” function and adjust time and pressure level as needed.
The unit will build pressure, indicated by the float valve rising, before the timer starts. Never open the lid until the float valve drops, signaling full depressurization.
This method rapidly cooks food under high pressure, tenderizing ingredients efficiently and locking in flavors. This sets you up perfectly for subsequent air frying if desired.
For optimal results when fermenting foods like sourdough starter, maintaining a precise temperature range during cooking processes can significantly enhance flavor and texture.
Switching To Air Fryer
Switching from pressure cooking to air frying on your Instant Pot requires a few critical steps to guarantee safe and effective operation.
First, release all pressure and make certain the float valve is down before removing the pressure cooker lid.
Carefully dump out any remaining water from the stainless steel inner pot; residual liquid causes unwanted steaming during air frying.
Next, unplug the cooker base, connect the Air Fryer Lid power cord to a 120 V source, and lock the Air Fryer Lid onto the base by aligning the arrows.
Select the Air Fry function, set the temperature (typically 400°F), and preheat.
Add your food into the air fryer basket placed inside the inner pot.
Remember to manually rotate or mix food every 5–10 minutes, then resume cooking by sealing the lid within three minutes after checking.
For best results, use the Instant Pot’s EvenCrisp technology to achieve a crispy texture with minimal oil usage.
Tips For Best Results
When combining pressure cooking and air frying in your Instant Pot, managing moisture is critical to achieving ideal texture and flavor. After pressure cooking, always dump out all water from the inner pot before air frying to prevent steaming.
Use the stainless steel inner pot exclusively for safety and peak function. Rotate or flip food every 5–10 minutes during air frying to guarantee even crispiness. Adjust temperature precisely: 365°F or 400°F depending on the food type and desired texture.
Follow these tips for best results:
- Remove all liquid before air frying
- Use only the stainless steel inner pot
- Rotate food periodically during air frying
- Set temperature based on food requirements
- Resume cooking promptly after lid lifts to maintain heat
These techniques will maximize your Instant Pot’s performance. Incorporating convection technology can also help ensure even cooking and maintain crispiness when air frying in your Instant Pot.
Air Frying Times and Tips for Common Foods
Since air frying times vary based on food type and size, it’s essential to follow recommended durations and temperature settings to achieve ideal crispiness without overcooking.
For chicken wings or legs, set the air fryer to 400°F and cook for 10–15 minutes, flipping every 5–10 minutes to guarantee even browning.
Frozen fries require 12–15 minutes at 400°F, shaken midway.
Vegetables like broccoli or Brussels sprouts crisp best at 365°F for 8–12 minutes, stirring halfway through.
Avoid adding liquid to the inner pot to prevent steaming that hinders crisping.
Use the stainless steel inner pot exclusively with the Air Fryer Lid, and always preheat to target temperature before adding food.
Manual rotation during cooking optimizes heat distribution and texture.
For best results, make sure to use an air fryer with AirCrisp® technology for even hot air circulation and crispy textures with less fat.
Keep Your Instant Pot Air Fryer Safe and Working Well
To keep your Instant Pot Air Fryer running smoothly and safely, it’s a good idea to clean a few key parts before each use. Make sure to give the anti-block shield, float valve, and steam release pipe a thorough cleaning. It only takes a minute, and it can really help keep everything in good shape.
Also, don’t forget to check that the sealing ring is properly seated. It’s super important! And make sure the steam release button is in the right position before you start cooking. Regularly checking these components can help you avoid any malfunctions and ensures that you have consistent pressure and temperature control.
Additionally, performing regular cleaning after each use helps maintain optimal performance and prevents residue buildup.
Regular Cleaning Tips
Regularly cleaning your Instant Pot Air Fryer guarantees peak performance and extends its lifespan.
Start by unplugging the unit and letting all parts cool completely.
Remove the Air Fryer Lid and stainless steel inner pot for thorough cleaning.
Use warm, soapy water and a soft sponge to avoid damaging non-stick surfaces.
Pay close attention to crevices, especially the anti-block shield and steam release pipe, to prevent clogging.
Focus on these key cleaning steps:
Wash removable parts after each use to remove food residue.
Wipe the heating element gently with a damp cloth.
Avoid abrasive cleaners or metal utensils inside the basket.
Make certain all parts are fully dry before reassembly.
Inspect the sealing ring for cracks or buildup and clean accordingly.
Consistent cleaning keeps your appliance safe and efficient.
For heavier grease buildup, consider using a biodegradable degreaser that is safe for multiple surfaces to maintain cleanliness without harsh chemicals.
Essential Safety Checks
Before every use, you must verify that the sealing ring is properly seated and the steam release button is set to the correct position to guarantee a secure pressure seal.
Check the anti-block shield, float valve, and steam release pipe for cleanliness and unobstructed function. Always confirm the inner pot is correctly placed and free of residual liquids before air frying to prevent steam buildup.
Unplug the Air Fryer Lid before removing it to avoid electrical hazards.
Proper airflow and convection design are essential for achieving crisp, even cooking results safely.
| Component | Checkpoint | Action Required |
|---|---|---|
| Sealing Ring | Properly seated | Adjust or replace if damaged |
| Steam Release | Set to correct position | Confirm before cooking |
| Float Valve | Clean, moves freely | Clean or clear obstructions |
| Inner Pot | Dry, properly seated | Remove liquids, reposition |
Troubleshooting Instant Pot Air Fryer Problems
Although the Instant Pot Air Fryer is designed for ease of use, you might encounter issues like uneven cooking, failure to reach the correct temperature, or error alerts on the display.
The Instant Pot Air Fryer offers convenience but can sometimes have uneven cooking or temperature issues.
To troubleshoot effectively, make certain you:
Use only the stainless steel inner pot with the Air Fryer Lid to maintain safety and proper function.
Avoid adding liquid when air frying, as moisture inhibits crisping.
Rotate or flip food every 5–10 minutes to prevent uneven cooking.
Confirm the sealing ring is properly seated and the steam release button is in the correct position.
Set the temperature precisely at 365°F or 400°F based on the food type and desired texture.
Frequently Asked Questions
Can I Use Accessories From Other Air Fryer Brands With My Instant Pot?
You generally shouldn’t use accessories from other air fryer brands with your Instant Pot Air Fryer.
The Instant Pot’s stainless steel inner pot and air fryer lid are specifically designed to work together, ensuring safety and proper function.
Using incompatible baskets or trays may cause poor fit, uneven cooking, or damage.
To maintain peak performance and avoid hazards, always use Instant Pot-approved accessories tailored for your model’s unique design and specifications.
How Do I Convert Traditional Oven Recipes for the Instant Pot Air Fryer?
To convert traditional oven recipes for your Instant Pot Air Fryer, reduce the cooking temperature by about 25°F and shorten the cooking time by 20–30%.
Use the air fry function at 365°F or 400°F depending on the food. Check doneness early and rotate food every 5–10 minutes for even crisping.
Avoid adding liquids to guarantee crispiness. Always use the stainless steel inner pot for safety and peak results.
Is It Safe to Leave the Instant Pot Air Fryer Unattended While Cooking?
You shouldn’t leave the Instant Pot Air Fryer unattended like it’s a ticking time bomb ready to explode.
While it has built-in safety features like pressure release valves and automatic shutoffs, it’s essential to stay nearby.
Monitor steam release and food progress, especially during pressure cooking and air frying shifts.
Always unplug the Air Fryer Lid before removing it.
Never bypass safety checks like the float valve position to guarantee safe operation.
What Is the Best Way to Clean Stubborn Grease From the Air Fryer Lid?
To clean stubborn grease from the air fryer lid, first unplug and let it cool completely.
Use a soft cloth dampened with warm, soapy water to gently wipe the exterior and interior surfaces.
For tough grease, apply a mixture of baking soda and water as a mild abrasive, then scrub carefully with a non-abrasive sponge.
Avoid immersing the lid or letting water enter electrical components.
Dry thoroughly before reassembling to maintain safety and function.
Can I Cook Multiple Types of Food Simultaneously in the Instant Pot Air Fryer?
Yes, you can cook multiple food types simultaneously in the Instant Pot Air Fryer, but keep them separated for even cooking.
Use the dehydrating tray or separate baskets if available to prevent flavors mixing.
Adjust cooking times and temperatures based on each item’s needs.
Rotate or flip foods every 5–10 minutes.
Avoid overcrowding the inner pot to guarantee proper air circulation and consistent crispiness across all foods.
Keep Your Instant Pot Air Fryer Performing Its Best With These Pro Tips
Using your Instant Pot Air Fryer is like mastering a finely tuned instrument. It demands precision and care.
By properly setting up, mastering air fry techniques, and combining pressure cooking with air frying, you’ll maximize efficiency and flavor.
Follow recommended cooking times, maintain your device regularly, and troubleshoot promptly to keep it performing at its best.
With these practices, your Instant Pot Air Fryer will consistently deliver crisp, delicious results with reliable safety and longevity.