Best Recipe for Chocolate Cake Without Oven: No-Bake, No Fuss
You can bake a moist chocolate cake without an oven using stovetop pans, microwaves, or pressure cookers.
Use a heavy-bottomed pan with a salt layer or wire rack to distribute heat evenly.
Maintain a steady medium-low flame and trap steam with a tight lid for consistent baking.
For quicker results, try microwave-safe containers and monitor doneness with a toothpick.
Adjust ingredient ratios for moisture and texture.
Follow precise heat control and ingredient preparation to perfect your cake, with more tips and methods ahead.
Key Takeaways
- Use a heavy-bottomed pan with a salt or sand layer for even heat distribution and steady temperature control on stovetop or pressure cooker.
- Prepare an eggless batter with all-purpose flour, cocoa powder, baking powder, baking soda, yogurt, oil, and vanilla for moist, tender texture.
- Cook covered on medium-low flame for 20–30 minutes, checking doneness with a toothpick and ensuring steam retention to avoid dryness.
- For microwave baking, use microwave-safe containers with adjusted ingredient ratios and cook 3–5 minutes, testing doneness similarly.
- Elevate the cake pan on a wire rack inside the pan or cooker to prevent direct heat contact and avoid burning the base.
Ingredients Lists for Making Chocolate Cake Without Oven
| Ingredient | Quantity | Notes |
|---|---|---|
| All-purpose Flour | 1 cup | Use sifted for a lighter texture |
| Cocoa Powder | 1/3 cup | Unsweetened, for rich chocolate flavor |
| Baking Powder | 1 tsp | Helps the cake rise without an oven |
| Baking Soda | 1/2 tsp | Enhances fluffiness |
| Salt | 1/4 tsp | Balances sweetness |
| Sugar | 3/4 cup | Adjust to taste |
| Eggs | 2 large | Room temperature for best mixing |
| Milk | 1/2 cup | Whole or any preferred milk |
| Vegetable Oil | 1/4 cup | For moist texture |
| Vanilla Extract | 1 tsp | Enhances flavor depth |
| Hot Water | 1/2 cup | Added last to intensify cocoa flavor |
Overview: Making Chocolate Cake Without an Oven

Although traditional baking relies on an oven, you can successfully make a chocolate cake without one by using alternative heat sources and techniques.
You’ll depend on controlled heat environments like stovetop pans, microwaves, or pressure cookers to achieve even cooking and proper rising.
Each method requires precise temperature management and specific equipment setups, such as heavy-bottomed pans with heat-distributing salt bases or microwave-safe containers with measured batter volumes.
Careful ingredient ratios compensate for the lack of oven heat. For instance, chemical leavening agents like baking powder or soda guarantee adequate rise and texture.
You’ll also need to monitor cooking duration closely, using tools like toothpicks to check doneness.
Mastering these variables allows you to create moist, well-textured chocolate cakes without traditional ovens.
Incorporating techniques that maintain precise oven temperature control can significantly improve the texture and rise of cakes cooked without an oven.
Stovetop Pan Method for Even Chocolate Cake Baking
To get started, preheat a heavy-bottomed pan with a layer of salt. This helps ensure that the heat is distributed evenly, giving you a nice, stable baking surface. It’s all about controlling that temperature, so keep your flame at medium-low and adjust it as needed.
This way, you can avoid those pesky hot spots and promote uniform cooking.
Now, here’s a little tip: use a wire rack to elevate your cake pan. This keeps it from making direct contact with the heat, allowing your cake to bake evenly all the way through. Happy baking!
For optimal results, consider using materials with excellent thermal shock resistance to maintain consistent heat and prevent cracking during stovetop baking.
Salt Base Benefits
When you use a salt base in the stovetop pan method, you create a stable, level surface that evenly distributes heat beneath the cake pan.
This technique prevents hot spots, ensuring your chocolate cake bakes uniformly without burning or undercooked patches. The salt layer also acts as an insulator, moderating direct heat from the gas flame.
Consider these key benefits:
1. Enhanced Heat Distribution
The salt spreads heat evenly, promoting consistent cake texture throughout.
2. Stable Support
It prevents the cake pan from wobbling, avoiding uneven rising or batter spillage.
3. Improved Temperature Control
The salt base buffers temperature fluctuations, maintaining steady baking conditions during the 20–30 minute cooking time.
Using a salt base is a simple yet effective way to optimize your stovetop chocolate cake baking results. For best results, monitor the heat carefully with an oven thermometer to ensure precise temperature control throughout baking.
Temperature Control Techniques
Building on the benefits of a salt base that guarantees even heat distribution and stable support, controlling the stovetop temperature plays a vital role in achieving a uniformly baked chocolate cake.
You’ll want to preheat a heavy-bottomed pan on medium-low flame. Spread a salt layer evenly, and place a wire rack to elevate your cake pan. Cover the pan with a lid to trap heat and maintain consistent temperature throughout the 20-30 minute cook time. Adjust the flame as needed to avoid hot spots or undercooking. Utilizing techniques similar to those found in ovens with convection airflow can further enhance even heat distribution on the stovetop.
| Step | Action | Purpose |
|---|---|---|
| 1 | Preheat pan | Make certain stable base heat |
| 2 | Spread salt layer | Distribute heat evenly |
| 3 | Place wire rack | Prevent direct heat contact |
| 4 | Cover with lid | Trap and circulate heat |
| 5 | Adjust flame | Maintain steady temperature |
Microwave Chocolate Cake Method for Quick Baking
So, to whip up a quick microwave chocolate cake, you’ll start by mixing together some dry ingredients. Think all-purpose flour, cocoa powder, sugar, and baking powder.
Then, you’ll add in warm milk or water to get that perfect cake batter consistency.
Now, the cooking time can really depend on the size of your microwave-safe container. If you’re using a smaller mold, it’ll take about 3 minutes.
But if you’ve got a bigger one, you might need to go up to 5 minutes. Just keep an eye on it!
By adjusting these little details, you’ll end up with a moist, evenly cooked chocolate cake—all without needing to turn on the oven.
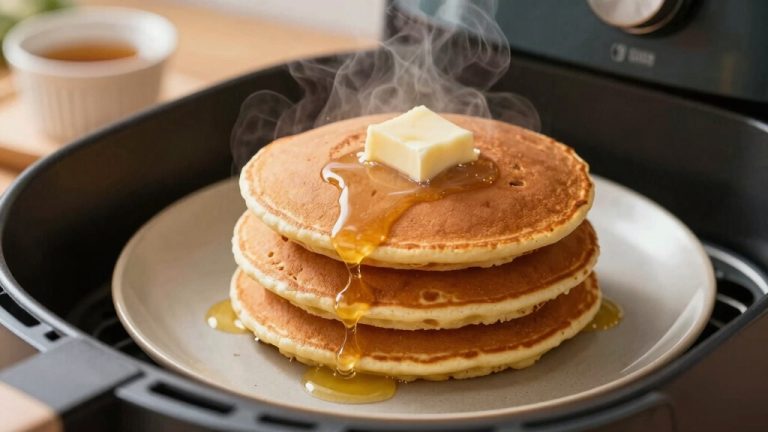
For best results, make sure to use a microwave-safe container that allows for even heat distribution, similar to how air fryers promote even cooking for crispy quesadillas.
Microwave Cake Ingredients
Gather the essential ingredients to quickly whip up a microwave chocolate cake that delivers moist texture and rich flavor without the wait of traditional baking.
To guarantee your cake rises perfectly and maintains a tender crumb, focus on the quality and proportions of your ingredients.
- Combine 220g all-purpose flour with 85g unsweetened cocoa powder and 150g sugar to create the dry base that balances sweetness and chocolate intensity.
- Add 3 teaspoons of baking powder to provide the necessary leavening, replacing oven heat’s rising effect.
- Incorporate 550g of warm milk or water to hydrate the mixture, guaranteeing a moist, soft cake texture in minutes.
Using these precise ingredients sets you up for a successful, quick chocolate cake in your microwave. For best results, ensure you mix wet and dry ingredients separately before combining to avoid overmixing.
Cooking Time Adjustments
Adjusting the cooking time is key to achieving the perfect texture and doneness in your microwave chocolate cake. Since microwave power and container size vary, you’ll need to fine-tune cooking duration carefully.
Smaller molds cook faster, while larger ones require extra minutes to set fully without drying out. Use this guide to adjust time based on container size and wattage:
| Container Size (inches) | Power Level (Watts) | Cooking Time (minutes) |
|---|---|---|
| 7-8 | 800-900 | 3 |
| 9-10 | 800-900 | 5 |
| 9-10 | 1000-1200 | 4 |
Always check doneness by inserting a toothpick. It should come out clean or with moist crumbs for ideal results. Utilizing cooling racks with optimal airflow design after microwaving helps prevent sogginess and ensures even cooling of your cake.
Cooking Chocolate Cake on a Tawa Griddle Pan
Using a tawa griddle pan on a gas cooktop offers a practical and efficient alternative to traditional oven baking for your chocolate cake. This method evenly distributes heat, ensuring a consistent bake without direct flames damaging the cake base.
To perfect this technique, you should:
- Preheat the tawa on medium-low heat to create a stable cooking environment.
- Place the cake batter in a greased, round pan and set it on the tawa. Cover with a tight-fitting lid to trap steam and heat.
- Cook for 20-30 minutes, adjusting heat as needed. Check doneness by inserting a toothpick; if it comes out clean, your cake is ready.
This approach yields a moist, spongy eggless cake with rich cocoa flavor and a tender crumb. Using a heat-resistant liner beneath the pan can help protect your tawa and make cleanup easier.
Pressure Cooker and Covered Pan Ovenless Cake
Create a controlled baking environment by placing a salt or sand layer at the bottom of your pressure cooker or heavy pan. This insulates the cake mold from direct heat.
Preheat this base on medium-low flame to guarantee even heat distribution. Position a wire rack or heatproof stand above the salt to elevate the cake pan, preventing direct contact with the heat source.
Cover the cooker or pan tightly with its lid to trap steam, maintaining moisture and promoting uniform cooking. Adjust the flame carefully to sustain a steady temperature throughout the 20-30 minute cooking duration.
This sealed, moist environment replicates an oven’s effect, allowing your chocolate cake to rise and bake evenly without burning at the base. This method delivers a tender crumb and rich flavor, ideal for ovenless baking.
For best results, ensure that the cooking vessel is cleaned and dried properly to maintain optimal heat distribution and prevent any unwanted flavors from developing during baking, as proper maintenance and cleaning is essential for kitchen tools.
Checking Doneness Without an Oven
After setting up your pressure cooker or covered pan for ovenless baking, the next step is to determine when your cake is perfectly cooked.
Since you can’t rely on an oven’s visual cues, use these precise methods to check doneness:
- Insert a toothpick or skewer into the cake’s center. If it comes out clean or with a few moist crumbs, the cake is done. Wet batter indicates more cooking time.
- Gently press the cake surface. It should spring back without leaving an indentation, showing a firm, set crumb.
- Observe the cake’s edges; they should start pulling slightly away from the pan, signaling proper cooking.
Using these techniques guarantees your stovetop cake is moist and evenly cooked without guesswork.
Eggless Ovenless Chocolate Cake Recipe
Though you might lack an oven, you can still enjoy a rich, moist chocolate cake by following an eggless stovetop recipe tailored for this purpose.
Start by mixing 1 cup all-purpose flour, ½ cup cocoa powder, ¾ cup sugar, 1 tsp baking powder, and ½ tsp baking soda.
Combine ½ cup yogurt, ½ cup vegetable oil, and 1 tsp vanilla extract to replace eggs and add moisture.
Preheat a heavy-bottomed pan with a salt layer on the base for even heat distribution.
Place a wire rack inside, set the cake pan on it, and cover with a lid to trap steam.
Cook on medium-low flame for 20-30 minutes, ensuring consistent temperature.
Check doneness with a toothpick; it should come out clean or with minimal crumbs.
For best results, arrange your ingredients and equipment properly, just as you would ensure proper air circulation when cooking frozen garlic bread in an air fryer.
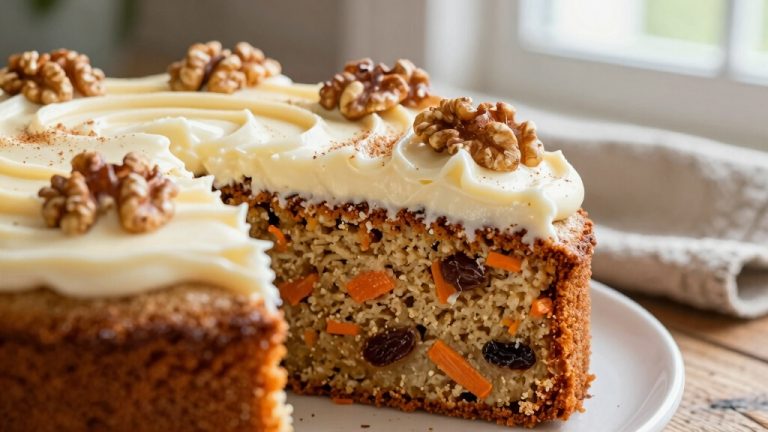
Easy No-Bake Chocolate Truffle Cake
When you want a rich chocolate dessert without any baking, an easy no-bake chocolate truffle cake offers a decadent solution. You’ll melt 8 ounces of 70% dark chocolate with 8 ounces of heavy cream to create a smooth ganache base.
For a rich, no-bake chocolate treat, melt dark chocolate and cream to form a luscious ganache base.
Adding espresso powder and allspice intensifies the flavor, while a pinch of fine grain salt balances the richness. After mixing, refrigerate the cake for several hours or overnight to achieve a firm, sliceable texture.
To elevate the presentation, dust with cocoa powder or garnish with cacao nibs or rose petals.
Follow these key steps:
- Melt chocolate and cream slowly for a silky ganache.
- Infuse with espresso and spices to deepen flavor.
- Chill thoroughly to set the cake perfectly.
Frosting and Presentation Tips for Ovenless Chocolate Cake
Frequently, the success of an ovenless chocolate cake hinges on the frosting and presentation. These elements elevate both flavor and visual appeal.
Opt for a smooth chocolate ganache or a creamy frosting made from whipped cream and icing sugar to complement moist textures. Use garnishes like cacao nibs, rose petals, or a dusting of cocoa powder to add elegance.
Presentation matters: serving the cake on a clean, attractive plate with minimalistic décor highlights your culinary effort.
| Frosting Type | Presentation Tip |
|---|---|
| Chocolate Ganache | Glossy finish, smooth spread |
| Whipped Cream Frosting | Light, fluffy peaks |
| Cocoa Powder Dusting | Subtle, elegant coating |
| Edible Decorations | Rose petals, cacao nibs |
Choose frosting and presentation thoughtfully to impress and delight.
Frequently Asked Questions
Can I Use Gluten-Free Flour for Ovenless Chocolate Cake?
Yes, you can use gluten-free flour for an ovenless chocolate cake, but you’ll need to adjust the recipe slightly.
Gluten-free flours often require additional binding agents like xanthan gum or guar gum to mimic gluten’s structure.
Also, monitor moisture levels carefully, as gluten-free flours can absorb liquids differently.
Whether you use stovetop, microwave, or pressure cooker methods, these adjustments guarantee your cake maintains proper texture and rises well without an oven.
How Do I Store Leftover Ovenless Chocolate Cake?
Just like a precious gem needs a proper setting, your leftover ovenless chocolate cake demands careful storage.
Wrap it tightly in plastic wrap or place it in an airtight container to preserve moisture and prevent staleness.
Store it at room temperature for up to two days or refrigerate for up to a week.
Before serving, let it come to room temperature to revive its soft texture and rich flavor.
What Substitutes Work for Cocoa Powder in These Recipes?
You can substitute cocoa powder with unsweetened baking chocolate, using 1 ounce for every 3 tablespoons of cocoa powder. Adjust sugar accordingly.
Another option is carob powder, which offers a milder, naturally sweet flavor and a 1:1 replacement ratio.
Dutch-processed cocoa can also work but alters acidity, so reduce baking powder slightly.
These alternatives maintain texture and flavor balance in your stovetop or no-bake chocolate cake recipes effectively.
Can I Add Nuts or Fruits to Ovenless Chocolate Cake?
You can definitely toss nuts or fruits into your ovenless chocolate cake to add texture and flavor.
Just chop them finely to guarantee even distribution without sinking. Toasting nuts beforehand boosts their crunch and aroma.
Dried fruits work best to avoid excess moisture that could affect baking. Incorporate about ¼ to ½ cup depending on your batter size, folding them gently to maintain the cake’s structure and guarantee a perfect rise.
Is It Possible to Make Vegan Ovenless Chocolate Cake?
Yes, you can make a vegan ovenless chocolate cake by substituting dairy and eggs with plant-based alternatives.
Use plant milk like almond or soy, and replace eggs with baking soda and vinegar or yogurt alternatives like coconut yogurt for binding.
Incorporate cocoa powder, all-purpose flour, and a vegan fat source such as vegetable oil.
Cook it on a stovetop using a heavy-bottomed pan or pressure cooker with a salt base to guarantee even heat distribution and moisture retention.
Share Your Experience with the Best Chocolate Cake Without Oven Recipe
Baking a chocolate cake without an oven is like steering a river without a bridge. You adapt, innovate, and still reach the sweet destination.
Each stovetop, microwave, or pressure cooker method becomes your vessel, proving that with the right tools and techniques, limitations transform into opportunities.
Trust your instincts, check for doneness carefully, and decorate thoughtfully. Your ovenless cake isn’t just dessert; it’s a tribute to creativity and resilience in the kitchen.