Sourdough Donut Recipe: Crispy, Airy & Irresistible
To make sourdough donuts, start with an active starter fed 4–12 hours prior. Mix warm milk, eggs, melted butter, sugar, and starter, then add bread and all-purpose flour. Knead gently until elastic, then ferment at 78°F with stretch-and-folds.
After bulk rise, shape 70-gram pieces, proof until puffed, and fry in 180–188°C oil until golden. Finally, cool and glaze for tender, airy donuts. Mastering these steps guarantees a perfect crumb and glaze finish. Expert tips follow.
Key Takeaways
- Prepare an active sourdough starter by feeding 4–12 hours prior, ensuring it doubles and bubbles at 75–80°F for optimal fermentation.
- Mix warm milk, eggs, melted butter, sugar, and starter first, then gradually add flour and salt, kneading to a smooth, elastic dough.
- Bulk ferment dough at 75–78°F with stretch and folds over 4–6 hours; optionally retard overnight in the fridge for flavor development.
- Shape dough into 70-gram pieces, maintaining surface tension, then proof at 70–78°F until puffed and increased in volume by 50%.
- Fry donuts in 180–188°C oil for 2–3 minutes per side until golden, cool completely, then glaze and serve fresh for best texture.
Quick Reference Recipe Table for Sourdough Donuts
| Step | Ingredient / Action | Details & Notes |
|---|---|---|
| Starter Prep | Active sourdough starter | Feed 4–12 hrs before use, must double & bubble |
| Wet Mix | Whole milk, eggs, melted butter, sugar, starter | Use room temp milk & large eggs for elasticity |
| Dry Mix | Bread flour + all-purpose flour, salt | Adjust 290–544 g flour depending on hydration |
| Kneading | Dough mixing | Knead gently until smooth & elastic (slightly tacky) |
| Bulk Ferment | 75–78°F, stretch & folds | 4–6 hrs, optional overnight retard for flavor |
| Shaping | 70 g portions | Maintain surface tension, shape evenly |
| Proofing | 70–78°F | Rise until 50% larger & puffed |
| Frying | Neutral oil (canola, avocado) | Fry at 180–188°C / 360–370°F for 2–3 min per side |
| Finishing | Glaze & toppings | Cool completely, then dip in vanilla, lemon, or chocolate glaze |
Ingredients Needed for Perfect Sourdough Donuts
When you’re aiming for perfect sourdough donuts, selecting the right ingredients is essential to balance texture, flavor, and structure.
Start with bread flour for strong gluten development, blending in all-purpose or cake flour to soften chewiness and enhance tenderness. Using flours with a high protein content helps achieve the ideal dough strength and rise.
Begin with bread flour for robust gluten, then mix in all-purpose or cake flour to soften and tenderize.
Adjust flour quantities between 290 g and 544 g based on hydration and starter activity to guarantee ideal dough consistency.
Incorporate 1/2 to 2/3 cup granulated sugar for balanced sweetness; consider brown sugar for richer flavor and softness.
Use 1/4 cup to 150 g melted butter to enrich the dough, and choose neutral oils with high smoke points like canola or avocado oil for frying.
Include whole milk at room temperature and 1–4 large eggs to boost elasticity and browning. The dough benefits from minimal handling after fermentation to maintain its airy, fluffy texture and ensure a light final donut.
Finally, precisely measure salt and vanilla extract to enhance flavor without overpowering.
Preparing the Sourdough Starter and Dough
You’ll start by feeding your sourdough starter 4 to 6 hours before mixing to make certain it’s active and bubbly. It’s important to use whole milk warmed slightly to add moisture and richness to the dough.
Next, combine the warmed milk, eggs, sugar, salt, starter, butter, and flour, kneading until the dough is smooth yet slightly tacky. Using a tare function on your kitchen scale can help you measure these ingredients accurately for consistent results.
Finally, ferment the dough at room temperature until it doubles in size, developing the structure and flavor essential for light, airy donuts.
Feeding the Starter
Although maintaining a consistent feeding schedule requires attention, it guarantees your sourdough starter reaches peak activity and bubbliness for ideal dough fermentation.
Feed your starter 4 to 6 hours before use, ensuring it doubles in volume. Warmer ambient temperatures accelerate this process.
Use a typical feeding ratio—1 cup bread flour, ¾ cup lukewarm water, and ½ cup starter—mixing thoroughly for even hydration and fermentation. Maintain approximately 100% hydration for superior consistency.
Store the starter at room temperature during this period to promote yeast and bacterial activity, characterized by bubbling and a pleasant sour aroma. Proper starter hydration (100% hydration) affects dough texture and fermentation activity.
Avoid discarding active starter; instead, remove excess to sustain microbial balance.
Preparing your starter this way ensures vigorous fermentation, directly influencing dough rise and the final texture of your sourdough donuts.
Mixing Dough Ingredients
Since the sourdough starter must be active and bubbly, begin mixing your dough by combining the wet ingredients—warmed milk, room-temperature eggs, melted butter or oil, and the starter—to guarantee even hydration. Using a digital scale can help ensure precise measurements for consistent results.
Gradually add dry ingredients—unbleached all-purpose flour, granulated sugar, salt, and optional spices—while mixing gently.
Use a dough hook or mix by hand until the dough is smooth, elastic, and slightly tacky. The fermentation process enhances the overall flavor profile, resulting in a more complex, rich taste compared to commercial yeast donuts.
Avoid overmixing to preserve tenderness.
Adjust flour quantity between 2 to 4 cups based on hydration and texture.
The dough should be firm enough to handle but well hydrated for shaping.
Proofing and Fermentation
After mixing the dough to the right hydration and texture, focus shifts to activating your sourdough starter and managing fermentation conditions. Begin by preparing a stiff levain, mixing starter with water and flour, then ferment it at 75°–78°F until it triples in volume, about 8–10 hours.
Maintain humidity by covering the levain to prevent drying and time its readiness to align with dough mixing for peak rising power. Using high-quality flours can enhance the fermentation results and final bread flavor.
For bulk fermentation, keep the dough at approximately 78°F in a humid environment, using tools like a proofing box or oven with water. Perform 2–4 stretch and folds over 4–6 hours to develop gluten. It is important to keep the final dough temperature within 27–28°C to ensure proper fermentation and butter incorporation.
Optionally, retard in the fridge overnight at 36°–40°F to enhance flavor and ease handling. Final proof occurs at 72°–78°F until donuts noticeably puff, ensuring light texture post-frying.
Mixing and Kneading Techniques
You’ll start by fully activating your sourdough starter to guarantee robust fermentation and dough rise. This process is crucial for developing the distinct flavors found in sourdough products and ensuring a good fermentation activity.
Next, balance hydration carefully to achieve a soft, tacky dough that’s easy to handle yet retains structure. Proper hydration also supports optimal gluten development and texture, which can be influenced by the choice of flours and dough handling methods.
Finally, choose kneading methods, whether stand mixer or stretch-and-fold, that optimize gluten development without overworking the dough. Using a stand mixer with paddle and dough hook attachments is preferred for lighter, softer donuts and can yield better results than hand kneading.
Starter Activation Process
Although activating a sourdough starter involves simple ingredients, mastering the mixing and kneading techniques is essential to cultivate a robust culture of wild yeast and lactic acid bacteria.
Begin by mixing whole grain flour with water at 68–70°F, ensuring thorough hydration without overmixing to protect delicate microbial colonies. This process activates bacteria and wild yeast necessary for leavening. Using a room temperature water optimizes fermentation in the dough.
Use gentle folding post-initial mix to aerate without damaging yeast.
Employ a non-reactive, transparent container to monitor bubble formation, signaling active fermentation.
Kneading the dough until smooth, tacky, and slightly elastic develops gluten vital for gas retention during proofing. Using a KitchenAid mixer can speed up gluten development compared to hand kneading.
For enriched doughs like sourdough donuts, adequate kneading compensates for fats and eggs that weaken gluten.
Timing is key—feed the starter 4–12 hours before use and maintain a warm environment at 75–80°F to optimize microbial growth and dough rise. Regular monitoring ensures the starter remains strong and active.
Dough Hydration Balance
When balancing dough hydration for sourdough donuts, you must carefully adjust water and flour ratios to achieve the desired texture and handling characteristics. Hydration typically ranges from 54% to 70%, affecting softness and dough manageability.
Adjusting hydration based on flour protein content and ambient humidity can help maintain optimal dough extensibility.
To incorporate hydration properly during mixing and kneading:
- Mix flour, water, and starter thoroughly to eliminate dry spots, ensuring even hydration.
- Use gradual liquid additions like milk or eggs to maintain moisture balance.
- Employ wet hands or dough hooks for moderate hydration doughs to promote gluten without overworking.
- Apply water roux by mixing cold water and flour initially, then gelatinize gently to improve moisture retention. It is important to confirm gluten development through the window-pane test before proceeding to the next steps.
These techniques help maintain dough elasticity and surface texture, crucial for consistent sourdough donut quality.
Kneading Methods Comparison
Balancing dough hydration lays the groundwork for effective kneading techniques, directly influencing gluten development and dough texture. You can choose between no-knead, hand, or mechanized methods based on your workflow and desired crumb structure.
Autolyse reduces mechanical kneading needs by initiating gluten formation enzymatically. Incorporating fresh herbs during dough preparation can enhance the overall flavor profile and complexity. Hand methods like the Rubaud provide tactile feedback and control, especially with hydrated doughs, while mechanized kneading offers speed but risks overworking the dough.
No-knead doughs often yield comparable volume and oven spring with less effort. Environmental variables can affect crust and crumb more than kneading style. In particular, handling techniques and fermentation can be tailored based on flour type and desired loaf characteristics.
Consider these factors when selecting your kneading approach for sourdough inclusions.
| Method | Key Feature |
|---|---|
| No-Knead | Minimal handling, high oven spring |
| Rubaud Hand | Gentle gluten development, tactile |
| Stretch & Fold | Periodic folding, preserves dough |
| Stand Mixer | Consistent, fast, less effort |
| Food Processor | Rapid, risk of over-kneading |
Proofing and Rising Times
How long should you proof and rise sourdough donut dough to achieve ideal texture and flavor? Typically, bulk rising at 76-78°F takes 3 to 4 hours, allowing the dough to double in size and become airy. Monitoring the dough’s activity and health during this time ensures a healthy starter contributes to optimal fermentation.
Bulk rising sourdough donut dough at 76-78°F for 3 to 4 hours yields ideal texture and flavor.
Alternatively, cold retardation in the fridge for 8-12+ hours slows fermentation, enhancing flavor and texture.
Proofing afterward usually requires 2 hours at 70-78°F to increase volume by 50%, though warmer conditions speed this process.
To optimize your proofing and rising:
- Keep dough temperatures near 76°F for consistent bulk rises.
- Cover dough to prevent drying during both rises.
- Space donuts 2 inches apart during proofing for even expansion.
- Use visual cues like puffiness and volume increase to judge readiness.
- Aim for donuts that are nearly over-proofed and soft, as ideal proofing ensures a light, fluffy texture after frying.
Maintaining stable temperatures ensures controlled yeast activity and ideal dough structure.
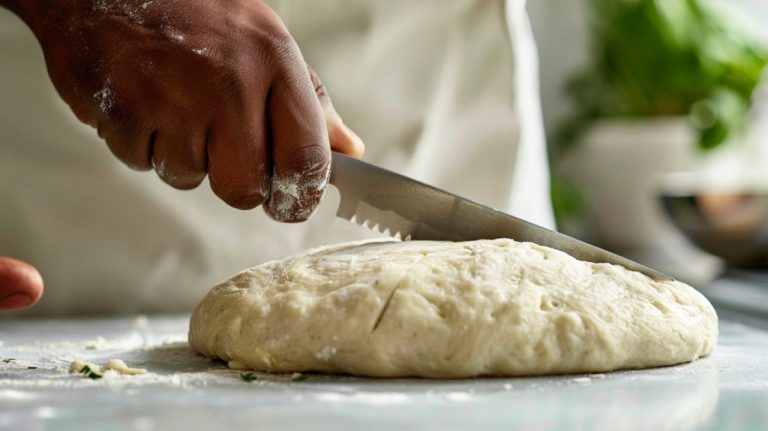
Shaping and Cutting the Donuts
Although shaping sourdough donut dough requires careful attention, mastering this step guarantees consistent texture and appearance.
Divide your dough on an un-floured surface using strip cutting to create uniform 70-gram pieces, maintaining dough tension. This technique helps maintain the light, airy texture essential for quality baked goods.
Flatten each piece slightly, folding corners inward, then round it seam side down, pinching the seam tightly to prevent expansion during frying.
Avoid excess flour to preserve stickiness and surface tension.
Roll the dough evenly to the desired thickness, then cut donuts with two biscuit cutters simultaneously for uniform shape and center holes. After cutting, arrange the donuts and holes on a parchment-lined sheet, leaving space for expansion and covering them to undergo a second rise.
Place cut donuts and holes on parchment paper to prevent sticking during proofing.
Handle gently to maintain shape, cover immediately to avoid drying, and keep proofing surfaces lightly floured without excess residue to ensure ideal final structure and texture.
Frying Tips and Temperature Control
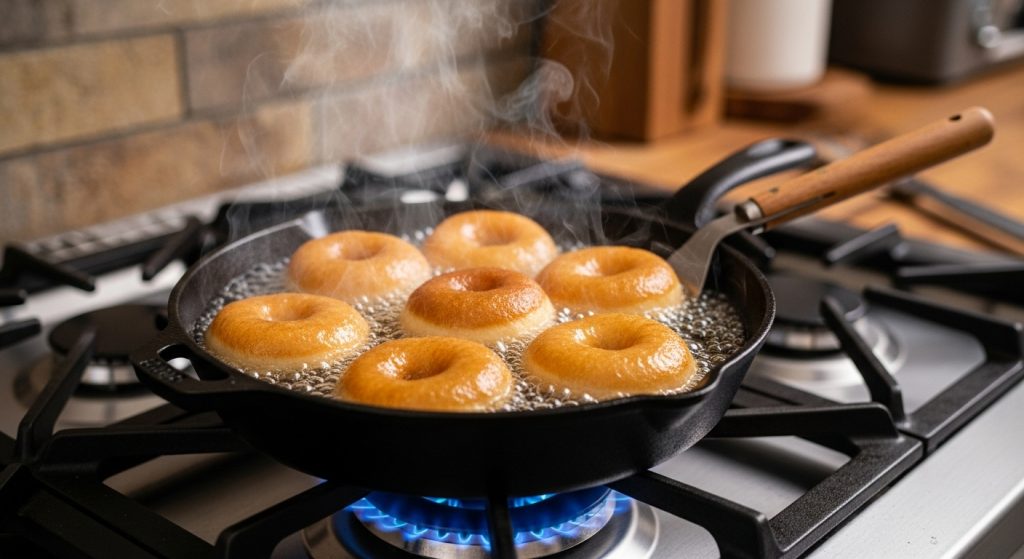
Once your sourdough donuts are shaped and proofed properly, controlling the frying process guarantees their texture and flavor develop correctly. Start by heating neutral oil (vegetable or canola) slowly to 180–188°C (360–370°F), using a deep-frying thermometer for accuracy.
Maintain 2–3 inches of oil depth to allow even floating and cooking. It is important to heat canola oil to the proper temperature before frying to ensure even cooking. Avoid overcrowding to prevent temperature drops and greasy results.
Fry donuts 2–3 minutes per side until deep golden brown, flipping once gently to preserve shape. Monitor oil temperature continuously and adjust heat to stay within the ideal range. Let the oil recover after adding dough.
Remove donuts promptly to prevent toughness and drain on a wire rack to keep crispness. Use long-handled tools and dry dough to avoid splatters and ensure safety.
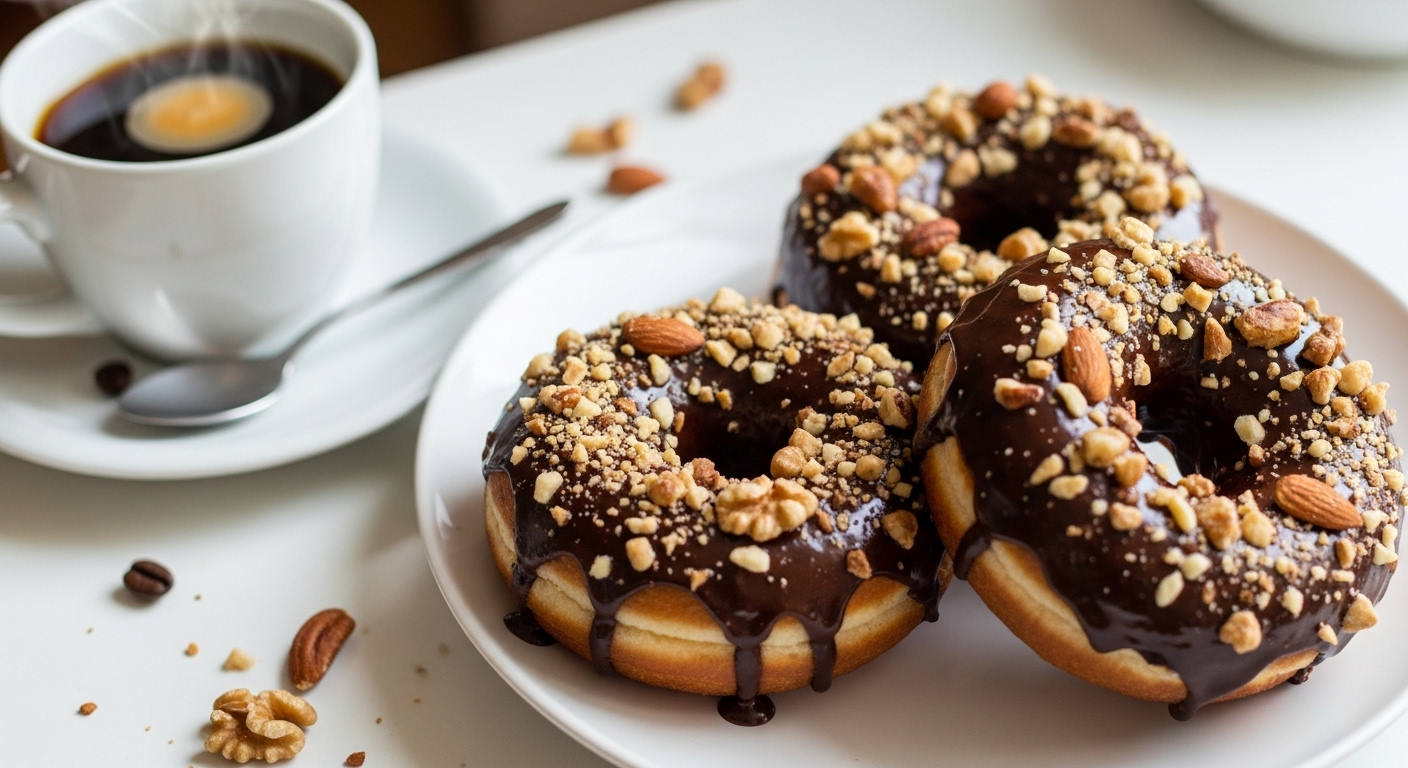
Glazing, Toppings and Serving Suggestions
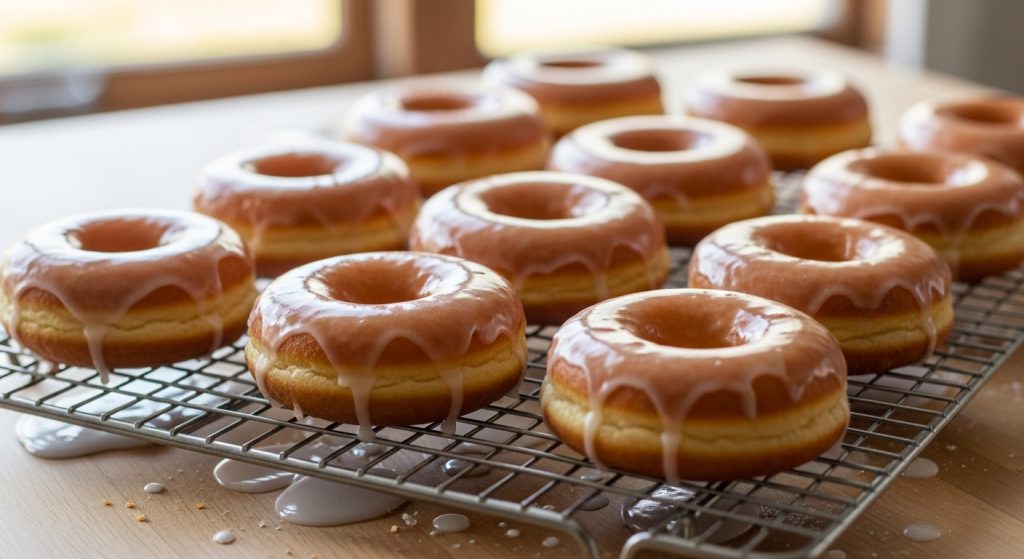
What elevates sourdough donuts from simple fried dough to a gourmet treat is the precise application of glaze and thoughtfully chosen toppings. Guarantee donuts are completely cooled before dipping the top half into a smooth, sifted powdered sugar glaze mixed with warm milk and vanilla.
Let excess drip, then apply toppings like crushed nuts or fresh zest before the glaze sets for ideal adhesion.
| Glaze Type | Key Ingredients |
|---|---|
| Vanilla | Powdered sugar, milk, vanilla extract |
| Lemon | Powdered sugar, lemon juice, melted butter |
| Chocolate | Powdered sugar, cocoa powder, milk |
Serve donuts fresh on racks to avoid sogginess, paired with coffee or tea. Reheat briefly if storing overnight to preserve texture and glaze integrity.
Frequently Asked Questions
Can I Freeze Sourdough Donuts After Frying?
Yes, you can freeze sourdough donuts after frying. Make sure they’re completely cooled, then flash freeze them individually on a baking sheet to prevent sticking.
Store them in airtight containers or freezer-quality bags without toppings to maintain texture and flavor. When ready, thaw at room temperature or microwave briefly, then reheat in an oven or air fryer to restore crispness.
Add glazes or toppings after thawing for best results.
How Do I Store Leftover Sourdough Donuts to Keep Them Fresh?
Think of your sourdough donuts as delicate treasures needing careful shelter. To keep them fresh, store them in an airtight container at room temperature for 1-2 days. Wrap each donut in plastic wrap to lock in moisture.
Avoid refrigeration unless you plan to eat them within a week, as cold air stiffens texture.
For longer storage, freeze unglazed donuts individually before sealing. Thaw and warm gently to revive softness.
Are Sourdough Donuts Healthier Than Regular Donuts?
Sourdough donuts aren’t substantially healthier than regular donuts calorie- or fat-wise. However, their natural fermentation can improve digestibility, reduce antinutrients, and slightly lower glycemic response.
You’ll get better nutrient absorption and a modest increase in fiber, but both types remain high in sugar and fat.
Can Sourdough Donut Dough Be Baked Instead of Fried?
You can bake sourdough donut dough instead of frying it, and you’ll find it yields a lighter, softer texture with less fat.
By combining sourdough starter with commercial yeast, you’ll guarantee proper rise.
Bake at around 180°C (350°F) for 12-16 minutes using a donut pan to maintain shape.
While you won’t get the crispy crust frying provides, brushing with butter and sugar afterward enhances flavor and moisture beautifully.
What Is the Best Oil for Frying Sourdough Donuts?
You’ll want to use refined coconut oil, canola oil, or rice bran oil for frying sourdough donuts. These oils have high smoke points—around 350ºF to 400ºF—ensuring stability and preventing breakdown during frying.
Their neutral or mild flavors preserve your donuts’ natural tang and sweetness. Avoid oils with strong flavors or low smoke points, as they can impact texture and taste negatively.
Always maintain proper frying temperatures for the best results.
Bake, Fry and Experiment Beyond This Recipe
Now that you’ve mastered each step, your sourdough donuts will rise like golden suns in a morning sky—crispy outside, tender inside. By controlling proofing times and frying temperature, you guarantee perfect texture and flavor every time.
Remember, the balance of your starter and dough consistency is the backbone of success. With precise glazing and creative toppings, you’ll transform simple ingredients into an irresistible treat that’s as technical as it is delightful.