How to Cold Proof Sourdough: Cool and Controlled
To cold proof sourdough, shape your dough and refrigerate it for 12 to 48 hours. Begin by combining water, sourdough starter, salt, and flour.
Allow it to bulk ferment at room temperature for 8 to 10 hours until it doubles in size with visible bubbles. After shaping, let it rest for an hour, then cover it and place it in the fridge.
Monitor your dough closely to avoid overproofing, ideally checking between 12 to 36 hours for the best flavor and texture. When you’re ready to bake, prepare for the next steps to perfect your sourdough experience.
Key Takeaways
- Prepare the dough by mixing water, sourdough starter, salt, and flour, then allow it to bulk ferment for 8 to 10 hours at room temperature.
- After bulk fermentation, shape the dough and rest it at room temperature for an hour before transferring it to the refrigerator.
- Cold proof the shaped dough in the refrigerator for 12 to 36 hours to enhance flavor and texture; avoid exceeding 48 hours to prevent overproofing.
- Gently handle the cold-proofed dough before baking to avoid deflation, and preheat the oven to 450-500°F (230-260°C).
- Score the dough before baking and cover to trap steam initially, then uncover for a final baking phase to achieve a crispy crust.
Preparing the Dough
To kick off the process of preparing your sourdough, you’ll start by mixing the dough. In a bowl, combine water, your sourdough starter, salt, and flour. Use a Danish dough whisk, wooden spoon, or fork to mix these ingredients until they form a rough and sticky dough ball.
It’s essential to measure your ingredients accurately, so a digital scale will guarantee you’re precise.
Once mixed, allow the dough to undergo bulk fermentation at room temperature, ideally around 70°F (21°C). This phase typically lasts between 8 to 10 hours. You’ll want to monitor the dough as it rises, aiming for a 50% increase in volume along with visible bubbles on the surface. Proper management of your sourdough starter will ensure it is active and ready for this crucial stage. During this time, you can also consider cold fermenting for enhanced flavor complexity. A healthy starter is essential for achieving desired dough rise during fermentation.
During the first two hours, perform a series of stretches and folds to enhance the dough’s strength and elasticity. Check for readiness by observing how the dough jiggles when moved.
It’s important to stop bulk fermentation when it reaches your desired volume, rather than waiting for it to double. This meticulous approach will set the foundation for a successful sourdough, ready for shaping and further proofing.
Storing the Dough
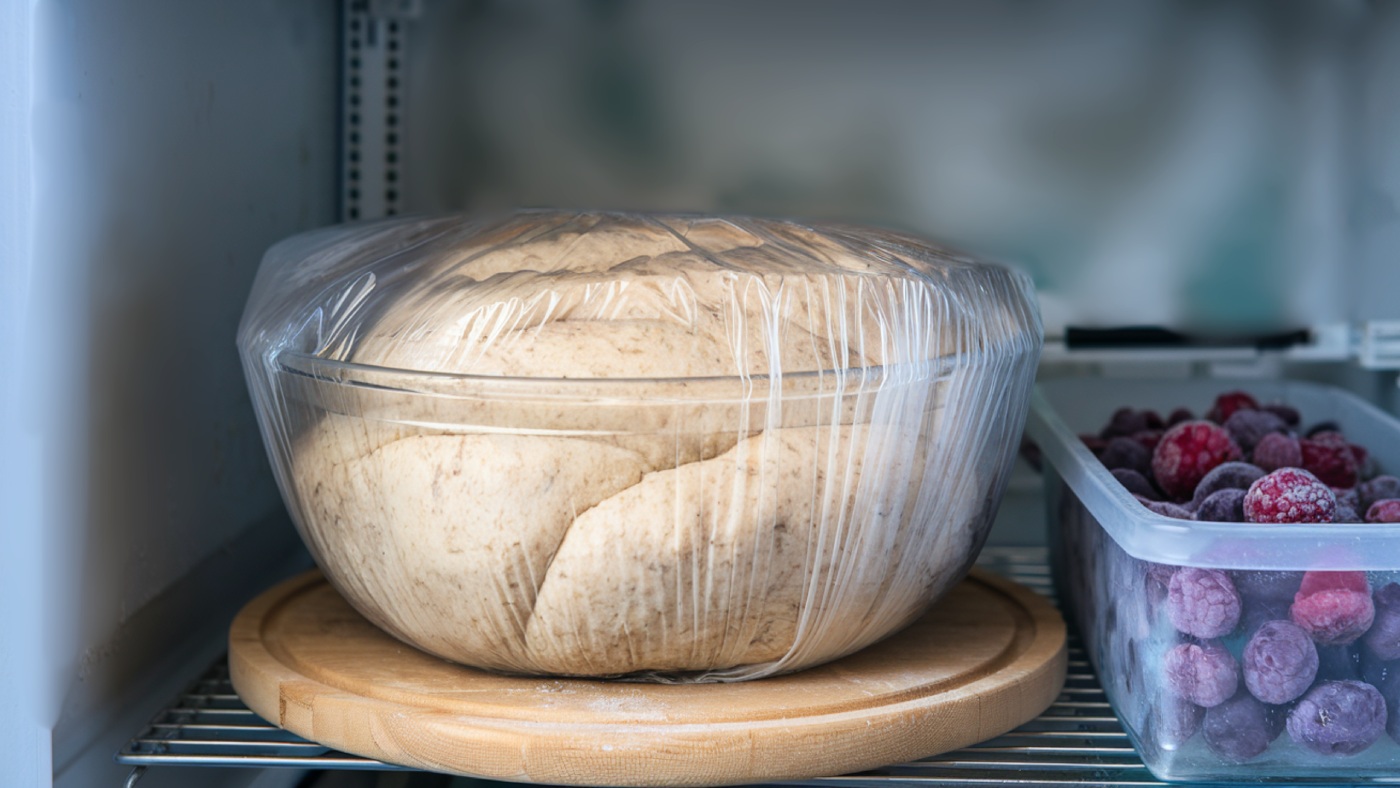
When storing your dough in the fridge, it’s crucial to take into account both timing and environmental factors. You can cold proof your dough for up to 36 hours, but common durations range from 8 to 16 hours, often overnight.
Keep in mind that longer proofing times can lead to a sourer loaf with reduced rise, and proofing for 48 hours may result in significant sourness. To prevent your dough from drying out, always cover it. Use a plastic shower cap, plastic wrap, or a plastic bag to maintain humidity.
This covering helps retain moisture and prevents a tough crust, especially in fridges with low humidity. Additionally, proper proofing techniques can help ensure that your dough achieves the desired flavor and texture.
Choosing a sourdough proofing basket can further enhance your dough’s quality during the cold proofing process. You don’t need to seal the bag completely; just make sure it’s covered to avoid sticking to the banneton.
Consider the airflow and humidity levels in your fridge, as these can affect your dough’s condition. Multi-airflow fridges tend to dry dough out faster. Also, the placement of your dough can impact the proofing outcome.
Rest your shaped dough at room temperature for about an hour before refrigeration, making certain it remains covered while it adapts to its new environment. Cold proofing is particularly effective as it allows the dough to develop flavor while preventing over-proofing.
Benefits of Cold Proofing
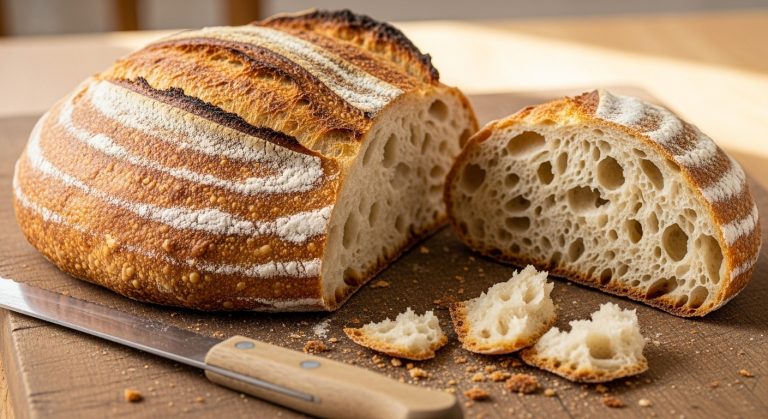
Cold proofing your sourdough greatly enhances flavor complexity, leading to more pronounced sour notes and a balanced profile. This extended fermentation period allows the dough to develop a superior crust texture, resulting in a crispy, blistered exterior that perfectly complements the light and airy crumb.
Additionally, the process of slow fermentation contributes to the overall depth of flavor, making each loaf truly unique. The chilling dough in the fridge not only slows fermentation but also enhances the flavor development even further.
Enhanced Flavor Complexity
Many bakers find that cold proofing sourdough greatly enhances the flavor complexity of their bread. Slowing down yeast fermentation allows beneficial bacteria to break down starches into lactic and acetic acids, resulting in a more intricate and tangy flavor profile. The fermentation process also contributes to a lower glycemic index, making it a healthier choice for those managing blood sugar levels.
The cooler temperatures of the refrigerator favor bacterial activity while restraining yeast, facilitating a longer fermentation period that increases desirable flavor compounds. This method also emphasizes the importance of proofing duration, which can significantly influence the final taste of the bread.
Cold proofing also reduces the risk of over-proofing, which can lead to bland flavors. It guarantees even temperature distribution, allowing flavor development to occur uniformly throughout the dough.
This slower fermentation process is particularly beneficial for wholegrain and rye flours, which are sensitive to acids and have weaker gluten networks. The enhanced breakdown of gluten in these flours makes the bread not only more flavorful but also easier to digest.
Flexibility in proofing times—ranging from 12 to 36 hours or more—means you can adjust according to your schedule and desired flavor intensity. This adaptability, combined with better gluten development, supports a more balanced flavor, making cold proofing an invaluable technique for any sourdough baker.
Improved Crust Texture
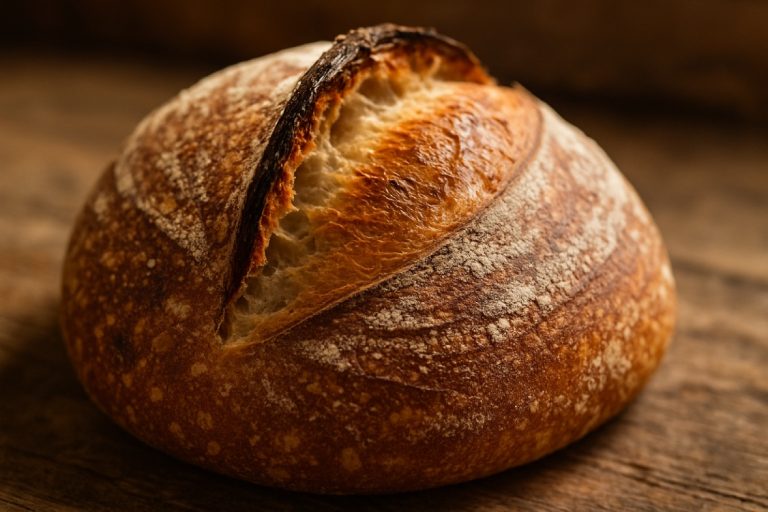
One key benefit of cold proofing sourdough is the remarkable improvement in crust texture. During cold proofing, the dough develops a thin, dry skin on its surface, which is essential for creating a better crust when baked. The slow fermentation process contributes to a more even crust development, while moisture from the outer layer evaporates or is absorbed into the banneton, enhancing overall texture.
This method results in a crisp yet delicate crust, often characterized by a glossy, blistered appearance. The longer fermentation time caramelizes the crust and makes it more resilient, reducing the risk of tearing during scoring.
You’ll find that cold-proofed dough is easier to handle and transfer to the baking surface, thanks to its firmer texture. Moreover, this dry skin allows for smooth scoring, minimizing damage to the dough before baking.
Cold proofing also guarantees a better oven spring, as yeast activity remains active, allowing the dough to expand properly. Additionally, using a Dutch oven can enhance the baking process by creating a humid environment, which further contributes to the crust’s quality.
Optimal Cold Proofing Times
Achieving the perfect balance in sourdough flavor and texture hinges on ideal cold proofing times. The minimum cold proofing duration is 2 hours; however, this offers limited benefits, primarily making it easier to score the dough.
For best results, aim for a range of 12 to 36 hours, as this timeframe fosters the development of complex flavors and a lighter crumb. You can push the proofing up to 72 hours, but be cautious—exceeding this might lead to overproofing, resulting in a denser loaf. Additionally, cold environment enhances fermentation quality, contributing to a more nuanced flavor profile. Maintaining an optimal dough temperature during fermentation is also crucial for achieving the desired results.
Some doughs can tolerate proofing for up to 96 hours, yet this greatly increases the risk of overproofing and can weaken the gluten structure.
Several factors influence cold proofing times. The type of flour you use plays a vital role; wholegrain and rye flours are particularly sensitive. Additionally, proofing in a refrigerator at around 39°F (4°C) slows fermentation compared to room temperature.
Consider your desired flavor profile and baking schedule to determine the best timing. Keep a close eye on your dough to avoid overproofing, especially when extending proofing beyond 36 hours.
Effects on Yeast and Bacteria
Understanding the effects of cold temperatures on yeast and bacteria in sourdough is essential for mastering fermentation. At cold temperatures, yeast activity notably slows but doesn’t halt completely. It becomes mostly dormant, leading to reduced CO2 production and limited dough rise.
However, yeast can still consume sugars at a slower rate, allowing for some fermentation. Conversely, bacteria, particularly lactobacilli, remain active even in cooler environments.
They continue breaking down sugars, producing acids that enhance the sour flavor profile. Maintaining the optimal fridge temperature is crucial for ensuring that yeast and bacteria function effectively during cold proofing.
The balance of wild yeast and bacteria in sourdough contributes to the unique flavor and texture of the final bread.
| Aspect | Yeast |
|---|---|
| Activity at Cold | Slows notably but not dormant |
| CO2 Production | Reduced during cold proofing |
| Sugar Consumption | Continues at a slower rate |
| Resumption of Activity | Rapid upon warming |
| Competitive Edge | Gains from reduced bacterial activity |
The cooler temperatures favor acetic acid-forming bacteria, increasing acetic acid production. This shift allows yeast to thrive in lower hydration conditions, which enhances flavor and dough texture, resulting in a well-developed sourdough.
Baking After Cold Proofing
Baking after cold proofing is a critical phase that can greatly impact the final texture and flavor of your sourdough. Start by removing the dough from the fridge. While it’s optional, letting it sit at room temperature for a brief period can enhance flavor development.
Next, turn the dough onto parchment paper or a lightly floured surface, being careful to handle it gently to prevent deflation. Score the dough with a sharp knife or bread lame to control the rise and achieve a desirable crust. Before placing it in the oven, verify the dough is free of excess flour.
Preheat your oven and baking vessel to a high temperature, around 450-500°F (230-260°C). For the initial baking, cover the vessel to trap steam, promoting oven spring. Using a Dutch oven is one of the simplest ways to create a steamy environment, significantly improving your bread’s crust.
Bake the dough covered for 20-30 minutes, then uncover and continue baking for an additional 15-25 minutes. Check for a golden-brown crust and a hollow sound when tapped on the bottom.
Once finished, cool the bread on a wire rack for at least an hour before slicing to verify the interior sets properly. Proper cooling and storage will help maintain the texture and flavor of your sourdough.
Tips for Successful Cold Proofing
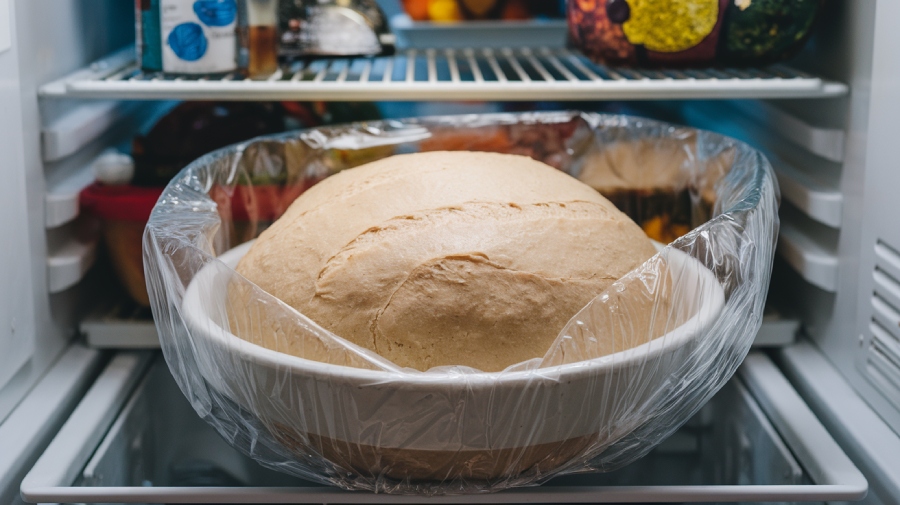
To achieve successful cold proofing, it’s essential to maintain an ideal refrigeration temperature of around 37°F (3°C).
Timing also plays a significant role; aim for a cold proof duration of 24 to 48 hours for maximum flavor development.
Monitor your dough closely to guarantee it doesn’t overproof, as this can compromise its structure and baking performance.
Ideal Refrigeration Temperature
Maintaining the perfect refrigeration temperature is essential for successful cold proofing of sourdough. For best results, aim for a temperature range between 34-38°F (1-3°C). This cooler environment slows down yeast activity while allowing beneficial bacteria to thrive, enhancing the flavor through the production of lactic and acetic acids.
A typical home fridge operates around 39°F (4°C), which can still be effective but may not maximize flavor development. Consistency in temperature is important; fluctuations can lead to uneven fermentation and potential over-proofing.
Additionally, consider your fridge’s airflow system, as poor air circulation can dry out your dough. To counteract this, always cover your dough with a plastic bag or shower cap to maintain humidity.
Placement in the fridge also matters. Position your dough on a middle shelf to take advantage of the most stable microclimate. Remember that different fridges have varying environments, which can impact the proofing process.
Timing and Duration Guidelines
Achieving the right timing and duration for cold proofing is essential for maximizing flavor and texture in your sourdough. Ideally, it would be best to aim for a cold proofing duration of 12 to 36 hours. This timeframe enhances the bread’s complex flavors and promotes easier digestion.
While you can cold proof for up to 72 hours, exceeding this limit risks overproofing, leading to a dense, flat loaf. If you only proof for less than 12 hours, you won’t fully tap into the benefits of cold proofing.
Several factors influence your cold proofing time. The type of flour you use matters; wholegrain and rye may not withstand long proofing as well as bread flour. The desired level of sourness also plays a role—longer proofing increases sourness but reduces rise. Additionally, the hydration level of your dough can affect its ideal proofing time.
To avoid overproofing, regularly check your dough’s expansion and texture. Properly proofed dough should feel firm yet have some give.
Remember to let your shaped dough rest at room temperature for about an hour before refrigerating it to guarantee a successful cold proof. Furthermore, incorporating prebiotic fibers in your diet, such as those found in sourdough, can enhance your gut health and overall digestion.
Troubleshooting Common Issues
Troubleshooting common issues during cold proofing sourdough can significantly enhance your baking results.
If you notice under-fermentation, check your bulk fermentation time, confirming it’s sufficient. An inactive starter can also slow fermentation, so make certain yours is lively. Verify the dough spends adequate time in the fridge at a consistent temperature around 37°F. Weak gluten structures from certain flours may lead to breakdown as well.
On the other hand, over-fermentation can occur if the dough remains in the fridge too long. Monitor your starter’s activity, as a very active one can cause issues even at cold temperatures. Allow the dough enough cooling time, and always check its condition before baking to avoid over-proofing.
Drying out is another concern. Always cover the dough during cold proofing to prevent moisture loss. Low humidity and poor container choice can exacerbate this issue, so choose an appropriate container. Additionally, if your starter is neglected for too long, it may become unhealthy or expired, which can impact the fermentation process.
Frequently Asked Questions
Can I Use Any Type of Flour for Cold Proofing?
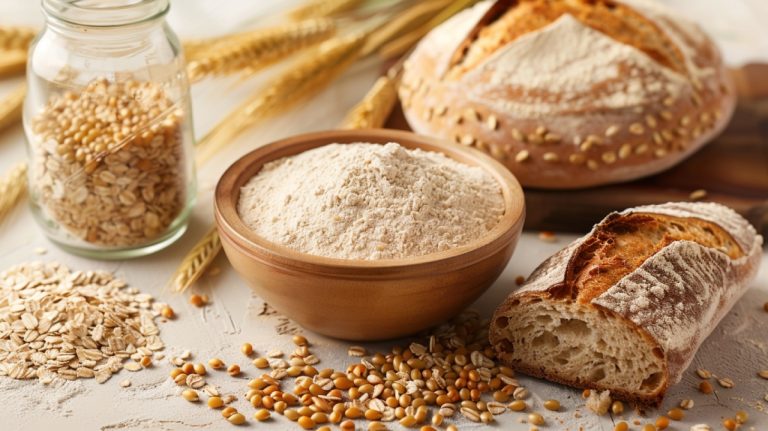
You can’t use just any type of flour for cold proofing. Bread flour works best because its strong gluten structure handles longer proofing times without breaking down.
Wholegrain and rye flours struggle due to weaker gluten networks, often resulting in denser loaves if over-proofed. Experimenting with flour blends can help balance these weaknesses.
Always monitor your dough’s fermentation and adjust proofing times to achieve the desired texture and flavor.
How Does Humidity Affect Cold Proofing Dough?
Humidity plays an essential role in cold proofing dough. In a refrigerator, the forced air can dry out your dough, which negatively affects its texture and oven spring.
To combat this, cover your dough with plastic wrap or a shower cap to retain moisture. Proper humidity helps maintain the gluten structure and allows bacteria to remain active, enhancing flavor.
A sealed environment guarantees your dough stays hydrated throughout the cold proofing process.
Is Cold Proofing Suitable for Gluten-Free Sourdough?
Cold proofing gluten-free sourdough can be like trying to balance on a tightrope; it requires precision and care.
While it can enhance flavor, gluten-free doughs are delicate and prone to breakdown during prolonged cold proofing.
You’ll need to monitor proofing times closely, ideally keeping them between 12-24 hours.
Using stabilizers like xanthan gum and ensuring the dough’s well-covered helps maintain structure, making it possible to achieve a tasty loaf without compromising integrity.
Can I Freeze Dough After Cold Proofing?
You shouldn’t freeze dough after cold proofing. Freezing can damage yeast and bacterial activity, negatively affecting fermentation and resulting in inconsistent flavor and rise.
It also weakens gluten structure, leading to a denser loaf with a poor crumb. If you must freeze, do it before the cold proofing stage to preserve dough integrity.
Always thaw slowly in the refrigerator and allow for additional proofing to recover fermentation capabilities.
How Do I Know if My Dough Is Overproofed?
If your dough looks like a puffy balloon on the verge of explosion, it might be overproofed.
When you poke it, if it doesn’t spring back, you’ve got trouble.
Check for a pale crust and a tight crumb; those are red flags.
If it smells more like a brewery than bread, it’s definitely past its prime.
Watch for deflation upon scoring; that’ll seal the deal on overproofing.
Cold-Proofing Sourdough: Relax and Let the Dough Work!
So, you’ve mastered the art of cold-proofing your sourdough—congratulations! Now, your bread can chill out while you stress over whether you forgot to add salt.
Remember, unlike that sad, undercooked hunk of dough you once salvaged, a perfectly cold-proofed loaf is just waiting to show off its flavor and texture. So, embrace the cold, let your yeast take a vacation, and prepare to impress everyone with your artisan skills—because who doesn’t love a good loaf?

