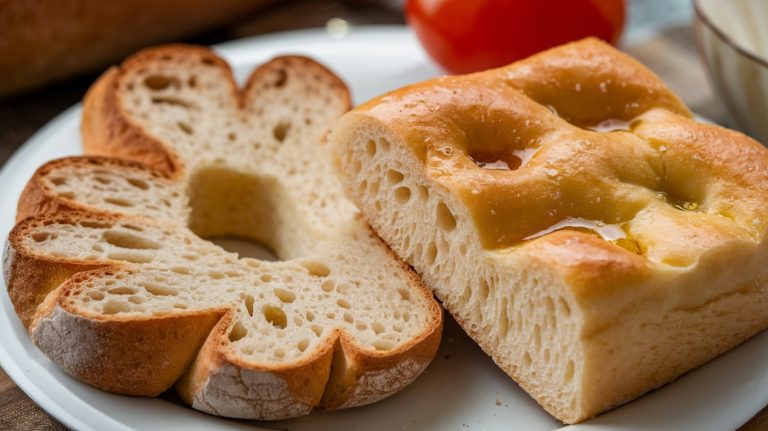
Shockingly Easy No Knead Focaccia: Stunning Results
You won’t believe how simple no-knead focaccia can be! With just a few ingredients—active dry yeast, all-purpose flour, and extra-virgin olive oil—you’ll create a deliciously airy bread.
After mixing, let it rise for a few hours or overnight in the fridge for that deep flavor. When it’s time to bake, preheat your oven to 450°F and enjoy the delightful aroma of freshly baked bread.
Dimpling the dough, drizzling olive oil, and sprinkling flaky sea salt elevate both texture and taste. If you stick around, you’ll uncover even more tips and tricks to master this delightful dish.
Key Takeaways
- No-knead focaccia requires minimal effort, with just mixing ingredients and allowing for rising times of 3-24 hours.
- Key ingredients include active dry yeast, honey, all-purpose flour, kosher salt, and extra-virgin olive oil.
- Achieve a golden-brown crust by baking at 450°F for 20-30 minutes after allowing a second rise.
- Enhance flavor by refrigerating the dough for up to 24 hours before shaping and baking.
- Serve focaccia warm, with options for dipping in olive oil or pairing with meats and cheeses.
Recipe Overview
Have you ever wanted to bake delicious bread without the hassle of kneading? The no-knead focaccia recipe is your answer! This method yields a soft, fluffy texture, making it perfect for enthusiastic beginners.
You’ll only need a few key ingredients: ¼ oz. active dry yeast, 2 tsp. honey, 5 cups all-purpose flour, 5 tsp. kosher salt, and 6 tbsp. Extra-virgin olive oil. For an even more delightful experience, consider adding a touch of extra virgin olive oil to enhance the flavor and crispiness of your focaccia.
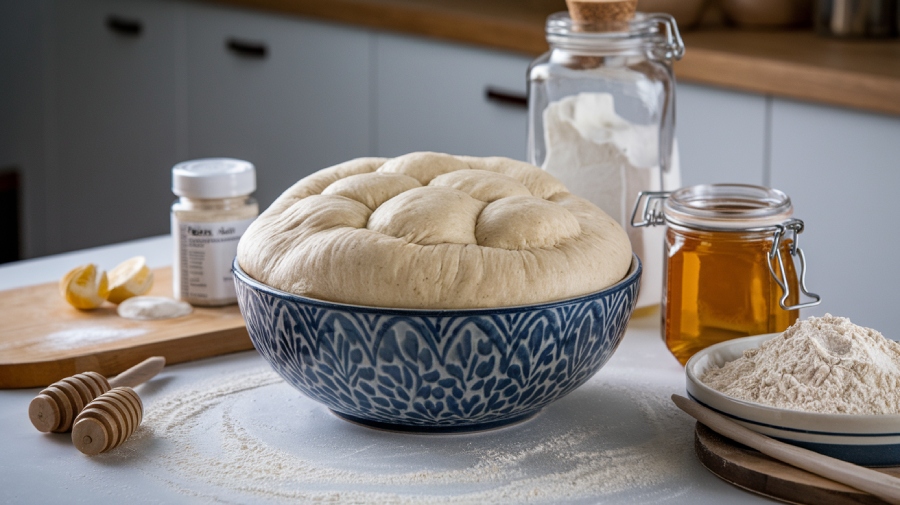
To start, you’ll mix the ingredients to form a dough that undergoes a first rise. You can choose to let it rise at room temperature for 3 to 4 hours or in the refrigerator for 8 to 24 hours, allowing the flavors to develop beautifully.
After shaping the dough, it will rise again in a buttered pan for 1½ to 4 hours.
When it’s time to bake, preheat your oven to 450°F and watch as the focaccia transforms into a puffed and golden brown delight in just 20 to 30 minutes.
Key Ingredients
When making no-knead focaccia, the ingredients you choose play a crucial role in the final product.
For instance, using high-protein bread flour is essential for achieving that chewy, airy texture that makes focaccia so delightful.
You’ll want to focus on activating your yeast correctly, selecting the right flour for texture, and incorporating rich olive oil for flavor.
Essential Yeast Activation Tips
To achieve the perfect rise in your no-knead focaccia, activating the yeast correctly is imperative. Start by combining ¼ oz. (about 2½ tsp) of active dry yeast with 2 tsp of honey in a bowl of lukewarm water, ideally around 100-110°F. This temperature is essential; water that’s too hot can kill the yeast, while cold water mightn’t activate it properly.
Let the mixture sit for about 5 minutes until it becomes foamy. This foaming is your confirmation that the yeast is active and ready to work its magic. For a more flavorful bread, consider incorporating a sourdough starter into your dough, which can enhance the fermentation process and overall taste.
The honey isn’t just a sweetener; it provides important nutrients that enhance fermentation and flavor development in your dough. By allowing the yeast mixture to sit undisturbed, you’re ensuring maximum activation, which will lead to a beautiful rise in your focaccia.
Once you see that frothy surface, it’s time to mix it with your dry ingredients.
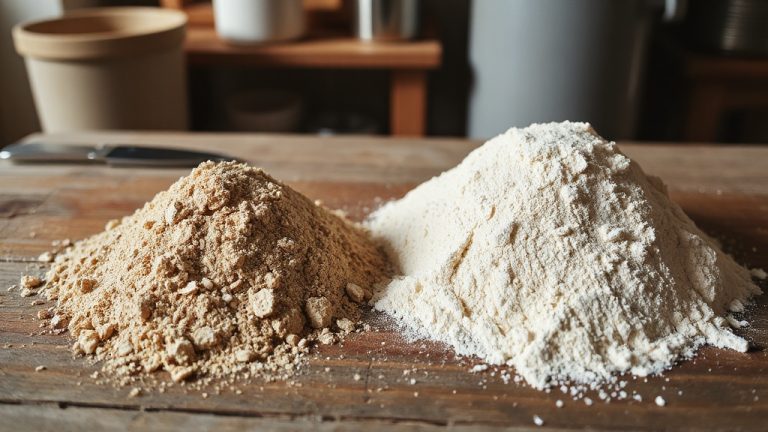
Flour Selection Importance
Selecting the right flour for your no-knead focaccia can make a world of difference in the final result. The flour you choose affects not only the texture but also the overall flavor of your bread. Here’s a quick guide to help you decide:
| Flour Type | Characteristics |
|---|---|
| All-Purpose Flour | Balanced protein for good structure and texture. Ideal for beginners. |
| Bread Flour | Higher protein content for enhanced gluten development, leading to a lighter, airier focaccia. |
| Gluten-Free Blend | Provides an alternative for gluten-sensitive individuals but may alter traditional texture. |
When using all-purpose flour, weigh it accurately—about 625 grams for 5 cups—to guarantee proper hydration and consistent results. If you’re feeling adventurous, consider experimenting with whole wheat or spelt flour.
Olive Oil Benefits
Choosing the right flour sets the stage for your focaccia, but the inclusion of olive oil takes it to a whole new level. Using extra-virgin olive oil not only enhances the flavor but also contributes greatly to the health benefits of your bread. Packed with monounsaturated fats, it helps reduce bad cholesterol levels, lowering the risk of heart disease.
Additionally, incorporating whole grain flour in your recipe can further improve its nutritional profile, as whole grain sourdough aids in managing type 2 diabetes due to its fiber content and fermentation.
Moreover, olive oil is rich in antioxidants, such as vitamin E and polyphenols, which offer impressive anti-inflammatory properties. These attributes make it a staple in Mediterranean diets, celebrated for promoting longevity and reducing chronic disease risk.
As you mix in olive oil, you’re not just creating a moist and tender crumb; you’re also supporting your cognitive function. Research suggests that regular consumption of olive oil may protect against neurodegenerative diseases, enhancing your mental well-being.
Dough Preparation
Dough preparation is a crucial step in achieving the perfect no-knead focaccia, and it all starts with activating the yeast. Begin by whisking together 1/4 oz. of active dry yeast, 2 tsp. of honey, and lukewarm water. Let this mixture sit for about 5 minutes until it becomes foamy, signaling that the yeast is ready to work its magic.
Using a durable glass container can make it easier to monitor the yeast activation and keep everything clean during the process.
In a separate bowl, combine 5 cups of all-purpose flour with 5 tsp. of Diamond Crystal kosher salt. Mix the dry ingredients into the yeast mixture until a shaggy dough forms.
Now, coat the dough with 4 Tbsp. of extra-virgin olive oil, then cover it and refrigerate for 8 hours to 1 day. This chilling period enhances flavor as the dough rises slowly.
If you’re pressed for time, let the dough rise at room temperature for 3 to 4 hours until it has doubled in size.
When it’s time for the second rise, transfer the dough to a buttered baking pan, shape it as needed, and let it rise uncovered for 1.5 to 4 hours until it has doubled again, ready for baking perfection!
Baking Instructions
Now that your dough is ready, it’s time to transform it into a golden delicacy. Preheat your oven to 450°F to create the perfect environment for that delightful rise.
Remember, achieving a beautiful crust relies heavily on the importance of steam in baking, so consider your baking vessel carefully.
As you prepare to bake, check the dough’s readiness and add those signature dimples for an extra touch of flavor and texture.
Dough Preparation Techniques
After allowing the yeast to come alive with a touch of honey and warm water, you’ll find yourself on the exciting path of crafting your focaccia. Start by whisking together the active dry yeast, honey, and lukewarm water, then let it sit for 5 minutes until foamy. This indicates your yeast is activated!
Next, combine 5 cups of all-purpose flour and 5 teaspoons of kosher salt with the yeast mixture until a shaggy dough forms—don’t overmix!
Transfer the dough to a bowl coated in olive oil, cover it, and refrigerate for 8 to 24 hours. This chilling time enhances the flavor and allows the dough to develop.
When you’re ready to bake, butter a baking pan and gently deflate the cold dough. Shape it into the pan and let it rise at room temperature until doubled, which may take 1½ to 4 hours.
Once risen, dimple the focaccia deeply with your fingers, drizzle generously with olive oil, and sprinkle with flaky sea salt. This step not only adds flavor but also creates beautiful pockets for the oil to pool.
Now, you’re almost ready to bake!
Baking Temperature and Time
With your beautifully risen focaccia ready for the oven, it’s time to focus on baking it to perfection. Preheat your oven to a sizzling 450°F to guarantee that crust develops just right.
Once the oven reaches this temperature, carefully place your focaccia inside. Bake it for 20-30 minutes, keeping a close eye on it. You’ll know it’s done when it’s puffed and golden brown on top, a sight that’ll make your mouth water.
To check for doneness, give the dough a gentle poke; it should spring back slowly. If it does, you’re in business!
For an extra layer of flavor, drizzle your focaccia with olive oil and sprinkle flaky sea salt on top before sliding it into the oven. If you prefer a softer crust, brush the focaccia with more olive oil immediately after it comes out. This not only enhances the flavor but also gives your focaccia a glossy finish that’s irresistible.
Storage Tips
To keep your focaccia fresh and delicious, it’s essential to store it properly right after baking. Focaccia is best eaten the same day it’s made, ensuring you savor the ideal flavor and texture.
If you have leftovers, don’t worry! You can slice your focaccia and place it in a freezer-safe container, where it can last up to three months.
For short-term storage, simply wrap your focaccia in a clean kitchen towel and keep it at room temperature for up to two days. This method helps maintain its moisture, keeping it enjoyable for a little longer.
When you’re ready to indulge in that leftover focaccia, reheat it for a delightful experience. Preheat your oven to 300°F, and pop the focaccia in for about 10-15 minutes until it’s warmed through and crispy.
To elevate the flavor, brush it with extra olive oil or garlic butter before serving.
Serving Suggestions
Focaccia’s versatility makes it a delightful addition to any meal, whether you’re hosting a gathering or enjoying a quiet dinner at home. You can slice it into squares or rectangles, making it perfect for sharing with friends and family.
Serve it warm, brushed with garlic butter for that irresistible aroma, and watch it disappear as it complements your soups and salads beautifully.
For a more interactive dining experience, set out a small bowl of olive oil mixed with balsamic vinegar for dipping. This simple pairing elevates the focaccia’s flavor, inviting everyone to indulge.
You can also transform focaccia into hearty sandwiches by layering it with your favorite meats, cheeses, and fresh vegetables.
Don’t stop there—customize your focaccia with various toppings before baking. Consider cherry tomatoes, fresh rosemary, or even a sprinkle of cheese to create an enticing flavor profile that suits your taste.
Flavor Variations
When it comes to flavor variations, focaccia offers endless possibilities that can elevate your baking experience. You can easily transform your basic focaccia recipe into a gourmet delight with just a few simple additions. Here are some tasty ideas to ponder:
- Savory Additions: Mix in caramelized onions or roasted garlic into the dough for a rich, deep flavor that’s sure to impress.
- Herb Infusion: Incorporate fresh herbs like thyme or basil directly into the dough, letting the aromatic oils permeate each bite.
- Salt Selection: Experiment with different salts, such as flaky sea salt or infused varieties, to enhance the bread’s taste and texture.
- Gourmet Finishes: After baking, a sprinkle of grated Parmesan or a drizzle of balsamic glaze can elevate your focaccia to new heights.
Whether you opt for cherry tomatoes, olives, or cheese as toppings, the versatility of focaccia allows you to customize it to your liking.
Drizzle some olive oil over the top before baking to create a beautifully golden crust.
Common Mistakes
Baking focaccia can be a delightful experience, but common mistakes can easily derail your efforts. One major pitfall isn’t allowing enough time for the first rise. Aim for 8-24 hours in the fridge for ideal flavor development.
When mixing, don’t use too much flour; stick to the recommended 5 cups (625 g) to guarantee your dough retains the right consistency.
Another mistake is failing to dimple the dough deeply before baking. This step is essential for developing that signature texture and crust everyone loves. Make sure you create ample dimples!
Additionally, don’t skip the drizzle with remaining olive oil or sprinkle with flaky sea salt before baking; these enhance both flavor and visual appeal.
Lastly, always preheat your oven to 450°F. A cold oven can lead to uneven baking, affecting your focaccia’s rise and golden crust.
When your dough is doubled and ready, pour any oil left in the bowl for extra richness and flavor.
Recommended Pairings

Pairing focaccia with the right accompaniments can elevate your dining experience to new heights. This versatile bread complements a variety of flavors, making it a delightful addition to any meal. Here are some recommended pairings that’ll enhance your focaccia experience:
- Olive oil and garlic butter: Dip your focaccia in infused olive oil or rich garlic butter for a flavor explosion that highlights its airy texture.
- Soups and stews: Enjoy focaccia alongside hearty soups and stews, allowing it to soak up delicious broths and sauces for a satisfying bite.
- Cheese platters: Focaccia shines on cheese platters, especially with soft cheeses like mozzarella or goat cheese, making it a perfect companion on charcuterie boards.
- Meat and vegetable sandwiches: Use focaccia as a sandwich base, layering it with meats like prosciutto or turkey and fresh vegetables for a robust meal.
You can also serve it with fresh garden salads, where the lightness of focaccia balances the crunchy texture and acidity of the greens, creating a well-rounded dining experience.
With these pairings, your focaccia will truly shine!
Frequently Asked Questions
Can I Use Whole Wheat Flour Instead of All-Purpose Flour?
Yes, you can use whole wheat flour instead of all-purpose flour! It’ll add a nuttier flavor and denser texture. Just remember, you might need to adjust hydration and rising times for best results.
What Temperature Should I Let the Dough Rise?
You should let the dough rise in a warm, draft-free area, ideally around 75 to 80°F. This temperature encourages yeast activity, helping your dough develop a light, airy texture that’s perfect for baking.
How Long Does the Dough Take to Rise?
The dough typically takes 1 to 2 hours to rise, depending on the temperature. You’ll notice it expanding and becoming airy, creating a perfect base for your delicious creations. Keep an eye on it!
Can I Freeze the Uncooked Dough?
Yes, you can freeze uncooked dough! Just shape it, wrap it tightly in plastic, and place it in an airtight container. When you’re ready, let it thaw and rise before baking for delicious results.
Is There a Gluten-Free Option for This Focaccia?
If you’ve ever craved focaccia while avoiding gluten, you can use a blend of almond flour and tapioca starch. It creates a soft, flavorful bread that’s perfect for dipping in olive oil and herbs. Enjoy!
Surprisingly Easy, Shockingly Delicious
So, did you think making focaccia required hours of kneading and expert skills? Surprise!
This shockingly easy no-knead recipe proves that delicious, artisan-quality bread is just a few simple steps away. With minimal effort, you’ll impress friends and family while secretly reveling in your newfound baking prowess.
Next time someone asks about your culinary talents, smile and say it’s all in the wrist—because, let’s be honest, your secret’s safe with this effortless masterpiece. Enjoy every bite!