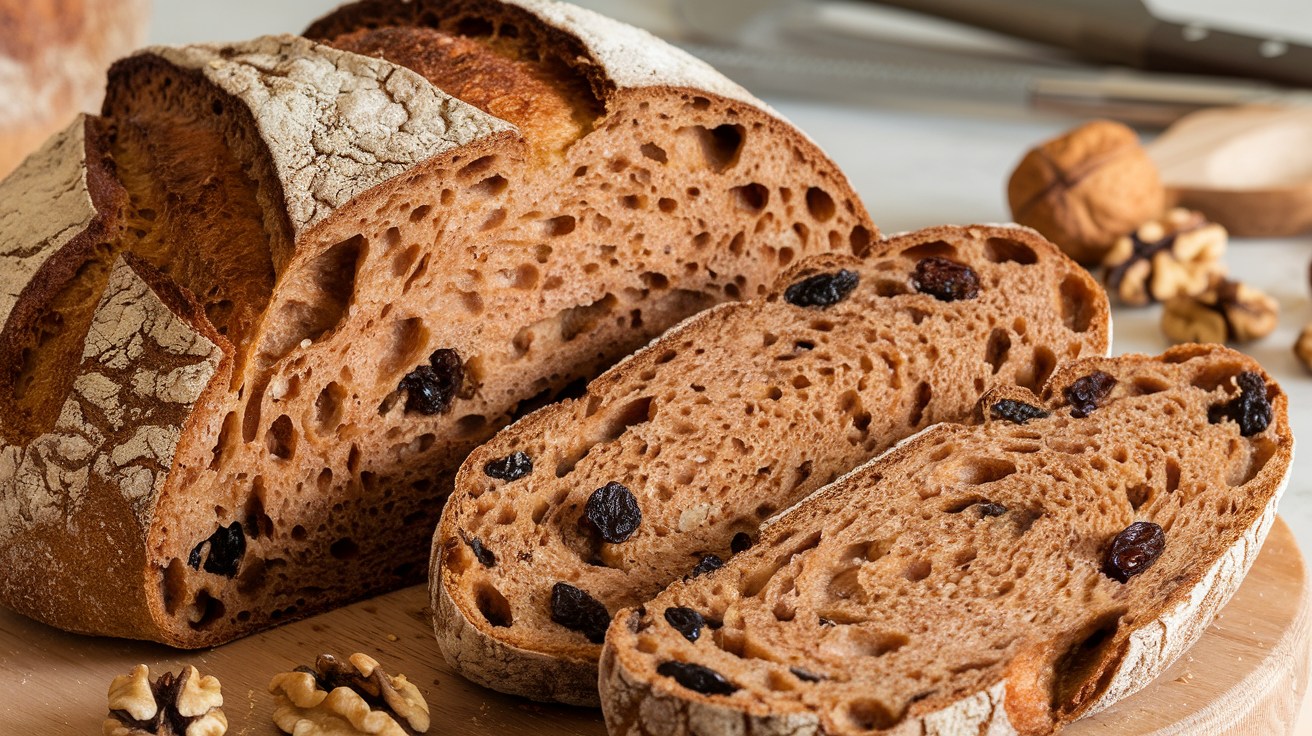
Walnut Raisin Sourdough Bread: Chewy, Crunchy, Tangy and Delicious
Walnut raisin sourdough bread is a delightful blend of flavors and textures you’ll love. Start with an active sourdough starter and combine it with high-quality flour, soaked raisins, and chopped walnuts.
The process involves a careful autolyse for gluten development, followed by a series of stretches and folds to strengthen your dough. After a gentle shape and proof, bake it in a hot Dutch oven for that perfect crust.
The result is a warm loaf with a chewy interior and a crunchy crust. If you want to elevate your baking skills, there’s much more to explore.
Key Takeaways
- Combine 100g active sourdough starter with 500g flour, 350-360ml warm water, and 9-10g salt for the dough mixture.
- Soak 50-100g raisins for 1-2 hours to enhance moisture and sweetness before incorporating.
- Incorporate 50-100g chopped walnuts for added crunch and flavor; optional spices like cinnamon can be added.
- Follow a stretch and fold technique during the first 2 hours of bulk fermentation to develop dough strength.
- Preheat your oven to 450°F and bake the shaped loaf covered for 20-30 minutes for a crispy crust.
Ingredients Overview
When it comes to crafting the perfect Walnut Raisin Sourdough Bread, understanding the ingredients is essential for your success.
Begin with a 100% hydration sourdough starter, using 100g of active starter to kickstart your fermentation. Regular feedings are essential for keeping the starter active, and preventing the overload of yeast and bacteria. Turn to 500g of strong bread flour, rich in protein, to give your loaf structure. You might also consider incorporating rye or whole wheat flour for an intriguing texture and flavor.
Next, add 50g to 100g of raisins. Soaking them in hot water can enhance their moisture and sweetness, and using golden raisins can provide additional antioxidant properties. Complement their flavor with 50g to 100g of chopped walnuts, which provide a delightful crunch and nutty essence. A pinch of cinnamon or optional spices like nutmeg and vanilla can elevate the taste profile further.
Don’t forget 9g to 10g of salt to control fermentation and enhance flavor. Hydrate your dough with approximately 350ml to 360g of warm, clean water.
Preparing the Dough
To prepare the dough, start by ensuring your sourdough starter is lively and bubbly, ready to bring life to your bread.
Next, mix the flour and water, allowing the combination to rest and hydrate before adding the starter and salt, creating a shaggy dough that’s full of potential. This initial resting time is essential, as it enhances the dough’s structure and flavor, setting the stage for a beautifully textured loaf.
Using all-purpose flour provides consistent and predictable results, making it an excellent choice for beginners. After mixing, perform a stretch and fold technique to develop the dough further, ensuring it gains strength and elasticity.
Sourdough Starter Activation
The heart of your walnut raisin sourdough bread lies in a vibrant, well-fed sourdough starter, which serves as the foundation for flavor and texture.
To activate your starter, begin by mixing equal parts of flour and water using a 1:1:1 feeding ratio by weight. Stir it well and let it rest in a warm spot, ideally between 75-80°F. In about 2-12 hours, you should see it bubbling and doubling in size, indicating that it’s ready for action.
A healthy starter is characterized by a strong smell and the presence of bubbles, which showcases its liveliness. A fed starter supports the growth of wild yeast and bacteria, enhancing dough activity for better rise.
Keep an eye out for peak activity—your starter should be filled with small and large bubbles, showcasing its liveliness.
To double-check its readiness, perform the float test by dropping a spoonful into the water; if it floats, you’re good to go!
Ingredient Mixing Techniques
Mixing ingredients for your walnut raisin sourdough bread is an essential step that sets the stage for a beautifully textured loaf.
Begin by briefly mixing your activated starter with water in a large ceramic or glass bowl. You’ll then add the flour and salt, stirring until a shaggy dough forms. This is where the autolyse comes into play—cover the bowl with cling film or a damp tea towel, letting it rest for about an hour. This process hydrates the flour, enhancing gluten development, which is vital for achieving a great texture.
Next, it’s time for the fillings. Soak your raisins in hot water for 1-2 hours to plump them up, ensuring their sweetness bursts through the bread. This step is crucial as it helps to achieve the desired flavorful bread experience.
After the autolyse, incorporate the walnuts and raisins by performing stretch and folds. Lift the dough, stretch it, and fold it over itself to evenly distribute those delightful fillings. Repeat this every 30 minutes for two hours, building strength in the dough, which is particularly important during the bulk fermentation process.
When you shape it, tuck the sides inward to create tension on the surface, preparing it for its final proof.
Dough Resting Importance
Resting periods in dough preparation are essential for achieving that perfect balance of texture and flavor in your walnut raisin sourdough bread.
These pauses allow your dough to develop its character, leading to a loaf that’s not just good but remarkable.
Here’s why you should embrace the resting stages:
- Better Gluten Relaxation: Resting reduces gluten tightness, making shaping a breeze and preventing tears while enhancing the dough’s ability to hold gas.
- Enhanced Dough Development: The autolyse stage jumpstarts gluten formation, improving water absorption and making the dough softer and more manageable. This facilitates dough preparation and results in a more cohesive texture.
- Improved Final Shaping: A bench rest allows gluten to relax after shaping, leading to a more uniform and aesthetically pleasing loaf.
- Flavor Complexity: The proofing and retarding stages cultivate fermentation, contributing to a deeper flavor profile and superior crust quality.
Bulk Fermentation Process
As you begin the bulk fermentation process, you’ll find that timing is essential—aim for 3 to 12 hours depending on your kitchen’s warmth. Keep a watchful eye on your dough, waiting for it to double in volume, signaling that the fermentation is just right.
This attentive monitoring not only guarantees a perfect rise but also enhances the flavor complexity of your walnut raisin sourdough. The incorporation of higher hydration during fermentation can significantly improve the overall texture and crumb structure of the bread. Additionally, maintaining an optimal dough temperature helps achieve the best results during bulk fermentation.
Ideal Fermentation Duration
Determining the ideal fermentation duration during the bulk fermentation process is essential for achieving the perfect texture and flavor in your walnut raisin sourdough bread. The time you allow your dough to ferment can greatly influence its development, so keep these key points in mind:
- Time Range: Expect a fermentation time of 3-5 hours in warmer kitchens (85°F), while cooler settings (65°F) may require 8-12 hours.
- Environmental Factors: Seasonal changes will impact your fermentation; summer’s warmth speeds things up, while winter’s chill may slow it down, often necessitating overnight fermentation.
- Dough Readiness: Look for a volume increase of about 1½-2x its original size. The dough should feel less dense and develop a few bubbles on the surface. Additionally, the dough requires stretching and folding every 30 minutes during the first 2 hours of fermentation to enhance gluten development.
- Inclusion Preparation: Remember, soaking your raisins and walnuts for at least an hour is essential to prevent them from absorbing moisture from the dough.
Monitoring Dough Development
Monitoring dough development during the bulk fermentation process is essential for achieving that perfect balance of flavor and texture in your walnut raisin sourdough bread.
As you watch the dough, aim for a temperature range of 74°F to 78°F (23°C to 25°C) to promote strong yeast activity. This warm environment encourages a lively fermentation, typically lasting between 2 to 5 hours. Remember that maintaining this temperature can also enhance steam retention, crucial for a crispy crust in the final bake.
Keep an eye on the dough’s texture; it should become smooth and shiny as fermentation progresses. Look for an increase in size—your dough should double, indicating that gluten has developed a robust structure to hold the yeast bubbles. Additionally, remember that stretching and folding the dough during this phase not only strengthens it but also promotes even fermentation throughout.
Regularly stretch and fold the dough to strengthen it, equalizing temperature while evaluating progress. Notice the bubbles, the sour aroma, and the visible fermentation activity; these are signs that you’re on the right track.
Shaping the Loaf
Shaping the loaf is a critical step in the sourdough process that influences the final texture and structure of your bread. Proper shaping creates tension in the dough, ensuring it rises beautifully in the oven.
Here’s how to shape your walnut raisin sourdough:
- Pre-shape: Lightly dust your work surface and gently pre-shape the dough into a rough round. Let it rest for 15 minutes.
- Final Shape: For a boule, fold the sides toward the center, then wrap the bottom over the top. For a batard, taper the ends while rolling.
- Seam Placement: Place the seam side up in your proofing basket, ensuring it retains its shape.
- Prepare the Basket: Dust the proofing basket with rice flour to prevent sticking, and cover your dough with plastic wrap or a damp tea towel. The use of rice flour is beneficial because it reduces moisture retention in the basket.
Handle the dough with care—this preserves the gluten structure. Additionally, the fermentation process enhances digestibility for gluten-sensitive individuals, making sourdough a more accessible bread option.
After shaping, allow it to rest and rise for 4-8 hours at room temperature.
Baking Instructions
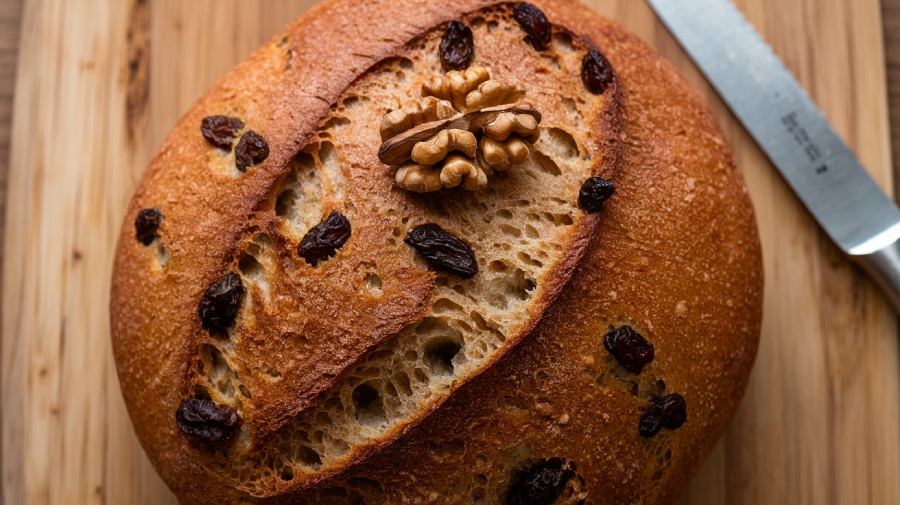
After your dough has risen beautifully and developed its flavors during the proofing stage, it’s time to turn your attention to baking. Preheat your oven to 450°F (230°C) with a Dutch oven inside. This step is essential for achieving that coveted crispy crust. Understanding the sourdough starter is vital for ensuring your dough rises properly, as steam is crucial for enhancing flavor and texture during baking.
Once preheated, carefully place your shaped loaf into the hot Dutch oven. Remember to score the top of the dough with a sharp blade to control its expansion while baking.
Cover the Dutch oven with its lid and bake for 20-30 minutes. This steam trap will help create a beautifully risen loaf.
After the initial baking, remove the lid and lower the temperature to 410°F (210°C). Continue baking for an additional 10-15 minutes until the crust turns a deep, golden brown.
Once you’ve reached that perfect color, take the loaf out and allow it to cool completely on a wire rack. Resist the temptation to slice into it too soon; letting it cool enhances the texture and flavor of your walnut raisin sourdough.
Tips for Success
When it comes to achieving the perfect walnut raisin sourdough bread, attention to detail is key throughout the entire process. By focusing on specific techniques and ingredient preparations, you can elevate your bread-making to new heights. Here are some tips for success:
- Quality Ingredients: Always use high-quality walnuts and raisins. Their freshness directly impacts the flavor and texture of your bread.
- Proper Preparation: Chop walnuts into smaller pieces for even distribution and soak raisins in water or a flavorful liquid to prevent dryness.
- Monitor Fermentation: Verify your sourdough starter is active. Allow for longer bulk fermentation to develop rich flavor, and keep an eye on dough temperature for ideal conditions.
- Shaping and Proofing: Use gentle shaping techniques to avoid pushing out walnuts and raisins. Proof in a banneton to maintain shape and control the environment for consistent humidity and temperature.
- Bread Maker Choice: Selecting a bread maker with dual kneading blades enhances the mixing and gluten development, contributing to a better texture in your sourdough.
Serving and Storage
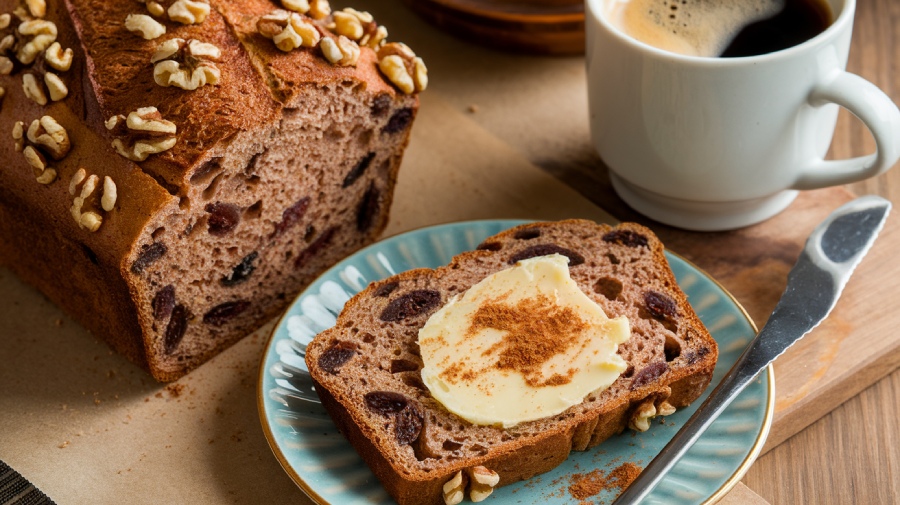
Serving your walnut raisin sourdough bread offers a delightful experience that can elevate any meal. Imagine starting your day with a warm slice toasted to perfection, topped with butter, and paired with eggs. Alternatively, transform it into French toast by dipping slices in a honey-infused egg mixture and frying them in a cast iron skillet, creating a breakfast that’s both indulgent and satisfying. For a high-protein option, slather cream cheese on your toast and enjoy a nutritious morning boost.
When it comes to storage, you’ll want to keep your bread fresh. Store it in a plastic or bread bag at room temperature for 5-7 days, but aim to consume it within the first 1-2 days for peak flavor.
To ensure the best texture, adequate hydration of dough is key, as it contributes to the overall quality of the bread. If you need to prolong its life, freeze fully cooled slices wrapped in plastic and foil for up to three months. To prevent them from sticking together, place small sheets of parchment paper between each slice.
Frequently Asked Questions
Can I Substitute Walnuts With Other Nuts in This Recipe?
Absolutely, you can substitute walnuts with other nuts in your recipe!
Just keep in mind that each nut brings its own unique flavor and texture. Almonds offer a sweet crunch, pecans add a rich buttery taste, and hazelnuts provide a delightful aroma.
Toasting any of these nuts enhances their flavor, but remember to adjust your dough hydration since different nuts absorb water differently.
Experimenting with small batches will help you find your perfect match!
How Do I Know if My Sourdough Starter Is Active Enough?
To know your sourdough starter’s active enough, look for bubbles and a frothy top, indicating fermentation.
Perform the float test—if a spoonful floats in water, it’s ready! You should see it double in volume within 4 to 12 hours after feeding.
The starter will have a shiny appearance and a mild, tangy aroma. At peak activity, it’ll be relaxed, showing a slight dip rather than a dome.
Trust these signs, and you’re set!
What Is the Best Way to Store Leftover Sourdough Bread?
You’re savoring the last morsels of your sourdough, but wait—how do you store those delicious leftovers?
First, wrap the loaf in a tea towel, allowing it to breathe while keeping it fresh.
If you’ve sliced it, place the cut side down on a board, covered with a cloth.
For longer storage, freeze slices in airtight bags.
Each method preserves the flavor, ensuring every bite feels like it just came out of the oven.
Can I Use a Different Type of Flour for This Recipe?
Absolutely, you can use different types of flour in your sourdough recipe! Each flour brings unique flavors and textures, enhancing your bread’s character.
If you opt for whole wheat or rye, just remember to adjust the water ratio and proofing times accordingly.
Mixing flours can create a delightful balance, but keep an eye on the protein content.
Experimenting will refine your technique and lead to delicious results you’ll love sharing!
How Can I Adjust the Recipe for Gluten-Free Flour?
Think of gluten-free baking as crafting a delicate tapestry.
To adjust your recipe, blend different gluten-free flours like rice and tapioca, adding xanthan gum for structure. You’ll need more liquid since gluten-free flours absorb it differently.
Increase yeast for better rise, and be gentle with your dough to prevent breakage.
Keep an eye on proofing times and lower the oven temperature to avoid burning.
With patience, you’ll weave a beautiful loaf!
A Timeless Baking Delight
Once you’ve savored that warm slice of walnut raisin sourdough, you’ll understand why this timeless recipe has stood the test of time, much like the invention of the wheel. Each bite bursts with tangy richness and nutty crunch, a demonstration of your craftsmanship.
Remember, the journey doesn’t end here; experiment with flavors and techniques to make it your own. Embrace the art of bread-making, and you’ll always have a delightful loaf waiting to impress your friends and family.

