Sourdough Pita Bread: The Perfect Pocket for Every Filling
Sourdough pita bread combines a tangy flavor with a soft, airy texture. You’ll start by mixing an active sourdough starter, warm water, and flour, letting it ferment for several hours to develop natural yeast qualities.
After shaping the dough into balls and allowing it to rise, you’ll bake them in a hot oven for just a few minutes until they puff beautifully. Perfect for wraps or dipping, there’s so much more you can explore with this delightful bread.
Key Takeaways
- Sourdough pita bread is made using a 100% hydration sourdough starter, providing a tangy flavor and improved texture.
- The dough requires a bulk fermentation of 4-6 hours, allowing it to double in size for optimal airy quality.
- Bake pitas at a high temperature (450°F to 550°F) for 3 to 5 minutes to achieve a perfect puff.
- Homemade pitas can be stored in airtight containers for up to three months while maintaining their flavor.
- Serve sourdough pitas with dips like hummus, use them for wraps, or create mini pizzas for versatile meal options.
Ingredients and Nutrition
When it comes to crafting delicious sourdough pita bread, the right ingredients make all the difference. Start with an active sourdough starter, ideally at 100% hydration and doubled in size.
Use unbleached, organic bread flour for that perfect structure, as high protein content contributes to a chewier texture and better rise in your pita. Consider adding whole wheat flour for a richer flavor and added nutrition. Warm water, around 80-90°F, is essential for ideal fermentation, while a splash of olive oil enhances moisture and flavor. Additionally, the sourdough starter contributes to the unique flavor profile and texture of the pita.
Each pita packs around 211 calories, boasting a higher protein content thanks to the flour choice. Plus, the addition of whole wheat flour boosts fiber and nutrients.
Preparation and Mixing
Crafting sourdough pita bread involves a series of purposeful steps that set the foundation for your delicious creation.
Start by mixing your sourdough starter, water, and part of the flour to form a thick batter. Let this mixture rest for about an hour in a process called autolyse, which fully hydrates the flour.
Next, incorporate salt, sugar, and olive oil, then knead the dough using a stand mixer with a dough hook or by hand for 5-10 minutes until it’s smooth and stretchy. This process is crucial for developing the dough’s structure.
Allow the dough to rest in a lightly oiled bowl, covered, to promote gluten relaxation.
Fermentation Process
Once you’ve achieved that smooth, pliable dough, the fermentation process begins, playing a vital role in developing flavor and texture.
At temperatures between 79-81°F (26-27°C), your dough will thrive. Typically, you’ll let it bulk ferment for 4-6 hours, fostering the natural yeast in your active sourdough starter. This warm, humid environment encourages the dough to double in size, enhancing its airy quality.
Remember, using whole wheat or all-purpose flour can influence the speed and texture of fermentation. A well-fed starter is crucial for optimal results, as it ensures the dough rises effectively. Additionally, monitoring the dough rise meticulously will help you achieve the desired gluten development for your pita bread.
Adding salt after mixing helps control yeast activity and boosts flavor. The result? A beautifully fermented dough that’s ready to puff into a delicious pita when baked.
Shaping and Proofing
Shaping and proofing your sourdough pita bread is essential for achieving that perfect puff and texture.
Start by dividing your dough into equal portions, roughly 65-90 grams each. Roll each piece into a tight ball, creating tension on the surface by rotating it gently. Use a well-floured surface to prevent sticking and keep your hands lightly floured. Creating tension in dough is crucial for ensuring a tight ball that will rise properly during baking.
After shaping, let the dough rest for 15-40 minutes at room temperature, ideally between 72-76°F, to relax the gluten. Cover the dough with a damp cloth to maintain humidity.
Finally, allow a final rise for about 30 to 60 minutes. This careful shaping and proofing will guarantee your pitas puff beautifully when baked.
Baking and Puffing
To achieve that perfect puff in your sourdough pita bread, you need to focus on the baking process as much as the preparation.
Start by preheating your oven to a scorching 450°F to 550°F. Use a baking stone, cast iron skillet, or baking steel to create a hot surface that promotes even baking.
Roll your dough thinly to guarantee it puffs evenly, and make sure it’s well-hydrated for steam retention. Additionally, consider the cultural significance of bread as a staple in Middle Eastern meals to appreciate the nuance in your baking.
Bake your pitas for 3 to 5 minutes, watching for that beautiful puff as steam forms inside. If you have a convection setting, use it for even heat distribution.
Finally, wrap your pitas in a towel post-baking to keep them soft and moist.
Uses and Variations
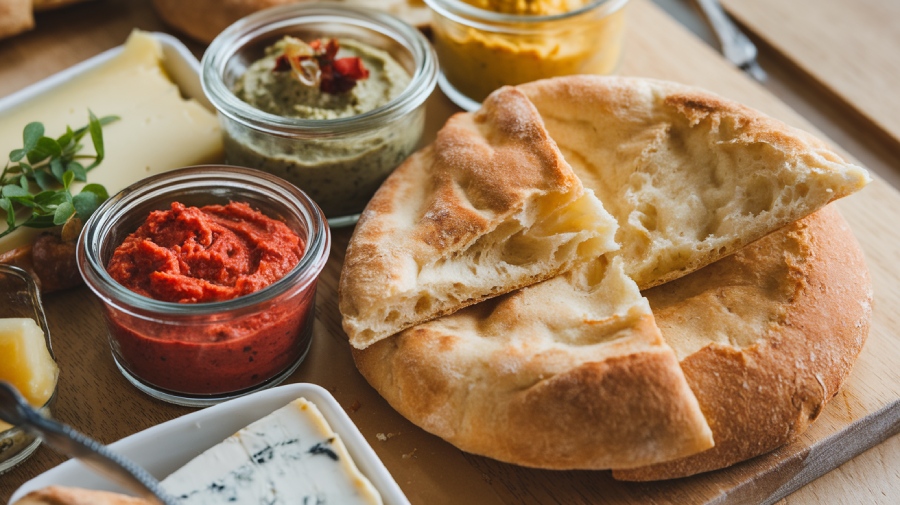
Sourdough pita bread offers countless possibilities in the kitchen, making it a versatile staple for any meal. You can enjoy it in various forms, whether you’re crafting a hearty sandwich, scooping up your favorite dip, or pairing it with a warm bowl of soup.
- Imagine wrapping falafel and veggies in a warm pita, drizzled with creamy tahini.
- Picture crispy pita chips, golden and perfect for dunking into hummus. Freezable pita breads can be stored for later use, ensuring you always have a delicious snack on hand.
- Envision mini pita pizzas topped with your favorite ingredients, baked to perfection.
These delightful uses guarantee that sourdough pita bread isn’t just a side but a celebrated component of your culinary adventures.
Flavor Enhancements
While exploring the world of sourdough pita bread, you’ll discover that flavor enhancements can elevate your baking experience to new heights.
The tanginess from an active sourdough starter adds a delightful complexity, while using whole wheat flour imparts a nutty richness. Balancing this with a bit of sugar softens the acidity, creating a harmonious taste. Additionally, adding 250 grams of sourdough starter to your dough can enhance both flavor and texture. A well-developed sourdough starter contributes to proper fermentation, ensuring the dough rises effectively.
Don’t forget the olive oil; it not only enriches the flavor but also guarantees a tender crumb. Techniques like long fermentation deepen the sour profile, and baking at high temperatures creates those perfect pita pockets.
Frequently Asked Questions
Can I Use Gluten-Free Flour for Sourdough Pita?
Absolutely, you can use gluten-free flour for sourdough pita!
Just remember, the absence of gluten changes the game. You’ll want to experiment with blends like brown rice or millet for the best results.
A gluten-free sourdough starter is essential, and you might need some xanthan gum to help with texture.
Keep an eye on rise times and baking conditions—small adjustments can make a big difference in achieving that perfect puff.
Enjoy the process!
How Do I Know When My Dough Is Ready?
How do you know when your dough’s ready? Look for visual cues: it should nearly double in size, displaying airiness with large bubbles.
You can also use the poke test; if the indentation stays, it’s good to go. Timing’s essential, but remember, overproofing can weaken the structure.
Keep an eye on it during bulk fermentation, and enjoy the process of bringing your dough to life!
What Can I Do if My Pitas Don’t Puff?
If your pitas don’t puff, check a few key factors.
First, make sure your dough’s rolled to the right thickness—too thick, and they won’t puff.
You’ll also want to verify your oven’s temperature; it should be around 500°F for best results.
Preheating is essential, so give it enough time.
Finally, consider the baking surface; a hot stone or skillet can help retain the heat needed for that perfect puff.
How Do I Revive a Sluggish Sourdough Starter?
If your sourdough starter’s feeling sluggish, think of it as a sleepy dragon needing a wake-up call!
Start by increasing feedings to twice a day, using equal parts flour and water by weight.
Keep it in a warm spot, and consider mixing in some rye flour for a nutrient boost.
Adding a splash of apple cider vinegar can help, too.
Patience is key; soon, you’ll see bubbles and activity returning!
Can I Flavor My Sourdough Pita With Herbs or Spices?
You can flavor your sourdough with herbs or spices!
Incorporating fresh or dried herbs like oregano or thyme enhances the tangy taste, while spices like cumin and paprika add warmth.
Mix them in during the initial dough preparation for even distribution.
Start with small amounts, around 1-2 tablespoons for herbs or 1/4 to 1/2 teaspoon for spices, and feel free to experiment with combinations to create unique flavor profiles!
Sourdough Pita: A Taste of Tradition and Joy
Savor the scrumptiousness of your sourdough pita bread! With its perfectly puffed pockets and delightful, dynamic flavors, this bread brings joy to any meal.
Whether you’re dipping, stuffing, or simply snacking, its versatility makes it a culinary companion for countless creations. Embrace the enchanting experience of homemade bread-making, and let each bite transport you to a world of warmth and wonder.
So, roll up your sleeves and relish in the rewarding ritual of creating this delicious delight.