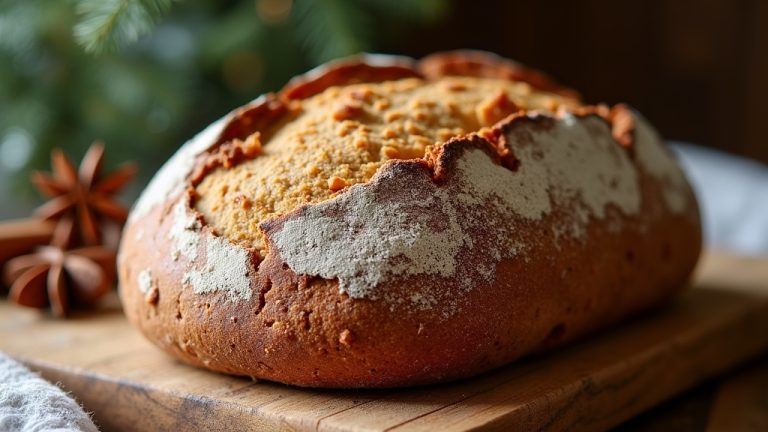
Sourdough English Muffin Bread Recipe with Crispy Crust
You’ll start by feeding an active sourdough starter and choosing a high-protein bread flour for that chewy texture.
Warm milk, water, and sweetener blend smoothly to nourish the yeast, while gentle mixing and resting develop gluten perfectly.
Shape the dough into discs coated with stone-ground cornmeal, then bake at 350°F with a covered top to trap steam.
This technique achieves a light, airy crumb and a crisp golden crust.
Keep going to discover how to master each step expertly.
Key Takeaways
- Use a mature, active sourdough starter combined with bread flour (≥12.5% protein) for optimal gluten and rise in English muffin bread.
- Mix warm milk and water with starter and sweetener, then autolyse with flour for 20–30 minutes to develop gluten and dough extensibility.
- Add salt after initial mixing to balance fermentation, then knead gently using stretch-and-fold techniques to preserve dough strength and texture.
- Bulk ferment dough at 65–70°F until 50–75% volume increase, then shape gently, coat with stone-ground cornmeal, and proof for light, airy crumb.
- Bake at 180°C (350°F) with a covered pan or lid to trap steam, creating a tender crumb and authentic cornmeal crust texture.
Essential Ingredients for Sourdough English Muffin Bread
| Ingredient | Amount | Purpose | Notes |
|---|---|---|---|
| Active sourdough starter | 150g | Provides natural leavening and tangy flavor | Must be fed and bubbly |
| Bread flour | 500g | Creates strong gluten structure for chewy texture | 10-12% protein content ideal |
| Warm water | 150ml | Hydrates flour and activates starter | 70-78°F temperature |
| Warm milk | 150ml | Adds tender crumb and richness | Room temperature preferred |
| Honey or sugar | 2 tablespoons | Enhances fermentation and flavor | Dissolve in warm liquid |
| Butter | 30g | Creates soft, flavorful crumb | Melted and cooled slightly |
| Salt | 10g | Controls fermentation and balances flavor | 1.5-2% of flour weight |
| Cornmeal | For coating | Creates signature crust texture | Stone-ground recommended |
Sourdough Starter Basics
Although it might seem complex at first, understanding sourdough starter basics is essential for baking flavorful, textured bread. Your starter is a living culture of wild yeast and lactic acid bacteria that naturally leavens your dough and builds rich, tangy flavor. The fermentation process in sourdough also lowers the glycemic index, making it a healthier choice for many bakers.
To create it, you mix equal parts flour and filtered water, forming a thick batter. Whole grain flours like rye or whole wheat jumpstart yeast growth by providing nutrients. Keep your starter in a breathable container covered loosely to allow airflow. A quart-sized mason jar or a glass, plastic, or ceramic bowl are common options for your container.
Feed it regularly by discarding some and replenishing with fresh flour and water, ideally at 75-80°F to speed fermentation. Within days, you’ll see bubbles and doubling in volume, signs your starter is strong and ready to work its magic in your bread.
Selecting the Right Flour for Your Bread
When you’re picking out flour for your sourdough English muffin bread, it’s super important to understand protein content. It really makes a difference in how strong and textured your dough will be. Flours with a protein content of 12.5% or higher are ideal for developing the gluten structure needed for chewy crusts and airy crumbs.
So, if you’re looking for that perfect protein boost, bread flour is your best bet!
Now, if you want to add a bit of flavor and nutrition, whole grain options are definitely worth considering. They can really elevate your bread. However, keep in mind that some whole wheat flours, like TAM 105, can have a very high protein content that requires adjustments in hydration.
Don’t be afraid to experiment with different types of flour—it’s all about finding that sweet spot for the perfect rise and chew in your muffins.
Choosing Flour Types
How do you choose the right flour to bring out the best in your sourdough English muffin bread? Start by balancing texture and flavor.
Bread flour, with its higher gluten, guarantees a strong, elastic dough that traps gas well, giving you that airy crumb and chewy bite. If you want a softer crumb, all-purpose flour works, though it won’t rise as much. Using precise measuring tools like stainless steel measuring spoons ensures consistent ingredient ratios for best results.
Whole wheat flour adds rich, nutty flavor and essential nutrients to boost fermentation, but use it sparingly or blend it with white flour to avoid dense, heavy bread. Because of its higher protein content, whole wheat flour supports a stronger gluten network that improves oven spring and crumb structure.
For a unique twist, experiment with small amounts of rye or ancient grains like kamut, which add complexity without overwhelming dough structure.
Choosing your flour thoughtfully shapes every bite of your loaf.
Flour Protein Content
Picking the right flour goes beyond the type; you also need to contemplate its protein content, which plays a major role in shaping your sourdough English muffin bread’s texture and structure.
Aim for flour with 10-12% protein, typical of bread flour, to develop a strong gluten network that balances chewiness and softness. This protein range helps trap fermentation gases, creating the signature open crumb and nooks while maintaining dough elasticity for easy handling. Using a fed starter in your dough enhances fermentation activity, which works synergistically with the flour’s protein to optimize rise and texture.
Flours with higher protein content absorb more water, which allows for a higher hydration dough and contributes to a tender crumb.
Too much protein, above 12.5%, can make your bread dense and tough, while too little results in sticky dough and a gummy crumb.
Remember, protein also affects water absorption. Higher protein flours hold more moisture, contributing to a tender crumb.
Choosing a consistent flour protein guarantees reliable results every time you bake.
Whole Grain Options
Why choose whole grain flours for your sourdough English muffin bread? Whole grain flours boost nutrition by retaining bran and germ, adding fiber, minerals, and complex flavors. Red wheat, in particular, offers elevated protein content and antioxidants, enhancing both nutrition and flavor.
They bring denser, chewier textures and richer aromas, making your bread both hearty and satisfying. Be ready to adjust hydration, as these flours absorb more water. The bran and germ contribute essential nutrients and a nutty flavor.
| Flour Type | Key Characteristics |
|---|---|
| Whole Wheat | Nutty flavor, dense crumb, high fiber |
| Rye | Tangy taste, moist dough, low gluten |
| Barley | Sweet, nutty, adds softness |
| Spelt | Nutty, good gluten structure |
| Oat | Mellow flavor, soft crumb, gluten risk |
Experiment with blends and hydration to find your perfect balance of flavor and texture.
Preparing the Liquid Ingredients
When you’re getting your liquid ingredients ready, it’s super important to blend water and milk together. This combo really helps create a tender and flavorful crumb in your baked goods, and using a precise scale can ensure the right liquid ratios.
Oh, and remember to keep those liquids at room temperature! This little trick helps your sourdough starter stay nice and active, which is exactly what you want. For a simple but effective buttermilk substitute, mix milk with a teaspoon of lemon juice or vinegar and let it sit for 5-10 minutes.
Also, don’t forget about your sweetener! Make sure to mix it in smoothly. This way, it enhances the fermentation process and adds just the right touch of sweetness to your recipe.
Happy baking!
Choosing the Liquids
Although choosing the right liquids might seem straightforward, it plays a crucial role in shaping your sourdough English muffin bread’s texture and flavor.
Water hydrates the flour and activates your sourdough starter, which itself adds liquid since it’s typically 100% hydration, equal parts water and flour. You’ll want to measure your water accurately, ideally around 70% of the flour’s weight, adjusting slightly based on humidity or desired crumb openness. Using warm water can also help activate yeast more efficiently in the dough.
Adding olive oil is optional but recommended if you want a tender, flavorful crumb. Use soft, filtered water when possible, as water quality influences fermentation and taste.
Mix your liquids gently with the active, bubbly starter to keep fermentation strong. Remember to feed your sourdough starter regularly by discarding half and replenishing it with equal parts flour and water to maintain its rising power.
Temperature Importance
Selecting the right liquids sets the stage, but controlling their temperature shapes how your sourdough starter behaves and how your dough develops.
Using water that’s too warm, above 80°F (27°C), speeds fermentation, causing faster rise but potentially a sourer, more acidic flavor.
Cooler water slows things down, letting flavors deepen over time. To get consistent results, measure your water temperature with a thermometer before mixing.
You can calculate the ideal water temperature by considering your starter, flour, room temperature, and mixing friction.
Aim for a dough temperature around 70–78°F (21–26°C). Maintaining a temperature of 74-86°F is crucial for optimal sourdough performance.
Adjusting water temperature helps you steer microbial activity, balancing lactic and acetic acid production to tailor flavor and texture.
This precise control guarantees your sourdough English muffin bread rises perfectly and delivers the ideal crumb and tang.
Sweetener Integration
How you incorporate sweeteners can make a big difference in your sourdough English muffin bread’s texture and flavor.
To prepare the liquid ingredients, dissolve granular sugars like caster or brown sugar in warm milk or water to guarantee even sweetness and prevent grittiness. This method helps maintain the hydration level critical for dough consistency.
If using honey or syrups, warm them slightly to blend smoothly, especially when adding larger amounts.
Remember, when substituting liquid sweeteners for sugar, reduce other liquids to keep dough consistency balanced.
Adding sweeteners early allows full hydration, softening the dough and tenderizing the crumb. This is because sugar accelerates fermentation, providing easier and faster food for the yeast.
This step also influences fermentation speed and crust color, so monitor rise times closely.
Mixing and Resting the Dough
When you start mixing the dough, gently warm the milk and butter until the butter melts and the temperature reaches between 105°F and 110°F, activating your sourdough starter perfectly.
Next, combine your active starter, warm milk mixture, water, and sweetener in a large bowl. Add the flour gradually, mixing until you get a shaggy dough that’s ready for resting. This step emphasizes the use of key ingredients like sourdough starter, honey, milk, butter, and bread or all-purpose flour, which are essential for the best flavor and texture. Make sure your starter is active and bubbly to ensure proper fermentation and rise.
During the resting phase, also called autolyse, the dough hydrates and gluten begins to form, improving its texture and workability. Keep it covered to prevent drying.
Remember these key points:
- Warm milk and butter activate your starter.
- Mix until dough is shaggy for gluten development.
- Rest dough 20-30 minutes, covered, to enhance extensibility and reduce kneading time.
Adding Salt and Kneading Techniques
Although salt may seem like a simple ingredient, adding it at the right moment and in the correct amount is essential for developing your sourdough English muffin bread’s flavor and structure.
Add salt after mixing your starter, water, and milk but before the flour to guarantee even distribution. Use about 1.5-2% of the flour’s weight to balance flavor and control fermentation without inhibiting yeast. This precise timing helps maintain the activity of the sourdough starter for optimal rise.
When kneading, keep it gentle and brief—about 1 to 5 minutes—especially since the dough is wet and sticky. Try stretch-and-fold techniques or use a flat paddle attachment if mixing mechanically. This dough benefits from a stretch-and-fold process performed twice with rests in between to develop gluten without overworking.
These methods build gluten structure effectively without the need for intensive kneading.
This careful approach strengthens gluten for a soft, elastic crumb with the signature nooks and crannies while preventing dense or crumbly textures for perfect English muffin bread.
Fermentation and Proofing Times
Since fermentation and proofing shape the texture and flavor of your sourdough English muffin bread, paying close attention to timing and environment is essential. You’ll want to control temperature and humidity carefully, as these factors influence dough activity and rise.
- Bulk Fermentation: Lasts 1-4 hours at 65-70°F. Look for a 50-75% volume increase and visible bubbles. Use stretch and fold techniques with rests to build dough strength.
- Proofing: Takes a few hours; warmer temps shorten it, cooler extend it. Cover your dough on a semolina-dusted pan to keep humidity. Proof until airy and risen but not overproofed.
- Refrigeration: After bulk fermentation, you can refrigerate dough for up to 3 days to slow fermentation. Warm dough to room temperature before continuing.
Monitor your dough closely to achieve perfect crumb and flavor.
Shaping Your English Muffin Loaf
As you prepare to shape your sourdough English muffin loaf, handle the dough gently to preserve its delicate gas bubbles while easing any excessive puffiness.
Lightly fold and stretch the dough to build surface tension, which helps maintain a round shape during proofing.
Gently folding and stretching your dough creates surface tension, ensuring a beautifully round shape as it proofs.
Let the dough rest for about 15 minutes to relax the gluten, making it easier to divide and shape. This step also helps prevent harmful behaviors in the baking process by ensuring dough consistency.
Use a scale to portion the dough into equal pieces, around 40 grams each, for even cooking.
Lubricate your hands with neutral oil to prevent sticking and create smooth surfaces.
Shape each piece into a tight ball by folding edges to the center, then gently press into a 1–1.5 cm thick disc.
Finally, coat both sides with semolina or polenta to ensure a textured crust and prevent sticking.
Baking Temperature and Timing Tips
Hey there! When you’re getting ready to bake, you’ll want to set your oven to about 350°F (180°C) for that nice, balanced bake.
But if you’re looking for a crust that’s got that perfect crunch, consider cranking it up to 425°F (218°C).
Now, don’t forget to keep an eye on the clock! Usually, 30 to 40 minutes does the trick, but it really depends on the size of your loaf.
For the best results, finishing the baking process in the oven after pan-cooking helps achieve an authentic texture and crust.
Remember, timing and temperature are best friends in the baking world—they work together to give you that ideal golden-brown finish and a tender crumb.
Optimal Oven Temperature
When aiming for perfectly baked sourdough English muffin bread, maintaining an oven temperature around 180°C (350°F) guarantees the ideal balance between a tender crumb and a beautifully browned crust.
This moderate heat assures your bread cooks evenly without burning the crust or leaving the interior underdone.
For best results, consider these key tips:
- Place your loaf on the middle rack for consistent heat distribution.
- Use a heavy-based or cast iron pan to promote uniform crust development.
- Keep the oven door closed during baking to maintain temperature and humidity.
Remove any steam lid near the end to encourage browning.
Sticking to this temperature range preserves the signature nooks and crannies while ensuring a soft, flavorful crumb. Using a second greased loaf pan or skillet as a lid during baking helps trap steam, mimicking traditional steaming methods for a light, fluffy texture.
Ideal Baking Duration
Although baking times vary depending on your oven and loaf size, aiming for the ideal duration is key to achieving that perfect sourdough English muffin bread crust and crumb.
Typically, baking at 425°F for 25–28 minutes yields a golden crust, while lower temperatures require longer times. To nail doneness, watch for a deep golden crust and a clean toothpick test. Covering the loaf early traps steam, preventing premature browning. Uncover it later to crisp the crust.
Using a thermometer to ensure the internal temperature reaches around 200°F can help confirm that the bread is fully cooked and has the desired texture, especially for sourdough varieties with a longer fermentation process internal temperature.
Here’s a quick guide:
| Temperature (°F) | Baking Time (minutes) |
|---|---|
| 425 | 25–28 |
| 375 | 40–45 |
| 350 | 30–40 (two-stage) |
| Lower temps | Longer, watch closely |
| All temps | Check crust, toothpick |
Adjust as needed, relying on visual cues and internal temperature.
Creating the Perfect Cornmeal Crust
Because the crust defines much of the sourdough English muffin bread’s character, mastering the art of creating a perfect cornmeal crust is essential.
The crust shapes sourdough English muffins’ identity, making a perfect cornmeal crust crucial.
Cornmeal adds delightful texture and a subtle nutty flavor, while the Maillard reaction during baking delivers that enticing golden-brown color and complex taste.
To get it right, focus on these key steps:
- Use stone-ground cornmeal to dust your baking surface, preventing sticking and boosting texture.
- Bake at a high temperature to promote a crispy, crunchy crust through ideal browning.
- Control baking time to adjust crust thickness—longer for crunchier, shorter for a tender finish.
Additionally, incorporating cornmeal and salt into the dough not only enhances flavor but also contributes to the characteristic crust texture.
Serving Suggestions and Storage Tips
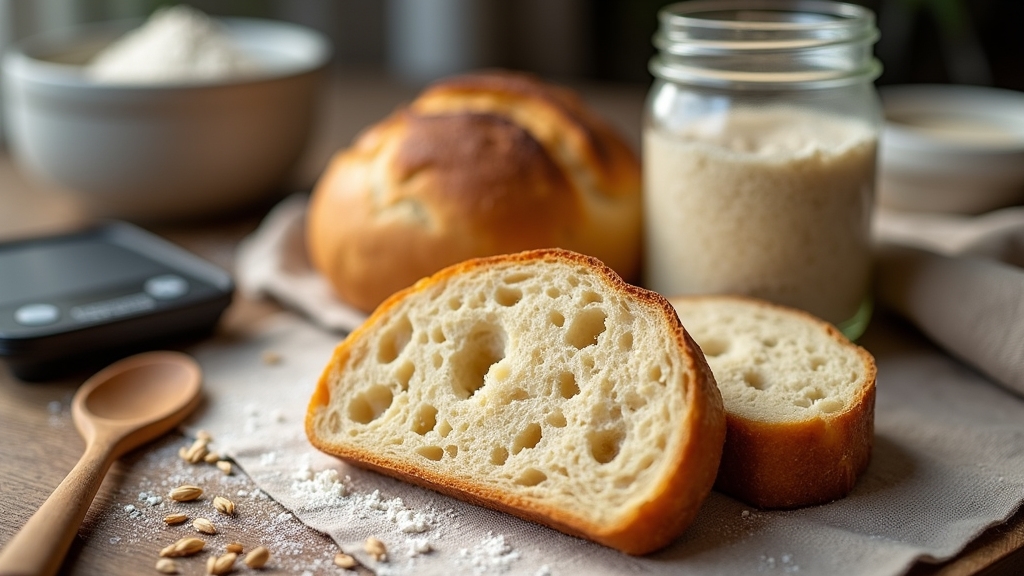
If you want to enjoy your sourdough English muffin bread at its best, serving it thoughtfully and storing it properly is key. Slice and toast it for a classic breakfast, slathering butter or jam. Pair it with eggs and avocado for a hearty start. Its light and airy texture makes it ideal for both toasting and eating plain.
Sweeten it with honey or peanut butter, or serve alongside soups and cheeses for lunch and dinner. Traditionally, dipping it in hot cocoa or coffee offers a comforting treat.
Store your bread in an airtight container at room temperature for 3–4 days to preserve freshness. Avoid refrigeration, which dries it out.
For longer storage, slice and freeze tightly wrapped for up to 3 months.
Reheat slices in a toaster or oven, and enjoy immediately for the best texture and flavor.
Frequently Asked Questions
Can I Use Gluten-Free Flour for Sourdough English Muffin Bread?
Yes, you can use gluten-free flour for sourdough English muffin bread, but expect some challenges.
You’ll need a specialized gluten-free blend and binders like psyllium husk to mimic gluten’s structure.
Your dough will be less stretchy and rise less, so longer fermentation and careful hydration are key.
Mixing gently and baking longer at moderate heat helps.
With patience and adjustments, you can enjoy a tasty gluten-free sourdough English muffin loaf.
How Do I Revive a Dormant Sourdough Starter for This Recipe?
You might think reviving a dormant sourdough starter takes forever, but it’s simpler than you imagine.
Start by feeding it equal parts filtered lukewarm water and the flour it loves, every 24 hours.
Keep it cozy between 70°F and 78°F.
Watch for bubbles and a tangy aroma; that’s life returning!
Stir gently to keep it fluffy, mark its growth with a rubber band, and soon you’ll have a lively starter ready to bake.
Is It Possible to Freeze the Baked Sourdough English Muffin Bread?
Yes, you can definitely freeze baked sourdough English muffin bread.
Just make sure it’s fully cooled for at least six hours to keep moisture from building up.
Wrap it tightly in plastic wrap or foil, then seal it in an airtight freezer bag.
For slices, freeze them individually on a tray first.
When you’re ready, thaw at room temperature still wrapped, or toast slices directly from the freezer to revive that perfect crust and texture.
What Are Common Troubleshooting Tips for Dense or Flat Bread?
If your bread turns out dense, check your flour type and use bread flour or add gluten.
Avoid overmixing and knead just until elastic. Make sure your oven temperature is accurate with a thermometer.
For flat bread, ensure proper rising time; let the dough double in size and preheat your oven.
Shape the dough correctly and create steam while baking to encourage a good rise and crust.
Can I Add Herbs or Spices to Enhance the Bread’s Flavor?
Yes, you can definitely add herbs or spices to boost your bread’s flavor! Fresh herbs like rosemary or thyme bring vibrant aromas, while dried versions pack a stronger punch; use them sparingly.
Try mixing herbs into your dough early for even flavor or brush herb-infused oil on top before baking. Spices like cinnamon or caraway add unique twists.
Just balance carefully so you don’t overpower your bread’s natural tangy taste.
Simple Recipe, Easy & Delicious English Muffin Bread
Now that you’ve mastered your sourdough English muffin bread, remember that good things come to those who wait. This process, though patient, rewards you with a crusty, flavorful loaf that’s truly worth the time.
Keep nurturing your starter, perfect your kneading, and enjoy the delightful aroma filling your kitchen. Whether toasted or fresh, your homemade bread will elevate any meal.
So, savor each bite and store it properly to enjoy that fresh-baked goodness longer.