Sourdough Challah Bread Recipe: Every Loaf is a Fleeting Freshness
Ready to bake a stunning sourdough challah bread? Start with high-quality bread flour, active sourdough starter, eggs, honey, and salt.
Mix a bubbly levain overnight at 23-24°C, then knead your dough until smooth and elastic. Ferment it at 78-80°F for 4-5 hours, shape into intricate braids, and bake at 350°F until golden, hitting 200-205°F internally.
Cool on a wire rack. Stick around to uncover deeper secrets for a flawless loaf.
Key Takeaways
- Use high-quality bread flour and active sourdough starter for optimal structure and flavor.
- Mix levain with a 1:1:1 ratio, fermenting overnight at 23-24°C until bubbly.
- Knead dough with eggs, sweetener, and oil for 8-10 minutes until smooth.
- Braid dough into 3, 4, or 6 strands, then proof at 78-80°F for 4-5 hours.
- Bake at 350°F for 25-40 minutes, cooling on a wire rack for 2 hours.
Gathering Your Ingredients

As you commence the rewarding journey of making sourdough challah, gathering the right ingredients is your first essential step. Immerse yourself in this process with fervor, ensuring you’ve got bread flour for that perfect structure, thanks to its high protein content.
Grab water at 75°F to 78°F to hydrate your dough flawlessly. Don’t skimp on eggs—2 to 6 will enrich and bind your mix. Sweeten with honey or sugar for taste and browning, and measure 10-17 grams of salt to boost flavor.
Add a neutral oil like sunflower for texture, and keep sesame seeds handy for a crunchy topping. Equip yourself with precise measuring cups and scales, large mixing bowls, and a trusty dough whisk to blend with passion and precision. For the most accurate measurements, invest in a digital baking scale to ensure consistency in your sourdough challah recipe. Remember to have an active sourdough starter ready, as it’s crucial for achieving that distinct tangy flavor.
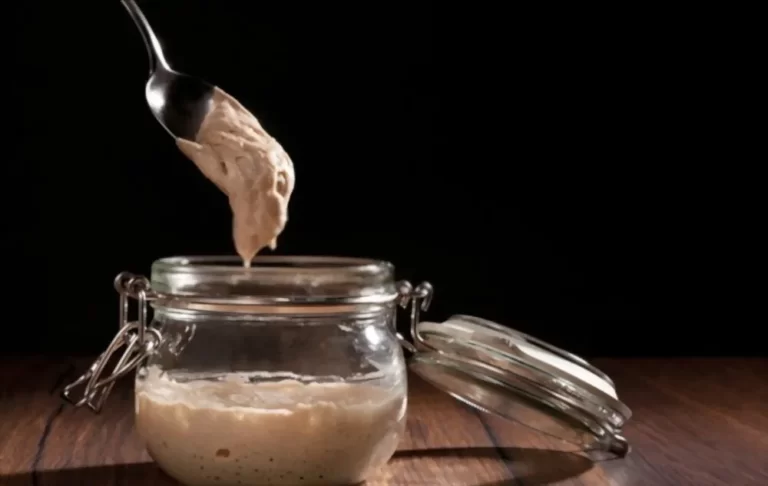
Preparing the Levain
Now that you’ve gathered your ingredients with care, let’s move into the heart of crafting sourdough challah by preparing the levain.
Grab your active sourdough starter, bread flour, and water—stick to a 1:1:1 ratio for balance, or tweak it per your recipe. If you’re craving a sweeter profile, toss in a pinch of sugar to boost fermentation and complexity.
Mix thoroughly until it’s smooth, then place it in a warm spot, around 23-24°C, to encourage vibrant fermentation. Remember to observe for bubbles and a yeasty aroma as signs of active fermentation within the first day.
Blend until silky, then nestle it in a cozy nook at 23-24°C to spark lively fermentation for your sourdough magic.
Let it rest for 5 to 12 hours, ideally overnight, until it’s bubbly with a sweet aroma signaling ripeness.
Watch it closely; a healthy, aerated levain is your foundation for an unforgettable sourdough challah. Passion drives perfection here! To manage flavor, consider using a sweet levain with added sugar to reduce sourness during fermentation.
Mixing the Dough
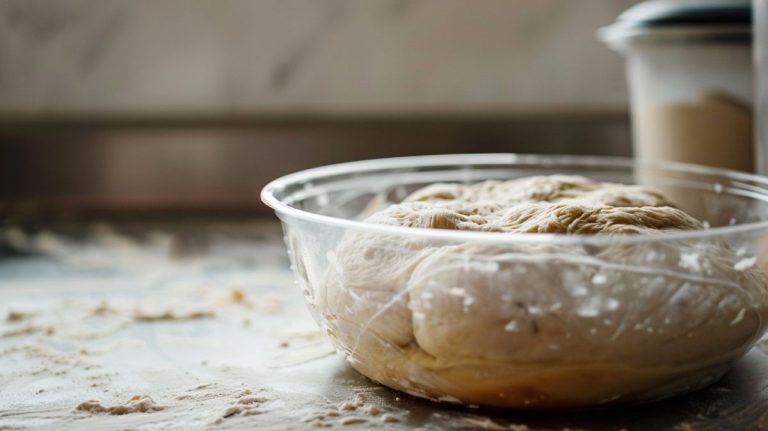
With your levain bubbling and ready, immerse yourself in the essential step of mixing the dough for your sourdough challah.
Gather your ingredients—medium-protein flour for structure, eggs for richness, sweetener for flavor, and salt to strengthen gluten—and weigh them precisely using a kitchen scale.
Place everything except oil into your stand mixer’s bowl, and knead for 2–5 minutes until just combined; it’ll feel sticky, but that’s normal.
Gradually drizzle in the oil, kneading for another 8–10 minutes until the dough turns smooth and elastic, passing the windowpane test.
Keep liquids chilled, monitor the dough’s temperature (aim for 75–78°F), and scrape the bowl often.
Ensure your sourdough starter is healthy by checking for consistent feeding schedules to prevent any risk of mold contamination.
Craft this dough with care—it’s the foundation of your stunning, braided masterpiece.
This step builds the gluten structure, ensuring your challah achieves that desirable soft, fluffy texture.
Fermentation and Resting
As you begin the fermentation and resting stage of your sourdough challah, recognize that this process is the heart of crafting a loaf with unparalleled depth and character.
You’ll need to monitor ideal resting periods, typically 4 to 5 hours at 78-80°F, to guarantee the dough expands just right, becoming airy and elastic without losing structure. During this bulk fermentation, expect the dough to double in size double in size as a sign of proper aeration and gluten strength. Performing stretch and folds during this period can further enhance gluten structure and improve the dough’s texture.
Watch closely as fermentation weaves complex flavors into your bread, transforming simple ingredients into a tangy, rich masterpiece that’s worth every moment of patience.
Importance of Fermentation
While crafting sourdough challah, you’ll find that fermentation isn’t just a step—it’s the heart of the process, shaping both flavor and texture with remarkable precision. Keep your dough in a warm spot, ideally 74-80°F (23-27°C), to ignite active yeast and bacterial magic, ensuring a lighter, airier loaf. Use a ripe starter and levain to fuel consistent rise and that signature tangy depth.
During bulk fermentation, lasting 4 to 5 hours, perform stretch and folds to build gluten strength, creating an elastic, aerated dough. Proper fermentation breaks down gluten, boosts digestibility, and crafts a fluffy crumb.
Aim for a dough that becomes puffy and about 1.5 times its original size during fermentation. Additionally, proper fermentation can lower glycemic index, potentially making your bread more suitable for health-conscious eaters.
Monitor closely—over-fermentation risks a slack, sour mess, while perfect timing yields a cloud-like texture that elevates your challah to perfection.
Optimal Resting Periods
Diving into the art of sourdough challah, you’ll discover that ideal resting periods are the backbone of crafting a loaf with unparalleled texture. Start by preparing your levain 8 to 12 hours before mixing the dough, ensuring it ferments at 76°F to 78°F in a warm, draft-free spot.
After mixing, let the dough undergo bulk fermentation for 2 to 5 hours at 78°F, monitoring for a near-double in size and folding gently to build structure. For even better flavor, consider a cold overnight proof in the refrigerator for 12-18 hours. This extended fermentation also helps in developing a tangier sourdough taste due to the activity of wild yeast and bacteria over time.
Post-shaping, give it a 30-minute rest before braiding. Then, final proofing takes about 5 hours at the same temperature—check readiness with a gentle poke.
Keep conditions consistent, and you’ll coax out the dough’s full potential with every meticulous rest.
Flavor Development Process
Building on the foundation of ideal resting periods, let’s explore how fermentation and resting shape the soul of your sourdough challah’s flavor.
Immerse yourself in the magic of sweet levain, with 40% sugar to flour, curbing sourness while boosting yeast for a stellar rise and subtle tang.
Keep bulk fermentation at 74°F–80°F for 4–5 hours; this warmth speeds up yeast activity without over-souring, ensuring airy, elastic dough.
Perform three sets of stretch and folds every 30 minutes early on to build gluten and even out gases for flawless braids.
Extend fermentation or cold-proof overnight to deepen complexity, letting enzymes break down starches for a sweeter, nuanced taste.
Your challah’s flavor will sing with every bite!
Additionally, incorporating high-quality ingredients like extra-virgin olive oil can enhance richness and moisture in the dough, elevating the overall flavor profile.
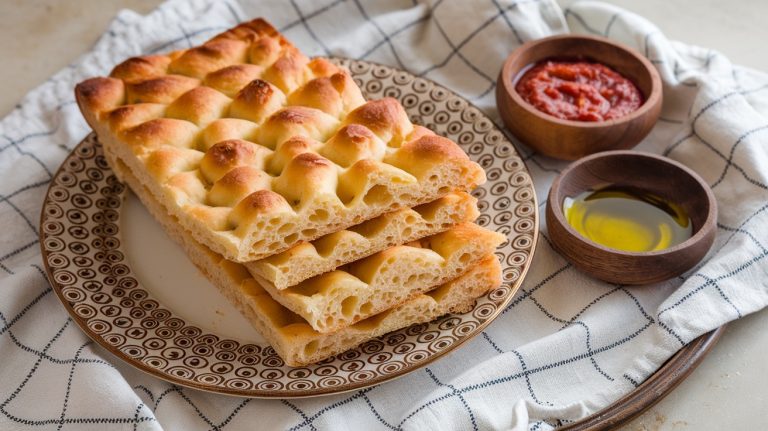
Shaping and Braiding Techniques
As you begin shaping and braiding your sourdough challah, prepare to transform cold, stiff dough into a stunning masterpiece with ease and precision. Cold dough handles beautifully, so divide it evenly using a scale for uniform strands.
Preshape into rounds, rest briefly, then roll into long, tapered strands of 40–45 cm, letting the dough relax if it resists. Remember to knead with patience, as proper kneading techniques develop gluten for the perfect texture.
Dive into shaping sourdough challah with cold, pliable dough, crafting uniform strands for a masterpiece of precision and beauty.
Master your braid with passion by following these tips:
- Pinch tops tightly* to secure strands.
- Choose your pattern*—3, 4, or 6-strand—and use guides for accuracy.
- Avoid stretching* to preserve fluffiness.
- Seal ends neatly* by rolling and tucking underneath.
- Transfer gently* to a baking sheet edge, maintaining shape.
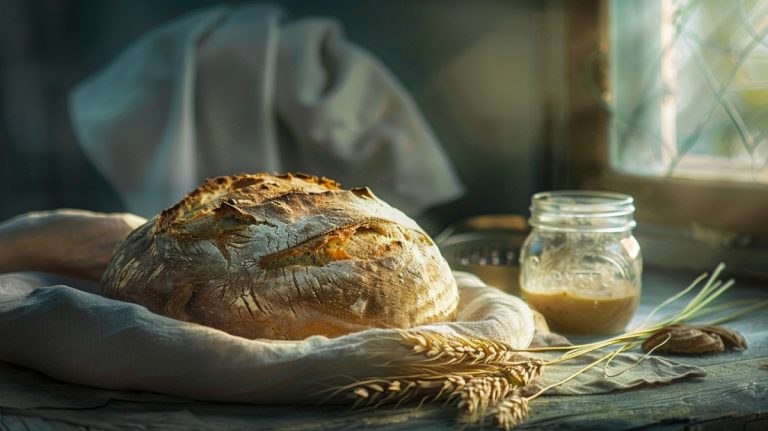
Baking the Challah
Three essential steps await as you commence on baking your sourdough challah, turning your braided masterpiece into a golden, aromatic delight. First, preheat your oven to 350°F (180°C) for even cooking, ensuring it’s fully heated for ideal crust development.
Next, confirm your dough’s readiness after a 4-to-6-hour final proof at 78°F to 85°F (25-29°C). It should feel airy, jiggle slightly, and spring back when pressed.
Then, gently brush on an egg wash—beat one egg with a splash of water—for that glossy sheen, adding sesame seeds if you’d like extra flair.
Finally, bake for 25 to 40 minutes, aiming for an internal temperature of 200°F to 205°F (93-96°C). Watch for a deep golden crust and listen for a hollow tap underneath. For precise measurements of ingredients like salt or yeast, using stainless steel spoons ensures accuracy and durability in your baking process.
Cooling and Storage Tips
Hey, you’ve baked a stunning sourdough challah, so let’s guarantee it stays perfect with precise cooling techniques by setting it on a coated wire rack for full air circulation. Cover it with a breathable bamboo towel to balance moisture for about 2 hours.
Then, nail the storage game by wrapping your fully cooled loaf in a tea towel and tucking it into a brown paper bag. This will keep that crust irresistibly crisp for days. Remember, storing sourdough at room temperature is ideal to maintain moisture and prevent staleness.
Proper Cooling Techniques
While your sourdough challah emerges golden and fragrant from the oven, don’t rush to slice into it just yet. Cooling it properly is *essential* to preserve that perfect crumb and crisp crust you’ve worked so hard for.
Transfer it immediately to a wire rack for airflow, preventing sogginess, and let it rest at room temperature for 1-2 hours until just slightly warm inside. Cooling on a rack also promotes even temperature and moisture release for consistent results.
Here’s how to nail the cooling process with passion and precision:
- Place it in a well-ventilated, draft-free spot.
- Avoid solid surfaces that trap steam.
- Don’t cover it if humidity’s high; use a loose towel if it’s dry.
- Never cool in the fridge—staling happens faster!
- Wait patiently for a flawless texture.
- Proper cooling techniques can enhance storage life, much like freezing unbaked pies preserves texture in savory dishes.
Effective Storage Methods
After mastering the art of cooling your sourdough challah to perfection, let’s focus on keeping that golden loaf fresh and flavorful for as long as possible.
Store it in a cool, dry spot between 60-70°F, away from sunlight or heat, to prevent staling and mold.
Wrap your bread in a breathable tea towel or cloth bag to balance moisture and maintain that crisp crust—avoid plastic unless freezing.
Don’t refrigerate; it’ll dry out your challah faster.
For long-term storage, freeze it tightly wrapped in plastic wrap to dodge freezer burn, then thaw at room temp in a cloth. Freezing halts the retrogradation process, preventing staling effectively over time.
Check regularly for mold, and if you spot any, discard immediately.
Customizing Your Recipe
As you immerse yourself in the art of crafting sourdough challah, customizing your recipe becomes an exciting journey of personal expression. Plunge into tweaking flavors and textures to make each loaf uniquely yours. Experiment with honey or maple syrup to adjust sweetness, or add cinnamon for warm, aromatic depth.
Play with hydration by increasing water for a lighter crumb, or swap in milk for richness.
Try these passionate customizations:
- Vary braiding with 4 or 6 strands for stunning visual flair.
- Mix in walnuts or raisins for delightful texture surprises.
- Use olive oil or tahini to deepen flavor and tenderness.
- Extend fermentation in the fridge for a complex, tangy bite.
- Top with sesame seeds for crunch and elegance.
Frequently Asked Questions
What Is the History of Challah Bread?
Imagine challah bread as a golden thread weaving through history, binding ancient rituals to modern tables.
You’ll uncover its roots in biblical commandments, where dough offerings honored priests.
Trace its journey through medieval South Germany, adopting the name “challah,” and watch braiding traditions emerge in 15th-century Austria.
Feel the sweetness of Polish sugar and U.S. innovations.
You’re tasting centuries of Jewish culture in every sacred, braided bite!
Why Is Challah Significant in Jewish Culture?
Hey, immerse yourself in the heart of Jewish culture, and you’ll find challah at its core. You’re embracing a sacred tradition on Shabbat and holidays, reciting blessings over this braided bread that symbolize unity and gratitude. It’s not just food; it’s your connection to heritage, embodying hospitality and sanctity.
Feel the passion in every loaf you share, linking generations and showcasing Jewish identity with every tender, meaningful bite.
Can Challah Be Made Without Sourdough Starter?
Did you know over 95% of online challah recipes rely on commercial yeast? You can absolutely make challah without a sourdough starter! Grab some active dry or instant yeast, and you’re set for a reliable, quick rise.
Measure precisely, mix with honey, eggs, and flour, then watch your dough transform. With passion, knead it smooth, let it proof, and bake a golden, traditional loaf you’ll cherish!
How Does Challah Differ From Other Breads?
Hey, let’s explore how challah stands out from other breads! You’ll notice its rich, tender crumb, thanks to eggs and oil, not dairy or butter, keeping it kosher and pareve.
Unlike leaner loaves, it’s slightly sweet with honey or sugar, and its iconic braided shape symbolizes unity.
That golden, glossy crust? It’s pure magic! Challah’s deep cultural roots in Jewish tradition make it uniquely meaningful on your table.
What Are Common Challah Serving Traditions?
Immerse yourself in the rich traditions of serving challah with heartfelt joy! You’ll slice this sacred bread at the start of Shabbat or holiday meals, often sprinkling salt to symbolize preservation and covenant.
Pair it with dips or spreads, and savor it alongside festive dishes. Don’t forget, you can transform leftovers into delectable French toast.
Sharing challah binds your community, marking every occasion with deep, sacred meaning.
The Art of Sourdough Challah—Customize, Create, Celebrate
You’ve crafted a masterpiece, a sourdough challah that weaves golden strands of tradition and tangy innovation into every bite. Let its warm, crusty embrace envelop your senses, a hearth of memories baked into each slice.
Store it with care, as if guarding a treasure, and savor the fleeting magic of its freshness. Customize it, dream with it—make this bread your canvas, painting flavors across your table’s endless horizon.