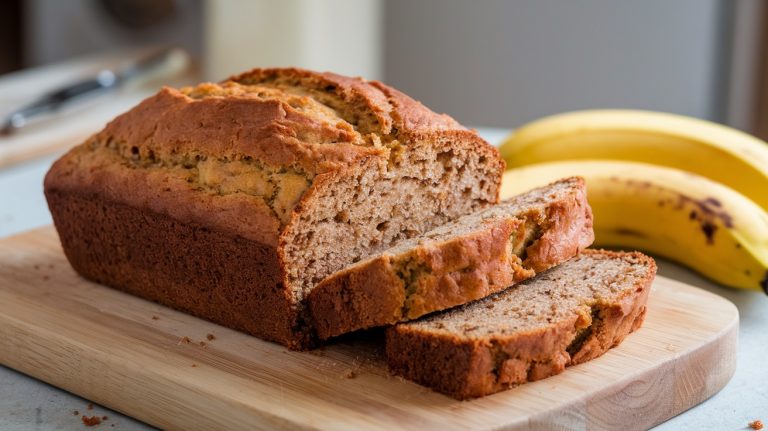
Recipe for Pound Cake Using Self Rising Flour: Moist & Easy
Start by creaming softened butter with sugar until pale and fluffy. Add eggs one at a time for proper emulsification.
Gently fold sifted self-rising flour and sour cream alternately, avoiding overmixing to keep the crumb tender and light.
Use a greased 9×5-inch loaf pan and bake at 325°F for 55–65 minutes, testing doneness with a toothpick.
Let cool before removing and storing airtight at room temperature. Mastering these steps guarantees a moist, airy pound cake; there’s more to perfect every detail.
Key Takeaways
- Use 2 cups sifted self-rising flour combined with 1/2 cup softened butter creamed with 3/4 cup sugar for consistent leavening and texture.
- Cream butter and sugar on medium speed until pale and fluffy, then add 2 eggs one at a time for stable emulsification.
- Fold flour in thirds alternated with 1/2 cup plus 1 tablespoon sour cream and 1/4–1/2 cup milk gently to avoid overmixing and gluten toughness.
- Bake in a greased and floured 9×5-inch loaf pan at 325°F for 55–65 minutes, testing doneness with a toothpick and spring-back touch.
- Cool cake in the pan briefly before removing to preserve moisture and maintain tender, light, fluffy crumb texture.
Recipe Table for Pound Cake Using Self Rising Flour
| What you need/do | Amount / Setting | Key tip |
|---|---|---|
| Self-rising flour (sifted) | 2 cups | Fold gently to keep a tender crumb |
| Butter (softened) + sugar | 1/2 cup + 3/4 cup | Cream until pale and fluffy (about 2–3 min) |
| Eggs | 2 | Add one at a time for smooth batter |
| Sour cream + milk | 1/2 cup + 1 Tbsp + 1/4–1/2 cup | Alternate with flour; stop when just combined |
| Vanilla | 1 tsp | Boosts classic pound cake flavor |
| Pan + oven | 9×5 loaf, 325°F | Grease + flour for clean release |
| Bake + cool | 55–65 min | Toothpick: clean or moist crumbs; cool 5–15 min in pan |
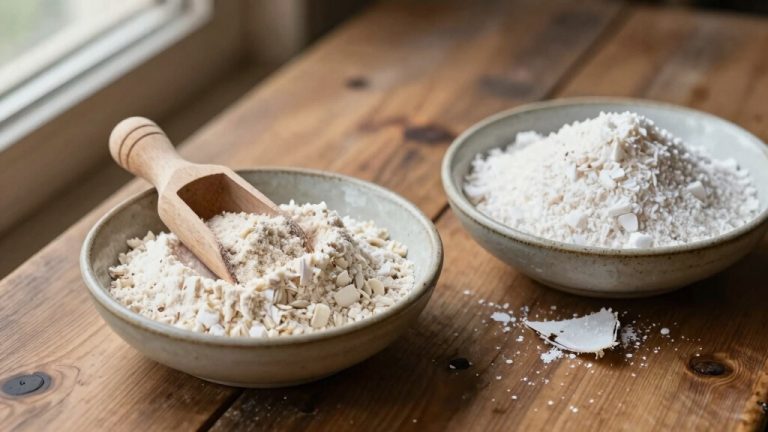
What Makes Self-Rising Flour Ideal for Pound Cake?

Self-rising flour simplifies your pound cake preparation by combining flour, baking powder, and salt in precise proportions. This ensures consistent leavening and proper texture without extra measuring.
Self-rising flour streamlines pound cake baking by blending flour, baking powder, and salt for perfect texture every time.
When you use self-rising flour, you eliminate the guesswork of balancing rising agents, which helps the cake rise evenly. This flour’s built-in leavening prevents uneven crumb structure and dense spots.
You should always sift or whisk the self-rising flour before measuring to distribute the leavening agents properly. Because it contains salt, you can reduce added salt in your recipe, maintaining flavor balance.
Using self-rising flour also cuts down on mixing steps, reducing the risk of overmixing and toughening the cake. Overall, self-rising flour guarantees a tender, moist crumb with a fine, uniform texture ideal for pound cakes.
For best results, consider baking your pound cake on parchment paper to ensure even baking and easy removal without sticking.
How to Prepare Ingredients for a Smooth Pound Cake Batter?
Before you begin mixing, make sure all your ingredients are at room temperature. This step is essential for achieving a smooth, well-emulsified batter.
Remove butter, eggs, and any dairy like sour cream or milk from the fridge about an hour before starting. This prevents curdling and helps ingredients combine evenly.
Next, sift your self-rising flour to eliminate lumps and aerate it for better texture. Measure flour accurately using a spoon and level it off with a knife to avoid packing.
Crack eggs into a separate bowl to check for freshness and shells. Have your vanilla and other liquids ready to add in sequence.
Proper preparation guarantees your batter mixes uniformly, creating the ideal consistency for a tender, classic pound cake.
Understanding the importance of gluten development in dough can also inform your approach to batter texture and mixing techniques.
How to Cream Butter and Sugar for Perfect Pound Cake Texture?
Alright, let’s get started on creaming your butter and sugar for that perfect pound cake texture!
First things first, make sure your butter is at room temperature. You’ll want to cream it with the sugar on medium speed. Keep mixing until the mixture turns a lovely pale yellow and feels light and fluffy—this usually takes about 2 to 3 minutes.
Now, here’s a little tip: use a paddle attachment or a sturdy whisk for this step. It’s super important not to rush through it! Proper air incorporation is key here; it’s what gives your cake that tender crumb we all love.
Just remember, timing is everything—once you reach that perfect consistency, stop mixing! Overmixing can really mess with the texture, and we definitely don’t want that. Happy baking! Using heavy-gauge materials for your baking pans can also help achieve even heat distribution for consistent cake results.
Butter And Sugar Consistency
Achieve the perfect pound cake texture by creaming butter and sugar until light and fluffy, which usually takes about 2 to 3 minutes on medium speed. You’ll know it’s ready when the mixture turns pale yellow and has noticeably increased in volume.
This process incorporates air, creating tiny bubbles that help your cake rise evenly and develop a tender crumb. Use room temperature butter for smooth blending, and scrape down the bowl’s sides to guarantee even creaming.
Avoid rushing the process; under-creaming leads to dense cake, while over-creaming can cause collapse during baking. The sugar should dissolve partially into the butter, creating a smooth, almost creamy texture.
Mastering this step lays the foundation for a moist, fine-textured pound cake every time. Using a KitchenAid Artisan Series mixer can help achieve consistent results due to its powerful motor and precise mixing capabilities.
Mixing Techniques And Timing
While creaming butter and sugar, maintain a consistent medium speed to guarantee the mixture becomes smooth and pale yellow within 2 to 3 minutes.
This step is vital for incorporating air, which creates the pound cake’s tender crumb and light texture.
Follow these steps precisely:
- Use room temperature butter to make sure it creams evenly without lumps.
- Beat the butter and sugar until the color lightens and the texture becomes fluffy; don’t rush this; stop at 2-3 minutes.
- Scrape down the bowl periodically to mix all ingredients uniformly and prevent clumps.
Avoid speeding up the mixer; too fast causes air bubbles to collapse, ruining texture.
Proper timing and mixing result in a smooth, even batter ready for adding eggs and flour.
Using a mixing bowl with a non-slip base can help maintain bowl stability during this process, making mixing easier and more consistent.
Why Adding Eggs One at a Time Creates a Light Pound Cake?
Adding eggs one at a time helps you create a light pound cake by allowing each egg to fully incorporate into the butter and sugar mixture, promoting better emulsification.
When you add eggs gradually, the fat in the butter and the proteins in the eggs combine smoothly, trapping air and creating a stable batter structure.
This process prevents curdling or separations which can happen if you add eggs all at once.
As you mix each egg in, the batter becomes pale and slightly thickened, indicating that air is being incorporated uniformly.
This step-by-step blending guarantees consistent texture and even distribution of moisture.
This gradual incorporation also strengthens the interfacial layer between fat and water phases, enhancing the emulsion’s stability throughout baking.
How to Incorporate Self-Rising Flour Without Overmixing Batter?
When you’re adding self-rising flour, it’s important to handle it gently. Use a spatula to fold it in, which helps keep that nice airy texture in your batter.
Try adding the flour in thirds. Just mix in each portion until it’s no longer visible—that way, you won’t overmix. This little trick is key to ensuring your pound cake turns out tender and light. Happy baking!
For best results, measure your ingredients precisely using engraved stainless steel measuring spoons to maintain accuracy and consistency.
Importance Of Gentle Folding
Incorporating self-rising flour gently guarantees your pound cake batter stays light and tender. Overmixing activates gluten, making the cake dense and tough.
To fold correctly, follow these steps:
- Use a large spatula and scoop from the bottom up, turning the bowl gradually to mix evenly.
- Pause folding as soon as you no longer see dry flour streaks to avoid overworking the batter.
- Incorporate flour in small batches to maintain control and prevent heavy mixing.
This gentle folding technique preserves the air bubbles created during creaming, ensuring a moist, tender crumb. Using an ergonomic silicone spatula with flexible edges helps achieve thorough but gentle folding without damaging the batter.
Timing Flour Addition
Although it’s tempting to pour in all the flour at once, you should add self-rising flour gradually and in stages to avoid overmixing.
Begin by sifting the flour to remove lumps and aerate it. Add one-third of the flour to your creamed butter, sugar, and eggs, then fold gently using a spatula or low-speed mixer setting.
Once incorporated, alternate adding the remaining flour in two batches with your liquid ingredients, maintaining gentle folding after each addition. This staged approach helps distribute the flour evenly without developing excess gluten, which would toughen the cake.
Avoid beating vigorously once flour is introduced. Stop mixing as soon as the flour disappears into the batter. Proper timing keeps your pound cake tender and ensures the self-rising flour’s leavening agents activate correctly.
Using a flour sifter before adding the flour can improve aeration and help achieve a lighter texture in your pound cake.
Effects On Cake Texture
Adding self-rising flour gradually helps protect the cake’s tender crumb by preventing gluten overdevelopment. When you mix all the flour at once, you risk overworking the batter, which tightens gluten strands and results in a dense, tough texture.
To maintain a light, fluffy cake, follow these steps:
- Add the flour in 3 equal parts, folding gently after each addition until just incorporated.
- Avoid beating or stirring vigorously once the flour is added; use a spatula instead of a mixer.
- Stop mixing as soon as you no longer see dry flour; some small lumps are okay.
This method keeps your pound cake moist and tender while allowing the self-rising flour’s leavening agents to work most effectively.
Using Sour Cream and Milk With Self-Rising Flour for Moist Pound Cake
Frequently, using a combination of sour cream and milk with self-rising flour creates a moist, tender pound cake by balancing acidity and moisture.
Start by measuring 2 cups of self-rising flour and sifting it to ensure even distribution of leavening agents.
In your mixing bowl, cream 1/2 cup softened butter with 3/4 cup sugar until pale and fluffy.
Add 2 eggs one at a time, blending well after each addition.
Alternate adding the flour with 1/2 cup plus 1 tablespoon sour cream and 1/4 to 1/2 cup milk, starting and ending with flour.
This combination enhances batter moisture without thinning it.
Finish with 1 teaspoon vanilla.
Mix just until incorporated to avoid toughness.
The acidity in sour cream activates baking powder, producing a tender crumb.
For longer storage, consider vacuum sealing your pound cake to maintain freshness and moisture using vacuum sealing techniques.
How to Choose and Prepare the Right Pan for Pound Cake?
When it comes to baking a pound cake, picking the right pan is super important. You’ll want to go for a heavy-gauge metal or nonstick pan. This way, you’ll get that nice even heat distribution and it’ll be easier to release your cake when it’s done.
Don’t forget to grease your pan well! A good coating of baking spray or shortening will do the trick. After you’ve greased it, dust it with some flour and shake out the extra. This little step can really help prevent sticking.
Now, let’s talk about size and shape. It’s best to choose a pan that matches your recipe, which is usually a 9×5-inch loaf or a bundt pan. This ensures that your cake bakes properly and has the right texture. Happy baking!
Pan Material Options
Selecting the right pan material plays a crucial role in achieving the perfect texture and even baking of your pound cake. Different materials conduct heat uniquely, affecting how your cake rises and browns.
- Aluminum: Offers quick, even heating. It prevents hot spots, ensuring a uniformly baked cake. Ideal for loaf pans, it’s lightweight and durable.
- Glass: Heats slower but retains heat longer. Glass pans may require lowering the oven temperature by 25°F to prevent over-browning. Use for softer crusts and moist interiors.
- Non-stick: Provides easy release, but avoid metal tools to protect the coating. It heats evenly but can brown the cake faster, so monitor baking time closely.
Choose wisely based on your oven and desired crust. Each pan type influences texture and baking time.
Greasing And Flour Techniques
Prepare your pan carefully by greasing it thoroughly with baking spray, shortening, or softened butter to ensure your pound cake releases easily after baking.
After greasing, dust the pan with flour and tap out excess to prevent sticking and promote even browning. Use self-rising flour for dusting to complement your batter.
Choose pans with nonstick surfaces or heavy-gauge metal for even heat distribution. Avoid glass or ceramic, which can cause uneven baking.
| Pan Type | Greasing Technique |
|---|---|
| Nonstick | Light baking spray |
| Aluminum | Shortening + flour dusting |
| Heavy-gauge | Butter + self-rising flour |
| Bundt | Shortening + flour dusting |
| Loaf | Butter + flour dusting |
Proper preparation ensures a smooth release and evenly baked pound cake every time.
Pan Size And Shape
The size and shape of your baking pan directly influence the texture, baking time, and final appearance of your pound cake.
Choosing the right pan guarantees even baking and the desired crumb.
Here’s how to pick and prep it:
- Select pan size: Use a standard 9×5-inch loaf pan for a classic shape. Larger pans require longer baking, while smaller pans reduce time.
- Consider shape: Bundt pans create decorative cakes but may need greasing with shortening and flour to prevent sticking. Loaf pans are simpler and yield a denser crumb.
- Prepare thoroughly: Grease your pan with baking spray or shortening, then dust with flour. Shake out excess to avoid soggy edges.
Following these steps helps you bake a pound cake with ideal texture and an attractive finish.
Best Oven Temperatures and Baking Times for Moist Pound Cake
When you bake pound cake, maintaining a consistent oven temperature between 300°F and 350°F guarantees even cooking and moisture retention. Baking at 300°F slows browning, allowing the cake to cook through without drying out.
Baking at 350°F shortens baking time but requires careful monitoring to prevent overbaking. Use greased and floured pans for best results.
| Oven Temp (°F) | Baking Time | Result |
|---|---|---|
| 300 | 60 minutes | Moist, tender crumb |
| 325 | 55-65 minutes | Balanced texture & color |
| 350 | 60-75 minutes | Slightly firmer crust |
Adjust times based on pan size and altitude. Always preheat your oven fully before baking.
How to Know When Your Pound Cake Is Done?
Baking times and temperatures guide you, but knowing exactly when your pound cake is done guarantees perfect results every time. Relying solely on the clock can lead to underbaked or dry cake.
Instead, use these precise methods:
- Toothpick Test: Insert a clean toothpick into the center. If it comes out clean or with a few moist crumbs, your cake is ready. Wet batter means it needs more time.
- Spring-Back Touch: Gently press the top of the cake. If it springs back quickly, the structure is set. A slow or no spring indicates it’s underbaked.
- Visual Cues: The edges should pull slightly away from the pan, and the top must be golden brown, not wet or shiny.
Using these indicators guarantees a perfectly baked pound cake every time.
Tips for Cooling, Storing and Serving Your Pound Cake
Although it’s tempting to dive right in, you should let your pound cake cool in the pan for 5 to 15 minutes to firm up and prevent breaking when you remove it.
Then, carefully loosen the edges with a knife and invert it onto a wire rack to cool completely. Avoid wrapping the cake while warm to prevent sogginess.
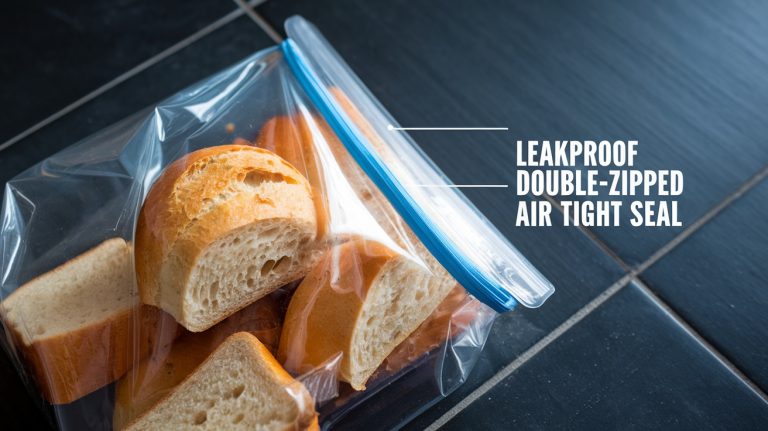
Once cooled, store your pound cake tightly wrapped in plastic or in an airtight container at room temperature. It will stay fresh for 3 to 4 days.
For longer storage, freeze the wrapped cake for up to 2 months; thaw at room temperature before serving.
Serve slices plain, toasted with berries, or topped with a dusting of powdered sugar for best flavor and texture.
Frequently Asked Questions
Can I Substitute Self-Rising Flour With Homemade Flour Mix?
Yes, you can substitute self-rising flour with a homemade mix by combining 1 cup all-purpose flour, 1 ½ teaspoons baking powder, and ¼ teaspoon salt.
Sift these together before measuring to guarantee even distribution. Use this blend in equal amounts to replace self-rising flour.
Just remember, this substitution works well in recipes that rely on the leavening in self-rising flour, so don’t add extra baking powder unless specified.
What Happens if I Use Salted Instead of Unsalted Butter?
Using salted butter instead of unsalted is like adding a tiny ocean of salt to your cake! It’ll increase the saltiness, which can overpower the delicate balance of flavors in your pound cake.
Since recipes are calibrated for unsalted butter, you should reduce or omit added salt in the recipe. Always taste and adjust carefully to avoid a salty cake.
Salted butter can also slightly affect the texture, making it denser.
How Does Cream Cheese Affect the Texture of Pound Cake?
Cream cheese makes your pound cake richer and moister by adding fat and moisture, creating a tender crumb.
It also gives your cake a slight tang, balancing sweetness.
When you beat it with butter and sugar, it emulsifies the batter better, helping trap air for a lighter texture.
Make sure your cream cheese is room temperature to blend smoothly, preventing lumps and ensuring even baking with a velvety finish.
Can I Freeze the Batter or Baked Pound Cake?
You shouldn’t freeze the batter because the leavening agents in self-rising flour lose effectiveness, affecting texture.
However, you can freeze baked pound cake. Wrap it tightly in plastic wrap, then foil, and store it in an airtight container or freezer bag.
Thaw it overnight in the fridge or at room temperature. This preserves moisture and flavor, ensuring your pound cake tastes fresh when you’re ready to enjoy it.
Is It Necessary to Sift the Self-Rising Flour Before Measuring?
Imagine a fluffy cloud of flour drifting gently into your mixing bowl. That’s what sifting self-rising flour does.
Yes, you should sift it before measuring to break up clumps and evenly distribute the leavening agents. This guarantees a light, tender crumb in your pound cake.
Sifting also prevents dense, uneven texture. So, always sift, then gently fold the flour into your batter to maintain that perfect, airy consistency.
Make-Ahead & Freezer Tips for Pound Cake Using Self Rising Flour
By following these steps, you’ll master a moist, tender pound cake every time. Did you know that self-rising flour contains about 1.5 teaspoons of baking powder per cup? This ensures perfect rise without extra effort.
Remember to cream butter and sugar thoroughly. Add eggs slowly and fold in flour gently, as these are key steps. Bake at the right temperature and test doneness with a toothpick.
Cool properly to preserve texture, then store airtight for freshness. Enjoy your flawless pound cake.