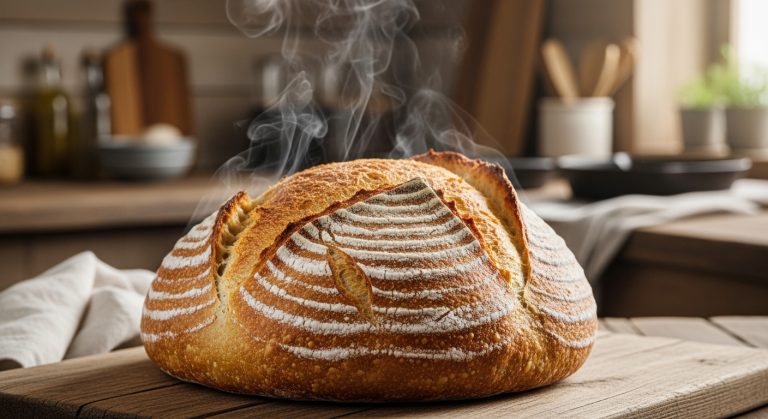
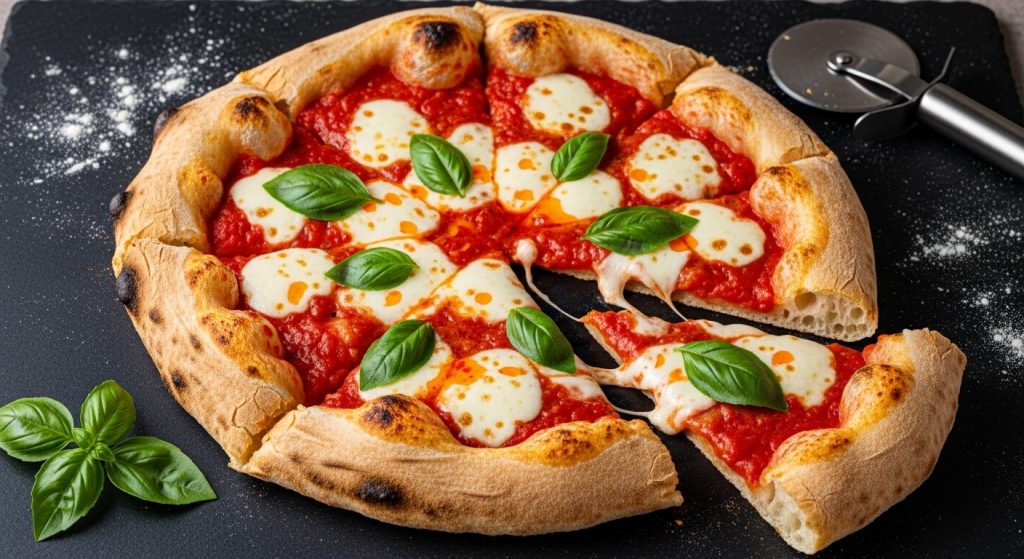
Neapolitan Sourdough Pizza Dough Recipe: Authentic Italian
To make authentic Neapolitan sourdough pizza dough, use Italian Tipo 00 flour with about 0.5 teaspoon yeast per 500g flour and salt at 2%.
Hydrate with room-temperature water at 60–65% for ideal texture. Mix flour and water first (autolyse), then add starter and salt, kneading until elastic.
Bulk ferment 4–6 hours at 75–79°F with stretch-and-folds, shape gently, proof at 16–18°C, then bake on a hot stone at 500–550°F.
Proper technique guarantees a chewy, flavorful crust. You’ll find detailed steps and tips that elevate your pizza-making next.
Key Takeaways
- Use Italian Tipo 00 flour with about 0.5 teaspoon of active yeast per 500g flour for authentic Neapolitan sourdough dough.
- Mix flour and water first for autolyse, then add starter and salt, kneading until elastic and rested for full hydration.
- Ferment dough at 75–79°F for 4–6 hours with stretch-and-folds every 30–45 minutes to develop gluten and flavor.
- Shape dough into taut balls, proof at 16–18°C for 24 hours in airtight containers to enhance rise and texture.
- Preheat oven or stone to 500–550°F, bake pizza quickly (2–5 mins) for blistered crust with tender, chewy crumb.
Complete Neapolitan Sourdough Pizza Dough Recipe Table
| Component | Details | Amount/Time | Temperature | Key Notes |
|---|---|---|---|---|
| Tipo 00 Flour | Italian finely milled | 500g (100%) | Room temp | Creates soft, chewy texture with ideal gluten |
| Filtered Water | Room temp or cold | 325g (60-65%) | 65°F | Provides proper hydration for handling |
| Sourdough Starter | Active and bubbly | 50-100g (10-20%) | Room temp | Natural leavening; complex flavor |
| Sea Salt | Fine grain | 10-12.5g (2-2.5%) | — | Enhances flavor; strengthens gluten |
| Yeast (optional) | Active dry | 0.5 tsp (0.1%) | — | Supports slow fermentation |
| Autolyse | Mix flour + water only | 20-30 minutes | 65°F | Activates enzymes for gluten development |
| Mix & Knead | Combine all ingredients | 8-10 minutes | 65°F | Knead until windowpane test passes |
| Bulk Fermentation | Stretch-and-fold every 30-45 min | 4-18 hours | 75-79°F | Dough doubles in size with visible bubbles |
| Shaping | Form into balls | 5-10 minutes | Room temp | Create taut surface; seam side up |
| Cold Proofing | Rest in airtight container | 24 hours | 61-64°F | Develops maximum flavor and texture |
| Final Rest | Before topping | 10-30 minutes | Room temp | Preserves gas bubbles for oven spring |
| Baking | On preheated stone/steel | 2-5 minutes | 500-550°F | Bake until leopard spotting appears |
Essential Ingredients for Authentic Dough
When crafting authentic Neapolitan sourdough pizza dough, you must start with the right ingredients, as each plays an essential role in developing the dough’s texture and flavor.
Italian Tipo 00 flour is your best choice, thanks to its finely milled texture and moderate protein level, which creates a soft, chewy crust. Many bakers find that using a mix made with high-quality flours significantly improves the dough’s rise and texture.
Italian Tipo 00 flour’s fine milling and balanced protein yield the perfect soft, chewy pizza crust.
Water should be clean and filtered, ideally at room or slightly cold temperature, maintaining around 60-65% hydration for balanced softness and handling. Cold filtered water aids in slow rise and flavor development in the dough.
Use small quantities of fresh, active dry, or instant yeast, about 0.5 teaspoon per 500 grams flour, to promote slow fermentation and complex flavor.
Sea salt, around 2-2.5% of flour weight, enhances flavor and strengthens gluten but must be evenly distributed away from yeast contact.
Prioritize ingredient quality for authentic results.
Preparing and Mixing the Dough
When it comes to preparing your dough, measuring your ingredients accurately is key. You want to make sure everything is just right so you can achieve consistent results and perfect fermentation every time. Sourdough fermentation enhances flavor, especially with a long cold fermentation. Using a banneton proofing basket can help maintain the dough’s shape during this critical phase.
Have you considered incorporating an autolyse step? It really helps with gluten development and makes the dough more extensible before you mix in the salt and starter.
Now, let’s talk about mixing techniques. Mastering these is crucial because it ensures that your dough is fully hydrated and has the right structure. This step really sets the stage for creating that authentic Neapolitan pizza you’re aiming for.
It’s all about getting those basics right!
Ingredient Measurements Precision
How precise are your ingredient measurements when preparing Neapolitan sourdough pizza dough?
Precision is critical to achieving the perfect texture and flavor. Use a digital scale to measure flour, water, salt, and sourdough starter accurately.
Typically, water should be about 65% of the flour weight, salt around 2%, and starter between 10-20%. Maintaining these ratios ensures consistent hydration and fermentation.
Keep these in mind:
Weigh “00” or “0” flour with a W value of 220-380.
Measure water precisely for desired dough hydration.
Control salt for flavor and dough strength.
Adjust starter amount based on potency.
Use digital scales for all ingredients.
Choosing the right baking tools can also improve the dough preparation process and final product.
This consistency guarantees a smooth, pliable dough that ferments properly and yields authentic Neapolitan pizza. Temperature control is also crucial since it influences yeast activity and fermentation speed, affecting dough flavor and structure.
Autolyse Process Benefits
Accurate ingredient measurements set the foundation, but mastering the autolyse process elevates the dough’s quality considerably.
By mixing flour and water and allowing them to rest, you activate enzymes that break down starches into sugars and proteins into gluten.
This enzymatic action enhances gluten development, creating a stronger, more extensible dough with improved hydration absorption.
As a result, your dough gains elasticity and structure, making it easier to handle and shape with less kneading.
The autolyse also boosts flavor by producing natural sugars that yeast feeds on during fermentation, leading to a richer, more complex crust.
Freezing sourdough dough after shaping and before baking can preserve its flavor and improve texture by promoting resistant starch formation.
Proper timing and water temperature during autolyse are vital. Enzymes like amylase and protease break down starches and proteins to improve dough quality.
Adapting the process to your flour type and environment ensures ideal dough consistency and a superior Neapolitan sourdough pizza crust.
Mixing Techniques Explained
Although mixing may seem straightforward, the technique you choose profoundly influences gluten development and dough texture in Neapolitan sourdough pizza.
Start by blending your 00 flour, water (around 65°F), sourdough starter, and salt just until combined. Avoid overworking here. Using Caputo Doppio Zero flour is essential for achieving the ideal elasticity and softness in the dough. For consistent results, precise measurement with a digital baking scale is highly recommended.
Then, let the dough rest 5–10 minutes to hydrate the flour fully.
When kneading, you can work by hand for 8–10 minutes or use a stand mixer until elastic and smooth, passing the windowpane test.
Keep in mind:
- Hand kneading offers tactile control and tradition.
- Stand mixers reduce mixing time and develop gluten efficiently.
- Oiled hands prevent sticking without adding flour.
- Under-kneading yields dense crusts; over-kneading toughens dough.
- Proper hydration (62.3%) balances extensibility and strength.
Master mixing to achieve a tender, chewy Neapolitan crust.
Bulk Fermentation and Gluten Development
During bulk fermentation, timing is really key. You want the dough to roughly double in size, which usually takes anywhere from 4 to 18 hours, depending on the temperature.
It can feel a bit like waiting for paint to dry sometimes!
To help strengthen the gluten and make the dough more elastic, try doing some regular stretch-and-fold techniques every 30 to 45 minutes. It’s a simple yet effective way to give your dough that perfect texture.
Oh, and don’t forget about the temperature! Keeping it around 75–79°F is crucial. It helps ensure that fermentation stays consistent and that gluten develops just right, giving you that strong, extensible dough we’re all aiming for.
Additionally, maintaining a hydration level of at least 65% hydration during mixing can significantly improve dough extensibility and reduce tearing during stretching.
Optimal Fermentation Timing
When you control fermentation timing carefully, you guarantee ideal gluten development and dough strength essential for Neapolitan sourdough pizza.
The bulk fermentation temperature between 24°C and 27°C accelerates gluten network formation, with higher temperatures around 26°C cutting fermentation time to about 4 hours.
Conversely, cold retardation at 4°C to 6°C slows fermentation, enhancing flavor and dough manageability.
Monitoring dough volume and bubbles helps prevent over-fermentation, preserving structure.
Key factors to visualize: warm bulk fermentation for 4–6 hours at ~25°C, dough volume increasing by about 10%, bubbles signaling active fermentation, salt strengthening gluten bonds, and cold fermentation for slow, controlled flavor development.
Mastering timing ensures a resilient, flavorful dough ready for shaping and baking.
Using nitrile gloves during dough handling can maintain hygiene without compromising dexterity or grip.
Stretch and Fold Technique
To develop a strong gluten network essential for Neapolitan sourdough pizza, you’ll rely heavily on the stretch and fold technique throughout bulk fermentation.
This method involves stretching the dough and folding it over itself 3 to 4 times at 30- to 40-minute intervals, using only your hands and a lightly floured surface. This technique is somewhat similar to the gentle handling used when working with cultured butter to maintain texture.
Each cycle strengthens gluten strands, improving dough elasticity and structure, which supports higher hydration and better oven spring.
During bulk fermentation, lasting 4 to 18 hours at room temperature, the dough roughly doubles in size and smooths out. Visual cues are key to knowing when fermentation is complete.
Proper gluten development ensures the dough passes the windowpane test and stretches thin without tearing.
Monitor carefully to avoid overproofing, which weakens gluten and leads to fragile dough.
Employing stretch and fold precisely is key to achieving a perfect Neapolitan crust.
Temperature Effects on Gluten
Mastering the stretch and fold technique lays the groundwork, but controlling dough temperature plays a vital role in gluten development during bulk fermentation.
Maintaining dough between 75°F and 80-85°F optimizes glutenin and gliadin bonding, enhancing elasticity and strength.
Temperatures outside this range either slow fermentation or cause overproofing, weakening the gluten network.
You can adjust temperature using warm water and ambient control for consistent results.
- Ideal gluten formation occurs near 75-80°F.
- Cooler temps slow yeast and gluten activity, producing dense dough.
- Warmer temps speed fermentation but risk gluten breakdown.
- Balanced temperature yields a strong, extensible gluten network.
- Consistent temp control ensures a light, chewy crust with ideal rise.
Temperature precision is key to mastering Neapolitan sourdough dough texture and rise. Understanding that optimal gluten formation occurs when proteins bond best between 75°F and 80°F helps bakers refine their dough handling for superior results.
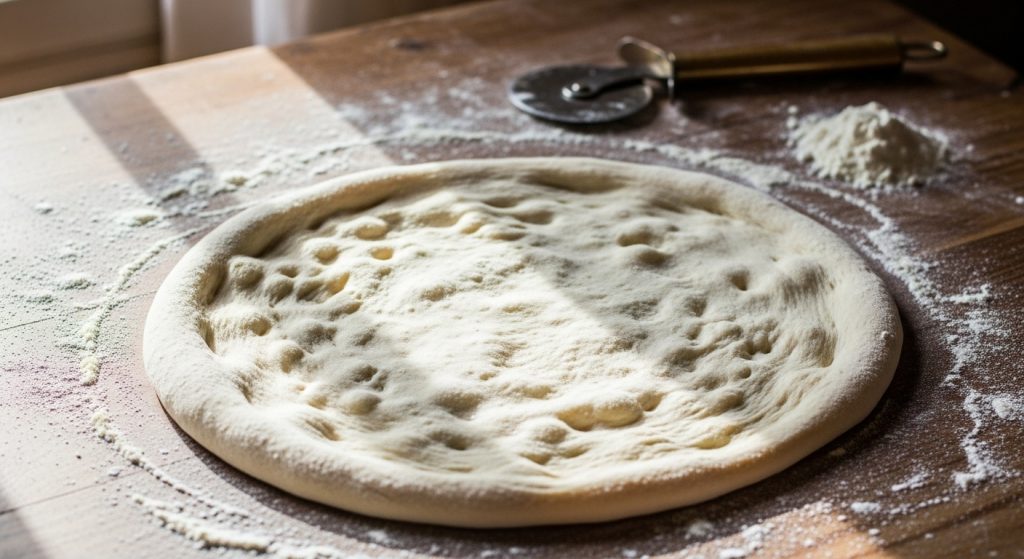
Shaping and Proofing Dough Balls
Although shaping dough balls might seem straightforward, it demands careful technique to develop the smooth, tight outer skin essential for Neapolitan sourdough pizza.
Roll the dough in a circular motion on a flat surface using gentle, repeated pressure to create a taut ball without tearing. Using a dough scraper can also help manage the dough and prevent sticking during this process.
Use a dough scraper to fold edges underneath, tightening the surface further.
Place shaped balls seam side up in a lightly oiled bowl to maintain surface tension during proofing.
Proof dough balls at 16°C–18°C in airtight containers for about 24 hours, covering them to prevent drying. Proofing at this temperature range promotes optimal dough rising and flavor development. Proper proofing results in a soft, well-risen dough with good elasticity, which is crucial for optimal texture. This step ensures the dough is ready for shaping and enhances its overall quality through active fermentation.
After proofing, handle the dough gently to preserve gas and elasticity.
Lightly flour the surface before transferring, then press gently to prepare for stretching.
This process ensures maximum extensibility and flavor development.
Baking Techniques for Perfect Crust
Once your dough balls have proofed and rested, preparing your oven and managing temperature takes center stage in achieving that perfect Neapolitan crust.
Preheat your oven or pizza stone/steel to the maximum temperature: 500–550°F for home ovens, ideally 900°F in a pizza oven, for at least an hour. This ensures radiant heat for a crisp, blistered crust. Using a baking stone can improve heat distribution and contribute to even cooking.
Handle your dough carefully. Rest stretched dough 10–30 minutes before topping and lightly oil the surface to enhance crispness. Using a stone on bottom shelf during preheating helps maintain consistent heat for better baking results.
Bake quickly: 2–5 minutes at home or 60–90 seconds in a pizza oven, watching for leopard spotting and puffed edges.
Key baking techniques include:
- Preheating stone/steel thoroughly
- Positioning rack to control browning
- Using broiler briefly if needed
- Keeping toppings room temp
- Resting pizza post-bake for texture stability
Common Issues and Expert Tips
When you encounter tearing or snapback in your dough, it’s often a sign that gluten development or hydration levels need adjustment. Using the right mixing equipment can improve gluten formation and overall dough consistency.
If your dough tears easily, perform the windowpane test; failing it means you need more kneading and longer proofing, sometimes up to four additional hours.
To fix small tears, patch with small dough pinches and press firmly. Avoid overworking the dough, which tightens gluten and causes snapback. Instead, rest it longer between kneading and shaping. Using a dough conditioner can also help relax the gluten, making the dough easier to stretch and less prone to tearing.
Manage hydration carefully; Tipo 00 flour requires less water, and gradual water addition ensures even gluten development.
Proper fermentation relaxes gluten, improving extensibility. Prolong proofing or raise dough temperature as needed to maintain starter health and dough quality.
Keep dough covered with cling film during rest to prevent drying and use gentle handling to maintain dough strength and elasticity.
Frequently Asked Questions
Can I Use a Sourdough Discard Instead of Mature Starter?
Yes, you can use sourdough discard instead of mature starter, but you’ll need to add commercial yeast for proper rise since discard lacks strong leavening power.
This approach speeds up dough preparation and still delivers some sourdough flavor, though it won’t develop the same complexity or dough strength as mature starter.
Adjust hydration and consider oiling the dough to manage stickiness. Discard recipes suit quick, tasty pizzas without long fermentation.
How Do Altitude and Humidity Affect Fermentation Times?
At 1,000 feet elevation, air pressure drops about 3%, speeding fermentation by expanding CO2 faster.
You’ll find dough rises quicker but risks overproofing, so reduce yeast by 25% and cut fermentation time by 15–30 minutes.
Low humidity at altitude dries dough, so increase water content to maintain hydration and gluten development.
Watch dough size, not clock, and consider cooler or refrigerated fermentation to control rise and improve flavor.
Is It Necessary to Weigh Ingredients for Home Baking?
Yes, you should weigh ingredients for home baking to guarantee precision and consistency.
Measuring by weight eliminates variations caused by scooping or packing, giving you exact amounts every time.
This precision helps achieve the right dough texture and flavor, reduces errors, and makes scaling recipes easier.
While some cooks rely on intuition, starting with accurate weights builds a solid foundation, improving your baking success and repeatability.
Can I Freeze Shaped Dough Balls Before Baking?
Yes, you can freeze shaped dough balls before baking. Freeze them after the first rise but before they’re fully proofed to allow final proofing during thawing.
Place dough balls on a firm surface, freeze quickly at 0°F (−18°C), then wrap tightly to prevent freezer burn.
Thaw overnight in the fridge, then let them warm at room temperature for 1–2 hours before shaping and baking.
This process helps maintain dough quality and ease of stretching.
What’s the Best Way to Store Leftover Baked Pizza?
Think of leftover pizza as a treasure chest. You want to keep its value intact.
Store slices in airtight containers or wrap them tightly in plastic wrap or foil to lock in freshness.
Place a paper towel inside to soak up moisture.
Refrigerate within two hours at 37°F and consume within 3-4 days.
For longer storage, freeze properly wrapped slices and thaw in the fridge before reheating. This preserves flavor and texture best.
Transform Your Pizza Night with This Sourdough Recipe
Now that you’ve mastered each step, from mixing to baking, the real magic begins as your dough transforms in the oven.
But don’t rush; the secret to that perfect Neapolitan crust lies in patience and technique.
Keep refining your process, and soon enough, you’ll pull out a pizza with the ideal balance of chew, char, and tang.
Ready to taste the difference your skill creates? Your authentic sourdough pizza awaits.