How to Make Simple Sourdough Biscotti: Delicious Tangy Treats
To make simple sourdough biscotti, start by mixing 150 grams of sourdough starter, 150 grams of sugar, and wet ingredients like oil and eggs. Whisk together 340 grams of flour and a pinch of salt in a separate bowl.
Combine both mixtures and fold in 130 grams of nuts. Shape the dough into logs about 10 inches long, then chill them for 30 minutes.
Bake at 350°F for 30 minutes, cool slightly, slice diagonally into pieces, and bake again until golden. Enjoy your crunchy biscotti with coffee, and discover more tips for perfecting your treats.
Key Takeaways
- Combine sourdough starter, sugar, oil, vanilla, and eggs in a large bowl for the wet mixture.
- Whisk flour, salt, sugar, and baking powder in a separate bowl for the dry mixture.
- Shape the dough into logs, aiming for about 10 inches long and 4 inches wide, then chill for at least 30 minutes.
- Bake the logs at 350°F until golden, cool slightly, then slice diagonally and bake again for extra crunch.
- Store cooled biscotti in an airtight container, enjoying them with coffee or tea for the best experience.
Ingredients Needed
When you’re ready to whip up some delightful sourdough biscotti, gathering the right ingredients is vital for achieving that perfect crunch and flavor.
Start with 150 grams of sourdough starter, which can be either a 100% hydration starter or a cup of sourdough discard. Regular feedings are essential for keeping the starter active and healthy, adding richness to your biscotti.
Sugar plays an important role in creating that sweet balance; use 150 grams of ultra-fine sugar or 1 1/3 cups of brown sugar. For the base, 340 grams of all-purpose flour will provide the structure you need.
Don’t forget 130 grams of your favorite nuts—hazelnuts or almonds work beautifully. For an extra layer of flavor, add 10 grams of vanilla essence and consider 1 tablespoon of almond extract. Additionally, using sourdough discard or bubbly starter allows for great flexibility in your baking.
A pinch of salt and 12 grams of baking powder guarantee a delightful rise. You can also incorporate optional ingredients like 100 grams of dried fruits or 150 grams of chocolate chips for extra indulgence.
Preparing the Dough
Getting ready to prepare the dough is an exciting step in your sourdough biscotti journey. Start by gathering your wet ingredients: combine your sourdough starter, oil, vanilla, and eggs in a large mixing bowl.
Using a stand mixer with a paddle attachment or a hand mixer makes this process easier. Mix until everything is well incorporated and smooth, ensuring the eggs and vanilla blend seamlessly with the starter.
Next, turn to your dry ingredients. In a separate bowl, whisk together flour, salt, sugar, and any extras like baking powder or cocoa powder, if desired. The addition of sourdough discard not only enhances flavor but also contributes to the biscotti’s unique texture.
If you’re adding nuts or seeds, fold them in now for even distribution. The unique fermentation process of sourdough not only enhances flavor but also aids in gluten breakdown, making the biscotti easier to digest.
Now it’s time to combine the wet and dry mixtures. Add the dry ingredients to the wet ones and mix until just combined—avoid overmixing, as this can lead to a tough texture.
If your dough feels sticky, dust your hands lightly with flour for easier handling. If it remains unmanageable, chilling it in the refrigerator for 30 minutes can help.
Keep the dough at room temperature until you’re ready to shape it into logs.
Shaping the Logs
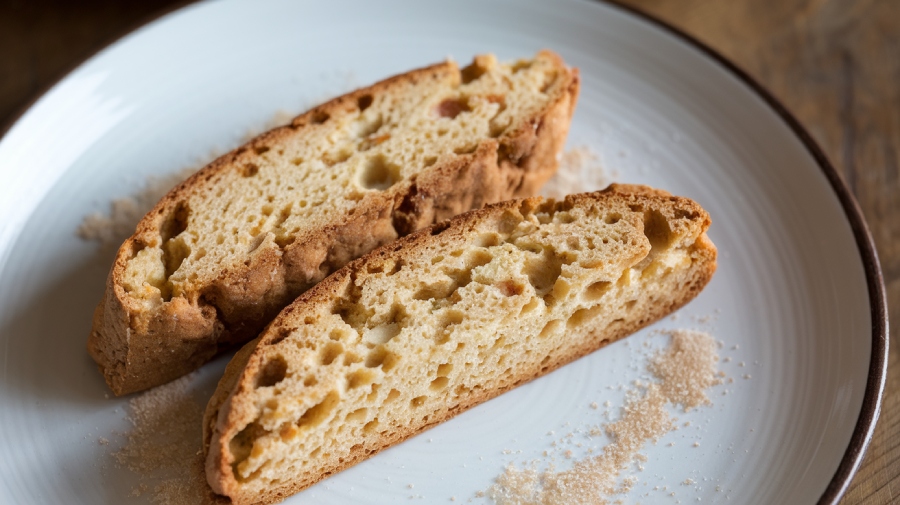
Now that your dough is ready, it’s time to shape those logs for your biscotti.
You’ll want to guarantee the consistency is just right, so if things feel sticky, a quick chill can work wonders. Sourdough discard not only adds flavor but also helps to create a nice texture in the final baked product. The use of unfed starters can impart unique flavors to your biscotti, enhancing the overall taste profile.
Aim for logs that are about 10 inches long and 4 inches wide, keeping them smooth and even for that perfect bake.
Dough Consistency and Texture
To achieve the perfect dough consistency for shaping your sourdough biscotti logs, you’ll want to focus on a few key techniques. The dough can be quite sticky, so managing its texture is essential for successful shaping. Here’s how to get it just right:
- Combine Ingredients: Start by mixing your wet ingredients—sourdough starter, oil, vanilla, and eggs—until well blended. In a separate bowl, whisk together the dry ingredients and gently fold in any nuts.
- Mix Carefully: Add the dry mix to the wet mixture and stir until you achieve a cookie dough consistency. Avoid overmixing to keep the texture light, as proper gluten development is crucial for the structure of baked goods.
- Handle Stickiness: If the dough feels overly sticky, lightly dust your hands with flour and use them to bring the dough together. A dough scraper can help manage the stickiness too.
- Chill if Needed: If you’re struggling to work with the dough, pop it in the fridge for about an hour. This will firm it up, making it easier to shape into logs. Additionally, remember that the twice-baked process of biscotti creates a unique texture that enhances the final product.
Log Dimensions and Shape
Once you’ve achieved the right dough consistency, shaping your sourdough biscotti logs is the next exciting step. Start by dividing the dough into two equal parts, making it easier to handle. Lightly dust your hands with flour to prevent sticking, then roll each portion into a log. Aim for a rectangular shape, about 3 inches wide and 11-12 inches long. If you want uniformity, weigh each log to around 450g. The extended shelf life of sourdough biscotti means you can enjoy them for days to come without sacrificing quality.
Place the shaped logs on a prepared baking sheet lined with parchment paper. Position them parallel to each other, leaving several inches of space between them—this guarantees they have room to spread while baking. A little space goes a long way in achieving that perfect crunch!
| Dimension | Recommended Size |
|---|---|
| Width | 3-4 inches |
| Length | 11-12 inches |
| Weight | 450g each |
Gently press down the logs to maintain their shape, and don’t forget to keep an eye on them as they bake. Proper shaping sets the stage for delicious biscotti that’s sure to impress!
Chilling for Firmness
As you prepare to shape your sourdough biscotti logs, chilling the dough becomes an essential step that can’t be overlooked. This vital process helps firm up the dough, making it easier to handle and shape into perfect logs.
Here’s why you should chill your dough:
- Firmness: The chill reduces stickiness, allowing for better log formation.
- Texture: It enhances the overall texture of your biscotti, ensuring a delightful crunch. Additionally, the fermentation process of sourdough contributes to improved digestibility, making your biscotti not only tasty but also easier on the stomach.
- Shape Maintenance: Chilling prevents the dough from spreading too much during baking, keeping your logs uniform.
- Slicing Ease: A chilled dough is less likely to break apart when you slice it. Additionally, the use of sourdough discard not only adds flavor but also contributes to the overall moisture content of your biscotti.
Aim to chill your dough for at least 30 minutes. If you’re prepping ahead, you can refrigerate it for up to 24 hours or even longer for a deeper flavor. Just remember to cover it with plastic wrap or store it in an airtight container.
Once chilled, preheat your oven to the specified temperature, place the logs on a lined baking sheet, and bake for about 30 minutes.
After cooling, slice the logs and prepare for the vital second bake.
First Bake Instructions
Before you plunge into baking your sourdough biscotti, it’s essential to prepare your workspace and ingredients. Start by preheating your oven to 350°F (177°C) and lining a large baking sheet with parchment paper. Make sure there’s enough room for the logs to spread out without crowding. If your dough feels sticky, lightly flour your surface for easier handling.
Next, combine your wet ingredients: sourdough starter, eggs, and vanilla extract—add melted butter or oil if the recipe calls for it. In another bowl, mix your dry ingredients: flour, sugar, salt, and any extras like cocoa powder. Gently fold the wet and dry mixtures together until just combined; remember, overmixing can ruin the texture. Biscotti are traditionally made with almonds or anise, which contribute to their unique flavor profile. A well-fed sourdough starter ensures optimal fermentation, enhancing the taste and texture of your biscotti.
Divide the dough into two equal portions and shape each into a log, about 3-4 inches wide and 11-12 inches long. Place the logs parallel on the baking sheet, pressing them slightly to form uniform rectangles.
Bake them in the preheated oven for about 30 minutes, until the tops are shiny and firm. Keep an eye on them to avoid overbaking. Let the logs cool for at least 10-15 minutes before moving on to the next step.
Slicing the Logs
Once your biscotti logs have cooled, it’s time to slice them with care to guarantee they hold their shape and flavor.
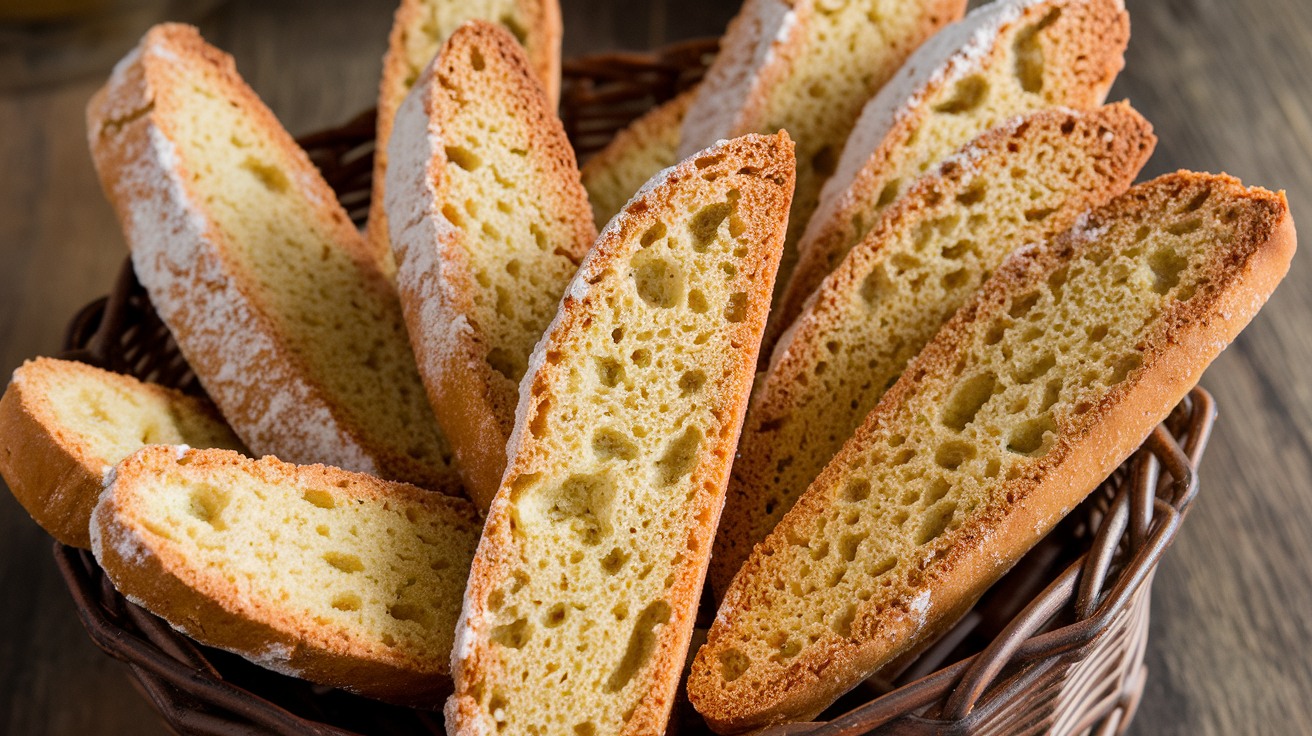
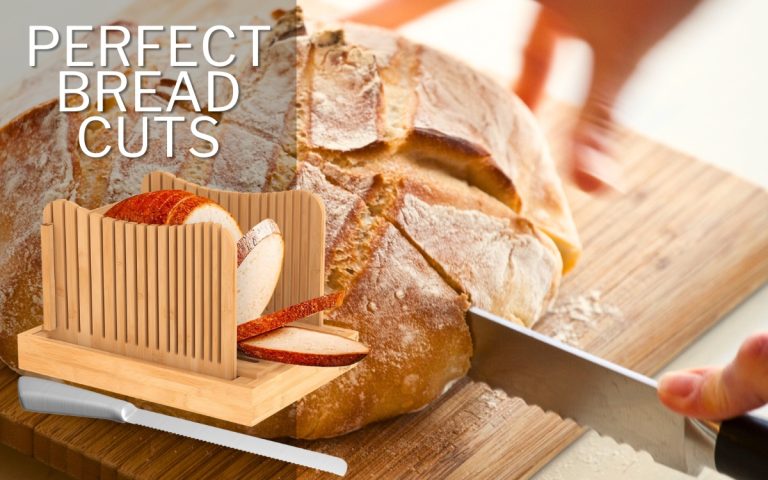
Using a sharp serrated knife, aim for slices between 1/2 inch to 1 inch thick for the perfect balance of crunch and chewiness. The right slicing technique not only affects the texture but also enhances the overall presentation of your delicious treats.
Importance of Proper Slicing
Proper slicing is essential for achieving the perfect sourdough biscotti, as it directly influences both texture and presentation. If you slice too soon or with the wrong technique, you risk crumbling your beautiful creation. To guarantee successful slicing, follow these key steps:
- Cool the Logs: Allow the biscotti logs to cool for at least 10-15 minutes on a cooling rack. This prevents them from falling apart and helps them set, making slicing much easier.
- Use the Right Knife: A serrated knife is your best friend. It allows for a clean cut without applying too much pressure, which can lead to breakage.
- Slice Diagonally: Cutting on a bias not only enhances the visual appeal but also optimizes the texture of each piece. Aim for slices about ½ to ¾ inches thick.
- Mind the Bake: Avoid overbaking your logs; this keeps them moist and manageable. Check them a few minutes early to guarantee they’re firm but not hard. Additionally, allowing your biscotti to cool properly helps maintain the integrity of the crust, similar to how proper cooling enhances the enjoyment of sourdough bread.
Tools for Slicing Biscotti
To achieve perfectly sliced sourdough biscotti, having the right tools is vital. The star of the show is a sharp serrated knife. This type of knife is essential for making clean cuts without breaking the biscotti. A dull or worn-out serrated knife can lead to disastrous results, so it’s wise to reserve a special, high-quality serrated knife solely for this purpose.
Look for one with sharp teeth, as it’ll glide through the almond pieces effortlessly. When you slice, employ a gentle back-and-forth sawing motion. It’s best to slice the logs when they’re cool enough to handle but still slightly warm. This balance helps reduce breakage. Be mindful to apply even pressure; rotating the log slightly while you slice can help prevent the knife from getting stuck.
Additionally, using a sharp knife is crucial for maintaining clean cuts in dense baked goods like biscotti. While no additional specialized tools are needed, make certain your knife is clean and dry before you start. A stable cutting surface is beneficial, but you don’t need a fancy cutting board. Avoid straight-edge knives, as they won’t perform as well on dense biscotti logs.
Recommended Slice Thickness
When you slice your sourdough biscotti, aiming for a thickness of 1/2 to 3/4 inches is key to achieving that perfect crunch. This thickness guarantees even baking and maintains the signature crisp texture you’re after.
If you slice too thick, your biscotti may remain soft and chewy; too thin, and they can become overly brittle. Here are some tips to keep in mind:
- Use a serrated knife for the best results—it’s ideal for cutting through the crust without crumbling.
- Employ a back-and-forth sawing motion to prevent breaking the logs; gentle pressure works wonders.
- Slice the logs after the initial bake and cooling period, making it easier to handle.
- Cut on a bias or straight, depending on your preference, but keep that thickness consistent for uniform texture.
Second Bake Process
The second bake process is essential for achieving that signature crunch and golden hue in your sourdough biscotti. After your first bake, slice the logs into ½-inch thick pieces for ideal texture. Place the slices cut side down on a baking sheet lined with parchment paper. This way, they’ll toast evenly and develop that satisfying crunch.
Preheat your oven to 325°F for a gentle bake or opt for 350°F if you’re feeling a bit bolder. Bake the slices for 10-15 minutes, then flip them over to guarantee both sides benefit from the heat. Depending on their thickness, you might need to adjust the time, aiming for 15-25 minutes total.
As they bake, keep an eye on the color and texture. Your biscotti should look dry, feel crisp, and have a lovely golden hue. Tap the middle of a slice to check for that delightful crunch. Additionally, maintaining a consistent heat during the baking process will help ensure a uniform crunch across all slices.
When they’re perfectly done, they’ll be slightly toasted all over, ready to complement your coffee or tea.
Cooling and Storing
Cooling biscotti properly is just as vital as the baking process itself. Once you’ve completed the second bake, your biscotti need some time to cool down. Here’s how to do it right:
- Initial Cooling: Let the biscotti rest on the baking sheet for about 5 minutes after the second bake. This helps them firm up slightly.
- Wire Rack Transfer: Move the biscotti to a wire rack to cool completely. This step is important for achieving that perfect crispiness.
- Slice Wisely: When slicing the cooled logs, use a sharp serrated knife to cut ½-inch to ¾-inch thick slices. This guarantees clean cuts and uniform thickness for even baking.
- Storing: Once cooled, store your biscotti in an airtight container at room temperature. A glass jar or cookie tin works best to maintain their crunch.
Serving Suggestions
Sourdough biscotti are more than just delightful snacks; they’re versatile companions that can elevate any occasion. These crunchy treats shine when paired with your favorite beverages. Enjoy them with a steaming cup of coffee or tea, where they make the perfect dunking companion.
Picture savoring a biscotti with a rich espresso or a comforting Pumpkin Spice Latte—pure bliss! They even complement dessert wines beautifully.
As an afternoon pick-me-up, sourdough biscotti satisfy your cravings without weighing you down. You can savor them solo or alongside fresh fruits for a delightful contrast in texture.
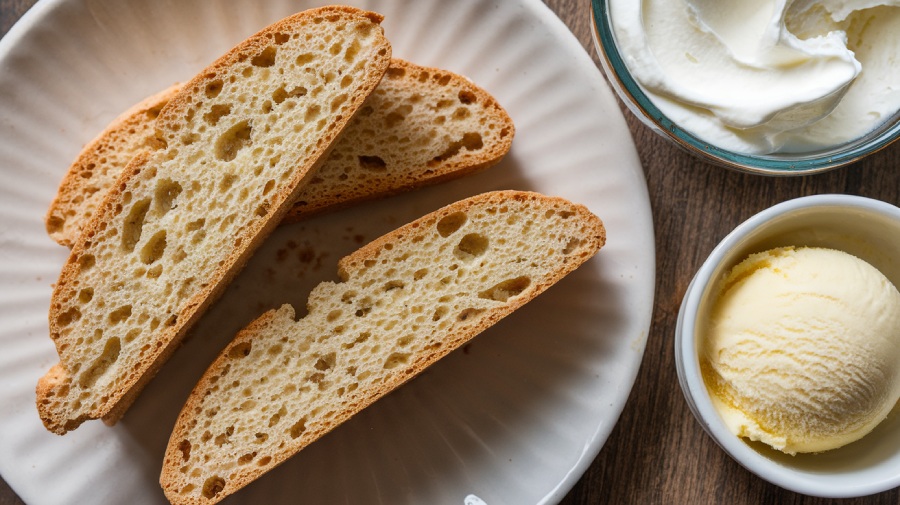
If you’re feeling indulgent, try pairing them with whipped cream or ice cream, which adds a luscious touch.
These biscotti also make fantastic gifts. Wrap them in parchment, tie with a ribbon, and you’ve got a charming present for any occasion.
You can elevate their presentation by drizzling melted chocolate over them or adding toppings for extra flair. Whether you’re serving them at a social gathering or enjoying them as part of a cozy snack routine, sourdough biscotti bring joy and flavor to every moment.
Frequently Asked Questions
Can I Use Whole Wheat Flour Instead of All-Purpose Flour?
Yes, you can definitely use whole wheat flour instead of all-purpose flour!
Just keep in mind that it’ll give your biscotti a nuttier flavor and denser texture. You’ll want to increase the liquid a bit since whole wheat absorbs more moisture.
Also, consider adjusting the sugar, as it may taste less sweet. If you’re mixing flours, balance the ratios, and don’t forget to watch your baking time to avoid overbaking!
How Long Can I Store Biscotti Without Losing Freshness?
You can store biscotti for up to two weeks at room temperature without losing freshness, given you keep them in an airtight container away from moisture and sunlight.
If you refrigerate them, they can last up to four weeks.
For longer storage, freeze biscotti, which preserves their crunchiness for three to four months.
Just remember to thaw them at room temperature before enjoying!
What Can I Substitute for Eggs in This Recipe?
If you’re looking for egg substitutes, you’ve got several tasty options!
Try mixing 1 tablespoon of ground flaxseed or chia seeds with 3 tablespoons of water; let it thicken for a few minutes.
Alternatively, you can use 1 ripe mashed banana or 1/4 cup of applesauce for moisture and binding.
For a creamy texture, blend 1/4 cup of silken tofu until smooth.
Each choice will bring its unique flavor and benefits to your dish!
Can I Freeze the Dough Before Baking?
Absolutely, you can freeze the dough before baking!
Just mix your ingredients until combined, then shape the dough into logs. Wrap them tightly in plastic wrap or foil, and store them in a freezer-safe bag.
Label it with the date for easy reference. When you’re ready to bake, thaw the logs at room temperature or in the fridge.
This way, you’ll enjoy fresh, delicious baked goods whenever you want!
How Do I Know When the Biscotti Are Fully Baked?
When it comes to baking biscotti, “a watched pot never boils,” but you’ll want to keep an eye on them.
They’re fully baked when the tops are shiny and firm to the touch, appearing golden and dry. You’ll check for a crispy texture, ensuring they don’t overbake.
After cooling, they’ll harden more, so trust your senses—if they feel crunchy all over, you’re good to go!
Enjoy the satisfying snap with each bite.
A Biscotti Experience Like No Other
Now that you’ve crafted your delightful sourdough biscotti, the real magic awaits. Imagine the moment you take that first bite, the satisfying crunch giving way to a rich, tangy flavor that dances on your palate.
You can’t help but wonder—will they be a hit at your next gathering? Or will you savor them all for yourself? Either way, these biscotti are sure to leave everyone craving more. So, are you ready to indulge?

