How to Make a Hard Chocolate Shell That Sets Instantly: Expert Tips
To make a hard chocolate shell, start by melting high-quality chocolate with measured solid coconut oil using a microwave or double boiler, stirring frequently to avoid seizing.
Cool the mixture to about 85–90°F before pouring it from six inches over a thoroughly frozen, dry dessert. The cooled shell hardens instantly, creating a crisp coating.
You can customize with flavors or add-ins and store it properly for reuse. Keep following for detailed tips on perfecting this technique.
Key Takeaways
- Melt high-quality chocolate and solid coconut oil together gently to ensure smooth, even consistency without seizing.
- Cool the mixture to 75–90°F (24–32°C) before applying to frozen desserts for optimal hard shell formation.
- Pour the cooled chocolate shell from about 6 inches height to achieve even coverage without pooling.
- Allow the shell to harden for 30–60 seconds on a thoroughly frozen, dry dessert before serving or adding toppings.
- Store leftover shell in a glass jar with an airtight lid at room temperature and reheat gently when needed.
Essential Ingredients and Measurements for Crafting a Perfect Hard Chocolate Shell
| Ingredient | Amount | Purpose | Notes & Tips |
|---|---|---|---|
| High-Quality Chocolate (Baking Wafers or Chips) | 1 cup (150g) | Base for chocolate shell | Choose 60-75% cocoa content for smooth melting and rich flavor |
| Solid Coconut Oil | 1/2 cup (120ml) | Creates hardening effect and crisp texture | Measure while solid; essential for rapid solidification on cold desserts |
| Flavor Extracts (Optional) | 1/4 to 1/2 tsp | Enhance aroma and taste | Vanilla or peppermint extract recommended; add before cooling |
| Add-Ins (Optional) | 1-2 tbsp | Add texture and crunch | Use finely chopped nuts or puffed rice; avoid moisture content |
| Frozen Dessert | As needed | Surface for shell application | Must be thoroughly frozen and dry for best results |
Choose the Best Ingredients
Selecting the right ingredients is essential for creating a smooth, hard chocolate shell. Start with high-quality chocolate, ideally baking wafers containing 60-75% cocoa; they melt more evenly than standard chocolate chips.
Choosing premium chocolate wafers with 60-75% cocoa ensures a smooth, evenly melting chocolate shell.
If you prefer chips, choose semi-sweet, milk, or dark chocolate varieties without stabilizers, as these melt more consistently. Measure coconut oil while solid at room temperature or chilled for accurate ratios.
Coconut oil’s saturated fat content guarantees rapid solidification upon cooling, critical for the shell’s texture. While alternatives like extra-virgin olive oil or butter can alter flavor and texture, they won’t replicate coconut oil’s hardening properties precisely.
Use dry, clean utensils and bowls to avoid moisture contamination, which can ruin the chocolate’s consistency during melting and setting. For best results, consider the chocolate’s cocoa content and fat as these influence texture and flavor in the finished shell.
Melt Chocolate and Coconut Oil Without Seizing
When melting chocolate and coconut oil, you must avoid any contact with water to prevent seizing. This causes the mixture to become grainy and unusable. Use dry, clean utensils and bowls.
Choose either the microwave or double boiler method for controlled heat application. Follow these steps:
- Microwave: Heat in 20-30 second intervals, stirring thoroughly between each to evenly distribute heat and prevent scorching.
- Double Boiler: Place a heatproof bowl over simmering water, ensuring the bowl’s bottom doesn’t touch the water. Stir gently until smooth.
- Combine measured coconut oil with chopped or chip chocolate before heating to ensure uniform melting and blending.
Avoid direct high heat and moisture; these cause crystallization and texture failure, ruining your chocolate shell’s smooth consistency. Using a digital instant-read thermometer can help monitor temperatures precisely to avoid overheating.
Cool Chocolate Shell Sauce Before Applying
After melting your chocolate and coconut oil mixture smoothly, allow the sauce to cool for 2 to 10 minutes before applying it to your frozen dessert.
Cooling prevents premature melting of the ice cream and guarantees the shell hardens quickly. Stir the sauce every 5 minutes to distribute heat evenly.
Use a glass jar for easy pouring and storage.
Frostings with quick-setting properties help maintain crisp texture and appearance, similar to how cooling aids chocolate shell formation.
| Cooling Time | Temperature Range | Stirring Frequency |
|---|---|---|
| 2 minutes | 95-100°F (35-38°C) | Every 5 minutes |
| 5 minutes | 85-90°F (29-32°C) | Every 5 minutes |
| 10 minutes | 75-80°F (24-27°C) | Every 5 minutes |
Avoid applying the sauce while it’s too hot to maintain dessert integrity and prime shell formation.
Apply the Chocolate Shell to Frozen Desserts
Pouring the cooled chocolate shell evenly over your frozen dessert guarantees a uniform, crisp coating that sets quickly. To apply it properly, follow these steps:
Pouring cooled chocolate shell evenly over frozen dessert ensures a crisp, uniform coating that sets quickly.
- Make sure your dessert is thoroughly frozen and dry to prevent melting or sogginess upon contact.
- Pour the chocolate shell from a height of about 6 inches, covering the surface evenly without pooling.
- Allow 30 to 60 seconds for the shell to harden completely before serving or adding toppings.
Work swiftly but deliberately; the coconut oil in the shell solidifies rapidly on the cold surface. Avoid applying if the shell is too warm, as this will melt the dessert underneath. Use a spoon or small ladle for precise control on smaller portions.
This method preserves the shell’s crisp texture and enhances presentation. For best results, ensure the dessert is arranged in a single layer like frozen garlic bread for optimal cooling and coating.
Customize Your Chocolate Shell With Flavors and Add-Ins
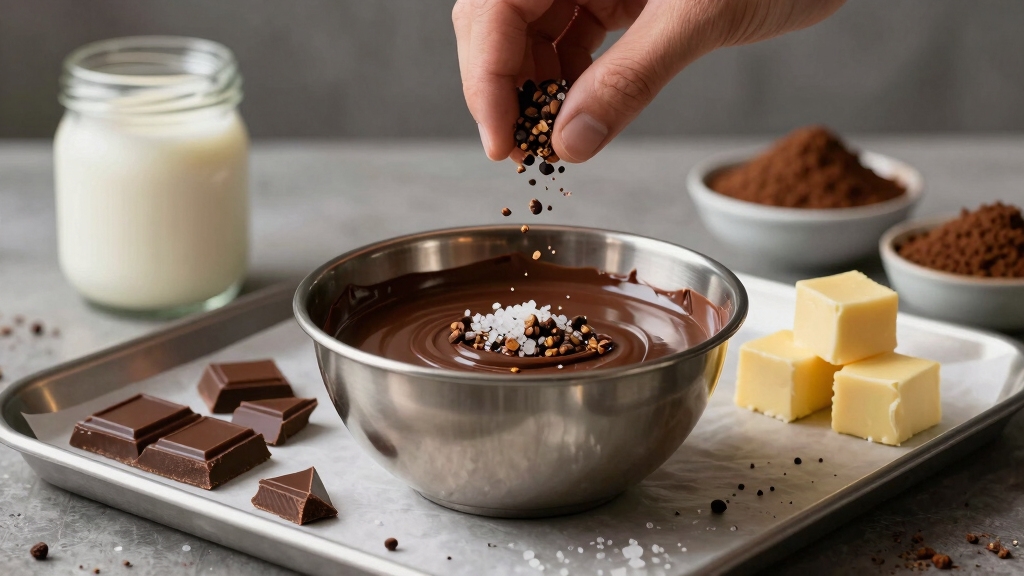
Spice up your chocolate shell by mixing in extracts, spices, or textured ingredients right after melting but before cooling.
Add 1/4 to 1/2 teaspoon of peppermint or vanilla extract to enhance the chocolate’s aroma and complexity. For a savory twist, sprinkle a pinch of flaky sea salt.
Incorporate finely chopped nuts or puffed rice cereal to introduce crunch and texture; fold them gently to ensure even distribution.
Colored sprinkles can be sprinkled on top immediately after pouring the shell onto the dessert for visual appeal.
Avoid adding ingredients that contain moisture, as this can cause the chocolate to seize.
Mix-ins must be fully integrated before the shell begins to cool and thicken to maintain a smooth, uniform hardening.
This precise timing guarantees a flavorful, textured chocolate shell that hardens properly.
For best results, maintain a stable temperature and avoid direct sunlight to preserve the chocolate’s optimal consistency during setting.
Store and Reheat Your Chocolate Shell
Once your chocolate shell has cooled and set, proper storage preserves its quality and usability. Store it in a clean glass jar with an airtight lid at room temperature to maintain liquid consistency.
Avoid refrigeration, which can cause unwanted solidification or moisture condensation. When you’re ready to reuse, gently reheat the shell using one of these methods:
- Place the jar in a hot water bath for 3-5 minutes, stirring occasionally to guarantee even heat distribution.
- Microwave in 15-20 second intervals on low power, stirring between intervals to prevent scorching.
- Use a double boiler, heating gently while stirring until fluid but not overheated.
Avoid direct high heat to prevent scorching or texture degradation. Always make certain the shell is smooth before applying to frozen desserts. Proper storage in airtight containers helps prevent moisture exposure and maintains the shell’s quality over time by avoiding condensation and softening.
Frequently Asked Questions
Can I Use Other Oils Besides Coconut Oil for the Hard Shell?
Yes, you can use other oils like extra-virgin olive oil or butter, but they alter texture and hardening speed.
Coconut oil’s saturated fat solidifies quickly on cold surfaces, creating that signature crisp shell.
Alternatives produce softer shells and may take longer to harden. If you choose another oil, expect different mouthfeel and durability.
Always measure oils while solid or chilled and test your mixture on frozen desserts to guarantee desired firmness.
Why Does My Chocolate Shell Crack Too Much After Hardening?
Your chocolate shell cracks excessively because the ratio of coconut oil to chocolate is likely off. Coconut oil’s saturated fat solidifies quickly, but too much makes the shell brittle.
Studies show that a 1:2 oil-to-chocolate ratio balances hardness and flexibility. Also, applying the shell at too low a temperature causes rapid solidification, increasing cracks.
To fix this, cool the mixture slightly before pouring and maintain precise ingredient ratios for an ideal, crack-resistant shell.
How Long Does the Hardened Chocolate Shell Stay Crisp on Desserts?
Your hardened chocolate shell stays crisp on desserts for roughly 1 to 3 hours at room temperature before moisture from the dessert softens it.
To maximize crispness, apply the shell to very cold or frozen surfaces and serve promptly.
Avoid refrigeration after hardening, as humidity accelerates sogginess.
If stored properly at room temperature, the shell maintains texture but gradually loses crunch as condensation forms or the dessert warms up.
Can I Make the Chocolate Shell Vegan or Dairy-Free?
Want a vegan or dairy-free chocolate shell? You absolutely can. Just swap regular chocolate chips for dairy-free or vegan-certified ones. Dark chocolate usually works best.
Replace coconut oil with plant-based oils like extra-virgin olive oil or refined coconut oil to maintain that crisp texture. Keep water away during melting to prevent seizing.
Stir frequently, cool sauce before applying, and you’ll get a perfect, dairy-free crunch every time.
What Causes Chocolate to Seize Even Without Water Contact?
Chocolate can seize without water contact if you overheat it or apply direct high heat, causing the cocoa solids to clump and separate from the fat.
Using standard chocolate chips with stabilizers also disrupts smooth melting. To prevent this, heat chocolate gently in short intervals, stir frequently, and avoid temperatures above 120°F (49°C).
Use high-quality baking wafers for better melting consistency and always make sure dry, clean utensils.
Why Settle for Ordinary? Create an Irresistible Hard Chocolate Shell Every Time
Now that you’ve mastered crafting a hard chocolate shell, think of it as your dessert’s armor. It’s like Excalibur for your ice cream.
By choosing quality ingredients, carefully melting without seizing, and cooling before applying, you guarantee a flawless, glossy finish.
Customize with flavors, then store properly to maintain its snap. With this technique, you’ll create a professional, crisp shell that transforms every bite into a perfectly protected, decadent delight.