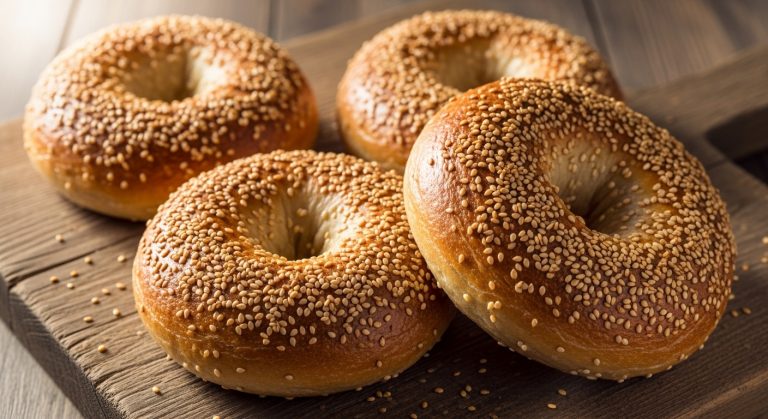
Gluten Free Sourdough Starter Recipe and Care
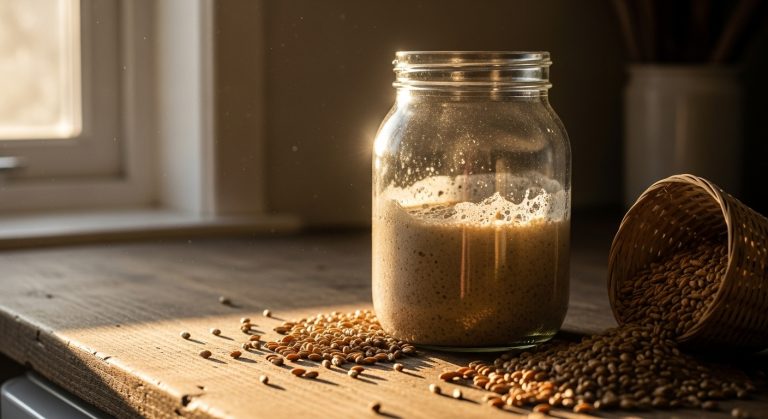
You can start your gluten-free sourdough by mixing equal weights of wholegrain gluten-free flour like brown rice or buckwheat and warm filtered water to create a thick batter.
Keep the starter in a clean jar, cover it loosely, and feed it regularly every 8-12 hours. Discard some before each feeding to manage acidity.
Watch for bubbles and a mild sour aroma as signs of activity. Adjust hydration for texture, and soon you’ll have a lively starter ready for baking.
Explore more to master its care and use.
Key Takeaways
- Use wholegrain gluten-free flours like brown rice, buckwheat, or teff for better fermentation and stable starter culture development.
- Mix equal weights of gluten-free flour and filtered lukewarm water to create a thick slurry for initial fermentation.
- Feed the starter every 8-12 hours at first, maintaining a 1:1:1 ratio of starter, flour, and water by weight, discarding excess before feeding.
- Keep the starter in a warm (70-75°F), breathable container and monitor for bubbling, rising, and a mild sour aroma as signs of activity.
- Store the starter refrigerated for weekly maintenance or dry it for long-term storage, reviving by feeding before baking.
Complete Recipe Guide for Gluten Free Sourdough Starter
| Component | Initial Starter (Day 1) | Daily Feeding | Refrigerated Feeding | Notes |
|---|---|---|---|---|
| Gluten-Free Flour | 50g brown rice flour | 50g same flour type | 50g same flour type | Use wholegrain flours like buckwheat, teff, or brown rice |
| Filtered Water | 50g lukewarm water | 50g filtered water | 50g filtered water | Avoid chlorinated water – let sit 24h or use filtered |
| Starter Portion | N/A | 50g existing starter | 50g existing starter | Discard excess before feeding to prevent acidity |
| Container | Wide-mouth glass jar | Same jar, cleaned sides | Same jar, cleaned sides | Non-reactive materials only – avoid metal |
| Temperature | 70-75°F room temp | 76-80°F optimal | Return to room temp first | Stable temperature prevents fermentation issues |
| Feeding Schedule | Initial mix | Every 8-12 hours | Weekly feeding | Daily feeding after first week for active starter |
| Coverage | Breathable cloth | Loose lid or cloth | Loose lid in fridge | Allow airflow while preventing contamination |
| Timeline | Day 1 setup | Days 2-7 active building | Maintenance phase | Bubbling activity typically starts day 2-3 |
| Signs of Success | Thick batter consistency | Doubles in size | Maintains activity weekly | Pleasant sour aroma and visible bubbles |
Choosing the Right Gluten-Free Flour
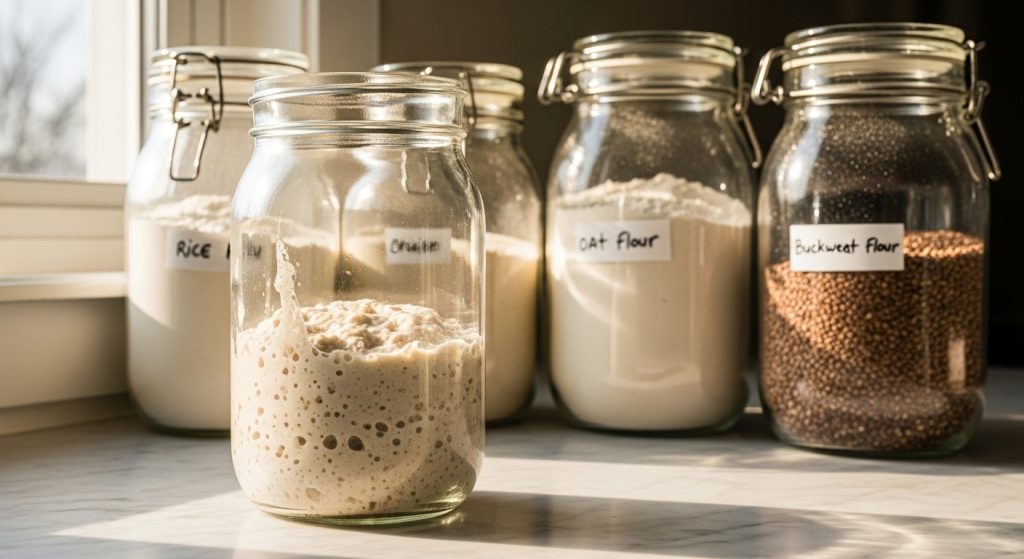
When you choose the right gluten-free flour, you set the foundation for a lively, flavorful sourdough starter. Wholegrain flours like sorghum, teff, millet, amaranth, buckwheat, and brown rice are ideal because their natural nutrients and microbes jumpstart fermentation.
Using gluten-free flour (not a blend) for feeding is essential to maintain starter health and activity. These wholegrain flours typically provide better fermentation performance due to their nutrient density.
Starting with a single wholegrain flour helps establish a stable culture, while mixing flours later enhances activity and complexity. Buckwheat and brown rice often provide consistent, strong starters, while teff ferments quickly, bubbling within two days.
You can add sweet rice flour after initial activity to boost stretchiness.
Some gluten-free bread flour blends that include wheat starch mimic traditional sourdough flavors and improve texture, offering fruity, lactic notes and better rise.
Experiment with blends to find your perfect balance of flavor, texture, and starter vigor.
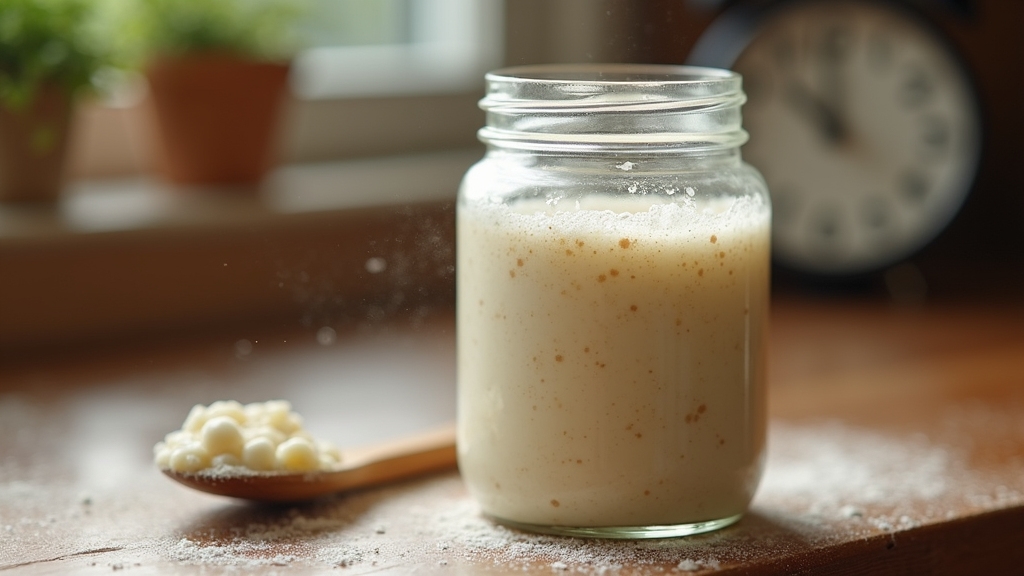
Preparing Your Starter Jar and Tools
Before you mix your first batch of gluten-free sourdough starter, prepare your jar and tools carefully to create the perfect environment for fermentation.
Start by choosing a clean, quart-sized glass jar with a wide mouth to allow easy stirring and monitoring of your starter’s bubbles and rise. This also provides optimal conditions for the microbial community to thrive.
Select a clean, wide-mouth quart glass jar for easy stirring and observing your starter’s activity
Thoroughly wash and sanitize the jar, then dry it completely to prevent any unwanted bacteria or mold. Using filtered water when mixing your starter helps prevent chlorine from inhibiting yeast growth.
Cover the jar with a breathable cloth secured by a rubber band to let air in while keeping contaminants out.
Use non-metal tools like a wooden spoon or silicone spatula dedicated solely to your starter to avoid chemical reactions and cross-contamination.
- Transparent, wide-mouth quart jar
- Sanitized and fully dried container
- Breathable cloth cover secured with a rubber band
- Non-metallic stirring utensils
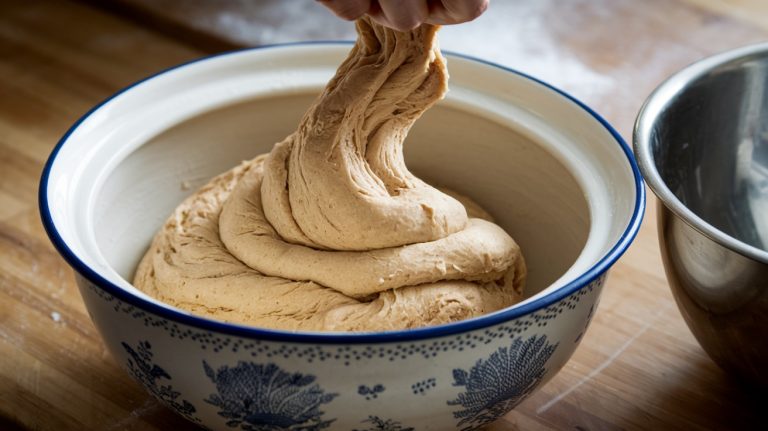
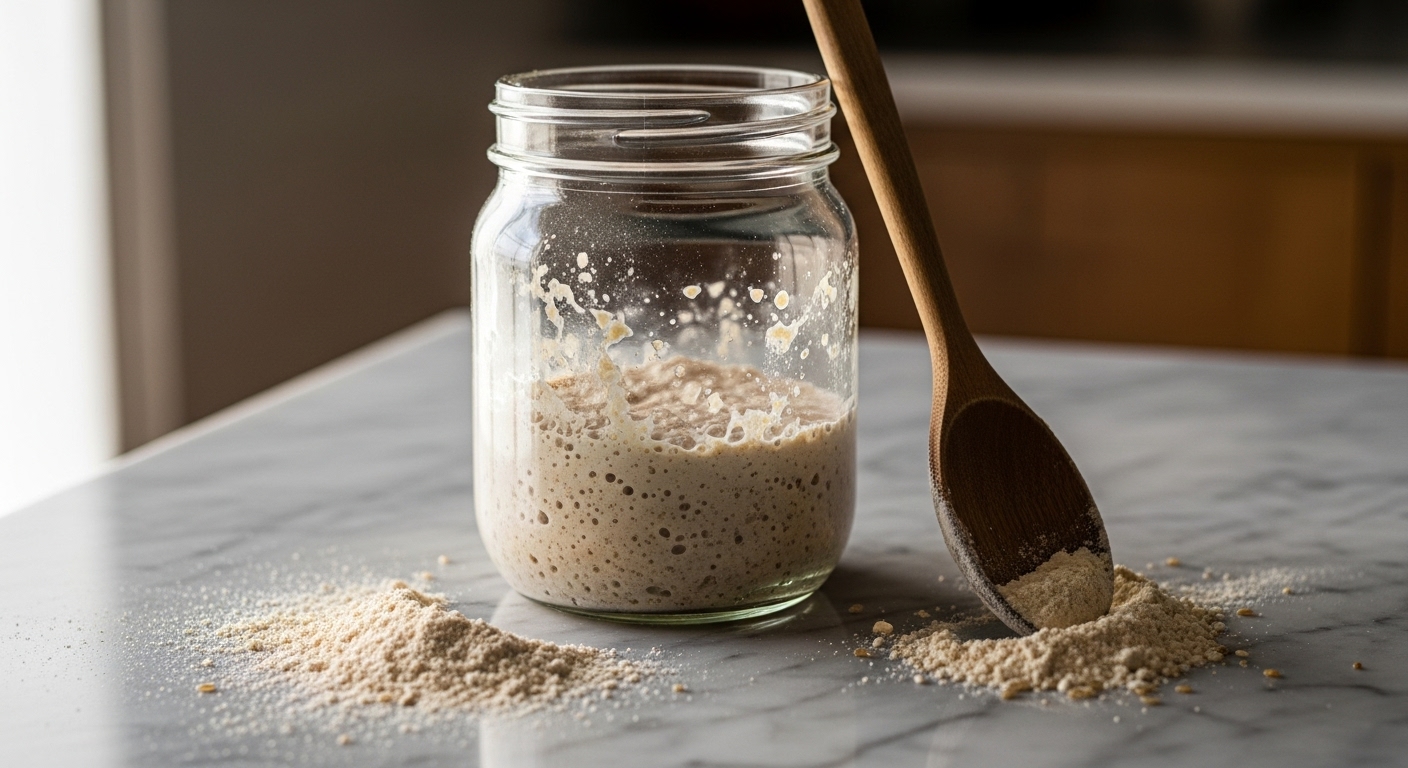
Mixing Your Initial Gluten-Free Starter
Although the process might seem simple, mixing your initial gluten-free starter requires careful attention to flour choice and hydration to create the ideal environment for wild yeast and bacteria to thrive.
Start by weighing equal parts of brown rice flour and filtered lukewarm water, about 50 grams each, to form a thick, pancake batter-like slurry. Using a precision kitchen scale ensures accurate measurements for consistent fermentation results.
Use a non-metal utensil to vigorously stir the mixture in a clean glass jar, incorporating air to invite wild yeast growth.
Avoid oat or quinoa flour and skip reactive metals; glass or ceramic containers work best.
Cover loosely with a breathable cloth or paper towel to allow airflow while keeping contaminants out.
Then, place your starter at room temperature around 70-75°F, giving wild microbes a cozy, inviting home to begin fermentation naturally.
Creating a wet, warm atmosphere with available sugar and protein encourages the growth of yeast and bacteria essential for a healthy starter.
Feeding Schedule for Developing Your Starter
Once your gluten-free starter starts bubbling, that’s when the fun really begins! You’ll want to feed it every 8 to 12 hours to help those yeasties grow strong and keep the starter nice and lively. It’s exciting to watch it grow!
As it matures and consistently doubles in size, you can ease up a bit and reduce feedings to just once a day for your regular baking needs. Make sure to discard some starter before feeding to maintain the 1:1:1 feeding ratio and keep your starter healthy.
Now, if you’re thinking about long-term care for your starter, a great tip is to pop it in the fridge. This way, you only need to feed it once a week. Just make sure you’re keeping that balance right with fresh flour and water, and your starter will thrive.
Initial Feeding Frequency
When you start your gluten free sourdough starter, feeding it within 8 to 12 hours is essential to ignite early fermentation and build a healthy culture.
Begin with small amounts, about 1 tablespoon each of flour and water, to gently rehydrate your starter without overwhelming it.
Early on, you might feed it 2 to 3 times daily to encourage rapid growth and prevent mold. Using a 1:1:1 ratio of starter, flour, and water is especially effective for gluten-free starters.
Maintaining a balanced flour-to-water ratio creates an ideal environment for wild yeast and bacteria to flourish.
Keep these in mind:
Feed every 8–12 hours to sustain fermentation.
Start small, gradually increasing feeding amounts.
Use equal parts flour and water by weight.
Discard some starter by day 3 to control size and boost activity.
This rhythm sets the stage for a lively, bubbly starter.
Long-Term Maintenance
To keep your gluten-free sourdough starter healthy and active over time, you’ll need to adjust your feeding routine as it matures. If you’re not baking daily, refrigerate your starter to slow fermentation and feed it once a week. The initial creation of your starter requires careful observation and adjustment to your environment to ensure successful fermentation.
Always discard a portion before feeding to prevent acidity buildup. Use the same gluten-free flour, like brown rice or buckwheat, and filtered water for consistent results. Maintain a 1:1:1 ratio of starter, flour, and water by weight, adjusting quantities as your starter grows. The fermentation process helps develop flavor and contributes to a lower glycemic index, which can be beneficial for health-conscious bakers.
Feed your starter at its peak height, just before it falls, to keep yeast robust. Track rise times and environmental changes to tweak feeding intervals.
Store loosely covered to allow airflow while guarding against contaminants. Clean jar sides during feeding to minimize mold risk.
Monitoring Starter Activity and Signs of Fermentation
Although gluten-free sourdough starters behave a bit differently from traditional ones, you can still track their progress by watching for key signs of fermentation. Monitoring the starter closely helps ensure you achieve the desired fermentation time and flavor development.
Pay close attention to changes in volume, aroma, and texture to know when your starter is active and ready. A lively starter will develop bubbles and rise, signaling healthy yeast and bacteria activity.
Look for these signs to monitor your starter:
- Doubling or more in volume 2-8 hours after feeding
- Small bubbles and air pockets throughout the starter
- A mild sour, bread-dough aroma replacing initial sweetness
- Dome-shaped rise on the surface indicating carbon dioxide production
Since gluten-free starters lack gluten’s gas-trapping network, they may show less visible rise, so relying on smell and texture is particularly important.
Adjusting Hydration and Consistency
Monitoring your gluten-free sourdough starter’s fermentation gives you clues about its health. Fine-tuning its hydration and consistency directly shapes how it behaves.
Start with equal weights of flour and warm water, about 100% hydration, for a batter-like texture. This hydration ratio influences dough texture and fermentation speed. If it feels too stiff, add water in small increments (5–10 grams per 25 grams of flour) to loosen it. This promotes faster fermentation and better microbial activity.
Begin with equal flour and warm water; add small water increments if too stiff for optimal fermentation.
Remember, wetter starters ferment quicker and create lighter crumbs. Stiffer ones develop stronger sour flavors but ferment slower.
Adjust water based on your flour type’s absorption; coarser flours need more hydration. Keep your feeding ratios consistent but flexible to maintain an ideal, slightly runny starter.
This balance ensures ease of mixing with robust fermentation for perfect gluten-free bread.
Maintaining and Storing Your Gluten-Free Starter
To keep your gluten-free sourdough starter lively, it’s essential to stick to a consistent feeding schedule. If you’re keeping it at room temperature, aim to feed it daily. A healthy starter will show active bubbles and a pleasant aroma, indicating it’s ready for baking.
On the other hand, if you prefer to store it in the fridge, you can stretch that out to every few days. Remember that storage in the fridge slows fermentation but does not stop the starter’s activity entirely.
Now, let’s talk about storage—it’s super important! Make sure you use breathable covers and non-reactive containers. This way, you’re protecting your starter while still allowing it to breathe.
With a little bit of care, your starter will stay healthy and be ready to enhance your baking whenever you need it!
Feeding Schedule Tips
When you’re nurturing your gluten-free sourdough starter, establishing a consistent feeding schedule is key to keeping it lively and ready for baking.
Early on, feed your starter every 8 to 12 hours to jumpstart yeast activity, then reduce to once daily after about a week for maintenance. Temperature impacts fermentation speed, so adjust feeding times according to your ambient temperature. Regular feeding is essential for maintaining an active and healthy starter culture.
Always discard excess starter before feeding to prevent acidity buildup and keep flavors fresh.
Use warm, filtered water and organic gluten-free flours like brown rice or buckwheat for best results.
Feed 3 times daily during the first 5-7 days, then once daily thereafter.
Maintain a 1:1:1 ratio of starter, flour, and water by weight.
Discard all but 50 grams before each feeding to refresh your culture.
Time feedings before baking to ensure peak starter activity and rise.
Storage and Handling
Keeping your gluten-free sourdough starter healthy doesn’t stop at feeding schedules. Proper storage and handling are key.
Refrigerate your starter in a covered jar with a loose or airtight lid to slow fermentation and extend the time between feedings, up to three weeks. A stiffer consistency by lowering hydration helps maintain the starter’s viability during refrigeration. Using eco-friendly storage options can also contribute to sustainability in your kitchen.
When ready to bake, take it out, feed, and let it activate.
For long-term storage, drying your starter into shards keeps it viable for years. Just store in a moisture-proof, airtight container.
Always maintain cleanliness by wiping jar rims and using clean utensils.
Label containers with dates and feeding reminders, keep starters out of direct sunlight, and adjust feeding times with seasonal temperature changes.
Before baking, revive refrigerated or dried starters by bringing them to room temperature and feeding to reactivate the microbes.
Frequently Asked Questions
Can I Use Tap Water for My Gluten-Free Sourdough Starter?
You can use tap water for your gluten-free sourdough starter, but you’ll want to treat it first.
Chlorine and chloramine in tap water can harm the bacteria and yeast that make your starter rise and bubble.
Letting water sit won’t remove chloramine, so using a carbon filter or dechlorinator helps keep your starter healthy.
Also, pay attention to water temperature and mineral content to encourage strong fermentation.
How Do Temperature Fluctuations Affect My Starter’s Fermentation?
Temperature fluctuations throw off your starter’s microbial balance, making fermentation unpredictable.
When temps swing too much, yeast and bacteria struggle, causing inconsistent rising and flavor changes.
Warmer spikes speed up fermentation but risk sourness and weak texture, while cooler dips slow it down, leading to dense, underproofed dough.
Keeping your starter steady around 76–80°F helps maintain a reliable rise and pleasant flavor, so try to avoid sudden temperature swings as much as possible.
Is It Possible to Use Gluten-Free Flour Blends Instead of Single Grains?
Yes, you can use gluten-free flour blends, but expect some challenges.
Blends often absorb water differently and can slow fermentation since they dilute the natural wild yeasts found in single grains.
To get the best rise and flavor, start your starter with wholegrain single flours. Then gradually introduce blends.
Keep an eye on hydration and feeding frequency, adjusting as needed to maintain a lively, bubbly starter ready for baking.
What Should I Do if My Starter Develops Mold or an off Smell?
If your starter develops mold or an off smell, discard it immediately to avoid health risks.
Visible mold or unpleasant odors mean harmful bacteria have taken over.
Don’t try to salvage it by scraping mold off, as spores might linger.
Start fresh with clean containers and fresh flour.
To prevent this, feed your starter regularly, keep it at stable temperatures, and avoid mold-prone environments.
Staying vigilant keeps your starter healthy and safe.
Can I Freeze My Gluten-Free Sourdough Starter for Long-Term Storage?
Wondering if you can freeze your gluten-free sourdough starter for the long haul?
Absolutely, you can! Just feed it until bubbly, then freeze individual portions in silicone trays.
After freezing solid, transfer to freezer bags. When ready, thaw at room temperature, feed it, and watch it come back to life with bubbling and that sweet-sour aroma.
Freezing keeps your starter safe up to six months, perfect for saving time and effort!
From Simple Starter to Spectacular Gluten Free Breads
Nurturing your gluten-free sourdough starter is like tending a delicate garden. Each feeding is a gentle rain, each bubble a blossoming flower.
With patience and care, your starter will grow vibrant and alive, ready to bring life to every loaf you bake. Keep watching, adjusting, and feeding it.
Soon you’ll harvest the rich, tangy flavors that only a well-tended starter can offer. Your kitchen’s little ecosystem thrives in your hands.