Fresh Milled Flour Sourdough Bread Recipe: Artisan Guide
Start by milling high-protein wheat berries for fresh, flavorful flour. Measure precisely with a digital scale, then autolyse flour and water for about an hour to hydrate enzymes and improve extensibility.
Add your sourdough starter, salt (1–2% of flour weight), and optional vital wheat gluten to boost dough strength. Use stretch and folds during fermentation, then gently knead and shape to preserve structure.
Bake in a preheated Dutch oven at 425°F for 40–50 minutes. Master these steps to reveal optimal sourdough quality.
Key Takeaways
- Mill high-protein wheat berries finely for optimal water absorption and gluten development in your sourdough bread dough.
- Autolyse flour and water for 1 hour before adding starter and salt to improve dough extensibility and enzyme activation.
- Use a 1:1:1 ratio of starter, water, and flour by weight with unchlorinated water to maintain active wild yeast and bacteria.
- Perform stretch and folds every 30–45 minutes during bulk fermentation at 70–75°F to build gluten strength without kneading.
- Bake in a preheated 425°F Dutch oven with steam for 40–50 minutes until internal temperature reaches 200–210°F for a crisp crust.
Sourdough With Freshly Milled Flour Recipe Table
| Step | Ingredient / Action | Details & Ratios | Tips for Success |
|---|---|---|---|
| 1. Mill Flour | High-protein wheat berries | Mill finely to produce ~500g flour | Fresh milling improves flavor, nutrition, and gluten strength |
| 2. Autolyse | Flour + water | 500g flour + 375g water (75% hydration) | Rest for 1 hour to hydrate enzymes & develop extensibility |
| 3. Add Starter & Salt | 100g active sourdough starter + 10g salt | Salt = 2% of flour weight | Mix gently to preserve structure |
| 4. Bulk Fermentation | Stretch & folds | Every 30–45 minutes for 3–4 hours at 70–75°F | Builds strong gluten without over-kneading |
| 5. Shape Dough | Lightly floured surface | Use “cup & turn” method | Creates surface tension for better oven spring |
| 6. Proofing | Banneton or bowl | 2–4 hrs at room temp or overnight cold proof | Cold proof enhances flavor depth |
| 7. Bake | Dutch oven, 425°F | Bake 40–50 min until 200–210°F internal temp | Steam first 15 mins for a crisp crust |
| 8. Cool & Serve | Wire rack | Cool fully before slicing | Prevents gummy texture and locks in flavor |
Preparing Your Sourdough Starter for Fresh Milled Flour
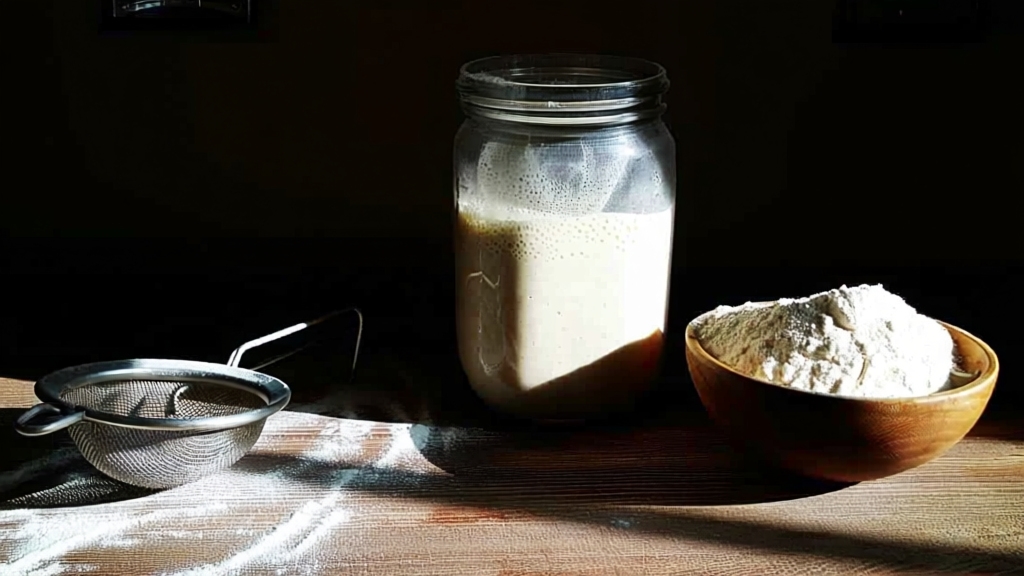
When preparing your sourdough starter with fresh milled flour, start by selecting high-quality hard white or hard red wheat flour to maximize microbial viability. Using flour made from fresh milling can enhance the flavor and texture of your bread, similar to the benefits seen with real ingredients in sourdough mixes.
Use unchlorinated water—preferably bottled spring water—to avoid inhibiting wild yeast and bacteria.
Measure ingredients precisely with a digital kitchen scale, maintaining a 1:1:1 ratio by weight of starter, water, and flour.
Combine these in a clean glass jar with a loose lid to allow airflow while preventing contamination.
Keep the starter at 75°F to 78°F (24°C to 26°C) to promote microbial activity. It is important to avoid mold growth by ensuring all utensils and containers are clean.
Stir thoroughly after feeding to distribute microorganisms and incorporate oxygen.
Feed your starter every 24 hours, discarding a portion beforehand to maintain volume and balance.
Monitor for bubbles and volume increase, which indicate healthy fermentation and readiness for baking.
Milling Wheat Berries and Measuring Flour
Start by selecting high-quality, clean wheat berries free from debris for consistent milling results. Choosing wheat berries with a high protein content ensures better gluten development and structure in your sourdough.
Measure your grains and flour by weight, not volume, to guarantee accuracy since grind coarseness affects density. Accurate measurement is essential to maintain proper hydration levels for your dough.
Use a reliable scale to maintain precise ratios critical for your sourdough bread’s texture and rise. Precision in ratios supports the development of a strong gluten network necessary for an airy crumb.
For best baking results, mill your wheat berries to a fine grind to ensure sufficient starch damage and optimal water absorption. This enhances fermentation and helps achieve the ideal dough consistency.
Choosing Wheat Berries
How do you select the ideal wheat berries for milling fresh flour tailored to your sourdough bread? Focus on protein content, gluten strength, and flavor profile.
Hard red and hard white wheats provide high protein (11–15%) and strong gluten, essential for dough structure and rise. Choose red wheat for robust flavor or white wheat for milder taste. Fresh milling, much like maintaining durability features in kitchen tools, ensures the flour retains its optimal baking properties.
Consider blending hard and soft white wheats for an all-purpose flour. This combination offers a balanced protein level and gluten strength, suitable for versatile baking needs.
Fresh milling preserves nutrients and affects water absorption, impacting dough workability. Milling just before use ensures maximum freshness and optimal dough performance.
In addition to these qualities, some bakers prefer organic wheat berries for their health-conscious benefits and reduced exposure to pesticides.
| Wheat Type | Protein (%) | Gluten Strength | Flavor Profile | Ideal Use |
|---|---|---|---|---|
| Hard Red Winter | 11–15 | High | Robust, hearty | Structured bread |
| Hard White | 11–15 | High | Milder, sweet | Soft, elastic bread |
| Soft White | 8–10 | Low | Mild | Tender crumb goods |
| Soft Red | 8–10 | Low | Smooth, subtle | Pastries, non-yeast |
| Hard + Soft White | ~10–13 | Medium | Balanced | Versatile baking |
Accurate Flour Measurement
Accurate measurement of freshly milled flour is essential for consistent sourdough baking results. Unlike store-bought flour, freshly milled flour is fluffier and less dense, weighing about 155 grams per US cup. Home millers benefit from using conversion charts to translate grains into precise flour measurements.
You should always use a digital kitchen scale to weigh your flour, as volume measurements fluctuate due to aeration and compaction. If you must use volume, fluff the flour first, spoon it into the cup, and level it off to reduce variability. Understanding the effects of temperature management on flour and dough can further enhance your baking outcomes.
Remember to tare your scale before weighing.
Keep in mind that milling affects particle size and moisture, altering flour density and water absorption.
Record your exact weights to refine conversions. Adjust hydration in your recipe since freshly milled flour absorbs more water due to bran and germ content.
Mixing Ingredients and Autolyse Process
When mixing ingredients for sourdough with fresh milled flour, you’ll begin by combining only flour and water to initiate the autolyse process. This rest period hydrates flour particles and activates enzymes, improving dough extensibility and gluten formation.
The autolyse technique helps to reduce the total mixing time by allowing gluten bonds to form naturally during this rest period, which benefits dough strength and texture reduces mixing time. Using high-quality, natural ingredients enhances the overall nutritional profile and flavor complexity of the bread, similar to how nutrient retention is valued in cooking.
Because fresh milled flour is thirstier, allow at least one hour for autolyse. However, avoid excessive autolyse to prevent weakening the dough.
Gentle mixing ensures uniform hydration without developing gluten fully. This approach helps prepare the flour for the next stages.
| Aspect | Guideline |
|---|---|
| Autolyse Duration | 1–4 hours (fresh milled: ~1 hr) |
| Mixing Technique | Gentle hand mixing or folding |
| Post-autolyse Action | Add starter and salt later |
This method enhances starch conversion to sugars, softens dough, and sets a strong gluten network for excellent sourdough structure.
Incorporating Salt and Vital Wheat Gluten
You’ll add salt after the autolyse to regulate yeast activity and strengthen gluten strands. This enhances dough structure and flavor balance. Adding vital wheat gluten increases the protein content of the flour, which is essential for building a strong gluten network. Incorporating essential wheat gluten compensates for fresh milled flour’s lower protein content.
This improves elasticity and gas retention in the dough. Precise timing and quantities are crucial. They ensure ideal dough performance and optimal crumb texture. Using a high hydration dough can further improve extensibility and crust quality in sourdough bread.
Salt’s Role in Dough
Although salt is often viewed simply as a seasoning, it plays a critical role in sourdough dough development by enhancing flavor, strengthening gluten networks, and regulating fermentation.
You should add salt at about 1–2% of flour weight to tighten gluten proteins. This improves dough cohesiveness and gas retention, resulting in better crumb structure and oven spring. Typical suggestion is around 10g salt for 500g flour, balancing flavor and dough performance. Consistent dough temperature around 75°F (24°C) also helps optimize salt’s role in fermentation control.
Salt’s osmotic effect slows yeast and bacterial metabolism, ensuring controlled, even fermentation. This enhances flavor and maintains dough temperature stability.
When combined with vital wheat gluten, salt’s tightening effect complements added gluten proteins. This boosts dough elasticity without compromising rise—though excessive salt can inhibit fermentation and negate gluten benefits.
Adjust salt levels carefully to balance flavor, dough handling, and fermentation control for ideal sourdough performance. Proper bulk fermentation and gluten development techniques further enhance the benefits of salt and vital wheat gluten in the dough.
Benefits of Vital Gluten
Balancing salt with essential wheat gluten enhances dough strength and fermentation control in your sourdough.
Crucial wheat gluten boosts protein content up to 90%, strengthening gluten bonds for better gas retention and improved loaf volume.
It compensates for weaker flours, enhancing dough elasticity and crumb texture without adding fat or sodium.
| Benefit | Effect |
|---|---|
| Protein Content | Increases gluten strength |
| Dough Workability | Reduces stickiness, improves shape |
| Fermentation | Supports longer proofing |
| Bread Volume | Enhances rise and gas retention |
| Crumb Quality | Produces lighter, chewier texture |
Use vital gluten to stabilize dough with whole grains or fresh milled flour, ensuring consistent rise and artisan-quality crumb without compromising natural sourdough flavor. For best results, measure your ingredients precisely using a digital baking scale to maintain consistent dough hydration and fermentation.
When to Add Salt
When incorporating salt into your sourdough, timing plays a crucial role in optimizing gluten development and fermentation control. Add salt during autolyse alongside flour, water, starter, and essential wheat gluten to ensure uniform mixing and a resilient gluten network.
This method strengthens gluten, regulates enzymatic activity, and tempers yeast, improving dough elasticity and oven spring. Adding salt early can help prevent flour bleaching due to its antioxidant properties. Proper mixing at this stage also facilitates better gluten formation throughout the dough.
Alternatively, add salt immediately after autolyse, before the first stretch and fold, to avoid compromising dough structure. This timing helps maintain dough integrity and ensures even salt distribution.
Avoid late salt addition after multiple folds; it complicates incorporation and risks weakening gluten. Never add salt directly onto yeast or gluten powder to prevent localized inhibition or damage.
Consistent early salt incorporation ensures balanced fermentation, enhanced dough strength, and uniform flavor, indispensable for a successful fresh milled flour sourdough.
Performing Stretch and Fold Technique
Since developing gluten strength is essential for sourdough structure, performing the stretch and fold technique during bulk fermentation allows you to build elasticity without traditional kneading. This technique also helps redistribute the microbial communities throughout the dough, supporting fermentation.
Begin by wetting your fingertips to prevent sticking, then stretch a portion of dough upward and fold it toward the bowl’s center.
Rotate the bowl a quarter turn and repeat in all four cardinal directions, completing one set of four folds.
Perform 2–4 sets spaced 30–45 minutes apart to strengthen gluten progressively and evenly. This timing aligns well with the typical intervals recommended for bulk rise.
Adjust intensity based on dough strength: gentle folds preserve structure, while vigorous ones improve slack dough.
Monitor dough texture, aiming for a plump, jiggly feel.
Avoid overdoing folds early, as that risks weakening gluten or degassing excessively.
Use smooth, controlled motions to prevent tearing and ensure ideal gluten alignment.
Kneading Freshly Milled Flour Dough
Although kneading freshly milled flour dough demands patience, mastering the process guarantees ideal gluten development despite the bran’s interference. Expect kneading times between 10 and 30 minutes, varying by grain type and environment.
Monitor the dough’s texture closely; it should evolve from shaggy to cohesive and slightly elastic.
Use a dough hook on a stand mixer for efficiency or hand knead with methods like slap and fold, adjusting time accordingly. A stand mixer with dough hook can provide consistent kneading that helps develop gluten more effectively.
Incorporate 15-minute rest intervals to relax gluten and improve extensibility.
Add water incrementally to balance hydration, as bran absorbs more moisture than commercial flour.
Handle dough gently to avoid tearing from bran particles.
Avoid over-kneading and excessive flour additions, which risk dryness and damaged gluten.
This precise approach ensures superior dough strength and workability.
Monitoring Fermentation and Dough Development
As you monitor fermentation, keep in mind that temperature and time critically influence dough development and flavor formation. At around 80ºF, bulk fermentation typically lasts 3.5 to 4 hours, but cooler conditions can extend this to 8-9 hours. Because freshly milled flour retains higher enzymatic activity, it enhances crust shine and flavor during fermentation and baking.
Temperature and time are key to dough development; warmer speeds up fermentation, cooler slows it down.
Use stretch and fold techniques to develop gluten structure and redistribute yeast. Observe the dough’s elasticity and air pockets as indicators of proper fermentation.
Maintain consistent temperature to control the pace and avoid over-fermentation. Use room temperature (70-75ºF) for slower, controlled fermentation.
Adjust hydration to achieve a springy, well-structured dough. Incorporate salt to moderate yeast activity and fermentation speed.
Employ refrigeration for cold proofing to extend fermentation time and enhance flavor complexity.
Shaping the Dough for Baking
When shaping your sourdough dough for baking, you’ll want to prepare a lightly floured work surface to prevent sticking while preserving enough dough tackiness for proper adhesion. Use rice or all-purpose flour sparingly to avoid gummy crust texture.
Guarantee the dough is at room temperature to relax gluten for easier handling. Employ the “cup and turn” method: gently pull the dough edges, tuck them underneath repeatedly, and rotate clockwise to build surface tension.
This tension stabilizes shape and promotes oven spring. Milling your own grain preserves natural oils that can affect dough handling and enhance flavor and texture.
Between shaping rounds, allow bench rests of 10-20 minutes for elasticity recovery.
Handle the dough gently to maintain fermentation gases, avoiding deflation. Once shaped, place the dough seam side up in a floured banneton or bowl lined with a floured cloth to support structure during proofing.
Baking Your Fresh Milled Flour Sourdough Loaf
Before you bake, preheat your oven to 425°F (218°C). Place your bread pan, Dutch oven, or baking stone inside to guarantee even heat distribution and proper crust formation. This step ensures excellent oven spring and a crisp crust.
Preheat your oven to 425°F with baking vessel inside for even heat and perfect crust.
Once your dough is ready, invert it gently onto a floured surface or peel. Then score it using a sharp blade to control expansion. It is important to recognize quicker fermentation reduces sourness, aiming for a mild flavor when working with fresh milled flour sourdough.
Transfer the dough carefully into the preheated vessel. Introduce steam during the first 15 minutes of baking to enhance crust texture.
Bake for 40-50 minutes until the crust is deep golden and the internal temperature hits 200-210°F (93-99°C). Avoid opening the oven door frequently to maintain stable heat.
Remove the bread immediately and cool it on a wire rack. This preserves crust crispness and promotes flavor development.
Frequently Asked Questions
How Do I Store Leftover Freshly Milled Flour to Maintain Freshness?
You’ll want to treat your leftover freshly milled flour like a delicate treasure. Store it in airtight, moisture-resistant containers to shield it from unwanted guests like moisture and pests.
Keep it cool, dark, and dry—refrigerate for up to a week or freeze for longer freshness, up to six months. Always use plastic containers or ziplock bags when chilling to avoid absorbing odors.
Don’t forget to label with milling dates for best quality tracking.
Can I Substitute Other Grains for Wheat Berries in This Recipe?
Yes, you can substitute other grains for wheat berries, but you must adjust hydration and expect changes in dough elasticity due to varying gluten content.
Start with partial substitutions (10-30%) using grains like spelt or kamut for better gluten strength.
Gluten-free grains need binders and will produce denser bread.
Monitor fermentation closely, tweak water levels, and adapt kneading to optimize texture and flavor when using alternative grains.
What Equipment Is Essential for Milling Wheat Berries at Home?
You don’t *require* much—just a grain mill, right? Actually, you’ll want an electric or manual grain mill with adjustable grind settings to control flour texture precisely.
A kitchen scale is essential for accuracy, plus a thermometer to prevent overheating your flour.
Mixers like a KitchenAid ease dough preparation, while sifters refine texture.
How Do Ambient Humidity Levels Affect Sourdough Fermentation?
Ambient humidity accelerates sourdough fermentation by increasing microbial activity, shortening bulk fermentation time.
High humidity makes your dough stickier and wetter, complicating handling. It also intensifies acidity and flavor changes by altering bacterial balance.
To manage this, lower hydration, use cooler water, and increase salt slightly. Monitor proofing closely, and consider cold proofing to slow fermentation.
Adjust starter feeding frequency to maintain microbial stability in humid conditions.
What Are Signs of Overproofed Sourdough Dough Before Baking?
You’ll notice large surface bubbles with thin membranes and sagging dough that can’t hold its shape.
When you gently poke it, the dough won’t spring back, leaving a deep dent.
The surface may feel sticky or overly soft, and scoring becomes difficult due to dough sticking to the blade.
You might detect a strong alcoholic smell, and visually, the dough can look deflated or wrinkled, signaling overproofing before baking.
Keep Baking, Keep Growing with Fresh Milled Flour
Think of your sourdough journey like nurturing a seed into a strong, fruitful tree. Each step—from milling fresh flour to the final bake—is an essential root, branch, and leaf that supports your loaf’s rise and flavor.
By mastering these techniques, you cultivate a living, breathing bread that rewards your patience and skill. Keep refining your craft, and your fresh milled flour sourdough will continually grow into a masterpiece of texture and taste.