Extra Sour Sourdough Bread Recipe for Bold Flavor
To make extra sour sourdough, start with nutrient-rich flours like rye or whole wheat to fuel lactic and acetic acid bacteria. Feed your starter at a cooler temperature with higher ratios (like 1:4:4) about 8 hours before baking to boost acetic acid for tang.
Use a long, cold fermentation (6–24 hours at ~3°C) to deepen flavor and improve crust. Shape gently to preserve gas, then bake with steam at high heat for a crisp, flavorful crust. Master these steps to elevate your sourdough’s tang and texture.
Key Takeaways
- Use whole rye or whole wheat flour in the starter to boost lactic and acetic acid bacteria for a tangier flavor.
- Feed the starter with a high ratio (1:4:4) and ferment at 75–82°F for 8–10+ hours to maximize acidity and sourness.
- Employ cold retardation of dough at 3°C for 12–24 hours to deepen sour notes and improve flavor complexity.
- Maintain starter and dough temperatures around 75–78°F during bulk fermentation and proofing to balance lactic and acetic acid production.
- Bake on a preheated stone or in a Dutch oven with steam at high temperature to enhance crust caramelization and sour flavor intensity.
Recipe Breakdown for Extra Sour Sourdough Bread
| Ingredient | Ratio / Amount | Purpose / Notes |
|---|---|---|
| Active Starter | 1 part (1:2:1 or 1:4:4) | Provides yeast & bacteria; higher ratios build tangy, extra sour flavor |
| Bread Flour | 85–90% of total flour | High protein for strong gluten structure and oven spring |
| Whole Grain Flour | 10–15% (rye or whole wheat) | Fuels lactic & acetic bacteria for maximum sourness |
| Water | 70–75% hydration | Warmer water speeds fermentation; cooler water intensifies sourness |
| Salt | ~2% of flour weight | Regulates fermentation, enhances flavor without muting sourness |
| Levain | 1:1:2 ratio | Starter + flour + water mixture for building dough strength & tang |
| Fermentation | 6–24 hrs cold at ~3°C | Cold retardation boosts acidity, tang, and complex flavors |
| Proofing | 2–4 hrs at 75–78°F | Controls rise & structure; longer cold proof adds sharper tang |
| Baking Method | Dutch oven or stone + steam | Ensures crisp, caramelized crust and deep sour notes |
Flour Choices for Maximum Sourness

When aiming for maximum sourness in your sourdough bread, understanding the impact of different flour types is essential. Whole wheat flour, rich in bran and germ, enhances sourness by providing nutrients that boost lactic acid bacteria activity.
Rye flour, with its unique sugars and enzymes, encourages vigorous fermentation and tangy flavors. Bread flour’s high protein content builds strong gluten networks, supporting longer fermentation and complex sour notes.
In contrast, all-purpose flour, with lower protein and less nutrient density, usually produces milder sourness and a denser crumb. To balance texture and sour flavor, combine whole grain flours like rye or whole wheat with bread flour.
Additionally, hydration level plays a crucial role in fermentation dynamics, as higher hydration can promote more active microbial activity and a more pronounced sour flavor. The natural fermentation process in sourdough relies on wild yeasts and bacteria, which work symbiotically to develop its signature tangy taste.
Preparing and Feeding Your Starter for a Tangy Boost
To boost your starter’s tanginess, select flours rich in nutrients like rye or whole grain, as they stimulate acid-producing bacteria.
Use precise feeding ratios such as 1:2:1 or 1:4:4 starter to flour and water to control acid levels.
Time your feedings about 8 hours before baking for peak sourness.
Maintain your starter at warm temperatures between 75°F and 82°F to accelerate acid development and achieve that sharp, tangy flavor.
Incorporating cooler water (60–70°F) during feedings can also help slow fermentation and enhance the sourness profile.
Choosing Flour Types
How does the type of flour you choose impact your sourdough starter’s activity and flavor? Different flours influence microbial vitality, acidity, and texture. Consider these key points:
- Whole grain flours like rye and whole wheat contain more nutrients, boosting yeast activity and producing a tangier, thicker starter with a slower peak. Rapid fermentation in rye and sprouted wheat starters suggests that flour composition strongly affects microbial activity and fermentation timing.
- Bread flour creates stronger gluten networks, leading to larger bubbles and moderate rise times but milder acidity. This is similar to how high-quality flours in bread mixes affect texture and rise.
- Sprouted wheat flour increases enzymatic activity, giving your starter a sweeter, maltier aroma without increasing gluten strength. This enzymatic activity may also contribute to a faster fermentation peak and a thinner starter texture.
Adjust hydration accordingly. Whole grains absorb more water, so expect a stiffer starter, which enhances acidity and sourness.
Feeding Ratios Explained
Although maintaining a sourdough starter may seem straightforward, understanding and controlling feeding ratios is essential for optimizing its activity and flavor. Feeding ratios indicate the weight proportions of starter, flour, and water—for example, 1:1:1 means equal parts by weight.
This balance nourishes the yeast and bacteria, sustaining a healthy microbial community. The quantity of starter you maintain should align with your baking frequency to minimize waste and discard, ensuring efficient use of resources (managing the starter). Using a digital baking scale can greatly improve the accuracy of these measurements, leading to better starter health.
Lower ratios like 1:1:1 or 1:2:2 accelerate ripening in 4–6 hours, requiring more frequent feedings. Higher ratios such as 1:4:4 extend fermentation to 10 hours or more, encouraging increased acid production and tanginess.
Choose feeding ratios that fit your schedule and desired sourness level. For extra sour flavor, a 1:4:4 ratio works well, promoting acidity buildup while maintaining yeast activity. Precise feeding guarantees a robust, tangy starter ready for exceptional sourdough bread.
Timing and Temperature
Mastering feeding ratios sets a strong foundation, but timing and temperature during starter preparation and feeding significantly influence your starter’s activity and flavor profile. Maintaining your starter between 76–80ºF encourages consistent fermentation and balanced acidity.
Cooler temperatures produce more acetic acid, boosting tanginess, while warmer conditions favor lactic acid for milder sourness. Feed your starter according to temperature to optimize activity and flavor.
Using a pseudo-proofing box or warming mat can help maintain a consistent temperature range during fermentation. The ideal fermentation temperature is 74°F (23°C) to promote optimal yeast activity and flavor development.
- Feed every 12 hours at approximately 78ºF to sustain robust fermentation and tang.
- At 44–48ºF, reduce feedings to weekly to slow activity without harming the starter.
- Use water below 100ºF to protect yeast viability during mixing.
Synchronize starter and dough temperatures for predictable rises and richer flavor. Temperature control is key to tailoring your sourdough’s tangy complexity.
Essential Ingredients and Their Ratios
Which ingredients and their precise ratios shape the distinctive character of your sourdough bread? Start with a thick, tangy starter using a 1:2:1 ratio (starter:flour:water by weight) to boost acidity.
Use mostly bread flour (85-90%) for strong gluten, adding 10-15% whole grain flour, especially rye, to enhance sour notes via acetic acid. Bread flour’s higher protein content supports gluten development and oven spring during long fermentation, which is essential for achieving that ideal texture and rise.
Hydrate your dough between 70-75% (water to flour weight) for an open crumb and faster acid development; adjust water temperature to 70–75°F to accelerate fermentation.
Keep salt at about 2% of flour weight to moderate fermentation and flavor without suppressing sourness.
For levain, blend starter, flour, and water in roughly a 1:1:2 ratio, then mix with your main dough flour and water as above.
Precise weighing guarantees consistent, extra sour results. Maintaining precise oven and fridge temperatures is crucial to optimize fermentation and flavor development.
Step-by-Step Dough Mixing and Autolyse Process
Now that you’ve measured your ingredients with exact ratios to shape your sourdough’s flavor and texture, it’s time to focus on combining them properly. Begin by mixing only the flour and water, with no salt or starter yet, to kick off the autolyse.
Follow these steps:
Follow these steps to hydrate your dough properly and prepare it for a successful fermentation.
- Add flour and water in batches, mixing gently between additions to hydrate evenly without overworking the dough. Stop once no dry flour remains. This step is crucial because flour hydration allows enzymes to activate. Using high-protein flour can enhance gluten development and improve dough texture.
- Cover the bowl immediately to lock in moisture and let the dough rest for 20 minutes to 2 hours. This rest activates enzymes that break down gluten proteins and starches, improving extensibility and flavor.
- After autolyse, incorporate salt and your starter gently, mixing just 3–5 minutes to avoid tightening gluten prematurely.
This method assures a well-hydrated, extensible dough ready for fermentation.
Techniques for Long Fermentation and Cold Retardation
Although long fermentation requires patience, it significantly enhances your sourdough’s flavor, texture, and digestibility. Begin bulk fermentation at room temperature, performing stretch-and-folds every 20–30 minutes to build gluten strength without degassing.
Use warm water during mixing to speed fermentation and encourage optimal starter activity. Maintaining an appropriate temperature during fermentation is crucial for flavor development and rise speed.
After 6–24 hours, gently transfer the dough to cold retardation at around 3°C. This process slows yeast activity, allowing lactic and acetic acids to develop, deepening sourness and improving dough manageability.
Keep the temperature steady and low to prevent over-proofing or spoilage. Use less starter and higher hydration (70%+) to support enzymatic activity and acidity during this phase. Hydration percentage directly influences the bread’s moisture and texture, contributing to the final crumb quality.
Cover the dough loosely to prevent drying while enabling gentle gas exchange. Handle it carefully to preserve gas bubbles, which are essential for an open crumb and superior texture in your extra sour sourdough.
Shaping, Proofing and Baking for Optimal Crust and Crumb
When shaping your dough, use the envelope method and handle it gently to maintain gas bubbles for an open crumb. Gently cupping the dough and moving it in a circular motion helps develop surface tension without deflating the loaf. Wearing textured nitrile gloves can enhance grip and hygiene during this delicate process.
Proof your loaf at room temperature until it passes the poke test, or opt for cold retardation to enhance flavor and crust. Refrigeration can be used for up to 12 hours to slow fermentation and improve dough structure.
Bake on a preheated stone or in a covered vessel with steam to achieve a crisp, caramelized crust and perfect oven spring. Preheating the baking vessel ensures even heat distribution and optimal crust development.
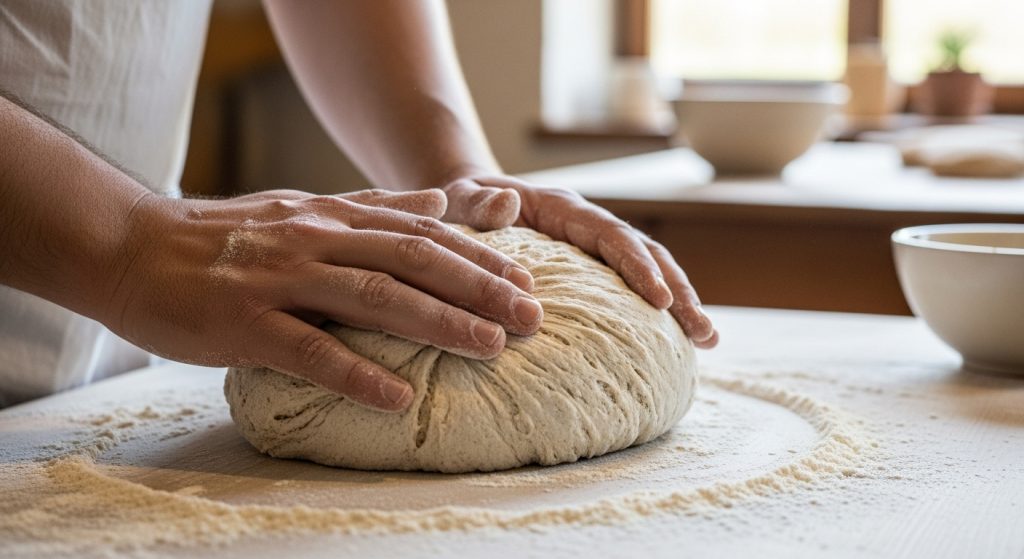
Dough Shaping Techniques
Because shaping directly influences your sourdough’s final texture and appearance, mastering proper techniques is essential for achieving an ideal crust and crumb. Start with the envelope method: stretch and fold each dough side toward the center to create surface tension. This technique also encourages even gluten development throughout the dough.
Then, gently cup and rotate the dough in circular motions with floured hands to tighten its shape before proofing. It is important to flour the surface before shaping to prevent sticking and ensure easier handling.
After initial shaping, flip the dough and let it rest 5 to 10 minutes. This relaxes gluten and eases final shaping.
Remember to handle the dough gently to avoid degassing and maintain oven spring.
Key shaping tips:
- Use minimal flour on surfaces to prevent drying.
- For boules, gather and tuck corners or fold slack dough to build tension.
- Proof seam side up in floured bannetons to preserve shape and promote crust crispness.
Proofing Time and Temperature
Once you’ve shaped your dough to build surface tension and structure, controlling proofing time and temperature becomes the next key step to optimize your sourdough’s rise, texture, and flavor.
Aim for a proofing temperature around 75°F to 78°F (24°C to 25°C) to balance yeast and bacterial activity, promoting stable fermentation and ideal dough handling. Maintaining a consistent temperature also helps the osmotic effect of salt regulate yeast metabolism during proofing. This stage is known as the final fermentation or proofing, which occurs after shaping and before baking.
Typical proofing lasts 2 to 4 hours at this range. If you want a tangier loaf, consider cold proofing at 39°F to 46°F (4°C to 8°C) for 8 to 16 hours, which slows fermentation and enhances sour notes.
Avoid temperatures above 85°F (29°C) to prevent overproofing, which weakens dough structure and crust quality.
Watch your dough closely—underproofed dough yields dense crumb, while overproofed dough becomes gummy and flat.
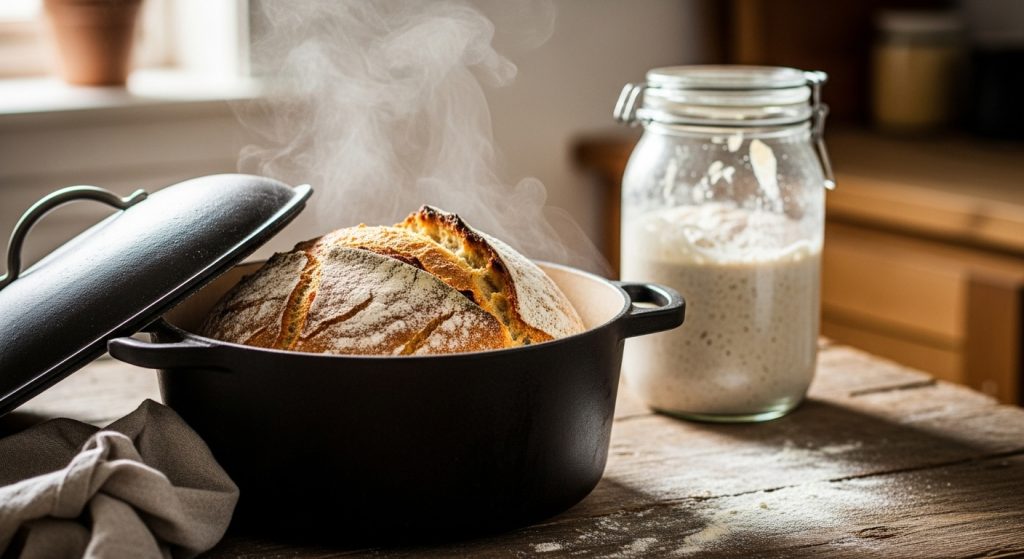
Baking Vessel and Steam
Although shaping and proofing prepare your dough for baking, selecting the right baking vessel and managing steam are essential to achieving an ideal crust and crumb in sourdough bread.
Use a Dutch oven made of cast iron, ceramic, or clay to trap moisture and create a self-steam environment that boosts oven spring and crust development. This trapped steam prevents crust formation early in baking, allowing the loaf to expand fully.
If you bake on stones or steel, generate steam by:
- Pouring boiling water into a preheated pan for an initial steam burst.
- Placing wet towels in a pan to sustain humidity early in baking.
- Removing lids or venting steam halfway through baking to dry the crust and enhance browning.
Control steam timing carefully: steam early for volume and crust flexibility, then vent to develop a crisp, caramelized crust and open crumb.
Tips to Intensify and Maintain the Extra Sour Flavor
When you want to boost and maintain an extra sour flavor in your sourdough bread, start by selecting the right flours and managing your starter carefully. Use whole grain flours like rye or whole wheat to promote acetic acid bacteria, which intensifies sourness.
Incorporate rye flour specifically for a sharper tang. Maintain a mature, active starter, feeding it less frequently to build acetic acid, and stir in the hooch before mixing.
Add the starter at its peak and prefer a stiffer consistency. Control fermentation by opting for longer, cooler bulk fermentation to favor acetic acid production.
Increase stretch and folds to distribute bacteria evenly. Retard the dough in the fridge for added complexity.
Adjust flour ratios and hydration to balance texture and sour intensity precisely.
Creating a steamy environment during baking is crucial to developing the desired crust and enhancing the overall flavor profile of the sourdough.
Frequently Asked Questions
Can I Use a Sourdough Starter Made From Store-Bought Bread?
You can’t reliably create a sourdough starter from store-bought bread because it lacks the wild yeast and beneficial bacteria needed for fermentation. Commercial breads often contain preservatives that inhibit microbial growth, so your starter won’t develop properly.
Instead, start your culture with just flour and water, feeding it regularly over 2 to 4 weeks to cultivate a healthy, active starter that produces authentic sourdough flavor and texture.
How Do Ambient Kitchen Temperatures Affect Sourdough Sourness Development?
Ambient kitchen temperatures directly influence sourdough sourness by affecting fermentation speed and acid production. Cooler temps (60–72°F) encourage lactic and acetic acid production, enhancing balanced sourness.
Warmer temps (above 80°F) speed yeast activity but reduce acetic acid, creating milder acidity. Keep your kitchen between 74–86°F to balance flavor and fermentation.
Monitor temps closely; too cold slows fermentation and too hot risks overproofing and weak dough structure.
What Is the Best Way to Store Leftover Sourdough Bread?
Imagine storing your sourdough like a medieval scroll—handle it with care. You should keep leftover sourdough bread at room temperature, ideally 60-70°F, away from sunlight and humidity.
Wrap it in a linen cloth or place it in a breathable cotton bag to maintain crust crispness and moisture.
Avoid plastic bags unless freezing. If freezing, double-wrap with plastic wrap and a freezer bag.
Always let bread cool fully before storing to prevent sogginess.
Can Adding Herbs Alter the Fermentation Process or Sourness?
Yes, adding herbs can subtly alter fermentation and sourness. Their antimicrobial compounds might slow microbial activity slightly, extending fermentation and potentially boosting sourness.
Herbs can also shift lactic acid bacteria strains, influencing acid production rates. While they don’t drastically change pH, they affect flavor complexity, which impacts perceived sourness.
To control this, add herbs gradually during stretch-and-fold phases and monitor fermentation times closely for best results.
How Does Hydration Level Influence the Bread’s Texture Versus Its Sourness?
You’d think pouring more water into your dough only makes it wetter, right? Actually, higher hydration creates a lighter, airier crumb but demands skilled handling since the dough gets stickier and weaker.
As for sourness, hydration plays a subtle role—wetter doughs speed up acid production yet risk over-fermentation. So, balance hydration carefully: aim for 65-75% for manageable texture and moderate sourness, tweaking based on flour and fermentation conditions.
Turn Every Loaf Into a Bold, Tangy Masterpiece
By choosing the right flour and nurturing your starter carefully, you’ll unseal that bold tang you crave. Follow each step from mixing to cold fermentation to develop complex flavors like a symphony building in intensity.
Shape and bake with intention to get the perfect crust and crumb. With these techniques, your extra sour sourdough will stand out, delivering a flavor punch that’s as sharp and satisfying as biting into a ripe green apple.