Dairy Free Bread Maker Recipe: Simple Steps for Fluffy Loaves
You can easily make delicious dairy-free bread in your bread maker by using all-purpose or gluten-free flour blends combined with plant-based milk like almond or soy.
Add neutral oils such as canola or melted coconut oil for moisture, and feed your yeast with natural sweeteners like maple syrup or honey to guarantee a good rise.
Remember to proof your yeast in warm water, keep your machine clean, and boost dough strength with ingredients like lecithin.
For crisp crusts and perfect texture, there’s more to master.
Key Takeaways
- Use plant-based milk (almond, soy, or rice) and vegetable oils or vegan butter substitutes for moisture and tenderness in dairy-free bread recipes.
- Combine gluten-free protein flours with starches for structure and balance flavor when using alternative flours in dairy-free bread.
- Add natural sweeteners like maple syrup or agave to feed yeast and improve crust color without dairy ingredients.
- Proof active dry yeast in warm water (100°F–110°F) with sugar to ensure proper activation for bread machine use.
- Increase dough hydration 10–15% and handle gently to develop a crispy crust and open crumb in dairy-free bread.
Dairy Free Bread Maker Recipe: Ingredient & Method Table
| Recipe element | Best dairy-free options | Suggested amount | Add to bread pan | Why it matters |
|---|---|---|---|---|
| Base flour | All-purpose flour or whole wheat flour | 3 to 3 1/2 cups | After liquids | Flour builds the loaf’s structure and crumb. |
| Gluten-free flour (swap) | Gluten-free flour blend (balanced mix) | 3 to 3 1/2 cups | After liquids | A good GF blend supports rise and reduces crumbling. |
| Liquid | Plant-based milk (unsweetened almond, soy, or rice) | 1 to 1 1/4 cups | Liquids first | Adds moisture and tenderness without dairy. |
| Water (for yeast proofing) | Warm water | 1/4 cup | Separate cup first | Helps start yeast activity (then pour into pan). |
| Yeast | Active dry yeast (or instant) | 2 to 2 1/4 tsp | Yeast last | Drives the rise and final volume. |
| Sweetener (yeast fuel) | Sugar or natural sweetener (maple syrup, honey, molasses) | 1 to 2 tbsp | With liquids | Feeds yeast and supports browning. |
| Fat | Vegetable oil (sunflower, olive) or melted coconut oil | 2 tbsp | With liquids | Improves softness, moisture, and sliceability. |
| Salt | Fine salt | 1 to 1 1/2 tsp | With dry ingredients | Controls yeast, strengthens dough, boosts flavor. |
| Optional dough strength booster | Lecithin (optional) | 1 tsp | With dry ingredients | Helps dough hold gas for a better crumb. |
| Optional mix-ins | Nuts or seeds (chia, flax, sunflower) | 1/4 to 1/2 cup | Near end of kneading | Adds texture, nutrition, and “bakery-style” bite. |
| Dough consistency check | Add liquid gradually if needed | ~1 tbsp at a time | During knead | Fine-tunes hydration for a smooth, elastic dough. |
Essential Ingredients for Dairy-Free Bread
When you’re making dairy-free bread, choosing the right ingredients is essential to achieve the perfect texture and flavor.
Start with your flour, whether it’s all-purpose, whole wheat, or a gluten-free blend, as it shapes your bread’s structure. Using non-toxic baking materials can also contribute to healthier bread-making.
Begin with your choice of flour—be it all-purpose, whole wheat, or gluten-free—to form your bread’s foundation.
For moisture, swap dairy milk with unsweetened, unflavored plant-based milks like almond, soy, or rice. Many recipes recommend adding liquid gradually, about 1 tablespoon at a time, to achieve the ideal dough consistency liquid adjustment.
You’ll need yeast, active dry or instant, to make your dough rise beautifully.
Add vegetable oils like sunflower or olive oil, or melted dairy-free butter alternatives to keep your bread tender and moist.
Don’t forget salt; it controls yeast activity, strengthens gluten, and boosts flavor.
To enhance leavening, sugar or natural sweeteners like molasses can feed the yeast and help with browning.
Preparing Your Bread Machine for Dairy-Free Baking
Before you start baking your dairy-free bread, make sure to thoroughly clean your bread machine to wipe out any lingering dairy residues. Rinse all parts with warm water to dissolve any stubborn buildup and maintain machine hygiene.
Wash the bread pan and kneading blades with warm, soapy water using a soft cloth to protect non-stick surfaces. For stubborn residue, natural cleaners like vinegar or baking soda can be used safely.
If possible, remove the blades to clean hidden buildup that could cause sticking or odors. Regularly inspecting and cleaning these parts helps prevent contamination and preserves the quality of your dough.
Check seals and lids for any dairy traces to prevent cross-contamination. Keeping these areas clean ensures your starter and dough remain uncontaminated.
Let all parts dry completely before reassembling to keep dough consistency perfect and maintain hygiene. Drying fully is essential to avoid unwanted bacterial growth.
When you add ingredients, follow the recommended order: liquids first, dry next, yeast last to keep yeast active.
Use warm water around 105-110°F to activate yeast without killing it.
Monitor dough during kneading and adjust flour or water as needed since dairy-free dough textures can vary.
For best results, use traditional Active Dry yeast rather than rapid-rise yeast to ensure proper rising and texture.
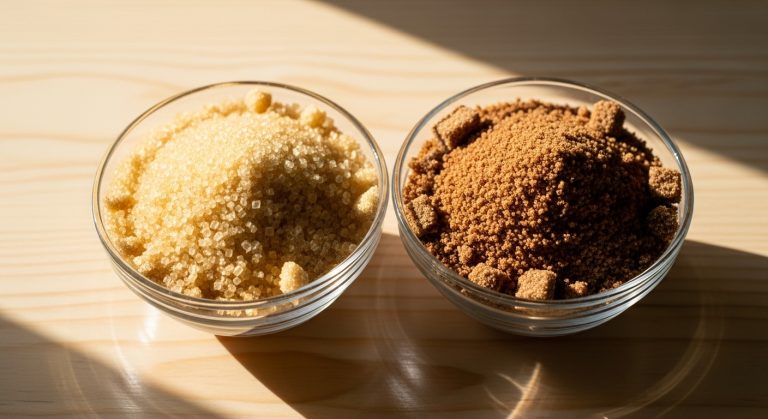
Selecting the Right Flour and Sweeteners

Choosing the right flour and sweeteners plays a crucial role in crafting delicious dairy-free bread that rises well and tastes great.
You’ll want a blend that balances protein-rich flours like almond or chickpea with starches such as tapioca for moisture and chew. Natural sweeteners like maple syrup or coconut sugar not only add flavor but also aid yeast activity. Milling your own flour can enhance the nutritional value and flavor due to the freshly milled flour retaining more nutrients.
A well-formulated gluten-free flour blend typically includes a balance of protein and starch flours to achieve optimal texture and structure.
Watch how protein flours’ distinctive tastes interact with your sweeteners to perfect your loaf’s profile.
| Flour Type | Protein % | Sweetener Examples |
|---|---|---|
| Almond | 15-25% | Maple syrup, molasses |
| Chickpea | 15-25%, strong taste | Coconut sugar, agave |
| Ancient Grains | Moderate | Date syrup, honey |
| Potato/Tapioca Starch | Low | Mashed banana |
Tips for Activating Yeast and Ensuring a Good Rise
Balancing the right flours and sweeteners sets the stage, but activating your yeast properly guarantees your dairy-free bread rises beautifully.
Start by dissolving active dry yeast in warm water between 100°F and 110°F; it should feel comfortably warm, not hot.
Add a teaspoon of sugar to feed the yeast, helping it foam and bubble, a clear sign it’s alive and ready.
Let it sit for 5 to 10 minutes until you see frothy foam on top. If no foam appears, your yeast might be expired or inactive, so swap it out.
Remember, room temperature affects rise speed. Warmer rooms speed it up, while cooler ones slow it down. Placing your dough in a warm, draft-free environment will help ensure optimal rising conditions.
Proper proofing makes certain your dough gains the lift and texture you want every bake. Using quality ingredients and following the correct preparation instructions significantly reduces rising problems and improves bread texture.
Choosing Oils and Fats to Enhance Texture

When you select the right oils and fats for your dairy-free bread, you directly influence its texture, moisture, and flavor.
Choosing between liquid oils and solid fats affects gluten development and crumb softness. Here’s how to enhance your bread’s texture:
- Use neutral oils like canola or grapeseed to keep flavors subtle while boosting moisture and tenderness. These oils typically have a lower saturated fat content compared to European-style butters, which can affect the crumb structure.
- Try vegan buttery spreads for a richer, buttery crumb that mimics traditional bread fat structure. It’s important to note that different fats change final product in gluten-free baking, so selecting a fat similar in type to the original can yield better results.
- Consider coconut oil carefully. Refined versions are mild, but virgin coconut oil adds flavor and alters texture, so match it to your recipe. The melting point and flavor profile of fats like coconut oil can significantly influence the final loaf’s softness and taste.
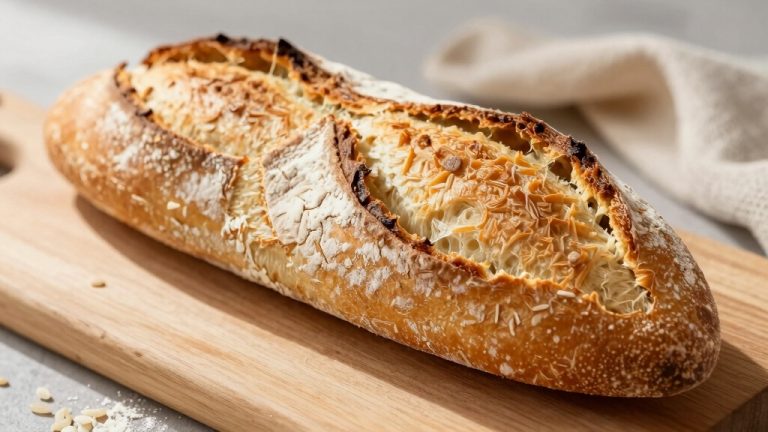
Baking and Finishing Touches for Perfect Loaf
To achieve that perfect golden, crispy finish on your loaf, mastering crust enhancement techniques is essential. Techniques like scoring and adding steam can make a big difference. Trust me, once you try it, you’ll see! Proper bread scoring controls expansion and enhances the crust’s visual appeal.
Now, let’s talk about cooling your loaf. It’s crucial to let it cool on a wire rack. This step helps maintain the texture and prevents sogginess before you slice into it.
Nobody wants a soggy loaf, right? Also, checking that the bread is fully baked by using a probe thermometer to ensure an internal temperature of at least 200°F / 93°C guarantees the loaf is done and avoids undercooked centers.
Crust Enhancement Techniques
Although achieving the perfect crust can feel elusive, mastering a few key techniques will transform your dairy-free bread into a bakery-worthy loaf.
You can enhance crust texture, color, and flavor by focusing on steam, dough enhancers, and hydration.
- Steam Magic: Create steam by placing ice cubes in a hot pan or spraying water on oven walls during the first 10 minutes. This delays crust setting, aids expansion, and produces a glossy, caramelized finish. Remember that gluten-free bread continues baking during cooling, so a well-formed crust helps maintain loaf structure and prevents gummy centers by supporting carryover cooking.
- Dough Boosters: Add lecithin, vitamin C powder, or essential wheat gluten to improve dough strength, softness, and crust chewiness without dairy.
- Hydration Control: Increase dough hydration by 10–15% to develop a crispier crust and open crumb. Handle dough gently after the first rise to preserve air pockets for better texture.
Try these tips to bake a crust that’s both beautiful and delicious!
Cooling and Slicing Tips
Proper cooling plays a crucial role in locking in the structure and flavor of your dairy-free bread, guaranteeing each slice holds its shape and texture. This is because the cooling phase is when the starches set and proteins firm, stabilizing the bread’s structure.
Remove the bread immediately from the pan and cool it on a wire rack at room temperature to avoid sogginess. Additionally, letting the bread cool properly helps maintain bread texture and prevents moisture loss.
Wait at least 2 hours before slicing to let moisture settle evenly. Use a serrated knife, employing gentle sawing motions to preserve crumb integrity.
| Cooling Step | Key Tip |
|---|---|
| Remove from pan | Prevent residual heat buildup |
| Cool on wire rack | Guarantee air circulation |
| Wait 2+ hours | Avoid gummy slices |
| Slice with serrated knife | Gentle sawing preserves texture |
Follow these tips for perfect slices every time.
Frequently Asked Questions
Can I Use Frozen Non-Dairy Milk in My Bread Machine?
Yes, you can use frozen non-dairy milk in your bread machine, but make sure to thaw and warm it to about 95°F before adding.
Stir it well to recombine separated fats and solids for even moisture. Using cold or unevenly mixed milk can slow yeast activity and affect dough rising.
Keep an eye on rise times and adjust if needed to get that perfect loaf with tender crumb and good volume.
How Do I Store Dairy-Free Bread to Keep It Fresh Longer?
Think of your dairy-free bread like a delicate flower. Best enjoyed fresh but needing care to last.
Store it at room temperature in breathable cloth or paper bags for 1-2 days to keep the crust crisp and prevent sogginess.
Avoid plastic wrapping unless freezing. Instead, freeze sliced portions in airtight wraps to lock in moisture.
When thawing, toast or warm slices to revive that fresh-baked texture.
Keep it cool, dry, and away from the fridge.
Are There Specific Bread Machine Brands Better for Dairy-Free Recipes?
Yes, you’ll find brands like Zojirushi and Oster are top picks for dairy-free recipes.
Zojirushi’s dual kneading blades and gluten-free settings guarantee smooth mixing and perfect texture.
Oster’s gluten-free preset also handles dairy-free dough well.
You’ll want a machine with adjustable cycles and quiet operation to get consistent results.
Avoid models with single blades or loud motors, as they might struggle with delicate dairy-free ingredients.
Can I Add Nuts or Seeds to Dairy-Free Bread Dough?
Yes, you can definitely add nuts or seeds to your dairy-free bread dough!
They’ll boost flavor, texture, and nutrition, making your bread hearty and chewy. Just chop or grind nuts for even distribution and try adding seeds like chia or flax for extra binding.
Balance their quantity with enough liquid and fat to keep the dough moist. Adding them near the end of kneading helps maintain their texture without breaking them down too much.
How Do Altitude Changes Affect Dairy-Free Bread Machine Baking?
Altitude changes speed up dough rising because lower air pressure boosts yeast activity and gas expansion.
You’ll need to reduce yeast by about 25% and add extra liquid to keep your dough hydrated.
Baking temperature should rise by 15-25°F to set the bread structure faster and avoid collapse.
Adjust sugar and salt slightly, and consider using cooler liquids to slow fermentation.
Watch your dough closely to tweak flour or liquid for perfect texture.
Try These Dairy Free Add-Ins for Gourmet Flavor
Now that you’ve mastered the essentials of dairy-free bread making, remember: “Don’t put all your eggs in one basket.”
Experiment with different flours, oils, and sweeteners to find your perfect loaf. Your bread machine is your trusty partner; keep it well-prepped and your yeast active for that perfect rise.
With these tips, you’ll bake delicious, dairy-free bread that’s soft, flavorful, and just what you need for any meal.