
How to Clean Air Fryer Oven Safely And Thoroughly?
Unplug your air fryer oven and allow it to cool before cleaning.
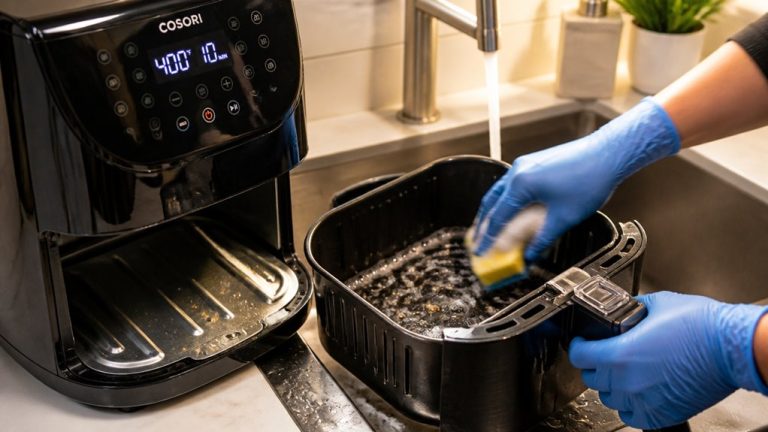
Remove all baskets, trays, and racks to wash them thoroughly with warm, soapy water, then dry completely.
Gently wipe the interior with a non-abrasive cloth, using baking soda paste for stubborn grease.
Clean the heating element and fan carefully with a damp cloth and soft brush, avoiding excessive moisture.
Regular maintenance prevents odors and guarantees peak performance.
Explore more detailed steps for effective, safe cleaning.
Key Takeaways
- Always unplug and cool the air fryer oven before cleaning to ensure safety and prevent damage.
- Remove and soak baskets, trays, and racks in warm, soapy water, then scrub gently with a non-abrasive sponge.
- Wipe the interior chamber with a damp cloth after soaking to remove baked-on food, avoiding abrasive pads.
- Clean the heating element and fan gently with a damp microfiber cloth and soft brush, avoiding excess moisture.
- Dry all parts thoroughly before reassembling to prevent moisture buildup and odors.
Unplug Your Air Fryer Oven and Get Ready to Clean

Start by unplugging your air fryer oven to guarantee safety during cleaning.
Make certain the appliance is completely cool before you begin to avoid burns or damage to internal components.
Never spray water or cleaning solutions directly onto electrical parts, including heating coils and fan blades, as this risks short circuits.
Use a dry, non-abrasive cloth to remove loose crumbs around the exterior and vents.
Consult your owner’s manual to verify which parts are dishwasher-safe, but hold off on removing them until the next step.
Avoid using abrasive sponges or brushes on nonstick surfaces to prevent scratches.
Following these precautions ensures you protect both yourself and your appliance, setting a safe and effective foundation for the cleaning process.
It is also important to unplug and let cool completely before accessing the heating element to prevent damage and ensure safety.
Remove and Wash All Removable Parts Thoroughly
Before cleaning the interior chamber, pull out all removable parts such as baskets, trays, racks, and pans.
Start by removing all baskets, trays, racks, and pans before cleaning the interior chamber.
Empty any loose crumbs and food debris to prevent residue buildup.
Inspect each piece for stuck-on food; soak those parts in warm, soapy water to loosen debris efficiently.
Check your owner’s manual to confirm if parts are dishwasher safe.
If so, you can place them in the dishwasher for thorough cleaning.
Use a non-abrasive sponge or brush to avoid damaging nonstick surfaces during hand washing.
Rinse each part under warm water to remove soap residue completely.
Finally, dry all components thoroughly with a lint-free cloth or allow them to air dry fully to prevent moisture buildup before reassembling your air fryer oven.
To preserve the finish and avoid damage, it’s best to place dishwasher-safe parts on the top rack and select gentle cycles when using the dishwasher.
How to Clean the Interior Chamber and Remove Baked-On Food?
Although cleaning the interior chamber might seem intimidating, you can effectively remove baked-on food by applying warm, soapy water and allowing it to soak for 5 to 10 minutes.
First, make certain the air fryer oven is unplugged and completely cool. Use a non-abrasive sponge or cloth soaked in the solution to gently scrub the interior walls and ceiling.
Avoid abrasive pads to protect the nonstick surface. After loosening stubborn residue, wipe away soap with a damp cloth.
For persistent spots, repeat soaking and gentle scrubbing. Finally, dry the chamber thoroughly with a lint-free cloth to prevent moisture buildup.
This method preserves the interior finish while efficiently removing food deposits, preparing your air fryer for peak performance.
Always unplug and cool the unit before cleaning to avoid burns and electrical hazards, as emphasized in the Safety First guidelines.
Clean the Heating Element and Fan Safely and Effectively
Before you dive into cleaning the heating element and fan, it’s super important to ensure that your air fryer oven is unplugged and completely cool.
Safety first, right?
Once you’re sure it’s cool, grab a damp microfiber cloth.
Gently wipe down the heating element, but be careful—avoid spraying directly or using too much moisture.
Now, for the fan area, a soft brush works wonders.
It can help you dislodge any debris without risking damage to those sensitive components.
Just take your time, and you’ll have everything looking great in no time!
Regular cleaning helps prevent grease buildup, which can cause smoke and trigger alarms during cooking.
Heating Element Cleaning Tips
When you clean the heating element and fan area, handle them with care to avoid damage and guarantee safety. Always unplug the air fryer and make sure it’s fully cooled before cleaning.
Avoid spraying water or cleaners directly onto electrical parts to prevent short circuits or corrosion. Use gentle tools and methods to maintain the element’s integrity.
Follow these tips for effective cleaning:
Wipe the heating element gently with a damp microfiber cloth to remove light residue.
Use a soft brush to carefully dislodge stuck food particles near the coil or fan.
Never submerge or soak the heating element to avoid electrical damage.
Avoid abrasive materials that could scratch or weaken the element.
Consult your owner’s manual for specific cleaning guidelines related to your model.
For safe maintenance, ensure liners or other accessories do not touch the heating element to avoid burning and fire hazards.
Fan Area Maintenance
After carefully wiping the heating element, you should turn your attention to the fan area, where grease and food particles tend to accumulate.
Begin by unplugging the air fryer and ensuring it’s completely cool.
Avoid spraying water or cleaners directly on the fan or motor assembly to prevent electrical damage.
Use a soft brush or microfiber cloth dampened slightly with water to gently dislodge debris from the fan blades and surrounding components.
Be cautious not to apply excessive moisture near electrical parts.
If stubborn grease remains, use a mild soap solution on the cloth but avoid soaking.
After cleaning, allow the fan area to air dry fully before reassembling or using the unit.
Regular maintenance here prolongs appliance efficiency and prevents unpleasant odors.
For easier cleanup in future uses, consider using silicone-coated parchment paper liners to reduce grease buildup and food residue.
Use Baking Soda and Vinegar to Tackle Grease and Stains
Although routine cleaning removes most residues, stubborn grease and stains often require a targeted approach using baking soda and vinegar.
Start by mixing baking soda with water to form a thick paste. Then apply it to greasy or stained areas.
Mix baking soda with water to create a thick paste, then apply it directly to greasy or stained spots.
Let it sit for 10–15 minutes to break down buildup before scrubbing gently with a nylon brush or toothbrush.
If residue persists, spray a small amount of vinegar to react with the baking soda, enhancing grease removal.
Rinse with a damp cloth and dry thoroughly.
Use baking soda paste for non-abrasive cleaning.
Target basket edges and crevices with a soft brush.
Apply vinegar only after scrubbing to avoid damaging surfaces.
Avoid soaking electrical components or heating elements.
Remove trapped debris carefully with a wooden toothpick if needed.
Always unplug the air fryer and allow it to cool before cleaning to ensure safety and protect the heating element.
Keep Your Air Fryer Oven Fresh and Odor-Free Between Uses
Regularly wiping down your air fryer oven immediately after each use helps prevent grease and food residue from accumulating, reducing odor development.
After unplugging and allowing the unit to cool, use a soft, damp cloth or mild soapy solution to clean both the interior and exterior surfaces.
Remove and thoroughly dry all detachable parts before reassembling to minimize moisture that fosters odors.
Avoid abrasive materials to protect nonstick coatings.
Air-drying components fully between uses is essential to prevent mold and stale smells.
Frequent light cleaning diminishes the need for intensive degreasing later and maintains peak appliance performance.
To optimize your kitchen space and reduce clutter, consider using a compact air fryer toaster oven that combines multiple cooking functions in one appliance.
Frequently Asked Questions
Can I Use Bleach or Harsh Chemicals to Clean My Air Fryer Oven?
You shouldn’t use bleach or harsh chemicals to clean your air fryer oven.
These substances can damage nonstick coatings and electrical components, potentially causing malfunction or health risks.
Instead, rely on mild soapy water, baking soda paste, or vinegar for tough stains.
Always avoid spraying liquids directly onto heating elements or fans.
Use non-abrasive cloths or brushes to protect surfaces.
Stick to approved cleaners to guarantee safety and maintain your appliance’s performance.
How Often Should I Deep Clean My Air Fryer Oven?
You should deep clean your air fryer oven every 3 to 4 weeks, especially if you use it frequently.
Studies show grease buildup can reduce cooking efficiency by up to 25%.
Regular deep cleaning prevents residue accumulation on heating elements and fan areas, maintaining peak performance.
Additionally, frequent maintenance helps avoid odors and prolongs appliance life.
Always make certain the unit is unplugged and cooled before deep cleaning to protect its electrical components.
Is It Safe to Clean the Air Fryer Oven With Aluminum Foil?
It’s generally not safe to line your air fryer oven with aluminum foil unless the manufacturer specifically approves it.
Foil can block airflow, causing uneven cooking and overheating. This can potentially damage the appliance or create a fire risk.
If you do use foil, avoid covering the entire basket or base. Always check your owner’s manual for guidelines.
Never let foil touch heating elements or fan blades to maintain safe operation.
Can I Put Air Fryer Parts in the Microwave for Cleaning?
No, you shouldn’t put air fryer parts in the microwave for cleaning.
Most air fryer components aren’t microwave-safe, especially metal baskets or racks, which can spark and damage your microwave.
Instead, remove the parts and wash them with warm, soapy water or in the dishwasher if the manual permits.
Avoid exposing electrical components to water or heat sources like microwaves to prevent damage and guarantee safety.
How Do I Fix a Burnt Smell That Won’T Go Away After Cleaning?
You know what they say: “Prevention is better than cure.”
To fix a burnt smell that lingers after cleaning, first make certain all removable parts are thoroughly cleaned and dried.
Next, wipe the interior and heating element carefully, removing any trapped food residue.
Run the air fryer empty at a low temperature for 10-15 minutes to help burn off odors.
If the smell persists, use a vinegar-water solution to neutralize odors safely.
Enjoy Fresher Cooking With A Simple Cleaning Routine
Cleaning your air fryer oven might seem time-consuming, but it’s quicker and easier than you think.
Imagine effortlessly removing baked-on grease with simple baking soda and vinegar, restoring your appliance’s efficiency.
Regular cleaning prevents odors and guarantees peak performance, saving you from costly repairs.
By following these precise steps, you’ll keep your air fryer oven in top condition, ready to deliver perfectly cooked meals every time without the hassle of tough, lingering messes.