Gluten Free Latkes Recipe With Foolproof Crispiness
You’ll love making gluten-free latkes with fresh grated potatoes and onions, carefully squeezed dry to prevent sogginess.
Mix in chickpea flour or potato starch as binders to keep them crisp and sturdy.
Fry in hot oil at 375°F without crowding the pan for golden, crunchy perfection.
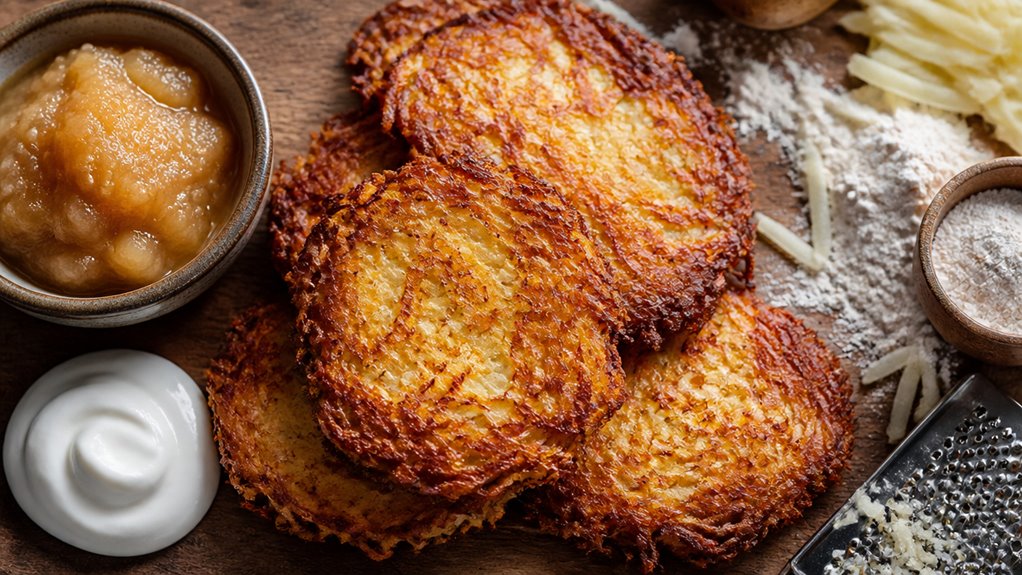
Serve warm with applesauce or sour cream.
If you want to explore variations, frying tips, and storage secrets, there’s plenty more to perfect your latkes.
Key Takeaways
- Use gluten-free flours like white rice flour, potato starch, or gluten-free oat flour blends for crisp, binded latkes batter.
- Grate and thoroughly squeeze potatoes and onions to remove excess moisture and prevent soggy latkes.
- Bind batter with eggs or vegan alternatives like chickpea flour or vegan mayo for structure and richness.
- Fry latkes in hot oil at 375°F, flipping when golden brown, to achieve crispy edges and tender interiors.
- Store latkes airtight with parchment layers; reheat in air fryer at 375°F or oven at 425°F to restore crispness.
Gluten Free Latkes Recipe Cooking Guide & Ingredients
| Category | Details | Notes |
|---|---|---|
| Recipe Type | Gluten-Free Potato Latkes | Classic crispy holiday side dish |
| Prep Time | 20 Minutes | Includes grating and squeezing moisture |
| Cook Time | 15 Minutes | Fry in batches for best browning |
| Total Time | 35 Minutes | Varies slightly by batch size |
| Servings | 4 to 6 Servings | Makes about 10 to 12 medium latkes |
| Potatoes | 2 Pounds Russet Potatoes | Use starchy potatoes for crisp edges |
| Onion | 1 Medium Yellow Onion | Grated finely for flavor and moisture balance |
| Binder | 2 Eggs | Or use chickpea flour for egg-free latkes |
| Gluten-Free Flour | 1/4 Cup White Rice Flour | Can substitute potato starch or GF oat flour |
| Seasoning | 1 to 1 1/2 Teaspoons Salt, 1/2 Teaspoon Black Pepper | Add more to taste |
| Optional Flavor | 2 Tablespoons Chopped Parsley | Add freshness and color |
| Frying Oil | Canola, Vegetable, Or Peanut Oil | Use a high smoke point oil |
| Frying Temperature | 375°F | Maintain steady heat for crisp results |
| Serving Suggestions | Applesauce, Sour Cream, Or Greek Yogurt | Serve immediately while hot and crisp |
| Storage | Refrigerate Up To 3 Days | Store in layers with parchment paper |
| Reheating | 425°F Oven For 5 to 10 Minutes | Air fryer at 375°F also works well |
Best Ingredients for Gluten-Free Latkes

When crafting the best gluten-free latkes, you’ll want to start with fresh, starchy potatoes and pungent onions. These form the flavorful base of these crispy treats.
Grate them finely to assure a perfect texture.
To bind your mixture, eggs are the classic choice, providing structure and richness. If you prefer gluten-free flour, white rice flour works wonderfully, adding body without overpowering the flavor.
You can also experiment with potato starch, oats, or gluten-free flour blends for extra crispness.
For vegan options, chickpea flour “egg” or vegan mayo offer excellent alternatives to eggs.
For optimal binding and structure, incorporating ground psyllium husk can enhance the texture and extensibility of your latke mixture.
How to Remove Moisture From Potatoes and Onions?
Start by grating your potatoes and onions finely. Then wrap them tightly in a clean kitchen towel, cheesecloth, or nut milk bag to squeeze out as much liquid as possible.
This step is vital because excess moisture can make your latkes soggy and prevent proper browning. Apply firm pressure to extract every bit of water. Patience here means crispier latkes.
Removing moisture guarantees your latkes hold together well and develop that perfect golden crust. For an even crispier texture, you can incorporate cornstarch for binding into your potato mixture.
| Step | Tool Options | Purpose |
|---|---|---|
| Grate | Box grater, food processor | Create fine shreds |
| Wrap | Kitchen towel, cheesecloth | Hold shreds firmly |
| Squeeze | Hands, twist cloth | Remove excess moisture |
| Repeat if needed | Same cloth or new | Guarantee dryness |
Choosing the Right Gluten-Free Binders
After you’ve successfully removed excess moisture from your potatoes and onions, the next step is to choose the right gluten-free binders to hold your latkes together.
Eggs are the classic choice, providing excellent structure and helping your latkes keep their shape.
If you’re aiming for a vegan or egg-free version, chickpea flour or vegan mayo can work wonders as substitutes.
To add extra binding strength and a touch of crispiness, consider mixing in white rice flour, potato starch, or a gluten-free flour blend.
These ingredients absorb any lingering moisture and create a batter that holds together like a dream without gluten.
Selecting the right binder guarantees your latkes won’t fall apart during cooking and will have that perfect balance of tenderness and firmness.
Tips for Frying Latkes Crispy and Delicious
To achieve perfectly crispy and golden latkes, maintaining the right oil temperature is crucial. You want the oil hot enough to sizzle on contact but not so hot that it smokes or burns the latkes.
Here’s how to nail it every time:
- Heat the oil to about 375°F before adding your latkes. Use a thermometer or test with a small drop of batter that should bubble immediately.
- Avoid overcrowding the pan. Fry in small batches to keep the oil temperature steady and ensure even browning.
- Flip latkes once the first side turns golden brown, usually after 2–5 minutes. Cook the other side similarly for crisp edges.
Following these tips guarantees latkes that are crispy outside and tender inside, perfect every time. After frying, make sure to clean your air fryer or pan promptly to prevent grease buildup that can cause smoke and odors during future cooking.
Easy Variations and Substitutions for Gluten-Free Latkes
Mixing things up with easy variations and substitutions can keep your gluten-free latkes exciting and tailored to your taste or dietary needs.
Swap some grated potato for zucchini or add a touch of shredded apple for a hint of sweetness.
If you’re avoiding eggs, chickpea flour or vegan mayo make excellent binders that hold your latkes together beautifully.
Instead of white rice flour, try potato starch or gluten-free oat flour to tweak the texture and crispness.
Don’t forget fresh herbs like parsley to brighten the flavor.
When your batter feels too wet, add a bit more flour or starch to reach that perfect pancake-like consistency.
These simple changes let you customize your latkes without sacrificing their classic crispy, golden charm.
For best results, whisk and sift your dry ingredients thoroughly to ensure even distribution and aeration for a lighter texture.
Serving, Storing, and Reheating Your Latkes
You’ll want to serve your latkes hot, right out of the pan! They go perfectly with classic toppings like sour cream or applesauce for that traditional touch. Trust me, it makes all the difference!
Now, when it comes to storage, just pop them in an airtight container. Try to eat them within a day or two to really enjoy that great texture.
And if you have leftovers, no worries! To bring back that crispy crunch, just reheat them in a hot oven for a few minutes. Avoid the microwave if you can; nobody likes soggy latkes!
For best results, allow gradual thawing in the fridge before reheating to preserve texture and flavor.
Serving Suggestions
When serving your gluten-free latkes, aim to present them hot and crispy, paired with classic accompaniments like sour cream, applesauce, or tangy yogurt to complement their savory flavor.
To keep that perfect crispness:
- Drain freshly fried latkes on paper towels or a cooling rack to remove excess oil.
- Serve immediately to enjoy their golden-brown crunch and tender inside.
- If you need to reheat, place them in a single layer on a baking sheet in a 425°F oven for 5–10 minutes until sizzling and crisp again.
These steps guarantee your latkes stay deliciously crunchy and flavorful, making each bite a satisfying experience.
Pairing with creamy or sweet toppings balances the richness and enhances every mouthful.
For a quick and crispy alternative, consider reheating latkes in an air fryer following similar temperature guidelines.
Storage Tips
Although latkes are best enjoyed fresh and hot, knowing how to properly store and reheat them guarantees you won’t waste a single crispy bite.
After frying, let your latkes cool completely on a wire rack or paper towels to drain excess oil and prevent sogginess.
Place them in an airtight container, separating layers with parchment paper to keep each crisp.
Store latkes in the refrigerator for up to three days or freeze them for longer storage.
Freeze flat on a baking sheet first, then transfer to a freezer bag to avoid sticking.
When it’s time to enjoy, avoid stacking latkes while storing or reheating, as trapped steam can soften their golden edges.
Proper storage preserves that perfect balance of tender inside and crispy outside.
For longer preservation, consider vacuum sealing latkes to maintain their texture and freshness during freezing.
Reheating Methods
Bring out the best in your latkes by reheating them properly to preserve their signature crispness and warmth. Avoid soggy, limp latkes by choosing the right method. Here’s how to revive that golden crunch:
- Oven Reheat: Preheat to 425°F and spread latkes in a single layer on a baking sheet. Heat for 5–10 minutes until sizzling and crisp.
- Skillet Warm-Up: Use a non-stick pan over medium heat. Lightly oil if needed and reheat latkes for 2–3 minutes per side to restore texture.
- Air Fryer: Place latkes in the basket in a single layer, then air fry at 375°F for 3–5 minutes for even reheating and crisp edges.
For best results, avoid overcrowding the basket or pan during reheating to ensure even heat circulation and consistent crispness.
These methods keep your latkes deliciously crispy and ready to serve with sour cream or applesauce.
Frequently Asked Questions
Can Latkes Be Made Ahead and Frozen for Later Use?
Yes, you can make latkes ahead and freeze them for later.
After frying, let them cool completely, then place them in a single layer on a baking sheet to freeze.
Once frozen, transfer them to a freezer bag or airtight container.
When you’re ready to enjoy, reheat them in a hot oven at around 425°F for 5 to 10 minutes.
This method keeps them crispy and delicious, just like fresh.
What Oil Is Best for Frying Gluten-Free Latkes?
When you choose oil for frying gluten-free latkes, think of it as the silent partner in your crispy dance.
The best oils are those with a high smoke point like canola, vegetable, or peanut oil. They let you fry at 375–400°F without burning, ensuring golden, crisp edges.
Olive oil’s flavor can overpower, and butter burns too fast.
Are There Any Low-Fat Cooking Methods for Latkes?
Yes, you can make latkes using low-fat methods like baking or air frying.
Baking your latkes on a parchment-lined sheet lets you skip the oil while still getting a crispy edge, especially if you spray them lightly.
Air frying delivers a similar crunch with minimal oil, making it a healthier alternative.
Just keep an eye on cooking time to avoid drying them out, and you’ll enjoy tasty latkes with less fat.
How to Prevent Latkes From Falling Apart While Frying?
Remove moisture, add binders, and handle gently. Squeeze grated potatoes and onions tightly to ditch excess water.
Then, mix in eggs or a gluten-free binder like rice flour to hold everything together. Form small, firm patties and don’t overcrowd the pan.
Fry over medium-high heat so they crisp without breaking. Flip once golden brown, and you’ll keep your latkes intact and delicious every time.
Can Gluten-Free Latkes Be Baked Instead of Fried?
Yes, you can bake gluten-free latkes instead of frying them. To keep them crispy, spread the patties on a greased or parchment-lined baking sheet and bake at around 400°F.
Flip them halfway through to brown both sides evenly. While baking may yield a slightly different texture than frying, you’ll still get delicious, golden latkes with less oil and cleanup.
Just be sure to press out excess moisture before baking for best results.
Bring Crispy Tradition To Your Table
Now that you’ve mastered gluten-free latkes, imagine surprising your family with crispy, golden treats that everyone can enjoy. Like Sarah did for her son’s first Hanukkah.
By choosing the right binders and removing moisture perfectly, you’ll create latkes that crisp up beautifully every time. Whether you stick to the classic recipe or try sweet potato variations, these latkes will bring warmth and joy to your table.
Making holiday moments truly unforgettable.