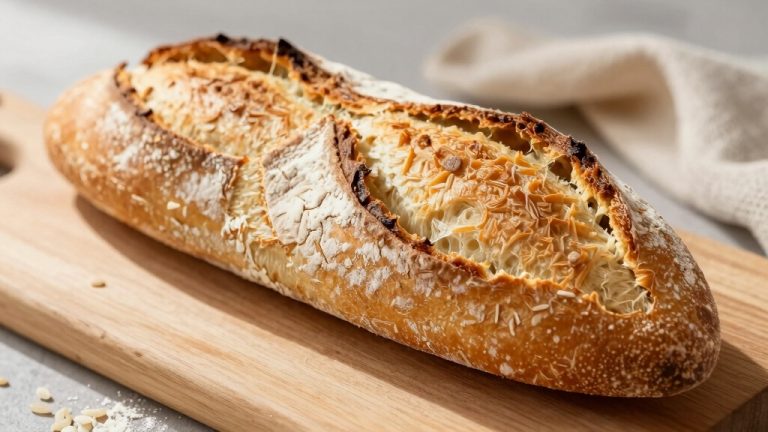
Air Fryer Fry Bread Recipe: Crispy & Easy Step-by-Step Guide
You can whip up crispy, golden fry bread in your air fryer using simple ingredients like flour, salt, yeast or baking powder, and water.
Knead the dough until smooth, rest it to relax gluten, then shape into ¼-inch discs.
Preheat your air fryer to around 330°F–360°F, lightly oil the dough, and cook flipping halfway for even browning.
This method is faster and less oily than deep frying yet deliciously satisfying.
Keep going to discover useful tips and flavor ideas.
Key Takeaways
- Combine flour, salt, yeast or baking powder, and water, then knead until smooth and elastic for proper dough structure.
- Let yeasted dough rise 1–2 hours or quick bread dough rest 30 minutes before air frying for optimal texture.
- Preheat air fryer to 330°F for thinner dough or 360°F for yeast dough to ensure even cooking and browning.
- Lightly brush dough with oil before cooking, air fry 7–25 minutes flipping halfway to achieve golden, crisp fry bread.
- Avoid overcrowding; cook dough pieces about 1/4 inch thick and golf ball-sized for uniform crispness and thorough cooking.
Ingredients and Their Key Roles in Air Fryer Fry Bread Recipe
| Ingredient | Purpose in Recipe | Key Benefit |
|---|---|---|
| All-Purpose Flour | Forms the dough’s sturdy structure and body | Provides elasticity and chewiness for perfect fry bread texture |
| Salt | Enhances and balances the overall flavor | Prevents blandness and improves taste depth |
| Yeast / Baking Powder | Leavens the dough to create rise and airiness | Determines texture: breadier crumb with yeast, quicker rise with baking powder |
| Water / Milk | Hydrates ingredients, affecting dough softness and pliability | Milk adds richness and softer crumb; water keeps it simple and light |
| Oil / Butter | Adds tenderness and promotes golden browning | Enhances crust crispness and enriches flavor |
Ingredients for Air Fryer Fry Bread

When you gather ingredients for air fryer fry bread, you’ll find that simplicity is key. Most recipes call for just a handful of staples like all-purpose flour, water, salt, and a leavening agent.
Gathering simple staples like flour, water, salt, and a leavening agent is all you need for air fryer fry bread.
Flour forms the sturdy base, providing structure and bite. Salt is essential, balancing flavors and enhancing the dough’s taste.
For rise and texture, you’ll choose between yeast, baking powder, or self-rising flour depending on your preferred method. Yeast offers a breadier crumb, while baking powder speeds things up.
Some versions keep it even simpler with self-rising flour and water alone. Optional touches like a bit of oil or milk can enrich the dough, making it softer or browner when cooked.
Preheating the air fryer for 3–5 minutes can help achieve even cooking and a better crisp texture in your fry bread.
How to Make the Dough Step-by-Step?
Alright, let’s kick things off by picking the right ingredients. You’ll want to think about the type of flour and leavener you’re using, as they really make a difference in the dough’s texture.
Once you’ve got your ingredients sorted, it’s time to mix and knead! Just keep at it until the dough is nice and smooth—this usually takes just a few minutes.
And hey, don’t skip out on the resting time! Allowing the dough to rise or rest is super important. It helps develop that rich flavor and gives the bread that light, airy texture we all love.
For best results, controlling the fermentation temperature can really enhance the yeast activity and overall dough quality.
Ingredient Selection Tips
Although air fryer fry bread recipes vary, selecting the right ingredients sets the foundation for a perfect dough. You’ll want all-purpose flour as your base, salt for flavor balance, and a leavener, either yeast, baking powder, or self-rising flour, to give your bread lift.
Water is essential, but you can swap in milk or add oil for a softer texture and richer taste. Avoid too many extras; simplicity keeps the dough tender and easy to handle. For an added flavor boost, consider how mixing in fresh herbs can elevate the taste and aroma of your bread.
| Ingredient | Purpose |
|---|---|
| All-purpose flour | Structure and body |
| Salt | Flavor enhancer |
| Yeast/Baking Powder | Leavening for rise |
| Water/Milk | Hydration and texture |
| Oil/Butter | Tenderness and browning |
Choosing quality basics sets you up for dough that’s easy to shape and air fry perfectly.
Mixing And Kneading
Mixing your ingredients thoroughly brings the dough to life, transforming simple components into a pliable, smooth base for your air fryer fry bread.
Start by combining flour, salt, and your chosen leavener in a large bowl. Gradually add warm water, stirring until the mixture comes together into a shaggy dough.
Once combined, turn the dough onto a lightly floured surface and knead with your hands, pushing and folding for about 3 to 5 minutes. You’ll feel it change texture, becoming elastic and smooth, no longer sticky.
This kneading process develops gluten, which gives your bread structure and chewiness. Aim for a dough that springs back when pressed gently.
When it’s ready, divide it into even portions for shaping. Proper mixing and kneading set the foundation for perfect, airy fry bread.
Maintaining a consistent dough temperature around 75°F (24°C) during mixing and kneading can optimize gluten development and dough performance.
Dough Resting Times
Once the dough is kneaded and divided, allowing it to rest is essential for developing flavor and texture.
If you’re working with a yeasted dough, let it rise in an oiled bowl covered with a damp cloth for about 1 to 2 hours. This gives the yeast time to create air bubbles, making your fry bread light and fluffy.
For quick breads using baking powder or self-rising flour, a shorter rest of around 30 minutes works well. This lets the leavening activate without overproofing.
Avoid starting the air fryer during this resting stage to maintain proper proofing. Resting also relaxes the gluten, making the dough easier to shape and preventing shrinkage when cooking.
This simple pause guarantees your air fryer fry bread turns out perfectly tender and full of flavor. For best results, preheat your air fryer to 350°F before cooking to ensure even heating and crispiness.
How to Shape and Rest Fry Bread Dough?
Shape your fry bread dough into evenly sized pieces to guarantee they cook uniformly in the air fryer. Aim for 6 to 7 portions, each about the size of a golf ball.
Gently flatten each piece with your hands or a rolling pin to a roughly 1/4-inch thickness, ensuring they’re not too thick to cook through or too thin to stay tender. Keep the edges slightly rounded for a traditional look.
Once shaped, place the dough pieces on a lightly floured surface or parchment paper. Cover them loosely with a damp cloth or plastic wrap and let them rest for 30 minutes to 2 hours, depending on your recipe’s leavening.
This rest allows the dough to relax and rise slightly, improving texture and puffiness during air frying.
For best results, ensure your air fryer is preheated and avoid overcrowding the basket to promote even cooking and crispness, as recommended for air fryer cooking.
Set the Right Air Fryer Temp and Time for Fry Bread
When you’re making fry bread in an air fryer, getting the temperature just right is key. You’ll want to set it between 330°F and 400°F. The exact temp really depends on how thick your dough is and what type you’re using.
Now, let’s talk about cook times. They can vary quite a bit, ranging from about 5 to 25 minutes. It’s usually a good idea to flip the bread halfway through to ensure it browns evenly on both sides.
Finding that sweet spot will help you achieve the perfect fry bread—crispy on the outside and soft on the inside. Enjoy your cooking!
To ensure even crispness without drying out, use an air fryer with precise temperature control and efficient airflow.
Optimal Temperature Range
Mastering the ideal temperature and timing is key to achieving perfectly cooked air fryer fry bread with a crisp exterior and tender interior.
You’ll want to keep your air fryer temperature between 330°F and 375°F for the best results.
Lower temps like 330°F work well for thinner dough, allowing the bread to cook evenly without burning.
In contrast, 375°F suits thicker pieces, promoting a golden crust.
If you’re working with yeasted dough, 360°F strikes a nice balance, gently baking through without drying out.
Remember, spraying or brushing your dough with oil enhances browning and crispness.
Adjusting the temperature based on dough thickness and ingredients helps you nail that ideal texture every time—crispy outside, soft and airy inside, just like traditional fry bread.
For consistent results, maintaining stable, precise temperature control is essential to avoid uneven cooking and achieve uniform textures.
Ideal Cooking Duration
Once you’ve set the right air fryer temperature for your dough’s thickness and type, dialing in the ideal cooking duration becomes the next step to perfect fry bread.
For thinner discs around 1/4 inch thick, cook at 330°F for about 7 minutes, flip, then air fry another 3 minutes for even browning.
If you’re working with yeast-based dough, a lower 360°F for 20–25 minutes offers a breadier texture with a crisp crust.
Thicker or self-rising flour doughs benefit from slightly longer cooking times, ensuring the inside cooks fully without burning the outside.
Keep an eye on your bread’s golden color and puffiness; these cues help you avoid under or overcooking.
Adjust times as needed based on your air fryer’s performance and dough moisture for the best results.
For consistent results, always remember to preheat your air fryer before cooking to ensure even heat distribution and optimal texture.
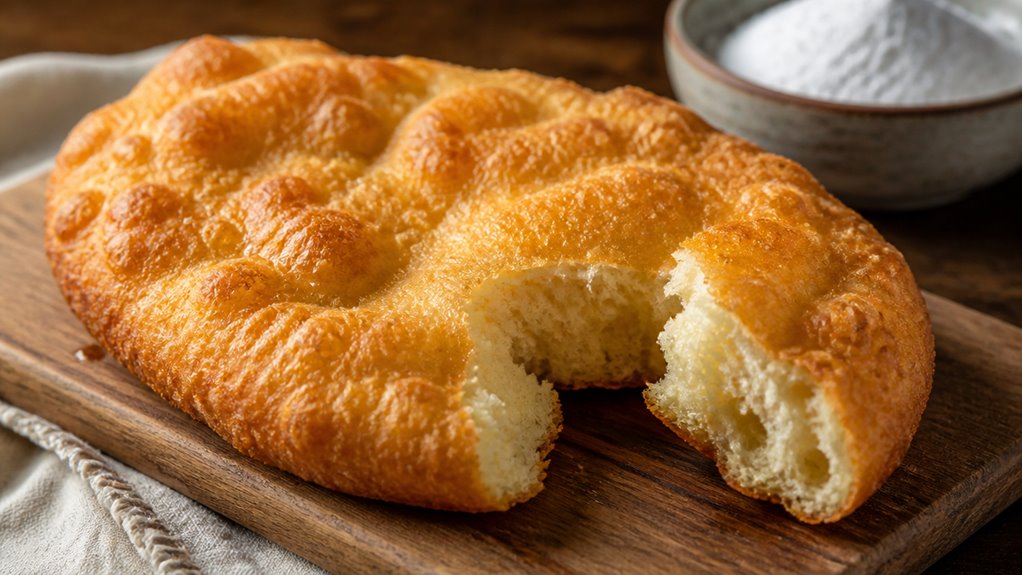
Get Crispy, Golden Fry Bread in Your Air Fryer
Frequently, achieving that perfect crispy, golden exterior on your fry bread in an air fryer comes down to a few key factors: dough thickness, oil application, and cooking temperature.
You want your dough rolled to about 1/4 inch thick. This thickness is thin enough to crisp up but thick enough to stay tender inside. Lightly brushing or spraying oil on both sides before cooking adds that essential golden sheen and crunch.
The right heat is pivotal. Typically, 360°F for 20–25 minutes works well for yeasted dough, while quicker versions may need slightly higher temps for shorter times.
To get it just right, focus on:
- Keeping dough thickness consistent around 1/4 inch
- Applying a thin coat of oil before air frying
- Preheating the air fryer for even cooking
- Flipping halfway for uniform browning
These steps help you master crispy, golden fry bread every time. Remember to reduce typical oven temperatures by about 25°F when baking in an air fryer to avoid overcooking and ensure even heat distribution.
Flavor Twists and Serving Ideas
After achieving that perfect crispy, golden fry bread, you can elevate your creation with exciting flavor twists and serving ideas that bring out its full potential.
Try brushing your fry bread with melted butter and sprinkling cinnamon sugar for a sweet treat. For a savory spin, add a dash of garlic powder or smoked paprika to the dough before cooking.
Serve your fry bread as a base for Navajo tacos; pile on seasoned beef, beans, onions, and fresh toppings. You can also top it with honey and fresh fruit for breakfast or dollop sour cream and salsa for a quick snack.
Whether sweet or savory, these twists turn simple air-fried bread into a versatile dish that’s sure to impress your family and friends.
Troubleshooting Air Fryer Fry Bread Problems
If your air fryer fry bread turns out too dense or unevenly cooked, don’t worry. These issues are usually easy to fix. Dense bread often means the dough needs more rest or you didn’t knead it enough to develop gluten.
Uneven cooking can result from placing dough pieces too thick or overcrowding the basket.
Try these tips to troubleshoot:
- Let yeast dough rest longer, allowing proper rise and airiness.
- Roll dough evenly to about ¼ inch thickness for consistent cooking.
- Spray or brush bread lightly with oil to promote browning and crispness.
- Avoid stacking or crowding pieces; give each room for hot air circulation.
With these adjustments, your fry bread will come out golden, fluffy, and perfectly cooked every time.
How Air Fryer Fry Bread Compares to Traditional Frying?
Once you’ve mastered the art of troubleshooting your air fryer fry bread, you might wonder how this method stacks up against the traditional deep-frying approach.
Air fryer fry bread offers a cleaner, less oily alternative that’s easier to handle and less messy. You’ll notice it’s crisp on the outside and tender inside, though it may lack the deep-fried puffiness and rich flavor you get from a hot oil bath.
Cooking times are longer but safer, and you can control browning with a light oil spray. While traditional frying delivers a classic texture and taste, the air fryer version shines for convenience and health-conscious cooks who still want that satisfying fry bread experience without the hassle of managing hot oil.
Frequently Asked Questions
Can I Freeze Air Fryer Fry Bread Dough for Later Use?
Yes, you can freeze your air fryer fry bread dough for later use.
Just portion it into individual balls, wrap them tightly in plastic wrap or place them in a sealed bag, then freeze.
When you’re ready, thaw the dough in the fridge overnight and let it rise at room temperature before cooking.
This way, you’ll keep the dough’s texture and flavor intact, making your fry bread fresh and delicious whenever you want.
What Type of Oil Is Best for Brushing Fry Bread Before Air Frying?
You’ll want to use a neutral oil with a high smoke point, like vegetable, canola, or avocado oil, for brushing your fry bread before air frying.
These oils won’t overpower the flavor and handle the heat well, helping you get that perfect golden crisp without burning.
Olive oil’s great for flavor but burns faster, so save it for finishing or low-temp cooking.
Brushing lightly guarantees a beautiful, crispy crust every time.
Is Air Fryer Fry Bread Suitable for Gluten-Free Diets?
Air fryer fry bread isn’t naturally gluten-free since it usually relies on wheat-based flour, which contains gluten.
But you can adapt the recipe by using gluten-free flour blends designed for baking.
Just know the texture might change; you might need extra binding agents like xanthan gum to get that chewy, airy feel.
Can I Use a Convection Oven Instead of an Air Fryer?
Yes, you can use a convection oven instead of an air fryer to make fry bread.
Just set the temperature slightly lower, around 350°F, and place the dough on a baking sheet.
The convection fan will circulate hot air, mimicking the air fryer’s crisping effect.
Keep an eye on cooking time; it might take a bit longer.
Brushing the dough with oil helps achieve that golden, crispy finish you want.
How Do I Store Leftover Air Fryer Fry Bread to Keep It Fresh?
You should let your air fryer fry bread cool completely before storing it. Wrap each piece tightly in plastic wrap or place them in an airtight container to lock in freshness.
Keep them at room temperature if you plan to eat within a day or two. For longer storage, pop the wrapped bread in the fridge for up to a week or freeze them for a month.
Reheat gently to restore crispness.
Explore the Secrets of Crispy, Golden Air Fryer Fry Bread Today
You might think air fryer fry bread and traditional frying are worlds apart, but surprisingly, they share that golden, crispy magic you crave.
By mastering the dough, shaping, and perfect air fryer timing, you’ll create a healthier version that’s just as delicious.
So, next time you want fry bread, let your air fryer surprise you. It’s coincidence or genius? Either way, you’re in for a crispy, flavorful treat without the extra oil mess.