Oatmeal Cake Recipe With Broiled Frosting and Caramelized Top
For a moist oatmeal cake with broiled frosting, start by soaking old-fashioned oats in hot milk to create a tender, chewy base.
Cream room-temperature butter with granulated and brown sugar until fluffy, then beat in eggs and warm spices like cinnamon.
Alternate adding sifted dry ingredients and soaked oats to the batter. Bake until golden, then spread a buttery coconut frosting topped with nuts and brown sugar.
Broil briefly for a toasty, caramelized finish that’s irresistibly cozy. Discover tips to perfect every step next.
Key Takeaways
- Use old-fashioned rolled oats soaked overnight in hot milk for a moist, tender oatmeal cake base with balanced flour and sugar ratios.
- Cream room-temperature butter with granulated and brown sugars, then beat in eggs and vanilla for a fluffy, moist cake texture.
- Mix cinnamon and optional nutmeg into dry ingredients; alternate adding soaked oats and dry mix to batter for even moisture distribution.
- Bake at 350°F for 30–35 minutes until a toothpick comes out clean, then cool and poke holes for frosting absorption.
- Prepare broiled frosting by melting butter, mixing brown sugar, heavy cream, coconut, nuts, and vanilla, then broil briefly for a toasted finish.
Quick Recipe Table for Oatmeal Cake Recipe With Broiled Frosting
| Stage | What to do | Key details |
|---|---|---|
| Soak oats | Soak old-fashioned oats in hot milk/water | 10 minutes (quick) or overnight (best texture) |
| Make batter | Cream butter + sugars, add eggs + vanilla, then mix in dry ingredients + soaked oats | Mix until just combined for a tender, moist crumb |
| Bake | Bake in a greased 9×13 pan | 350°F until set and golden |
| Broiled frosting | Cook butter + brown sugar + cream, stir in coconut + nuts + vanilla, spread on cake | Broil briefly for a toasty, caramelized top |
| Serve & store | Slice and serve warm/room temp; cover leftovers | Room temp 1–2 days or fridge up to 4 days; rewarm gently |
Choosing the Best Ingredients for Oatmeal Cake

How do you choose the best ingredients to make your oatmeal cake truly stand out?
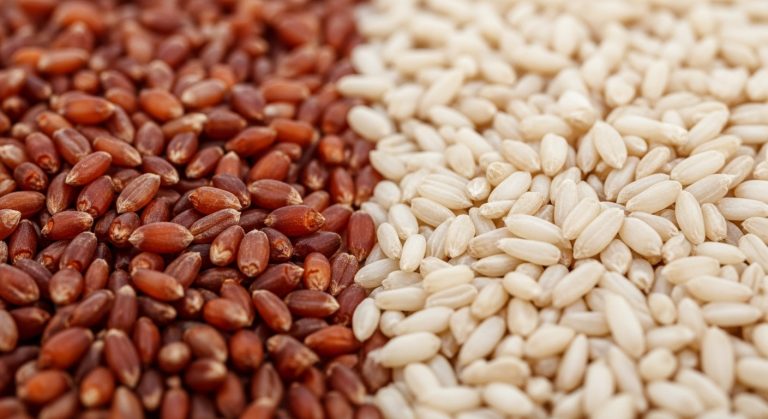
Start with old-fashioned rolled oats. They bring a moist crumb and pleasant chewiness that quick oats can’t match. Use 1 to 1½ cups, steering clear of instant oats since they might alter moisture. Old-fashioned rolled oats are recommended over quick oats to maintain texture and moisture. Selecting the right baking pan can also influence how the cake bakes, promoting even heat distribution and a perfect crumb.
For flour, stick to 1⅓ to 1½ cups of all-purpose, spooning and leveling to avoid density. Sift with dry ingredients for even mixing.
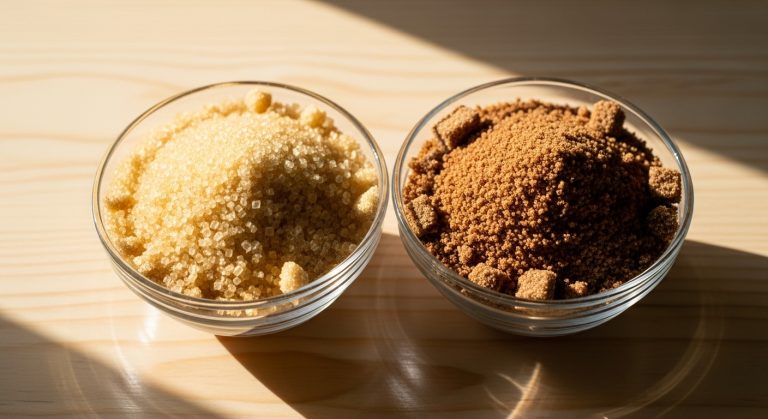
Balance your sugars evenly: ¾ to 1 cup each of granulated and light brown sugar, creamed with butter for fluffiness.
Fresh ground cinnamon is essential, with a pinch of grated nutmeg if you like, mixed into the dry blend.
Choose unsalted butter and room-temperature eggs. Beat eggs into sugars for perfect texture and controlled salt. Using heavy-duty materials for your baking equipment can improve heat retention and overall baking results.
Soaking Oats to Create Moist Oatmeal Cake Batter
Soaking your oats overnight is a game changer! It not only softens them, but it also helps with nutrient absorption and digestion. This means you get a naturally moist base for your cake batter—who doesn’t want that? Using the right measuring tools, such as accurate measuring spoons, can ensure your liquid-to-oat ratio is perfect for soaking.
Now, when you’re picking your acidic liquid, think about options like yogurt, buttermilk, or even lemon juice. These choices are great because they help break down those tough grain barriers and lessen anti-nutrients.
If you can give those oats at least a couple of hours to soak, you’ll really notice the difference. Your batter will transform into this creamy, tender texture that bakes up into a perfectly moist oatmeal cake. Trust me, it’s worth the wait!
Soaking oats ideally for 8-24 hours allows the grains to fully hydrate and develop a thick texture that improves the final baked oatmeal cake.
Benefits Of Soaking
Five key benefits await when you soak oats before mixing them into your oatmeal cake batter.
First, soaking breaks down starches naturally, boosting nutrient absorption by reducing phytic acid and activating enzymes that make minerals easier to digest.
Second, soaked oats become gentler on your stomach, mimicking partial cooking without heat and easing digestion. This process also helps the oats retain more resistant starch, which supports gut health.
Third, soaking lowers the glycemic response, helping your body absorb carbohydrates slowly and steadily, which means lasting energy without spikes. This slow process is somewhat similar to the extended fermentation seen in techniques like sourdough starter.
Fourth, soaking preserves resistant starch, a prebiotic fiber that feeds beneficial gut bacteria, promoting a healthy digestive system.
Finally, the soluble beta-glucan fiber remains intact, supporting heart health by lowering cholesterol and stabilizing blood sugar.
Soaking oats isn’t just about texture; it’s a simple step that enhances nutrition and wellness in your oatmeal cake.
Optimal Soaking Time
When should you soak your oats to achieve the perfect moistness in your oatmeal cake batter? For a quick yet effective softening, soak oats in boiling water for 10 minutes. This tenderizes them just enough to blend smoothly into the batter.
If you have more time, extend soaking to 20 minutes using a hot water and butter mixture. This produces a notably moister, more tender cake. The fermentation process occurring during soaking can improve the overall texture.
For even richer texture and consistency, soak oats in the refrigerator overnight. This allows them to fully absorb liquids and develop subtle fermentation.
A 24-hour soak enhances batter rise and evenness. Remember, temperature and soaking duration directly influence your cake’s final moistness.
In some traditional oatmeal recipes, soaking oats with a dairy mixture such as soured cream or kefir overnight encourages beneficial fermentation that improves flavor and texture.
Adjusting soak times based on your schedule can help you achieve an oatmeal cake that’s perfectly soft and flavorful every time.
Soaking Liquid Choices
Choosing the right liquid to soften your oats can make a noticeable difference in your oatmeal cake’s texture and flavor.
Boiling water, typically measured at 1 1/4 cups, is the standard for soaking old-fashioned rolled or quick oats, ensuring uniform absorption and a moist crumb.
Using 1 1/2 cups hot water speeds softening and adds extra moisture. For a tender crumb, try substituting buttermilk or thin, non-Greek yogurt—about 3/4 cup—which adds richness without diluting flavor.
Melted unsalted butter, around 1/2 cup, can be combined with boiling water during soaking to boost richness and depth.
Water helps oats soften and adds moisture to the cake, making it essential to soak the oats in a warm liquid before adding them to the batter for the best results water soaking. Maintaining the proper hydration balance in your batter ensures optimal texture and consistency.
Precise liquid measurements matter; they balance hydration and batter consistency, helping you achieve that perfect, moist oatmeal cake every time.
Creaming Butter and Sugar for Oatmeal Cake
To get that perfect oatmeal cake texture, you really want to cream your butter and sugar just right. This step is super important because it traps air, which helps your cake rise and stay light. So, here’s a little tip: make sure your butter is soft but not melted—ideally around 65°F. This way, it can hold onto those tiny air bubbles that make a difference! Using room-temperature butter makes it easier to achieve a smooth and fluffy mixture, which is key to proper creaming.
With the right temperature and technique, you’ll be on your way to achieving a fluffy, tender crumb. Trust me, that’s what makes every bite of your oatmeal cake absolutely irresistible!
Importance Of Creaming
Why does creaming butter and sugar play such an essential role in baking your oatmeal cake?
It’s the secret to a light, tender crumb and a moist, fluffy texture.
As you cream, sugar crystals puncture the butter, trapping air pockets that expand in the oven, lifting your cake beautifully.
This process also evenly disperses sugar, creating a smooth, stable base for your batter and enhancing flavor by holding aroma compounds in tiny air bubbles.
The temperature of the butter is crucial; ideally, it should be around 18-20°C to blend best without grittiness or excessive oiliness. Using precise measuring techniques can further improve the consistency of your batter.
| Benefit | How It Works | Result |
|---|---|---|
| Texture | Air incorporation via sugar | Light, tender crumb |
| Structure | Fat-sugar-air network formation | Stable, smooth batter |
| Flavor & Aroma | Air pockets trap flavor compounds | Intensified taste |
Mastering creaming guarantees your oatmeal cake’s perfect rise and melt-in-mouth softness.
Butter Temperature Tips
How do you know when butter is just right for creaming in your oatmeal cake?
It should be softened at room temperature for 30-60 minutes, yielding slightly to finger pressure without melting. This consistency lets butter blend evenly with sugars, preventing lumps or streaky batter.
Avoid cold butter; it demands longer mixing and can cause uneven distribution. Use unsalted, real butter, preferably European-style for richer flavor and texture. When creaming, start at medium-high mixer speed for 5-7 minutes, adding sugar gradually to achieve a light, fluffy mixture. Remember to scrape the bowl sides periodically for even blending.
Proper butter temperature ensures smooth incorporation, setting a solid foundation for your oatmeal cake’s tender crumb and balanced sweetness. Additionally, creaming the butter and sugars until the mixture is light and fluffy helps create the soft, moist cake texture characteristic of a good oatmeal cake. This technique is similar to the importance of even heat distribution in baking, which ensures consistent results throughout the process.
Achieving Fluffy Texture
Once your butter reaches the perfect softness, the next step is creaming it with sugar to build that light, airy texture your oatmeal cake needs.
Use an electric mixer, either a stand mixer with a paddle attachment or a handheld one, starting on low speed to prevent splashing. Gradually increase to medium or medium-high speed, beating for 3 to 5 minutes until the mixture turns pale yellow and fluffy. This mixing technique helps incorporate air gently, essential for tender crumb development.
Make sure to scrape the bowl at least once to evenly distribute the butter and sugar. You want no visible butter chunks, with sugar granules fully dispersed.
This creaming process incorporates air, creating a soft, airy batter essential for your oatmeal cake’s tender crumb and perfect rise. Starting with butter at the right temperature around 65°F helps trap air effectively and ensures the creaming process works optimally.
Mixing Wet and Dry Ingredients for Oatmeal Cake Batter
Where do you begin when combining the wet and dry ingredients for your oatmeal cake batter? Start by creaming room-temperature butter with brown and white sugars using an electric mixer until fluffy.
Beat in eggs one at a time, then add vanilla. Meanwhile, whisk together flour, cinnamon, baking soda, and salt in a separate bowl for even distribution.
Next, soak your oats in hot milk or boiling water to soften, including the soaking liquid for moisture. Using old fashioned oats is recommended to achieve the best texture in the cake. To mix, add half the dry ingredients to the creamed wet mixture on low speed, followed by the soaked oats and their liquid.
Finish by adding the remaining dry ingredients gradually, mixing gently each time. This alternating method ensures a smooth, lump-free batter ready for baking.
Baking Your Oatmeal Cake to Golden Perfection

With your oatmeal cake batter perfectly mixed and smooth, it’s time to focus on baking it to golden perfection. Preheat your oven to 350°F for conventional or 330°F for convection. Position the rack in the middle for even heat.
Preheat your oven to 350°F (conventional) or 330°F (convection) and place the rack in the middle for even baking.
Prepare your pan thoroughly: grease and flour a 9×13-inch pan or butter a skillet to prevent sticking. Then, pour in the batter evenly. Using precision scales can help ensure your measurements are accurate for consistent results.
- Bake for 30-35 minutes, adjusting time for different pans. The cake should be baked until a toothpick comes out clean, indicating it is fully cooked.
- Check doneness by inserting a toothpick; it should come out clean with a few crumbs.
- Look for a golden brown surface, edges slightly pulling away, and a springy top.
- Cool on a wire rack for 5 minutes, then poke holes for better topping absorption.
Stick to these steps, and your oatmeal cake will bake beautifully every time.
Making and Broiling Classic Oatmeal Cake Frosting
How do you transform a simple oatmeal cake into a luscious, caramelized treat?
Start by melting 8 tablespoons of unsalted butter, then stir in ½ to 1 cup packed light brown sugar, ¼ cup heavy cream, 1 to 1.5 cups shredded sweetened coconut flakes, ½ to 1 cup chopped pecans or walnuts, 1 teaspoon vanilla extract, and a pinch of kosher salt if you like. Incorporating a creamy texture similar to classic lemon curds can enhance the frosting’s richness and mouthfeel.
Cook this mixture until it bubbles, then remove it from heat and let it cool slightly. This blend creates a rich, textured frosting bursting with caramel and nutty flavors. The recipe, created by Kaleb Wyse, is known for its quick to put together nature using pantry ingredients.
Once ready, you’ll spread it on your cake and broil it briefly to achieve a golden, toasted finish that enhances both taste and appearance.
How to Spread and Broil Frosting Perfectly?

A flawless frosting finish starts with the right tools and preparation.
First, ensure your cake is cool and leveled for an even base. Using a cake turntable makes rotating the cake effortless and helps achieve a smooth, even frost.
Use an offset spatula to spread a thin, even layer, pushing frosting over edges for a clean overhang.
Next, smooth the top by holding the spatula at a 45-degree angle while rotating the cake, preventing a domed center.
Then, apply frosting to the sides with vertical knife sweeps, smoothing with a bench scraper held parallel to the cake.
Finally, soften frosting slightly for a shiny final coat before broiling.
Remember to keep your tools clean and warmed for seamless spreading and a perfect, broiled finish that’s both smooth and visually stunning.
Oatmeal Cake Variations and Serving Ideas
Why settle for just one version when oatmeal cake offers delightful variations that cater to different tastes and occasions?
You can choose between old-fashioned rolled oats or quick oats for a tender crumb, and adjust flour from 1⅓ to 1½ cups to control density. The cake’s base typically includes 1 cup quick oats soaked in boiling water to create a moist texture.
Spice it up with cinnamon alone or add nutmeg for warmth. For topping, try boiling or uncooked frosting bases using whole milk, half & half, or evaporated milk, paired with 1 to 1½ cups shredded coconut and optional pecans, walnuts, or almonds.
Serve your cake slightly warmed or at room temperature to enhance the broiled frosting’s flavor and texture.
With these tweaks, you create a personalized dessert perfect for any gathering or cozy moment.
Frequently Asked Questions
Can I Substitute Quick Oats for Old Fashioned Rolled Oats?
Yes, you can substitute quick oats for old-fashioned rolled oats in most recipes.
Quick oats soften faster and create a softer, cakier texture with a smoother, more uniform appearance.
Expect your baked goods to be less chewy and more tender.
Keep in mind, quick oats absorb more moisture, so your dough might be slightly wetter.
If you want a similar texture to old-fashioned oats, try pulsing them briefly in a food processor instead.
How Long Can I Store Leftover Oatmeal Cake?
Think of your leftover oatmeal cake like a favorite book you want to savor slowly.
At room temperature, it stays fresh for 1-2 days sealed tight.
Pop it in the fridge, and you can enjoy it for up to 4 days without losing flavor.
If you want to save it longer, wrapping it well and freezing it can keep it good for months.
Just thaw gently, and you’re set!
Is It Possible to Freeze the Cake With Frosting?
You can freeze oatmeal cake with frosting, but it’s tricky. The broiled coconut pecan frosting tends to soak into the cake and lose its unique texture when frozen.
If you want to freeze it, wrap it tightly in plastic wrap and place it in an airtight container, ideally using it within two months. For best results, freeze the cake unfrosted and add fresh frosting after thawing to keep that perfect texture and flavor.
Can I Use a Different Pan Size for Baking?
Yes, you can use a different pan size, but adjust your baking time and temperature.
Smaller pans like 8×8 need about 30-35 minutes at 350°F. Thicker batter means watch for overbrowning.
Larger pans like 15×10 bake faster, taking 20-25 minutes and yielding more servings.
Always check doneness with a toothpick. If edges brown too fast, bump the oven to 355°F.
Rotate pans for even baking when needed.
What Is the Best Way to Reheat Leftover Cake?
The best way to reheat leftover cake is by gently warming it in a conventional oven at 325°F for about 5-6 minutes.
Ideally, place a water-filled dish nearby to keep it moist. You can also use the microwave in short 20-second bursts with a damp paper towel to trap moisture.
For a quick method, try the air fryer at 375°F for 4-5 minutes, wrapping the cake in foil to prevent drying or leakage.
Try a Twist: Variations on Oatmeal Cake With Broiled Frosting
Now that you’ve mastered this oatmeal cake with broiled frosting, you’re ready to impress at any gathering.
Remember, “the best things come to those who wait,” so take your time soaking the oats and perfecting that golden broil.
Each step adds layers of flavor and texture that make this cake truly special. Enjoy the warm, comforting taste you’ve created, and don’t hesitate to experiment with variations to make it your own.