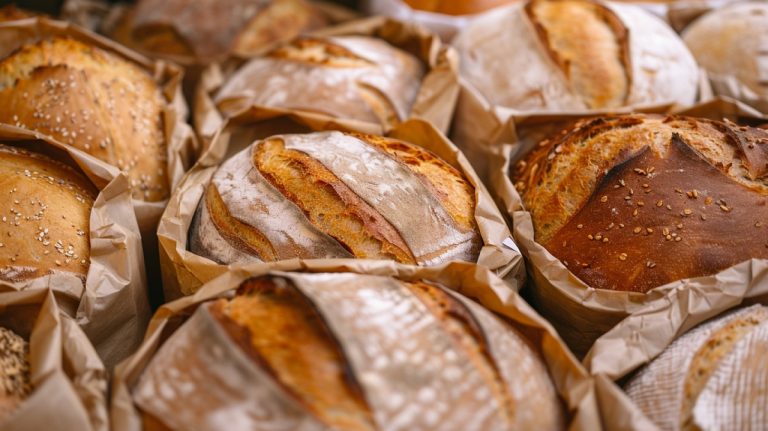
No Knead Bread Sourdough Recipe for Bakery-Style Loaf
You’ll start by combining equal parts bread and whole wheat flour with filtered water and your active sourdough starter, mixing until shaggy with about 70–75% hydration. Skip kneading; let time and gentle stretch-and-folds build gluten during a 3-5 hour bulk ferment at 75°F.
Shape, proof overnight in the fridge, then bake in a preheated Dutch oven at 450°F for a crisp crust and open crumb. Follow these steps, and you’ll craft a rustic, flavorful loaf with ease.
Learn how to perfect each stage for bakery-quality results.
Key Takeaways
- Mix equal weights of bread and whole wheat flour with filtered water and sourdough starter until shaggy, then autolyse 20-45 minutes before adding salt.
- Use 70–75% hydration for a sticky, extensible dough suitable for no-knead methods and gentle folding during bulk fermentation.
- Perform 3-4 gentle stretch-and-fold sets spaced 15–30 minutes apart during 3-5 hours bulk fermentation at 74–76°F.
- Shape dough gently into a smooth ball with surface tension, proof 1-3 hours at room temperature or 12-15 hours refrigerated.
- Bake in a preheated 450°F Dutch oven for optimal oven spring and crust, preheating the pot for about an hour before baking.
Easy No-Knead Bread Sourdough Step-by-Step Recipe Guide
| Step | Ingredients & Measurements | Method & Key Tips |
|---|---|---|
| 1. Mix Dough | 250g bread flour, 250g whole wheat flour, 350–375g filtered water, 100g active sourdough starter, 10g sea salt | Combine flour, water, and starter. Mix until shaggy. Rest (autolyse) for 20–45 minutes. Add salt dissolved in a little water. |
| 2. Hydration Control | Maintain 70–75% hydration | Use wet hands or spatula. Dough should feel sticky yet elastic. Adjust water slightly depending on flour. |
| 3. Bulk Fermentation | Room temp 74–76°F, 3–5 hours | Perform 3–4 stretch-and-folds every 15–30 minutes. Dough should rise about 75% and feel airy. |
| 4. Shape Dough | Light flour for handling | Rest dough 20–30 mins. Shape into boule or batard, creating surface tension. Place in floured basket. |
| 5. Proofing | Room temp 1–3 hrs or Refrigerate 12–15 hrs | Use poke test for readiness. Refrigeration deepens flavor and strengthens crumb. |
| 6. Bake | Preheat Dutch oven 450°F, 45–60 mins | Place dough in hot pot. Bake covered 20–25 mins, then uncovered 20–25 mins until crust is golden and crisp. |
| 7. Cool & Serve | Cooling rack | Rest loaf at least 4–12 hours before slicing to avoid gummy texture. Slice with serrated knife. |
Preparing and Activating Your Sourdough Starter
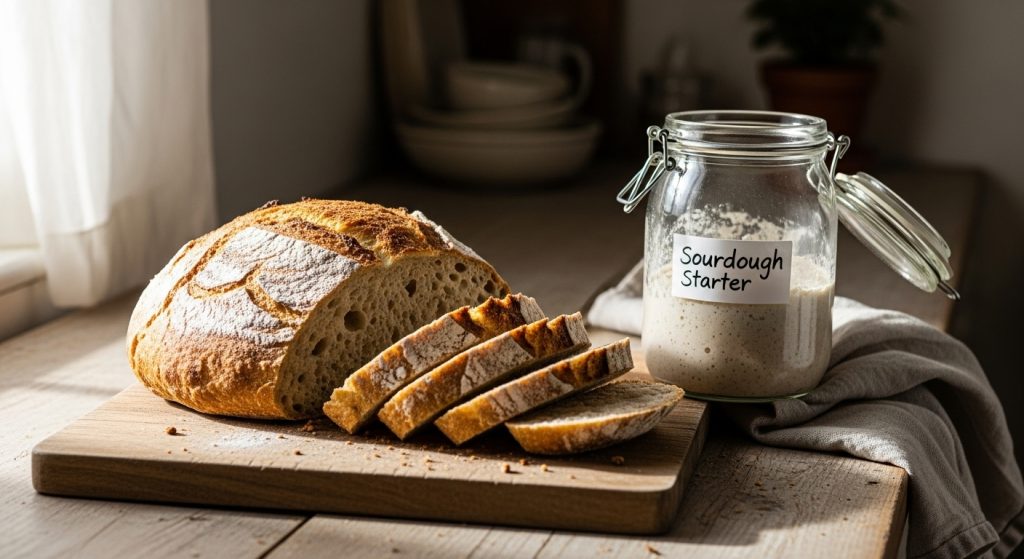
Before you plunge into baking, you’ll want to prepare and activate your sourdough starter—the living foundation of your bread’s flavor and rise.
Start by mixing equal weights of unbleached all-purpose and whole wheat flour with filtered, chlorine-free water at room temperature—typically 100 grams each. Stir thoroughly until you see no dry lumps, forming a thick paste. This mixture will collect beneficial bacteria and wild yeast from the environment. The microbial diversity in this mixture is key to developing the complex flavors characteristic of sourdough.
Begin by combining equal parts unbleached all-purpose and whole wheat flour with filtered water into a smooth, thick paste.
Place this mixture in a clean container with a loose cover like cheesecloth to allow airflow.
Feed your starter daily by discarding half and replenishing with equal flour and water weights.
Maintain a warm environment around 70–75°F and stir the starter once or twice daily to aerate it gently. This temperature range helps optimize the fermentation speed and flavor development.
Watch for bubbles and doubling in size, signs your starter is healthy and ready to bake with.
Essential Ingredients and Measuring Tips
Choosing the right flour sets the foundation for your sourdough’s texture and flavor. So opt for a blend of bread and whole grain flours. Maintaining consistent ratios ensures reliable results regardless of flour substitutions, making your baking process more predictable.
Different flours, such as whole-wheat sourdough, contribute unique textures and flavors that can elevate your bread. Pay close attention to water quality. Filtered and chlorine-free water helps your starter thrive and fermentation flourish.
When measuring salt, weigh it precisely using fine sea or kosher salt to enhance flavor without overpowering your loaf. Using iodized salt can impart a metallic taste that may affect the final flavor of your bread.
Flour Types Selection
When you select flours for your sourdough bread, understanding their unique properties can transform your baking experience. Bread flour, with its higher protein content, builds strong gluten for a better rise and chewy texture. Using high-protein flours promotes a strong gluten network essential for good oven spring and an open crumb.
Whole wheat adds a nutty flavor and coarse texture but often pairs with white flour to balance crumb softness.
Rye flour gives tangy earthiness yet creates sticky dough, so use it sparingly.
Ancient grains like spelt and kamut offer mild sweetness but blend best with bread flour for easier handling.
All-purpose flour suits beginners but yields a softer crumb.
Measure your flours by weight to guarantee accurate hydration since each flour absorbs water differently.
Adjust water gradually, especially with whole grain or high-protein flours, to achieve the perfect dough consistency every time.
Water Quality Importance
How does the water you use shape your sourdough’s texture and flavor? Water is vital for gluten development and fermentation. Medium-hard water (100–200 mg CaCO₃/L) offers the best balance, enhancing dough softness and yeast activity.
Slightly acidic water (pH 5.0–6.0) encourages ideal enzymatic reactions and fermentation, improving texture and tanginess. Additionally, water that is excessively hard can tighten gluten and reduce fermentation rate, negatively affecting dough rise and crumb structure.
This is why maintaining optimal water hardness is crucial for bread quality. Using a digital kitchen scale can help ensure precise water measurement, contributing to consistent dough hydration.
Avoid very hard or soft water; too hard tightens gluten, too soft weakens dough. Also, guarantee your water is free from chlorine and sulfur to preserve your sourdough’s aroma and taste.
| Factor | Ideal Range | Impact on Sourdough |
|---|---|---|
| Hardness | 100–200 mg CaCO₃/L | Enhances dough stability and softness |
| pH | 5.0–6.0 | Favors yeast growth and enzymatic action |
| Mineral Content | Moderate | Supports microbial activity and flavor |
| Contaminants | None (chlorine-free) | Prevents off-flavors and culture damage |
Salt Measurement Tips
Since salt plays a crucial role in shaping your sourdough’s flavor and fermentation, measuring it accurately can make all the difference between a perfect loaf and a disappointing one.
Aim for about 1.8% to 2% of your flour’s weight—say, 10 grams for 500 grams of flour.
Use a digital kitchen scale for precise measurement; spoons often lead to guesswork and inconsistency. Digital scales measure ingredients by weight for greater accuracy and consistency in baking.
Add salt after the initial autolyse to avoid hindering enzyme activity, dissolving it in reserved water for even distribution. This timing helps maintain the starter’s fermentation activity for optimal dough development.
Fine sea salt or kosher salt works best, as coarse or iodized salts can cause uneven flavor or fermentation issues.
Getting salt levels right controls yeast activity, strengthens gluten, and enhances crust color, ensuring your sourdough rises beautifully with complex, balanced flavor.
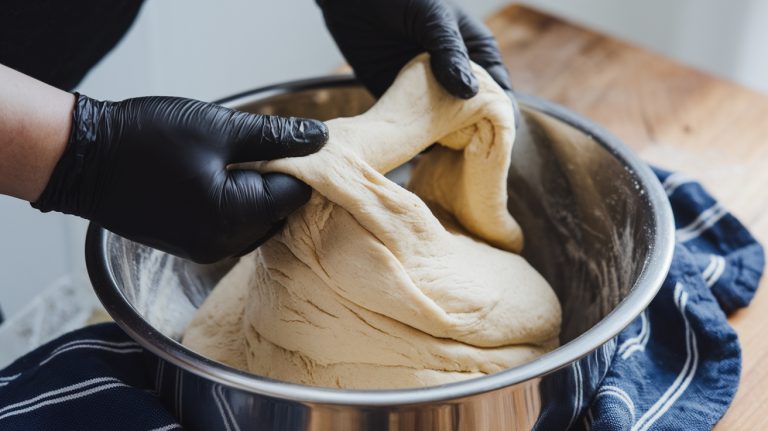
Mixing the Dough for Optimal Hydration
Achieving the right hydration level during dough mixing sets the foundation for a no-knead sourdough’s texture and rise. Aim for 70-75% hydration—this balance ensures your dough is sticky and extensible without becoming unmanageable.
Start by mixing flour, lukewarm water (~75°F), and starter until no dry flour remains, creating a shaggy mass. Let it autolyse for 20-45 minutes to hydrate the flour fully and activate enzymes. It is important to ensure your starter is active and ripe before beginning this process. Using a digital scale can help achieve precise measurements to maintain consistent dough hydration.
Then, gently incorporate salt and any remaining water without vigorous kneading to preserve dough extensibility. Use wet hands or a spatula to handle stickiness efficiently.
Adjust hydration slightly if needed based on flour absorption or humidity. This careful mixing distributes starter and enzymes evenly, kickstarting fermentation and setting you up for a beautifully open crumb and strong gluten development during the slow rise.
Understanding the No-Knead Technique
You’ll find that gentle mixing sets the stage for gluten to develop gradually without the need for vigorous kneading.
Instead, time and moisture work together, allowing the dough’s structure to strengthen naturally. This minimal equipment requirement makes no-knead bread highly convenient for home bakers. Using a no-knead method is somewhat similar to how sourdough bread, with its distinct texture, can be transformed into a rich dessert like bread pudding.
This slow process results in a tender crumb and rich texture that’s the hallmark of no-knead bread.
Gentle Mixing Benefits
When you embrace gentle mixing in sourdough baking, you tap into a method that eases physical effort while enhancing dough quality. This technique minimizes fatigue by replacing intense kneading with gentle folds, preserving delicate yeast and bacteria vital for fermentation.
It also improves dough extensibility through rest periods that kickstart gluten formation naturally. During these rest periods, the gluten continues to develop and strengthen without the need for vigorous kneading. Using oven gloves with heat resistance can help protect your hands during the baking process.
Here’s why gentle mixing benefits you:
- It maintains dough structure, allowing gas bubbles to grow evenly for a light, airy crumb.
- It reduces oxidation, preserving flavor compounds that create a complex, tangy sourdough taste.
- It fits easily into busy schedules, letting you fold intermittently without constant attention.
Using gentle mixing means you craft bread with superior texture and flavor, all while saving effort.
Gluten Development Method
Gentle mixing sets the stage for gluten to develop naturally over time, which is the heart of the no-knead technique. Instead of kneading, you let time do the work, allowing glutenin and gliadin proteins in the flour to hydrate and bond slowly during extended fermentation.
This passive gluten development builds strength and elasticity without physical effort. You can enhance this by incorporating periodic stretch and folds every 20–30 minutes early on, aligning gluten strands and redistributing gases to improve dough structure.
This method is especially effective as it strengthens gluten, allowing the dough to hold larger air bubbles without collapsing. Starting with an autolyse—mixing just flour and water—further boosts gluten formation and extensibility before adding salt and starter.
Minimal handling preserves gluten integrity, while baking in a steam-filled vessel maintains moisture, supporting gluten’s elasticity and resulting in a chewy, open crumb with impressive oven spring. Additionally, maintaining balanced fermentation encourages beneficial bacteria growth, which can improve dough flavor and texture.
Bulk Fermentation and Folding Steps
Although bulk fermentation requires patience, mastering this stage is key to developing your sourdough’s flavor and texture. During this 3 to 5-hour process at around 75°F (24°C), your dough will grow by about 75%, while wild yeast and bacteria produce the signature tang and rise.
Using a mix of medium-protein bread flour and whole wheat provides a balanced base that enhances both flavor and texture during fermentation. This process is similar to how sourdough culture in certain bread mixes contributes to flavor and a lower glycemic index.
Bulk fermentation, lasting 3-5 hours at 75°F, is crucial for flavor, rise, and dough development.
To guarantee ideal gluten structure without kneading, you’ll perform several stretch-and-folds. Here’s how to nail it:
- Perform 3 to 4 stretch-and-fold sets spaced 15-30 minutes apart, lifting and folding the dough gently to strengthen gluten.
- Keep your hands wet during folds to prevent sticking and preserve delicate gas bubbles.
- Cover your dough to maintain humidity and let it rest undisturbed between folds for proper fermentation and elasticity.
This careful routine guarantees a well-developed dough ready for the next stage.
Shaping the Dough for Final Proofing
As your dough completes bulk fermentation, preparing it for final shaping sets the stage for a beautifully risen loaf. Lightly flour your work surface to prevent sticking, but don’t overdo it—too much flour can hinder sealing and rising. Using a loaf pan provides support during the rise to help maintain the dough’s shape.
Gently turn the dough out, folding edges toward the center to build surface tension, forming a rough ball. Dough that has undergone stretching and folding during fermentation typically exhibits a smoother texture and more surface bubbles, which can aid in shaping.
Let it rest for 20–30 minutes to relax the gluten before final shaping.
When shaping, create a taut skin by pulling edges underneath for a boule or folding and rolling into an oval for a batard.
Bring seams together neatly, placing the seam side down in a floured proofing basket.
Handle the dough gently to preserve its delicate structure, and use smooth, consistent motions to ensure it holds shape through proofing and baking.
Proofing and Refrigeration Strategies
How long you proof your sourdough and at what temperature can transform both its flavor and texture. Room temperature proofing typically lasts 1-3 hours, while refrigeration for 12-15 hours slows fermentation, enhancing flavor complexity and crumb structure.
To master proofing and refrigeration, perform bulk fermentation at 74-76°F for about 3.5 hours with stretch and folds to build gluten strength. This method aligns with the no-knead technique that relies on stretching and folding rather than traditional kneading.
Refrigerate shaped dough covered with plastic wrap or a banneton liner to prevent drying and develop a thicker crust.
Use the poke test—dough should slowly spring back when pressed—to judge readiness and avoid overproofing.
Bring refrigerated dough to room temperature before baking or bake straight from the fridge for ideal oven spring and crust development.
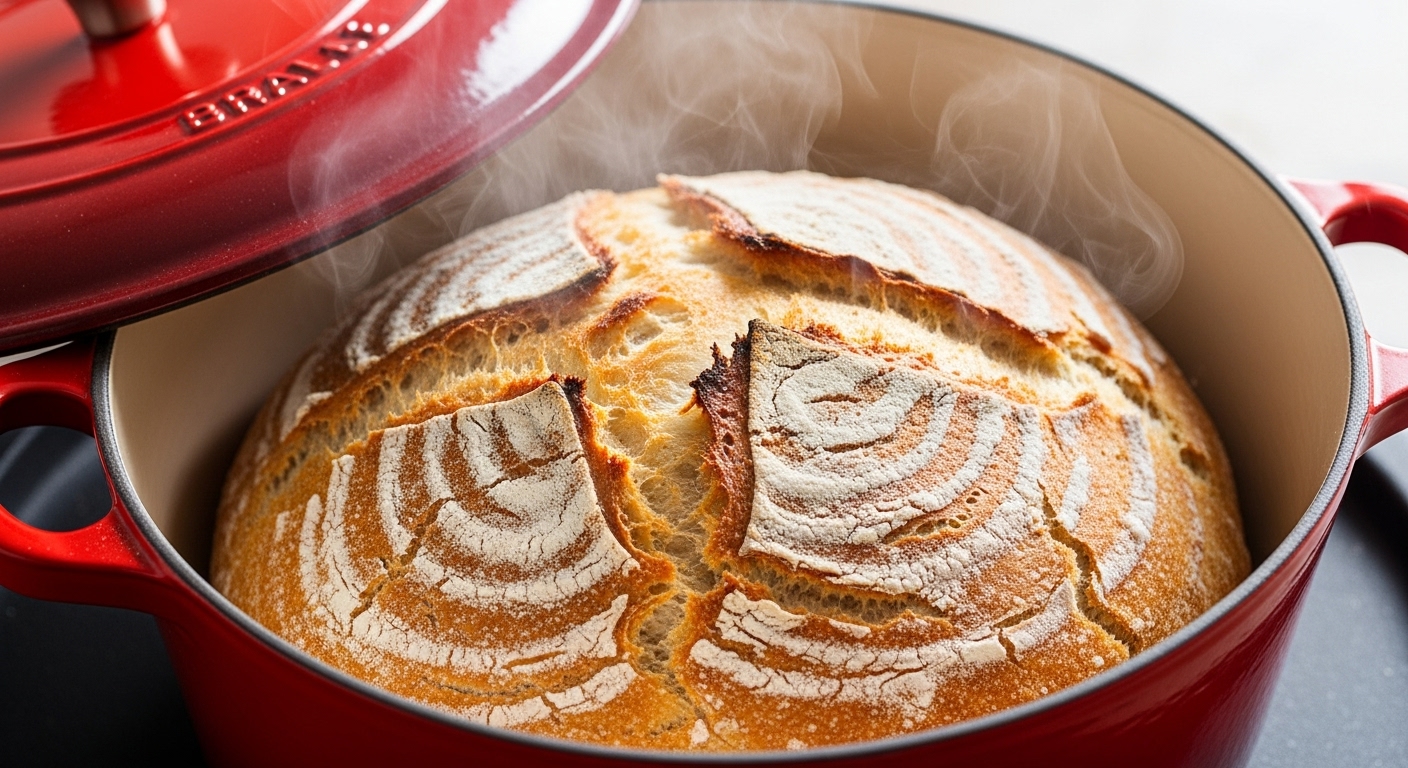
Preheating and Using Your Dutch Oven
To get that perfect crust, you’ll want to preheat your Dutch oven between 400°F and 450°F for about 30 to 60 minutes.
This temperature range guarantees even heat distribution and a cozy environment for your dough to rise beautifully.
Timing is key. Too hot or too short, and you might miss out on the ideal oven spring.
It’s important to preheat Dutch oven thoroughly to enhance crust color and texture, creating desirable blisters.
Optimal Temperature Range
Although you might be tempted to crank your Dutch oven to the highest heat, preheating it between 400°F and 450°F strikes the perfect balance for your no-knead sourdough bread. This temperature range helps develop a crisp crust without hardening it too fast, allowing your loaf to expand fully.
Here’s why it’s ideal:
- Maintains even heat distribution, preventing warping or damage to your Dutch oven.
- Creates a steamy environment essential for that signature crust and ear formation.
- Supports gradual browning, ensuring a tender crumb inside with a beautifully caramelized exterior.
- Maintaining a consistent temperature during baking is crucial for achieving reliable baking results.
Stick to this range to maximize ovenspring and flavor, making your no-knead sourdough both delicious and visually stunning every time.
Preheating Duration Tips
When you preheat your Dutch oven for about an hour at 450°F, you guarantee it reaches the intense heat needed to create that perfect oven spring and crust. Shorter preheating, under 30 minutes, risks a dense crumb due to insufficient heat retention.
Avoid overlong preheating beyond an hour to prevent equipment stress without extra benefits. Using a 6 quart Dutch oven is recommended for optimal baking results.
Use parchment paper to protect your dough from scorching, and handle the pot carefully—it’s extremely hot.
| Preheat Time | Temperature | Result |
|---|---|---|
| 15 mins | 400°F | Less oven spring |
| 30 mins | 450°F | Moderate crust, rise |
| 60 mins | 450°F | Ideal crust & spring |
Stick to about an hour for the best balance of heat and crust formation.
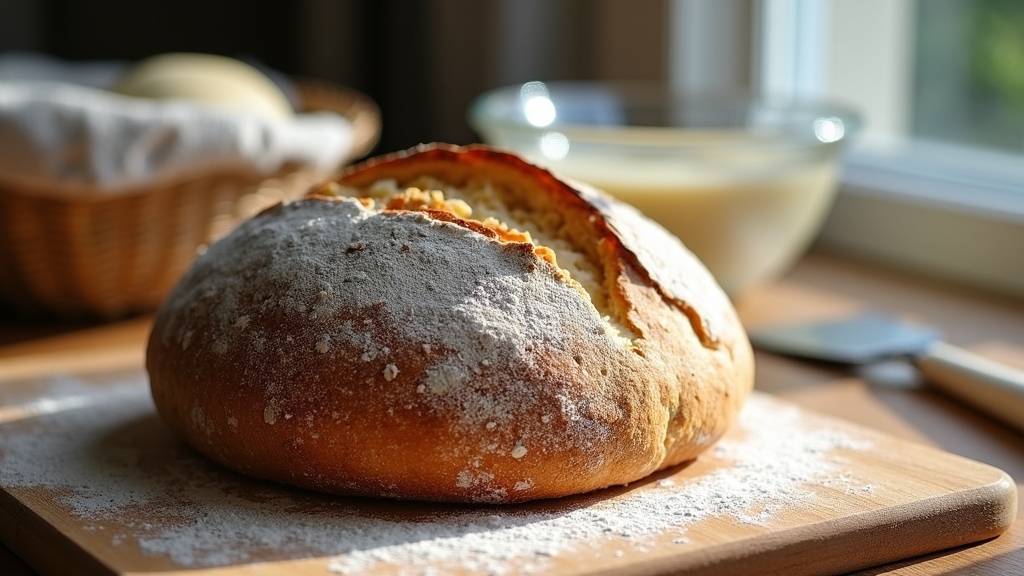
Scoring and Baking Your Sourdough Loaf
Since scoring controls how your sourdough loaf expands in the oven, mastering this step is essential for achieving that perfect crust and oven spring. Use a sharp blade held at a 30-45° angle to make swift, clean cuts about 1/4 to 1/2 inch deep. Proper scoring guides the dough’s expansion, preventing random ruptures and encouraging an attractive “ear” on your loaf.
To score and bake like a pro:
- Score fully proofed, cold dough on a lightly floured surface to preserve gas bubbles. Scoring also helps steam escape, which improves crust texture and influences the shape and rise of the bread.
- Place the scored dough carefully into a preheated Dutch oven at 450°F (232°C), maintaining steam for 15–20 minutes.
- Remove the lid midway to brown and firm the crust, revealing a stunning, well-expanded loaf.
Precision here transforms your bread’s look and texture beautifully.
Cooling and Serving Recommendations
As your sourdough loaf comes out of the oven, you’ll want to give it ample time to cool—ideally between four to twelve hours—before slicing to reveal its full flavor and perfect texture.
Cooling on a wire rack lets air circulate, preventing a soggy crust while allowing moisture to redistribute evenly inside. This step also helps maintain the crust texture developed through proper steam baking methods.
Resist slicing too soon; the crumb needs this time to set, avoiding gummy texture and structural collapse.
When ready, use a serrated knife to slice gently, preserving the airy crumb.
Serve fresh within 24 hours for the best crust and flavor, or toast slices later to revive texture.
Store cooled bread uncovered at room temperature initially, then bag or freeze slices for longer freshness.
Proper cooling not only enhances taste but also enriches your sourdough’s complex character.
Frequently Asked Questions
How Can I Adjust the Recipe for High Altitude Baking?
You’ll want to boost dough hydration gradually since high altitude air’s drier, making flour thirstier.
Cut your starter by about 25% and use cooler water to slow fermentation.
Raise baking temperature roughly 25°F to tackle faster moisture loss, and consider shorter or additional rises for better gluten.
Cover dough tightly to avoid drying out.
These tweaks help you craft a soft crumb and golden crust despite altitude challenges.
What Are Common Troubleshooting Tips for Dense Sourdough Bread?
If your sourdough turns out dense, check your starter’s maturity and activity first. You’ll want it bubbly and well-fed.
Avoid under or overproofing by watching dough rise and testing with a wet finger. Adjust hydration; too little water stiffens dough.
Use proper flour and avoid adding salt too early. Shape dough carefully, score before baking, and bake at the right temperature in a preheated oven.
Finally, always cool before slicing to keep crumb light.
Can I Use Gluten-Free Flour in No Knead Sourdough Recipes?
Yes, you can use gluten-free flour in no knead sourdough recipes, but it’s like painting with a new palette—you’ll need to adjust your technique.
Gluten-free dough behaves differently, often wetter and less elastic, so add binders like psyllium husk to create structure.
Use a gluten-free starter and expect a slower rise.
Baking in a Dutch oven helps develop a crisp crust, while patience during fermentation builds that tangy sourdough flavor you’re after.
How Do I Store Leftover Sourdough Bread to Maintain Freshness?
To keep your leftover sourdough fresh, place it cut-side down on a wooden board at room temperature in a cool, dry spot away from sunlight.
Wrap it loosely in a breathable cloth or linen bag to maintain crust crispness and prevent mold.
Avoid refrigerating since it dries out bread faster.
If you want longer storage, slice and freeze it in airtight bags, then thaw and reheat for a fresh-baked taste.
What Are Signs My Sourdough Starter Needs to Be Discarded?
You need to discard your sourdough starter if you see colored mold—pink, orange, green, blue, or black—anywhere on it or in the jar.
If it smells rotten, like garbage or vomit, toss it immediately.
A pinkish or brownish-gray tint throughout also signals spoilage.
If your starter stays flat, shows no bubbles after several feedings, or has broken glass contamination, it’s time to start fresh for safety and quality.
From Starter to Crust: Master Your Sourdough Journey
By now, you’re practically a sourdough sorcerer, effortlessly transforming simple ingredients into a crusty masterpiece with zero kneading drama. Your kitchen smells like a bakery on steroids, and that golden, crackling crust? Pure magic.
With just patience and a trusty Dutch oven, you’ve revealed bread-baking bliss that’ll have friends begging for your secret.
So, slice into that warm, tangy loaf and savor the triumph. You’ve officially mastered the art of no-knead sourdough perfection.