How to Bake Sourdough in a Loaf Pan: Step-by-Step Guide
To bake sourdough in a loaf pan, combine 100g of active sourdough starter with 300g of water and 5-10g of salt (as you prefer). Gradually mix in 450g of strong bread flour until a shaggy dough forms.
Rest the dough for 30 minutes. Perform a series of stretches and folds for gluten development. Pre-shape it into a ball, then shape it into a log and place it seam-side down in a greased loaf pan.
Allow the dough to rise at room temperature for 2-4 hours or until it reaches the rim, then bake at 400°F for 45 minutes until the internal temperature hits 190°F. Cooling is essential for the ideal texture and flavor.
Key Takeaways
- Combine 100g active sourdough starter, 300g water, 10g salt, and 450g bread flour to form a shaggy dough.
- Perform stretch and folds during bulk fermentation to develop gluten.
- Shape the dough into a log and place it seam-side down in a lightly dusted loaf pan.
- Proof the dough at room temperature for 2-4 hours until it rises 1-2 inches above the pan rim.
- Bake at 425°F for 20 minutes, then reduce to 350°F and bake for 20-30 minutes.
Benefits of a Loaf Pan
Baking sourdough in a loaf pan offers numerous advantages, particularly for those new to the craft. By using a loaf pan, you simplify the shaping technique as the dough naturally conforms to the pan’s structure. This aspect is vital for beginners who might struggle with free-form shaping.
The walls of the loaf pan provide essential support during the rise, guaranteeing your dough doesn’t spread out and create a flat loaf. Additionally, this method allows for better moisture retention, which can enhance the flavor and texture of your bread, making it even more enjoyable for sourdough bread benefits.
One key benefit is the production of uniform slices, perfect for sandwiches and toast. Unlike free-form loaves that often yield irregular shapes, sourdough baked in a loaf pan maintains a consistent form, making slicing effortless.
Additionally, baking at lower temperatures, around 200°C (392°F), results in a softer crust. This softer crust not only enhances the texture but also simplifies slicing.
For home bakers, using a loaf pan makes the process more accessible. You don’t need specialized tools, which lowers the barrier to entry.
The loaf pan’s structure and support guarantee a controlled rise, producing a loaf that’s both aesthetically pleasing and practical. This method is especially beneficial for those looking to achieve consistent results with minimal fuss.
Preparing the Dough
To begin preparing the dough, combine 100 grams of active sourdough starter, 300 grams of water, and 10 grams of salt in a large mixing bowl. Mix until the salt dissolves completely. Gradually incorporate 450 grams of strong bread flour into the mixture. Stir until a shaggy dough forms, then let it rest for 30 minutes to allow for proper hydration.
To enhance the sourness of your sourdough, consider using whole grain flours like whole wheat or dark rye, as they promote the growth of acetic acid-producing bacteria, intensifying the tangy flavor of whole grain flours.
During the initial phase of bulk fermentation, perform three sets of stretches and folds every 30 minutes over a two-hour period. This technique enhances gluten development. Allow the dough to rise for 3.5 to 6 hours or until it has doubled in size.
Once bulk fermentation is complete, pre-shape the dough into a round ball. Let it rest for 15-30 minutes to relax the gluten. After resting, shape your dough into an oval or log, preparing it for the loaf pan.
Before placing the dough in the loaf pan, lightly coat the pan with butter and dust it with semolina or rice flour. This step guarantees ideal structure and makes removal easier after baking.
Place the shaped dough seam side down in the loaf pan, ready for the next stage.
Shaping Techniques
To shape your sourdough for a loaf pan, pre-shape the dough into a round ball and let it rest for 15-30 minutes. This resting period allows the gluten to relax, guaranteeing better structure.
Next, flatten the dough into a rectangle, fold the corners inward, and roll it into a log, maintaining surface tension.
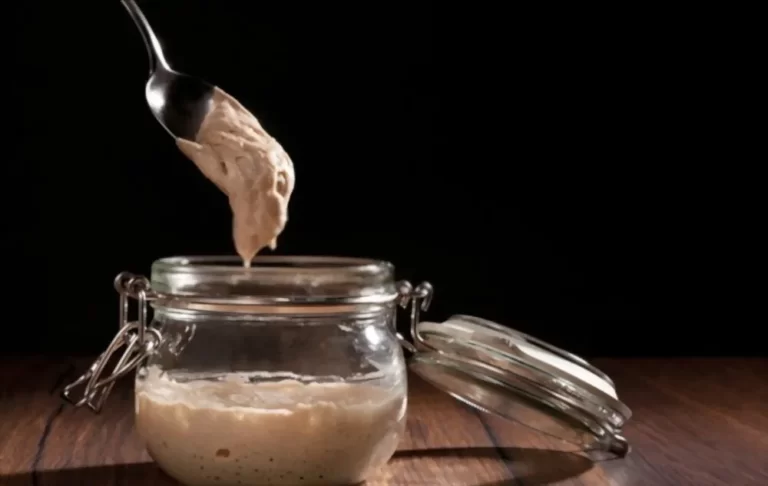
For best results, make sure you’re using a bubbly, vibrant starter for ideal fermentation and rise, as mentioned in sourdough bread making.
Forming the Dough
After bulk fermentation, it’s crucial to pre-shape your dough into a round ball to create surface tension, which guarantees a better final shape in the loaf pan. Begin by turning the dough onto a lightly floured surface. Using your hands, gently shape the sourdough into a round ball. This step is critical to help the gluten structure form properly. Let the pre-shaped dough rest for 15-30 minutes to relax the gluten, making it easier for the final shaping.
Next, the final shaping is performed by forming the dough into an oval or log. Fold the corners inward and roll it tightly. Make sure the dough is seam-side down before placing it in the loaf pan. Lightly coat the loaf pan with butter and dust it with semolina or rice flour to prevent sticking. This guarantees a smooth release after baking.
| Step | Description |
|---|---|
| Pre-shape | Form dough into a round ball to create surface tension. |
| Rest | Allow dough to rest for 15-30 minutes to relax the gluten. |
| Final shaping | Fold corners inward, roll tightly, and place seam side down in the loaf pan. |
Gently lift and place the shaped dough into the loaf pan to maintain its structure and avoid degassing. Now, you’re ready for the next step in baking sourdough bread.
Pan Placement Tips
When placing your shaped dough into the loaf pan, handle it gently to maintain its structure. First, lightly grease the loaf pan with butter and dust it with semolina or rice flour to prevent sticking and guarantee easy release after baking.
The ideal dough temperature during this phase should be around 74 to 78°F (23 to 25°C) to support ideal fermentation ideal fermentation conditions. Shape the dough by tucking the sides under to create a smooth top, then place it seam side down in the loaf pan. This technique helps maintain the dough’s structure and promotes a good rise.
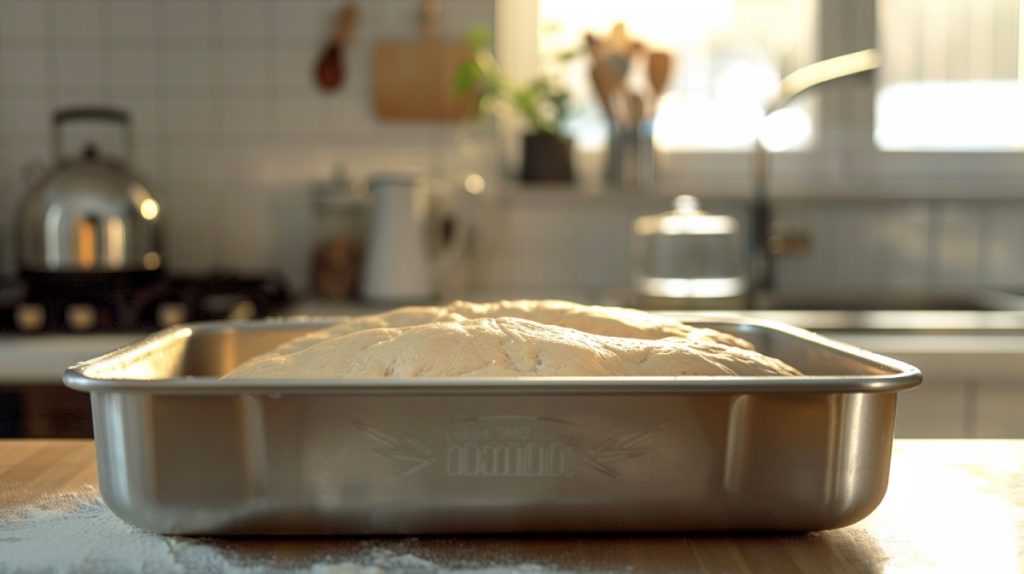
Use a straight edge to lift and transfer the dough into the loaf pan gently. This careful handling guarantees that the dough retains its shape. Allow the dough to proof until it rises approximately one to two inches above the pan’s rim. Proper proofing is vital for achieving the desired rise and structure in your sourdough bread.
Before baking, consider lightly scoring the top of the dough. Scoring allows for controlled expansion during baking, especially if the dough has had a shorter proofing time.
Proofing and Fermentation
To achieve ideal proofing conditions, allow your dough to rise for 2 to 4 hours at room temperature until it feels puffy and soft.
Utilizing techniques such as the stretch and fold method can enhance gluten development during this time.
For enhanced flavor, you can utilize cold fermentation by refrigerating the dough for several hours or overnight, but monitor it closely to avoid over-fermentation.
Verify the loaf rises at least one to two inches above the pan rim for a good oven spring and proper structure.
Optimal Proofing Conditions
Maintaining ideal proofing conditions is vital for baking a perfect sourdough loaf in a pan. To achieve this, you need to create an environment that encourages yeast activity and proper dough rise. A warm environment, ideally between 75°F to 80°F (24°C to 27°C), is essential. This temperature range maximizes yeast activity, resulting in a noticeable increase in volume and improved nutritional benefits due to enhanced fermentation.
Here are three important steps to guarantee optimal proofing:
- Monitor Dough Volume: Keep an eye on the dough as it proofs. It should increase by about 90% before baking. This guarantees a well-risen loaf with the perfect texture.
- Proper Covering: Use a lightly oiled plastic wrap to cover the dough. This prevents drying out while allowing ventilation. It’s vital to avoid surface crusting, which can hinder expansion.
- Humidity Control: Maintaining a humidity-controlled environment is beneficial. This can be achieved by placing a damp cloth or shallow water tray in the proofing area. Consistent humidity prevents the dough from developing a hard crust prematurely.
Check the dough regularly to avoid over-proofing. If it puffs up but starts losing structure, it’s time to bake. These steps guarantee your sourdough loaf achieves optimal texture and flavor.
Cold Fermentation Benefits
Exploring cold fermentation offers bakers a powerful method to enhance their sourdough’s flavor and texture. By refrigerating the dough after an initial rise, you slow down yeast activity, allowing the dough to develop more complex flavors and a superior crust. This extended fermentation results in a more tangy taste profile, enriching your sourdough bread.
Cold fermentation improves the dough’s structure, ensuring a better rise and making it easier to handle. The cold environment during fermentation reduces the risk of over-proofing, giving you more flexibility in your baking schedule. Typically, you can refrigerate the dough for 12 to 24 hours. During this period, the dough will puff up slightly, indicating it’s ready for baking.
When you’re ready to bake, the enhanced dough strength makes it easier to shape and transfer into a loaf pan. This method also allows the bread to rise more uniformly, ensuring a consistent crumb and texture.
Cold fermentation is a precise technique that not only boosts the flavors and structure of your sourdough bread but also accommodates your timing needs, making it an invaluable strategy in your baking repertoire.
Baking Instructions
Achieving the perfect bake for your sourdough loaf begins with preparation. First, preheat your oven to 200°C (392°F) to create ideal baking conditions. This guarantees your sourdough bread starts baking immediately upon entry, aiding in oven spring and crust formation.
Next, it’s time to score your dough. Using a sharp blade, make a few shallow cuts on the top. This step is essential for proper oven spring unless your loaf has already been proofed for 3-4 hours, in which case you can skip scoring.
Before placing the dough in the loaf pan, lightly spray it with water to maintain moisture. This helps in achieving a softer crust.
Place your loaf pan in the oven and bake for 45 minutes. Monitor the development of a desirable golden crust and check the internal temperature, which should reach at least 190°F (88°C).
Once baked, remove the loaf from the oven and allow it to cool on a wire rack for at least 1 hour to enhance texture and avoid sogginess.
Key Steps:
- Preheat oven and score dough.
- Bake for 45 minutes, aiming for a golden crust and 190°F internal temperature.
- Cool on a wire rack for 1 hour.
Tips for Success
After successfully baking your sourdough loaf, it’s important to focus on techniques that can elevate your bread to the next level. Start with a well-fed, active sourdough starter, ideally fed 4-8 hours before baking. This guarantees proper fermentation and rise.
Key Steps for Success
| Step | Details |
|---|---|
| Starter | Feed 4-8 hours before baking for maximum activity. |
| Shaping | Pre-shape into a round, rest 15-30 minutes, then shape into a log or oval. |
| Proofing | Proof at room temperature for 2-4 hours until 90% risen. |
Pre-shape your dough into a round, let it rest for 15-30 minutes, then shape it into a log or oval to place seam side down in a greased loaf pan. This step improves structure.
Proof the shaped dough at room temperature for 2-4 hours until it has risen about 90%. This helps prevent ripping during the bake.
Baking and Cooling
| Step | Details |
|---|---|
| Oven Temperature | Start at 425°F (218°C) for 20 minutes with steam, then lower to 350°F (180°C) for 20-30 minutes. |
| Cooling | Cool completely on a wire rack for at least 1 hour. |
Preheat your oven to 425°F (218°C) and bake with steam for the first 20 minutes, then reduce the temperature to 350°F (180°C) for an additional 20-30 minutes to achieve the perfect crust. Finally, let the bread cool on a wire rack for at least an hour before slicing to maintain excellent texture and prevent sogginess.
Frequently Asked Questions
Can Sourdough Be Baked in a Loaf Pan?
Yes, you can bake sourdough in a loaf pan. It simplifies shaping, supports even rising, and guarantees a consistent loaf shape. Use a lower temperature, around 200°C, and grease the pan for best results.
Should You Score Sourdough in a Loaf Pan?
Scoring sourdough in a loaf pan is like a craftsman’s final touch. If proofed for about 2 hours, score for an attractive crust. For longer proofs, avoid scoring to prevent uneven rise and side ripping.
Do I Need a Dutch Oven to Bake Sourdough Bread?
You don’t need a Dutch oven to bake sourdough bread. Using a loaf pan provides adequate structure, simplifies the process, and allows for lower baking temperatures, preventing crust burning and resulting in a softer, sandwich-friendly loaf.
What Temperature to Bake Sourdough Bread?
Bake sourdough at 200°C (392°F) for a balanced crust and crumb. For alternative methods, start at 475°F (246°C) for 20 minutes, then reduce to 350°F (180°C). Verify the bread’s internal temperature reaches 190°F (88°C).
Elevate Your Baking: Perfecting Sourdough in a Loaf Pan
Why not take your baking skills to the next level by trying sourdough in a loaf pan? With a bit of practice, you’ll soon refine the art of dough preparation, shaping techniques, and perfecting proofing and fermentation.
Follow the baking instructions closely to achieve that delicious, crusty loaf. Remember, attention to detail is key. With dedication, you’ll be rewarded with a beautifully baked sourdough loaf every time. Happy baking, and savor the satisfaction of your homemade creation.