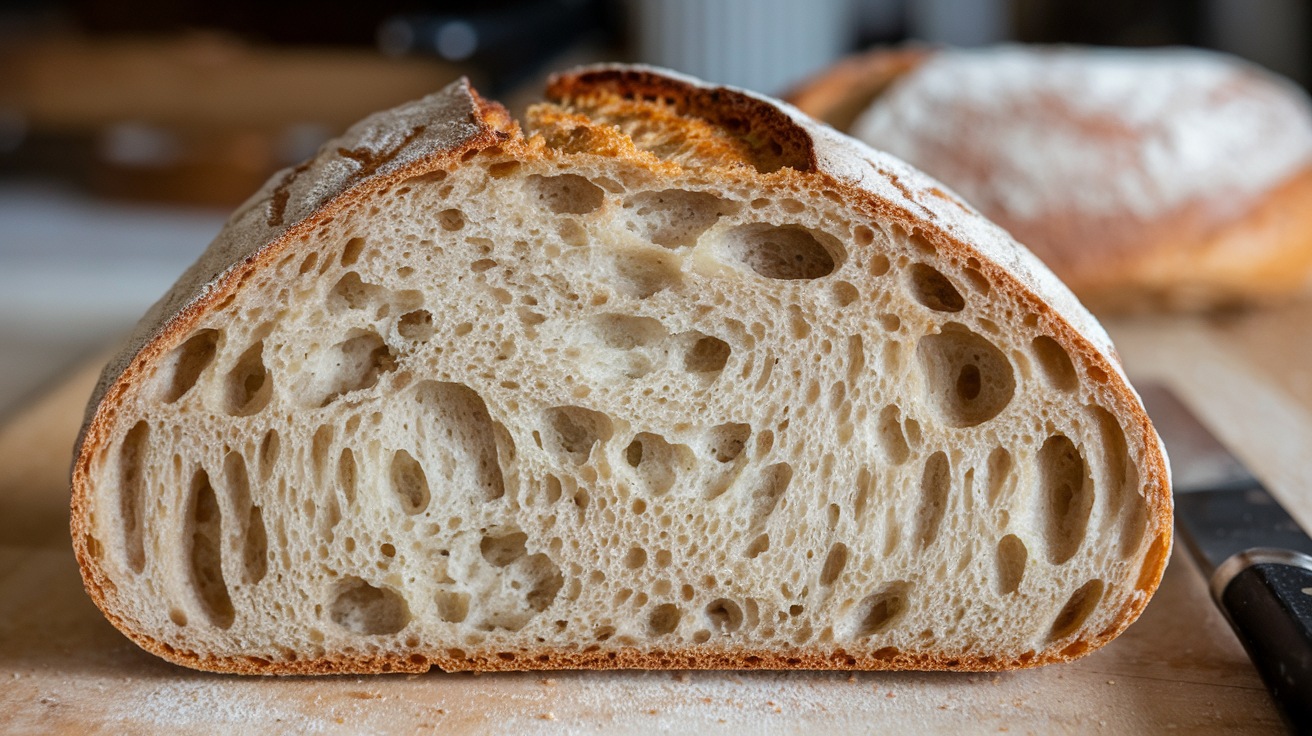
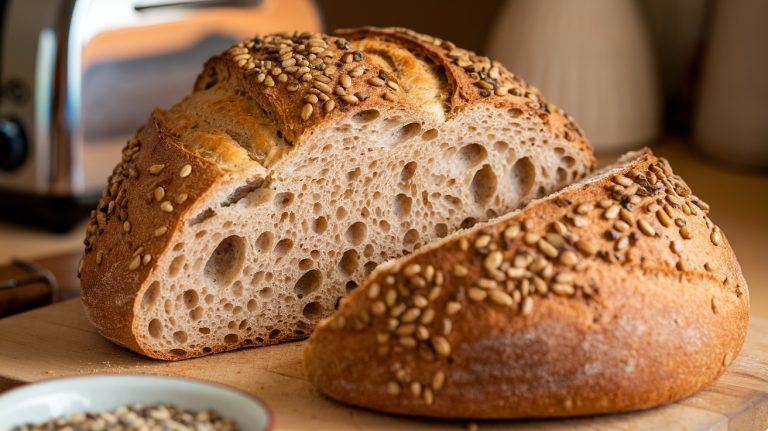
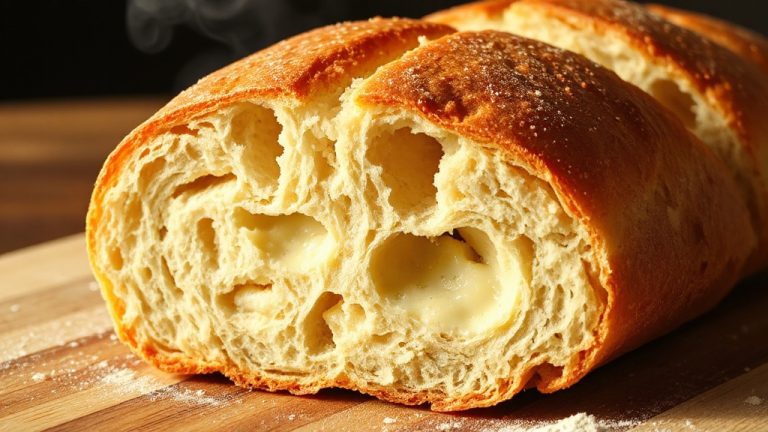
How to Get an Exaggerated Open Crumb: Perfect Airy Bread
To get an exaggerated open crumb, focus on high-hydration dough, ideally between 67%-80% water. Select a high-protein bread flour for strong gluten development.
Embrace gentle handling techniques, like stretch and fold, to preserve air pockets. Optimize your fermentation process; longer bulk fermentation enhances flavor and structure.
Keep your dough’s temperature steady, around 24°C-26°C, to guarantee consistent yeast activity. Finally, avoid common pitfalls like overmixing and improper proofing, leading to a closed crumb.
With these strategies in mind, you’re on your way to mastering that lofty texture and flavor. There’s more insight to explore.
Key Takeaways
- Use high-protein bread flour (12.7% protein) to develop a strong gluten network essential for an open crumb structure.
- Incorporate a vigorous sourdough starter to enhance fermentation and achieve larger, evenly distributed holes in the bread.
- Maintain a high hydration level (67%-80% water) to improve dough texture and promote airiness in the final loaf.
- Employ gentle handling techniques, like stretch and fold, to preserve air pockets without overworking the dough.
- Control fermentation temperature (24°C-26°C / 75°F-79°F) to optimize yeast and bacteria activity for better flavor and texture.
Key Factors for Success
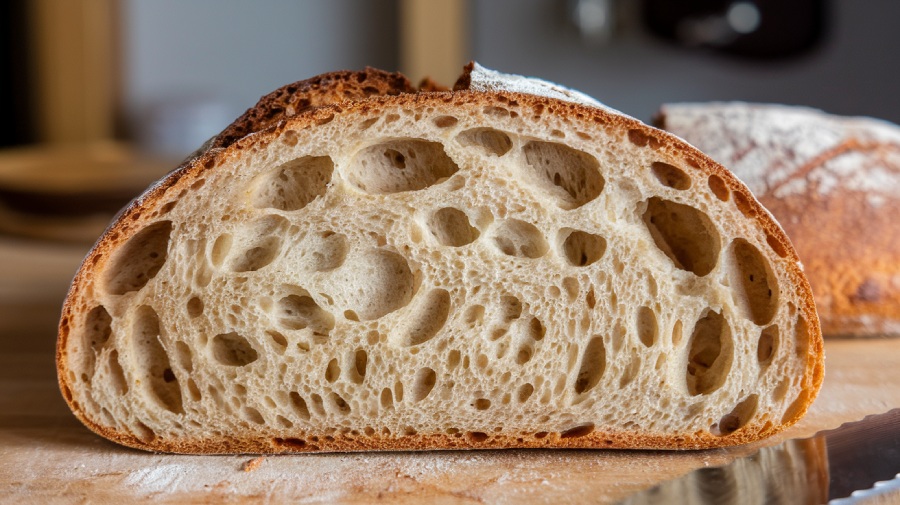
What elements truly contribute to achieving that coveted open crumb? First, your flour selection matters immensely. Opt for high-protein bread flour, ideally between 11% and 13%, as it builds a strong gluten network essential for trapping air bubbles.
White flour is your best bet; whole wheat’s cutting effect can hinder that airy structure. When it comes to dough handling, gentle techniques are key. Overworking your dough squashes those precious bubbles. Instead, use stretch and fold during bulk fermentation to align gluten without deflating.
Shaping and proofing also play significant roles. Keep your shaping quick and minimal to preserve the open structure. Consider boule shaping with folds to enhance strength and oven spring. Additionally, a long fermentation time can greatly improve gluten development and contribute to a more open crumb.
Be wary of overproofing; a brief final proof is essential to maintain that airy quality.
Lastly, steam is your ally in the baking phase. Preheat your oven and baking stone, and introduce steam with a pan or towel for best results.
Optimal Fermentation Techniques
Mastering ideal fermentation techniques is essential to achieve that exaggerated open crumb.
You’ll find that embracing longer bulk fermentation, combined with minimal dough handling, allows the flavors to blossom and the structure to strengthen. Additionally, implementing slow fermentation techniques can greatly enhance the flavor and texture of your bread, contributing to that desired airy quality. Maintaining an optimal dough temperature is crucial, as it directly influences the yeast and bacteria activity during fermentation.
Plus, controlling the temperature during this critical phase can make all the difference in developing that airy texture you aim for.
Long Bulk Fermentation
Mastering the art of long bulk fermentation is crucial for achieving an exaggerated open crumb in your bread. This critical stage occurs when yeast and bacteria work their magic, developing flavor and strength within the dough.
Aim for a warm temperature range of 74 to 78°F (23 to 25°C), allowing fermentation to last between 2 to 5 hours. During this time, you’ll notice your dough doubling in volume—an important indicator of completion. Longer fermentation enhances digestibility and nutrient availability, contributing to the overall quality of your bread.
Incorporate stretch and fold techniques every 15 to 30 minutes to enhance gluten development. This gentle up-and-over motion not only strengthens the dough but also regulates its temperature and incorporates essential air, contributing to that sought-after open crumb structure.
If you prefer a more extended approach, opt for cold bulk fermentation. Start at room temperature, then refrigerate your dough overnight. This process slows down fermentation, allowing for a complex flavor profile while making dough handling much easier the next day.
Minimal Dough Handling
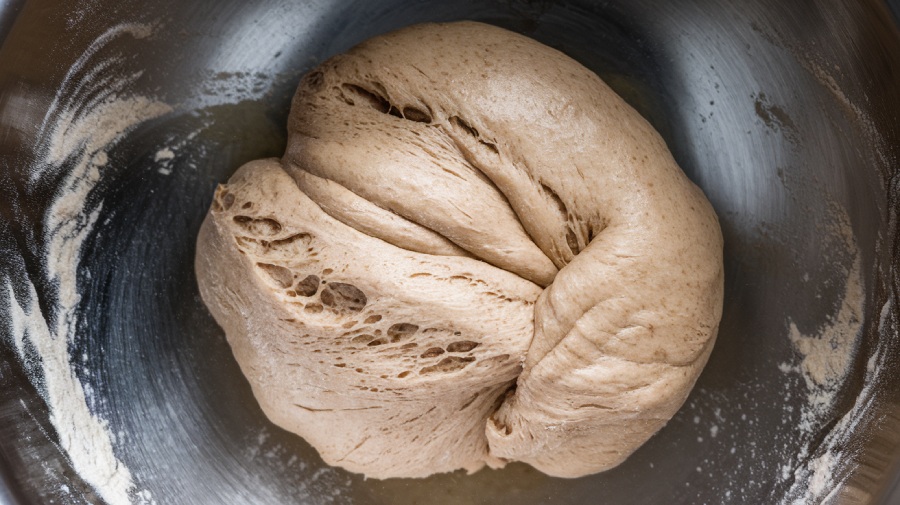
When aiming for an exaggerated open crumb, minimal dough handling becomes crucial in maintaining the delicate balance of fermentation and gluten development. You can enhance your dough’s structure without overworking it by employing techniques such as cutting, slap and fold, and careful shaping.
It’s important to note that high-hydration dough contains 67% to 80% water relative to flour weight, which significantly impacts the final bread’s texture and crumb. A well-developed sourdough starter is essential for achieving your high-hydration loaves’ desired rise and flavor.
| Technique | Description |
|---|---|
| Dough Cutting | Cut the dough into strips, mound it up, and repeat for 2 minutes to hydrate and distribute gluten evenly. |
| Slap and Fold | Slap the dough on the counter, fold it over, and aerate to strengthen the gluten network. Use both hands or a bench knife for ease. |
| Gentle Shaping | Divide and place the dough gently on parchment, using minimal flour to prevent sticking while preserving strength. |
These methods are particularly beneficial for high-hydration doughs, allowing for efficient gluten development. Remember to handle the dough with care; gentle folds and minimal shaping guarantee you avoid deflation.
Each step in this process contributes to a dough that’s airy and robust, setting the stage for that incredible open crumb you desire. Embrace these techniques, and watch your bread transform into a masterpiece of texture and flavor.
Temperature Control Importance
Maintaining an exaggerated open crumb relies on gentle handling and the temperature at which your dough ferments. Temperature greatly influences fermentation, making it essential to achieve that coveted texture. Aim for an ideal dough temperature between 24°C and 26°C (75°F to 79°F) to foster optimal yeast and bacteria activity. Steam is essential for achieving a beautiful oven spring, which contributes to the overall texture of your bread.
Yeast thrives at around 27°C (80°F), while bacteria prefer even warmer conditions, leading to a dynamic fermentation process that enhances flavor and texture. As you mix, be aware of factors that can inadvertently increase dough temperature—friction from mixing and the warmth of your environment can all play a role.
Calculate your water temperature by considering the air and flour temperatures to achieve consistent results. Adjust your water accordingly to hit your desired dough temperature, factoring in friction for accuracy.
If your dough gets too warm, you risk overproofing, leading to pale and soft crusts devoid of flavor. Conversely, maintaining that sweet spot allows for longer fermentation times, amplifying your bread’s quality and ensuring a delightful rise and a beautifully open crumb structure.
Gentle Handling and Shaping
When you handle your dough, every gentle touch counts—favor minimal manipulation to keep those precious air pockets intact. Quick shaping techniques allow you to preserve the gas bubbles that contribute to that sought-after open crumb.
The balance between the gluten network and yeast processes is crucial for achieving the best results in your bread. Utilizing techniques like coil folds can significantly enhance gluten development, further promoting the desired open crumb structure.
Minimal Dough Manipulation
Many bakers find minimal dough manipulation key to achieving an exaggerated open crumb. By handling the dough gently, you preserve its delicate gluten structure, which is essential for that airy texture.
Here are three fundamental strategies to keep in mind:
- Employ the Autolyse Method: This technique allows for proper hydration, reducing the need for extensive mixing. This method can help achieve an ideal hydration level that enhances the dough’s texture.
- Limit Your Folds: Too many folds can lead to overworking, so be mindful of how often you handle the dough.
- Incorporate Resting Periods: Letting the dough rest helps the gluten relax, enhancing its elasticity and strength. Gentle handling methods, such as Rubaud mixing, promote better gluten development and control over dough consistency and texture.
To maintain ideal hydration, monitor your dough’s resistance during handling. Gentle lifting and minimal shaping will help retain that precious tension, ensuring an open crumb structure.
Quick Shaping Techniques
Shaping your dough with care can make all the difference in achieving that coveted open crumb. Gentle handling is essential; it preserves gas bubbles that contribute to a light, airy structure. When you fold during bulk fermentation, keep the pressure light to maintain that precious dough integrity.
Adjusting hydration levels based on flour protein content can also enhance dough consistency and improve your final crumb. Also, scoring techniques are crucial in controlling the bread’s expansion and crust characteristics.
Here’s a quick reference guide for shaping techniques:
| Technique | Description | Purpose |
|---|---|---|
| Gentle Folding | Lightly fold dough during bulk fermentation | Maintains gas bubbles |
| Batard Method | Fold and transfer to a banneton | Creates a more open crumb |
| Pre-rounding | Use a bench knife for pre-rounding | Preserves dough integrity |
As you shape, aim for a taut surface without over-tightening. Avoid excessive stretching; it can deflate the dough and ruin your crumb structure.
Common Mistakes to Avoid
Achieving an exaggerated open crumb in your bread is an art that demands precision and mindfulness, yet common mistakes can easily undermine your efforts. Here are three essential pitfalls to avoid:
- Overmixing: It may seem like a good idea to guarantee everything’s combined, but overmixing reduces bubble size, leading to a closed crumb. Aim for just enough mixing to develop gluten.
- Underfermentation: Skimping on fermentation can leave your dough dense. Give it the time it needs to rise, allowing bubbles to form and develop the airy structure you’re after; this is crucial because adequate proofing time allows yeast to develop flavor and structure.
- Inconsistent proofing: Not monitoring your proofing can wreak havoc on bubble size and crumb structure. Keep an eye on dough volume and texture to guarantee even fermentation.
Flour Selection for Open Crumb
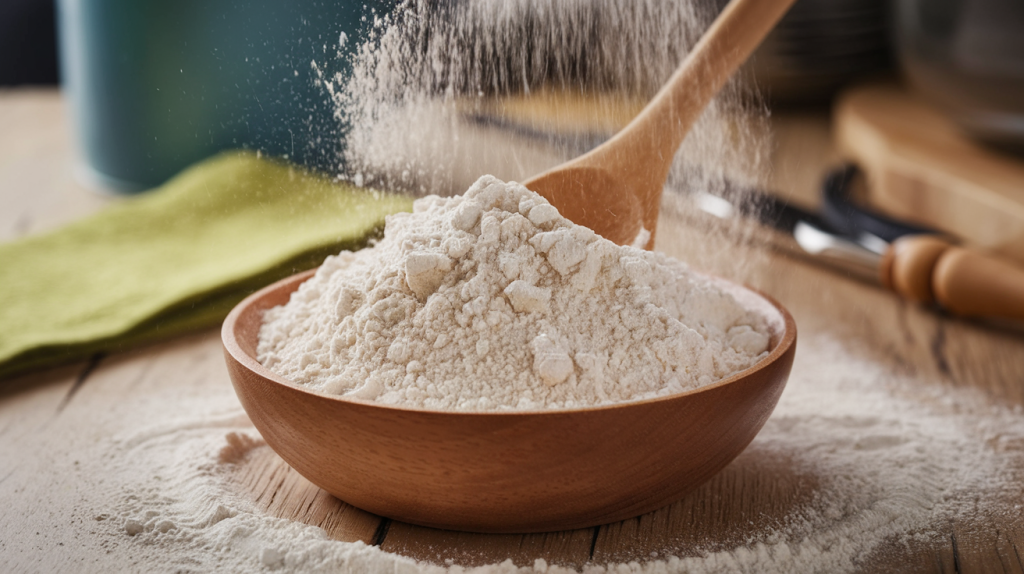
Flour is a game changer for creating that sought-after open crumb in your bread. You’ll want to focus on flours with higher protein content, as they promote better gluten development, which is essential for trapping those delightful gas bubbles.
Bread flour, with around 12.7% protein, is ideal. If you opt for all-purpose flour, consider blending it with bread flour to boost protein levels. Whole wheat flour can tighten your crumb, but a small blend with bread flour can add flavor without sacrificing openness.
A well-maintained sourdough starter contributes to vigorous fermentation, which is crucial for achieving an open crumb. Additionally, using flour with a higher protein content enhances the dough’s ability to retain gas, further supporting an open structure.
Here’s a quick reference for flour types:
| Flour Type | Protein Content |
|---|---|
| Bread Flour | ~12.7% |
| All-Purpose Flour | 10-12% |
| Whole Wheat Flour | ~13-15% |
Consistency matters when selecting flour. Choose reputable brands like King Arthur to guarantee reliable results. Sifting can also help by removing bran particles that disrupt gluten formation.
Baking Techniques for Best Results
Mastering the baking techniques is essential for achieving that prized open crumb in your bread. Each step in the process contributes to the final texture and structure, so pay close attention to these significant elements:
- Proofing: Verify your dough is well-proofed. It should spring back slowly when pressed, indicating it’s ready for the oven. If it’s over-proofed, you’ll end up with a closed crumb. Regularly documenting starter activity can help ensure optimal proofing times. Yeast activity slows during cold proofing, allowing for better texture development.
- Oven Temperature: Preheat your oven thoroughly. A consistent, high temperature is critical for achieving that dramatic oven spring, dramatically enhancing the crumb structure.
- Retarding the Dough: Consider retarding your dough in the fridge before baking. This slow fermentation boosts flavor and promotes a lighter, more open crumb. High-hydration doughs typically yield better open crumb structures, so adjusting your hydration levels may also be beneficial.
Frequently Asked Questions
What Type of Sourdough Starter Is Best for Open Crumb?
For achieving an open crumb, you’ll want to use a ripe sourdough starter, one that’s just peaked in fermentation.
Look for a starter that’s risen well, has bubbles on top, and smells pleasantly sour. Refresh it several times before your bake to boost its activity.
Opt for a semi-firm, active starter; this’ll help trap gas better. The strength of your culture is vital—stronger cultures yield a lighter, airier crumb in your bread.
Can I Use Whole Grain Flour for Open Crumb?
Yes, you can use whole grain flour for an open crumb, but it requires finesse. The sharper bran particles can disrupt gluten formation, so consider mixing in higher protein flours.
Adjust your hydration levels, aiming for 90% for best results. Gentle handling is essential—embrace techniques like stretch and folds during fermentation.
With patience and the right methods, you’ll harness the unique flavors of whole grain while achieving that beautiful, airy texture in your bread.
How Does Room Temperature Affect Fermentation Speed?
Room temperature affects fermentation speed like a warm hug encourages growth. When it’s warmer, yeast becomes lively, speeding up fermentation and producing lactic acid quicker.
Conversely, cooler temperatures slow down yeast activity, extending the process. This balance is essential; too high, and you risk off-flavors, while too low can dull taste.
Keeping a consistent temperature guarantees your dough ferments predictably, allowing you to control flavor and texture precisely. Embrace the temperature!
What Tools Help Achieve Better Dough Handling?
To achieve better dough handling, you’ll need a few essential tools. A bench scraper helps divide and shape dough without damaging its structure.
A digital kitchen scale guarantees precise measurements, vital for consistent results. A dough whisk allows for gentle mixing, minimizing gluten over-development.
How Can I Tell if My Dough Is Over-Fermented?
To tell if your dough’s over-fermented, look for a stringy, sticky texture that’s lost its smooth appearance.
When you handle it, if it breaks apart easily or tears, that’s a red flag. You might notice it’s too extensible, collapsing instead of holding shape.
After baking, if the loaf’s smaller than before with dense, gummy crumbs, you’ve likely overdone it.
Trust your instincts; a well-fermented dough should feel elastic and slightly tacky.
Achieve Bakery-Style Airy Loaves at Home
Achieving an exaggerated open crumb is a delicate dance between art and science. While overmixing can lead to dense failure, gentle handling invites the airy beauty you crave.
The right hydration transforms your dough from a mere mixture into a living entity, bubbling with potential as you master fermentation and choose your flours wisely.
Remember: each loaf is a canvas, and with patience and practice, you’ll create bread that’s not just edible but a breathtaking experience.

