Why Is My Vacuum Sealer Not Vacuuming: Simple Maintenance Tips
If your vacuum sealer isn’t vacuuming, check for damaged components like worn gaskets or seal bars. Confirm the power supply is stable and verify that the sealer is plugged into a working outlet. Improper bag preparation, like overfilling or using wet bags, can also disrupt the process.
Inspect for obstructions that may block the vacuum path and avoid overheating by allowing the unit to cool between uses. Regular maintenance is essential for peak performance. If you address these common issues, you can likely restore functionality and learn how to prevent future problems along the way.
Key Takeaways
- Check the power supply; ensure the vacuum sealer is plugged into a functioning outlet and the power cord is undamaged.
- Inspect the vacuum pump for any unusual noises or signs of malfunction, as these can affect suction performance.
- Examine the sealing gasket for cracks or debris buildup, which can prevent proper sealing and vacuuming.
- Ensure the vacuum chamber is not overfilled, as this can disrupt the vacuum process and lead to ineffective sealing.
- Clean the seal bar and vacuum passages regularly to prevent obstructions that could hinder the vacuuming function.
Common Vacuum Sealer Issues
When dealing with vacuum sealers, frustration often arises from common issues that can disrupt the sealing process. One major problem is incorrect bag preparation. If the bag’s surface isn’t dry, moisture can interfere with the vacuum sealing.
Additionally, any punctures, tears, or rips in the bag will create leaks, allowing air to enter. Wrinkles in the bag can also hinder a proper seal, while food debris around the seal area can cause sealing failures. Regular inspection of the sealing strip and heating element is essential to prevent these issues.
Another critical factor is machine maintenance. Dirty sealing bars can result in poor sealing, and worn-out seal bar coverings need replacement to guarantee effectiveness. Overheating from extended use can damage components, while issues with the vacuum pump can lead to inadequate vacuum performance.
Operational mistakes further complicate the process. Insufficient space on the sealing bar can leave air trapped, leading to incomplete seals. Incorrect sealing settings or an improperly closed lid can prevent efficient operation. Finally, accessory hose obstructions can hinder vacuuming.
Addressing these common issues can greatly improve your vacuum sealing experience and enhance the longevity of your machine.
Damaged Components
Common issues like incorrect bag preparation and machine maintenance often lead to vacuum sealing failures, but damaged components can also play a significant role. Inspecting and maintaining the critical components of your vacuum sealer is essential for ideal performance.
Here’s a quick overview of the common damaged components that can affect vacuum sealing:
| Component | Impact |
|---|---|
| Worn-out Sealing Gaskets | Cracks or tears can prevent proper sealing. |
| Issues with Sealing Bar | Dirty or damaged bars can lead to ineffective seals. |
| Vacuum Pump Malfunction | A faulty pump can impede vacuuming and sealing. |
| Obstructions in Passages | Debris can block the vacuum path, hindering performance. |
Regularly check your gaskets for wear and clean the sealing bar to promote efficient sealing. If your vacuum pump isn’t functioning properly, inspect connections and perform maintenance to address any problems. Issues with the sealing bar can prevent proper heating and sealing, so ensure it is free from debris and damage.
Finally, keep the vacuum passages clear of any obstructions to maintain effective vacuuming.
Power Supply Problems
Power supply problems can greatly hinder your vacuum sealer‘s performance. If your vacuum sealer isn’t running, start by checking the power supply. Here are some key areas to inspect:
- Outlets and Plugs: Verify your vacuum sealer is plugged into a functioning outlet. Look for any damage to the power cord or outlet, and if you’re using a surge protector, try plugging it directly into the wall. Confirm the outlet is grounded and that the cord is securely connected.
- Cord and Wire Issues: Inspect the power cord for signs of fraying or wear. A damaged power cord can pose safety risks, so consider replacing it if necessary. Verify all wires are tightly connected and check for blockages along the cord.
- Electrical Supply: Confirm that your electrical supply is stable. Look for blown fuses or tripped circuit breakers, and check if your vacuum sealer is receiving the correct voltage. If possible, test the sealer on a different outlet. Additionally, be cautious of any damaged power cords that can disrupt electrical supply and pose safety risks. If these checks don’t resolve the issue, you may need to investigate internal power components or consult a professional.
Gasket and Seal Issues
Gasket and seal issues can considerably impact your vacuum sealer’s effectiveness, leading to incomplete seals and compromised food storage. First, inspect the gaskets for any cracks, tears, or excessive wear. Worn-out gaskets should be replaced promptly to maintain sealing efficiency.
Make certain to clean any debris buildup on the gaskets, as cleanliness is vital for effective sealing. Regular inspections are essential; you should check the gaskets every six months, especially if you use the sealer heavily.
Additionally, verify that new gaskets are properly seated in their grooves to avoid sealing problems. If you notice leaks or insufficient pressure during sealing, the issue may lie with damaged gaskets or incorrect installation.
Remember to clean gaskets with a soft, damp cloth before each use to maintain their integrity. Finally, if your sealer continues to struggle, consider lubricating the gaskets as per the manufacturer’s recommendations.
Seal Bar Concerns
When dealing with seal bar concerns, you should first inspect the seal bars for any damage, as even minor imperfections can lead to ineffective sealing. Additionally, regular cleaning of the seal bars is essential; dirt and residue can obstruct the sealing process, resulting in poor performance.
Addressing these issues promptly can greatly improve the functionality of your vacuum sealer, as maintaining operational efficiency is crucial for effective food packaging.
Damaged Seal Bars
If your vacuum sealer struggles to create a proper seal, damaged seal bars could be the culprit. Seal bars are vital for guaranteeing a tight closure, and any issues with them can lead to vacuum failure. It’s important to inspect these components regularly for signs of damage or wear.
Here are some common seal bar concerns to look out for:
- Worn-out seal bar coverings: These can drastically reduce sealing effectiveness.
- Broken seal elements: If these are damaged, sealing will be compromised.
- Overheating: Excessive heat can create weak spots in the seal.
To troubleshoot, test the sealing bar by running a cycle without a bag; it should heat up evenly. Sealing bar malfunction can often be mistaken for circuit issues, so thorough checks are essential. Look for blockages or debris in the seal area that may hinder performance. Adjust your sealing settings for best results, and check for overheating issues.
If you notice any damage or wear, it’s important to replace the seal bars promptly. Regular maintenance, including cleaning and inspections, can help prevent these problems and guarantee your vacuum sealer operates effectively.
If problems persist, consult the manufacturer’s guidelines for further assistance.
Cleaning Seal Bars
Maintaining clean seal bars is essential for the best performance of your vacuum sealer. Regular cleaning guarantees your sealer operates efficiently and extends its lifespan.
After each use, wipe down the vacuum chamber and seal bar with a soft cloth or sponge to remove any food particles, liquids, or residues that may have accumulated. For stubborn residue, you can use acetone on a paper towel to thoroughly clean the seal bar.
It’s also important to clean the seal gasket with a damp cloth and mild soap, avoiding harsh chemicals or abrasive materials that could damage the surfaces. Regular inspections for wear or damage on the seal bar should also be part of your routine. To ensure optimal performance, check for compatibility with high-quality vacuum sealing bags to prevent leaks.
To maintain an airtight seal, confirm the gasket is free of debris and perform exterior cleaning to prevent dust buildup. Overloading the vacuum chamber can lead to poor sealing, so be mindful of your load.
Always refer to your user manual for specific maintenance guidelines, and consider using high-quality vacuum sealing bags to prevent leaks.
Operational Mistakes
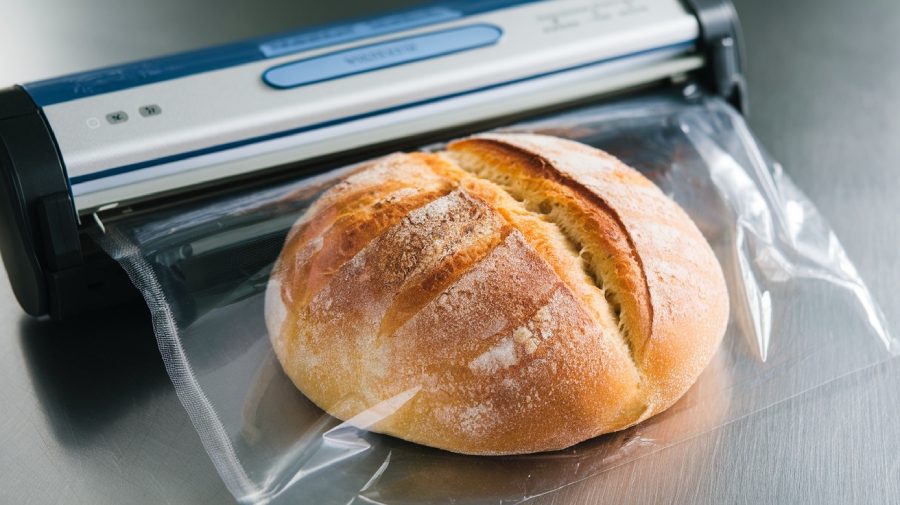
Using your vacuum sealer correctly is important for ideal performance, and operational mistakes can greatly hinder its effectiveness. Several common errors can prevent your vacuum sealer from functioning properly, so it’s essential to understand these pitfalls.
- Not following manufacturer instructions
- Not cleaning between uses
- Incorrect power setup
One of the most frequent issues isn’t adhering to the manufacturer’s guidelines, which can lead to malfunctions. Confirm the device is correctly plugged in and that the power button is functional. Additionally, if you don’t lock the lid securely, the vacuum sealing process will fail. If there is a lack of suction power, this may indicate a need for troubleshooting.
Overfilling the chamber can also obstruct the vacuum pump, so always allow for sufficient space.
Routine maintenance is critical; failing to clean between uses can cause food debris to interfere with operation. Always check for signs of wear and address any issues promptly to maintain the device’s performance.
Finally, using the wrong vacuum mode can result in inadequate sealing.
Bag Integrity Problems
Operational mistakes aren’t the only factors that can hinder your vacuum sealer’s performance; bag integrity problems also play a notable role. When preparing bags, make sure you don’t overfill them with liquid, as excess moisture can obstruct the sealing process.
Wrinkles in the bag can lead to poor vacuum sealing, so keep the bag flat and evenly distributed. Inspect the seal area for any food debris or moisture, as these can cause seal failures. Proper placement of the bag in the sealer is vital; incorrect positioning can compromise seal integrity. Using high-quality bags designed for your specific vacuum sealer model is essential to ensure effective sealing.
Once sealed, perform a visual inspection for a continuous, consistent cross-hatch pattern, and conduct a resistance test by pulling the pouch apart to verify seal integrity.
Using high-quality bags designed for your specific vacuum sealer model is essential. Low-quality or textured bags can lead to wrinkles and sealing issues. Regularly check the sealing strip and heating element for wear, and listen for any sounds of air entering the bag to confirm a good vacuum seal.
Vacuum Pump Malfunctions
If your vacuum sealer isn’t performing properly, the vacuum pump might be the culprit.
Look out for signs like unusual noises, excessive vibrations, or reduced suction power, as these indicate a malfunctioning pump. Regular maintenance of the vacuum pump is essential to prevent issues that could hinder its performance. Depending on the severity of the issue, you may need to repair or replace the pump to restore its functionality.
Common Vacuum Pump Issues
Vacuum pump malfunctions often lead to frustrating performance issues, making it vital to identify and address common causes. Understanding these issues can help you troubleshoot effectively and restore your vacuum sealer’s functionality.
Here are three common causes of vacuum pump malfunctions you should consider:
- Leaky Connections: Unsecured or loose fittings can disrupt the vacuum process, leading to inefficient sealing. Worn seals or clogged filters may also affect airflow. Regularly checking for high-quality machines can help prevent these issues.
- Mechanical Failures: Worn vanes, incorrect wiring, or overheating can drastically reduce performance. If you notice recurring blown fuses, it might indicate a deeper electrical issue.
- Improper Use: Misalignment of the vacuum sealer or failure to maintain it can result in poor performance. Confirm you’re using the correct settings and regularly servicing the unit.
Signs of Malfunctioning Pump
Identifying the signs of a malfunctioning pump can save you time and prevent further damage to your vacuum sealer. One major indicator is reduced performance; if you notice a decrease in pumping speed, your pump may be clogged or worn out.
Unusual noises or vibrations during operation can signal impending mechanical failure. Fluctuating vacuum levels often suggest a leak or malfunctioning component that needs attention.
Additionally, look out for oil leaks or signs of contaminated oil, as these can lead to decreased performance and increased processing times. If you find that the vacuum sealing process takes longer than usual, it may indicate a failing vacuum pump. Reliable vacuum pumps are essential for maintaining operational efficiency in your sealing processes.
Common causes of these issues include poor maintenance, such as infrequent oil changes, and extended continuous usage without breaks, leading to overheating and wear.
Contamination from solids or liquids can also cause clogs and damage. Finally, guarantee proper installation; any misalignment can contribute to pump failure.
Repair or Replace Options
When faced with vacuum pump malfunctions, you must weigh your options between repair and replacement carefully. Consider the nature of the issue, your budget, and long-term implications. Here are some key factors to assess:
- Cost Effectiveness: Minor issues in newer pumps often make repair cheaper.
- System Failure: Frequent breakdowns may suggest replacement is more economical.
- New Technology: Upgrading to modern pumps can enhance efficiency, as new vacuum pumps offer higher reliability and efficiency.
If you opt for repair, professional technicians can diagnose specific problems and perform necessary fixes, potentially saving you money and reducing waste.
Regular maintenance is vital, as it helps identify issues early, making repairs simpler and more affordable.
However, if your pump consistently operates at maximum capacity or has a history of major issues, replacement is worth considering. Long-term costs of repeated repairs can exceed those of investing in a new unit.
Overheating Concerns
Overheating can greatly impact the performance of your vacuum sealer, leading to frustrating sealing failures. Extended use without adequate cooling periods can cause your machine to overheat, resulting in reduced suction and inefficient vacuuming.
If you’re sealing too many bags consecutively or using high sealing settings for prolonged periods, you may notice that the vacuum sealer fails to remove air properly, leaving you with leaks. Older models may still function effectively for sealing, providing a backup during overheating issues.
Symptoms of overheating include needing to pause frequently to allow the machine to cool down and experiencing burning smells, which indicate potential damage.
To prevent overheating, make sure you allow the sealer to cool between cycles and avoid excessive sealing without breaks. Regularly check the condition of the seal bars and Teflon tape, as worn-out components can contribute to overheating issues.
If your vacuum sealer does overheat, turn it off immediately to prevent further damage. Allow it to cool completely before attempting to use it again.
Inspect the seal bars for debris or damage and consider adjusting the sealing settings to lower temperatures. If overheating persists, seeking professional repair may be necessary to restore your machine’s functionality.
Additional Troubleshooting Tips
If your vacuum sealer continues to have issues after addressing overheating concerns, it’s time to explore additional troubleshooting tips.
First, inspect the sealing strip. A clean, undamaged strip is essential for effective sealing. Next, check your bags. Confirm they’re compatible with your sealer and free from any damage, wrinkles, or folds.
Here are some key points to reflect on:
- Inspect the Vacuum Pump: Make sure it’s securely connected and functioning properly.
- Clean Vacuum Channels: Remove any obstructions, such as food debris or liquids, that might be blocking the vacuum passages.
- Verify Power Supply: Confirm your device is plugged in or that batteries are charged/replaced as necessary. Additionally, ensure that the sealing strip is securely attached to the unit for optimal performance.
Additionally, inspect the sealing gasket and sealing bar for wear or debris.
Using bags specifically designed for your model can greatly improve performance. Regular cleaning and maintenance will extend the lifespan of your vacuum sealer.
If problems persist, don’t hesitate to reach out to the manufacturer for further assistance or replacement parts.
Frequently Asked Questions
How Often Should I Perform Maintenance on My Vacuum Sealer?
You should perform maintenance on your vacuum sealer regularly to guarantee peak performance.
For commercial use, change the oil every 1-2 months or after 400-500 cycles. For residential use, do it every 2-3 months.
Daily checks include inspecting the sealing bar and cleaning it.
Weekly, lubricate moving parts and check electrical connections.
Monthly, replace worn parts and deep clean the machine.
Always consult the manufacturer’s manual for specific maintenance guidelines.
Can I Use Any Type of Bag With My Vacuum Sealer?
You can’t use any type of bag with your vacuum sealer; it depends on the model.
Suction vacuum sealers require mesh-lined bags for effective air removal, while chamber vacuum sealers can utilize various bags, including chamber pouches.
Always check your machine’s specifications to verify compatibility.
Using the wrong type can lead to sealing issues, so make certain you’re using the appropriate bags for best performance and food safety.
Is It Normal for My Vacuum Sealer to Make Noise While Operating?
It’s not unusual for your vacuum sealer to sing while it works, like a machine orchestra in harmony.
However, the noise level can vary based on the type of pump inside. If it’s a rotary vane pump, expect some racket, especially if it’s dirty.
Turbo and cryo pumps might whine or hum, too. Regular maintenance can help reduce noise, ensuring your sealer performs efficiently without turning into a cacophony.
What Is the Lifespan of a Typical Vacuum Sealer?
A typical vacuum sealer’s lifespan is around 10 years, but this can vary based on maintenance and usage.
Regular cleaning and replacing worn-out parts, like gaskets, can greatly extend its life. Heavy use may shorten this lifespan, while high-quality components can enhance durability.
Proper storage in clean, dry conditions also plays a crucial role.
Can Environmental Factors Affect My Vacuum Sealer’s Performance?
Yes, environmental factors can greatly affect your vacuum sealer’s performance.
Extreme temperatures can lead to overheating or slow down the sealing process, impacting efficiency. High humidity may damage electronics and cause condensation, compromising seals.
Additionally, make sure your sealer is on a stable surface free from obstructions and dust. Regular maintenance and cleaning can help you avoid performance issues, keeping your vacuum sealer operating at peak efficiency.
Restoring Your Vacuum Sealer’s Peak Performance
To sum up, if your vacuum sealer isn’t vacuuming, don’t despair. Picture yourself troubleshooting with a clear mind, checking for damaged components, ensuring the power supply is steady, and inspecting the gasket and seals.
By methodically addressing each potential issue, you can restore that satisfying whoosh of air being sucked out, preserving your food with confidence. With a little patience and attention to detail, you’ll have your vacuum sealer working like new in no time.

