Why is My Sourdough Starter Separating: Getting Your Starter Back on Track or When It’s Time to Bail Out
In the world of baking, there’s nothing quite like the joy of creating your very own sourdough starter. It’s a magical mix of flour, water, and wild yeast, bubbling away on your kitchen counter and promising the most delicious loaves of bread imaginable.
But what happens when things start to go wrong? Your once-bubbly starter can suddenly turn sour (in the wrong way) or even begin to separate, with a layer of watery liquid on top and a thick, gloopy mass below. What’s going on here?
Don’t panic just yet. This is a common problem that many bakers face, and there are several reasons why this can happen.
It may be due to the temperature of your kitchen, how much water you use or the type of flour you’re using, and the feeding ratio of your starter. Whatever the cause, you can fix the issue by following a few simple steps.
Let’s dive deep into why your sourdough starter may be separating and, most importantly, ways to get it back on track. It’s time to get back to the basics and rediscover the joy of baking without any stress or anxiety.
Why Does My Sourdough Starter Separate?
Sourdough starters are a basic mix of flour and water left to ferment over several days. They give your sourdough bread that distinct tangy flavor and chewy texture.

However, like all living things, sourdough starters are prone to changes affecting their health and ability to produce high-quality bread. One of the most common problems with sourdough starters is separation.
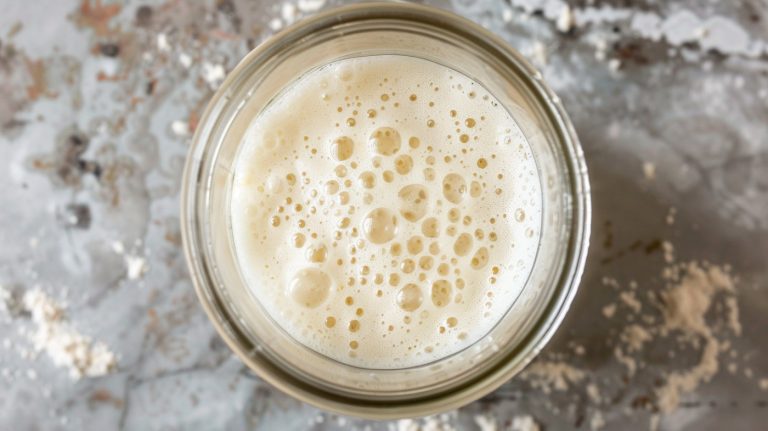
In simple terms, as your starter ferments, it naturally separates into layers due to the varying densities of the components. When your sourdough starter is actively fermenting, the yeast and beneficial bacteria are hard at work consuming the sugars in the flour and releasing gas, which causes the mixture to rise and become bubbly.
This forms the thick, frothy layer on top of your starter. But beneath this bubbly layer, you may notice a more liquid layer.
This combines water and other fermentation byproducts, such as alcohol and acids. While it may not look as appetizing as the top layer, it’s an integral part of the sourdough ecosystem.
It’s important to note that not all sourdough starters will separate similarly. The thickness of the top layer, for example, can vary depending on factors such as the starter’s hydration level, the environment’s temperature, and the type of flour used.
Some starters may even have more than two layers!
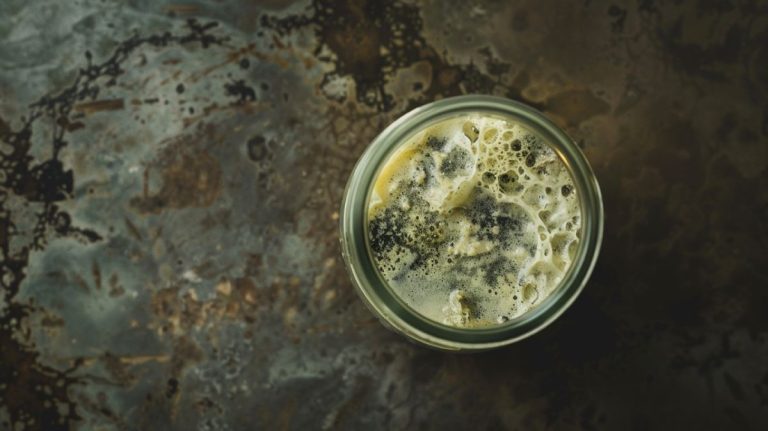
However, if your sourdough starter has an unusual color or odor, it may be a sign that something is off. For example, a gray or pink hue can indicate the presence of unwanted bacteria or mold.
Or you may notice a sour or musty smell, which could be due to over-fermentation. If this happens, it’s best to discard your starter and start fresh to prevent any potential health hazards.
To identify a separated starter, give your jar a gentle swirl or shake. You will notice the layers shifting and mixing momentarily before separating again.
With time, you’ll become accustomed to the entire fermentation process of your starter in its different stages.
Causes of Separation
Now that you know what a separated sourdough starter looks like, let’s talk about the reasons why this can happen in the first place.

Temperature
Temperature is perhaps one of the most critical factors you need to consider regarding the sourdough starter. It’s important to understand that your starter is a living and breathing organism highly sensitive to the environment in which it is kept.
The temperature range your starter is exposed to can make or break it. The ideal temperature range for sourdough starters is between 70°F(22°C) and 75°F(24°C).
At this range, the starter will be at its most active, consume the flour you feed it evenly, and won’t separate. So, what happens when the starter is stored at higher or lower temperatures than the recommended range?
When the temperature is too high, the starter will be overactive and consume more flour, leaving behind water that will result in a separation of the ingredients. An overly active starter can also produce alcohol, giving your bread a sour and unpleasant flavor.
On the other hand, if the temperature is too low, the starter will become dormant and may take longer to consume the flour you feed it, making separating the ingredients more common.
Hydration Level
The hydration level of your starter is also an essential factor that can affect separation. Keeping the starter at the right hydration level is essential to ensure that it ferments and rises evenly.
Generally speaking, sourdough starters should be between 70 to 80% hydrated. If the starter is too dry, it will not be able to ferment and rise properly and will eventually separate.
And if it’s too wet, it won’t be able to hold itself together, and you’ll end up with a slimy mess. It’s important to monitor the hydration level of your starter regularly and adjust it accordingly.
Insufficient Stirring
When the starter isn’t stirred thoroughly, it can result in the mixture separating into layers of liquid and solid. This is because the moisture content of the starter rises to the top while the heavier, denser portion sinks to the bottom.
Over time, the separation can become more significant. The impact of insufficient stirring on your sourdough starter can have serious consequences.
When the separation is significant, the mixture can become unbalanced, changing pH and acidity. This can affect the flavor, texture, and rise of your bread.
The separation also creates a breeding ground for mold and bacteria, which can harm the quality of the starter and make it unsuitable for use in baking.
To avoid insufficient stirring, thoroughly mixing your sourdough starter is essential. This can be achieved by using a spoon or spatula to stir the mixture in a circular motion and scraping the sides and bottom of your container.
Ensure you stir your sourdough starter at least once daily to prevent any moisture build-up on the top layer.
Flour Type
Flour is essentially the lifeblood of a starter, providing the yeast and bacteria with the nutrients they need to thrive. However, not all flours are created equal, and some can lead to a less-than-satisfactory sourdough starter.
There are various types of flour, including all-purpose flour, whole wheat flour, rye flour, spelt flour, and more. Each type of flour is unique, with different gluten levels, protein content, and nutrient profiles.
The type of flour used in sourdough starter can affect its health and stability greatly. For example, all-purpose flour is a popular choice for starters because it’s widely available and less expensive than other types of flour.
However, it has a lower protein and nutrient content than whole wheat and rye flour. As a result, a starter made with all-purpose flour may not have the same level of robustness as one made with whole wheat or rye flour.
Another factor to consider is how the flour is processed. For example, bleached and enriched flours are typically stripped of many natural nutrients during processing, which can impact a sourdough starter’s health and performance.
Unbleached and minimally processed flours, on the other hand, tend to contain more of the nutrients needed by the yeast and bacteria in a starter. Separation is often a sign that your starter isn’t getting the nutrients it needs to produce good results.
Therefore, it’s important to use flour suitable for baking sourdough bread and check the expiration date on the package before using it to ensure optimal performance from your starter.
So, what types of flour are recommended for a healthy sourdough starter? Generally, whole wheat, rye, and spelled flours are good choices. These flours have higher protein and nutrient contents than all-purpose flour, which can help create a stronger and more stable starter. Additionally, unbleached or minimally processed flours are ideal.
Feeding Ratio
The feeding ratio is the amount of flour and water you add to your starter during feeding. This ratio is usually measured in weight (grams).
A typical feeding ratio is 1:1:1, adding equal parts of flour, water, and starter to your jar. However, some bakers prefer a different ratio, such as 1:2:2 or 1:3:3.
Feeding your starter too often or too little can lead to separation. Overfeeding refers to adding too much food to your starter, which can cause it to become too acidic and less active.
Overfeeding occurs when we add too much flour or water to our sourdough starter in each feeding cycle, causing an imbalance in the microbial ecosystem. Think of it this way: if we overeat, we feel bloated and uncomfortable, right?
Similarly, excess food in a starter can cause fermentation activity to spike, leading to separation. When there’s too much food, the bacteria and yeast in a starter become overactive, feeding on the available nutrients and producing more carbon dioxide and acids.
Over time, these high acidity and carbon dioxide levels can cause the starter to separate, with liquid sitting on top of the starter and a thick mass at the bottom.
On the other hand, underfeeding means not feeding your starter enough, which can result in a weak starter struggling to rise.
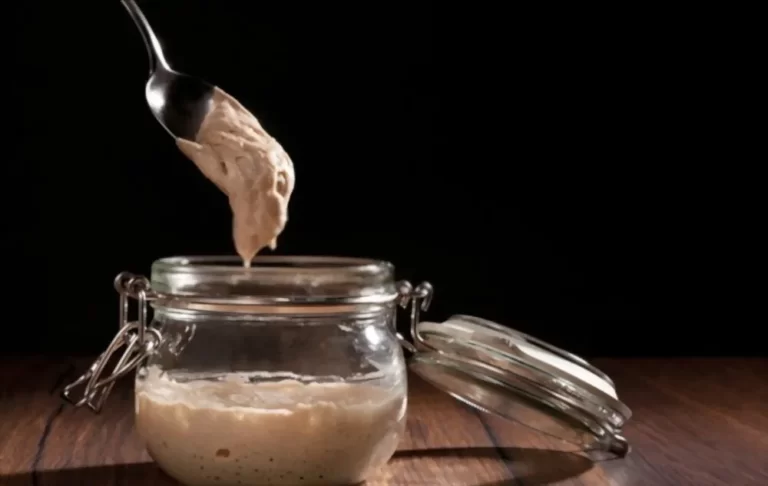
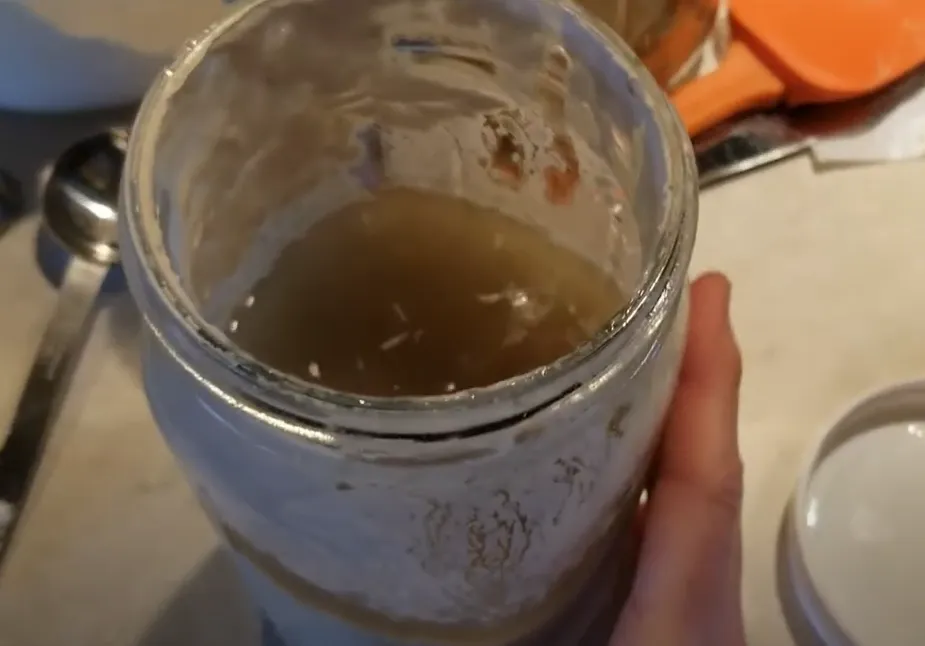
‘Hooch’ or liquid on the top of the starter is a sign that it’s been underfed. Hooch is a by-product of fermentation, and it’s produced when the starter is not fed enough, characterized by a yellowish liquid on the top of the starter.
To prevent separation, it’s essential to understand your starter’s needs and its feeding schedule.
A well-maintained starter should be fed every 12 hours or at least once a day. Using a 1:1:1 ratio, you can feed it with 50 grams of flour and water every 12 hours.
If you’re using a different ratio, adjust the amount of flour and water accordingly.
A starter’s feeding schedule, or lack thereof, is responsible for the separation. Using the right feeding ratio and maintaining a consistent feeding schedule is important to keep your starter active and healthy.
Contamination
One of the common issues that sourdough bakers face is the separation of their starter. This can be frustrating and alarming for those just starting to cultivate their sourdough bread.
Several factors can contribute to this separation, and one of these is contamination. Contamination can occur in several ways, and one of the main culprits is unsanitary equipment.
Bakers who do not properly sanitize their utensils or containers before using them to feed the starter risk contamination of their mixture. Another source of contamination is the environment, which can be affected by factors such as temperature, humidity, and airborne microorganisms.
The effects of contamination on sourdough starters can be manifested in several ways, including the separation of the mixture. A contaminated starter can produce unwanted bacteria, yeasts, or molds, which can adversely affect the health and quality of the starter.
In some cases, separation can be observed when a layer of liquid forms on top of the mixture, which eventually causes the structure of the starter to break down. One way to recognize the different types of separation is to understand the signs and symptoms that are associated with them.
- Watery separation occurs when the mixture becomes very liquid, and a layer of clear liquid forms on top. This type of separation can occur due to overfeeding, an imbalance in the acidity level, or poor storage conditions.
- Hooch is the term used to describe the separation when a layer of dark amber liquid forms on top of the mixture. This type of separation is a sign that the starter is hungry and needs to be fed.
Hooch can also occur when the mixture is stored for an extended period without attention.
- Clumpy separation occurs when the mixture appears thick and clumpy and has a sour smell. This type of separation indicates an imbalance in the flour-to-water ratio, or the mixture has been overfed.
This separation can be resolved by adjusting the feeding schedule to ensure the mixture is not overfed and reducing the amount of water added.
The effects of contamination on a sourdough starter can be detrimental. The unwanted microorganisms can cause the starter to separate, emit an unpleasant odor, or produce off-flavors and a weak, inconsistent, or unusable starter.
Getting Your Starter Back on Track
If you are experiencing separation issues with your starter, don’t panic. It is not always a sign of something wrong, and it can be resolved quickly with some simple measures.
- Start by checking the consistency of your starter. Is it too thick or too thin?
- How often have you been feeding it?
- Has the starter been stored in a warm or cold environment?
Once you get to the root of the issue, make any necessary adjustments, and re-taste your starter. Several methods exist to get it back on track and maintain a healthy starter.
Let’s take a look at some of them.
How to revive your separated starters?
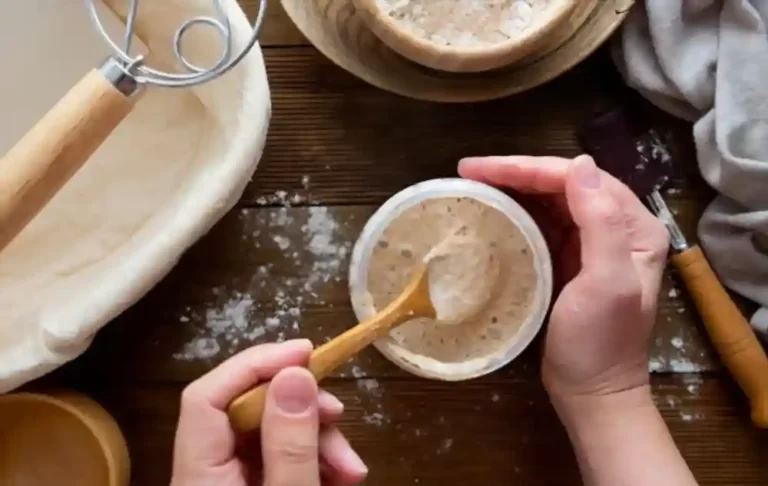
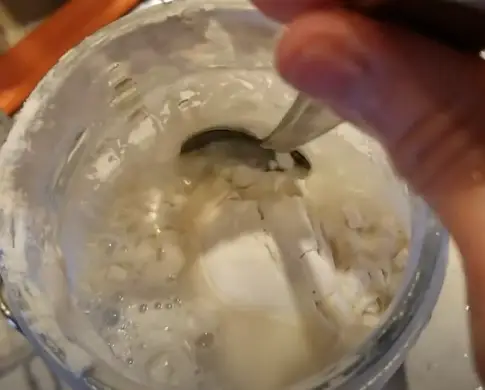
1. Stirring: The first step is to stir your starter well. Separation occurs when the water and flour in the starter separate, so stirring helps to recombine these elements.
Use a clean utensil to stir your starter, scraping the sides and bottom of your container to incorporate the mixture fully.
2. Discarding: Once you’ve stirred your starter, it’s time to discard some of it. This might seem counterintuitive, but discarding a portion of your starter helps to prevent it from becoming too acidic or inactive.
Remove half of your starter (you can use it to make sourdough pancakes or other sourdough-based recipes!), leaving just enough to continue feeding.
3. Feeding: With your starter partially discarded, it’s time to feed it fresh flour and water. Combine flour and water (by weight) and mix well with the remaining starter.
Cover the container loosely and let it sit at room temperature for several hours or overnight. After this time, check to see if your starter has become bubbly and active – if not, you may need to repeat this feeding process.
4. Timing: Timing is crucial for sourdough starter care. Make sure you are feeding your starter regularly (every 12 hours is typical, although some bakers prefer once-a-day feedings) and that you’re using the correct ratios of flour and water.
If your starter is still separating after several feedings, you may need to adjust your feeding schedule or the flour and water you use.
Throughout this process, it’s important to monitor your starter’s progress. If it smells unusually foul or develops mold, it may be time to start with a new starter.
However, with proper care and attention, most separated starters can be revived and returned to life.
There are several tips to remember to maintain a healthy starter over time. Start using high-quality flour and filtered water to ensure your starter has the nutrients it needs to thrive.
To prevent contamination, it’s essential to maintain high levels of cleanliness throughout the sourdough starter’s creation and maintenance process. This includes washing hands before handling ingredients, using clean containers, utensils, and surfaces, and storing the starter in a clean and dry place.
Using filtered or boiled, water can also help eliminate any potential contaminants. Incorporate a feeding schedule that promotes the growth of beneficial bacteria and yeast.
Feeding the starter at regular intervals and discarding a portion of the starter with each feeding can help maintain a healthy and robust starter.
When It’s Time to Bail Out?
Warning signs of a starter that cannot be saved
Regarding sourdough starters, it is important to watch for certain warning signs indicating it’s time to bail out. The first and most obvious sign is when your starter has a foul odor, resembling that of rotten eggs. This can be caused by unwanted bacteria in your starter, making it unsafe to use.
Another warning sign is when your starter is completely separated into layers, with a dark layer at the bottom and a lighter layer at the top. This means your starter’s beneficial bacteria and yeast culture has died, leaving only the liquid behind. In this case, you should start over with a new starter.
Lastly, if your starter has not shown any signs of activity within a week, the yeast and bacteria have likely died, and it is time to bail out. While this may seem disheartening, starting over with a fresh start is always better than continuing to use an unhealthy one.
What to do with a failed starter?
If you have determined that your sourdough starter is beyond saving, do not despair. There are several ways to put your failed starter to good use. The first option is to compost your starter. This will avoid wasting your starter and help enrich your soil.
Another option is to use your failed starter for baking flatbread or crackers. This way, you can still enjoy your sourdough starter’s flavor and nutritional benefits without wasting it. You can also use your failed starter as a flavor enhancer in soups, stews, and sauces.
Starting over with a new starter
Starting over with a new sourdough starter can seem daunting, but it is a simple and rewarding process. To start, mix equal parts flour and warm water in a container, and let it sit for a day or two until it starts to bubble. Discard half of the mixture and add fresh flour and water, repeating this process daily for about a week. By the end of the week, you should have a healthy and active sourdough starter to use in your baking endeavors.
Is my sourdough starter ruined?
So, you’ve been diligently tending to your sourdough starter, and now you’re worried you might have ruined it?
Don’t fret because there are a few ways to tell if your starter has gone bad.
Take a good whiff of your starter. If it smells very strongly of acetone or nail polish remover, it may be a sign that your starter has become too acidic and needs to be fed more often.
If your starter smells like alcohol or is too sour, it may be an over-fermented sign.
Check your starter’s surface next. If you see any mold growing, it’s time to throw it out and start again.
However, if you see small bubbles forming on the surface, this is a sign that your starter is still active and ready to use.
Finally, try using your starter in a recipe. It may be a sign that it’s time to refresh or replace your starter if it fails to rise or produce a good flavor.
So, the best way to tell if your sourdough starter is ruined is to use your senses and look for signs of mold, strange smells, or lack of activity.
Why is my sourdough starter rising but not passing the float test?
It’s great that your sourdough starter is rising, but it can be frustrating when it doesn’t pass the float test. Don’t worry; there are a few reasons why this might be happening.
- Make sure that you have given your starter enough time to ferment. If your starter isn’t mature enough, it might not float despite rising.
Give it more time to develop, and then try the float test again.
- Another reason is that it isn’t hydrated enough. Ensure you add enough water to your mixture when you feed it. Aim for a 1:1 ratio of flour to water and adjust as needed.
- If you are still having trouble, another possibility is that your starter isn’t getting enough food. Feed it regularly and with enough flour.
A good feeding schedule is typically once daily or every 12 hours if you want a more active starter.
- Your sourdough starter might not pass the float test because it is too cold. If you keep your starter in a cooler area, it might not be as active as needed.
Try moving it to a warmer spot or finding a way to keep it warmer.
Overall, be patient and keep trying.
Put on That Baker’s Hat and Start Experimenting
Don’t be discouraged if your sourdough starter is separating. This common occurrence during fermentation doesn’t necessarily mean it’s ruined.
With extra attention and patience, you can revive your starter and keep it healthy and thriving. Experiment with different types of flour and water, and adjust your feeding schedule until you find the perfect recipe for your bread.
Baking is all about trial and error, so keep learning and improving your skills. Enjoy your delicious homemade sourdough bread and impress your friends and family with your newfound baking abilities.
Keep experimenting, and you’ll soon have a healthy and robust starter.