Two Layer Chocolate Cake Recipe Decadence
To make a moist two-layer chocolate cake, start by sifting all-purpose flour with Dutch-processed cocoa, baking soda, and salt.
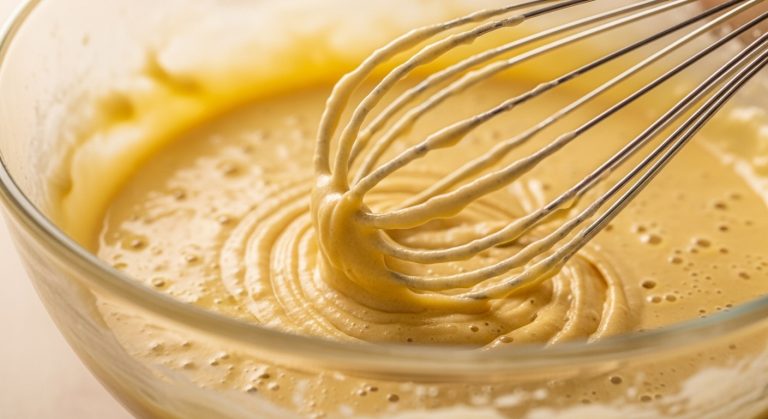
Whisk together eggs, buttermilk, oil, and vanilla, then gradually mix into the dry ingredients for a smooth, thin batter.
Prepare greased, floured pans with parchment liners and bake at 350°F until a toothpick comes out clean.
Cool layers completely, level with a serrated knife, then frost with creamy, chocolate buttercream.
For richer results, precise measurements and layering techniques make all the difference.
Key Takeaways
- Combine wet ingredients like eggs, milk, oil, and vanilla with sifted dry ingredients including cocoa powder and flour for a smooth batter.
- Use Dutch-processed cocoa for richer chocolate flavor and consider sour cream or mayonnaise for moist, dense texture.
- Divide batter evenly into two greased, floured 9-inch pans lined with parchment; bake at 350°F for 27-35 minutes.
- Level cake layers by trimming domed tops and chill before frosting to ensure stability during assembly.
- Frost with creamy chocolate buttercream, applying crumb coat first, then evenly coat sides and top using a rotating cake stand.
Two Layer Chocolate Cake Ingredients
| Ingredient | Cake (2 Layers) | Frosting | Quantity | Notes |
|---|---|---|---|---|
| All-Purpose Flour | Yes | No | 1¾–2 cups | Sift for tenderness |
| Dutch-Processed Cocoa | Yes | Yes | ¾–1 cup | Bloom for rich flavor |
| Large Eggs | Yes | No | 2–3 | Room temperature |
| Buttermilk | Yes | No | 1–1½ cups | Or sour cream alternative |
| Vegetable Oil | Yes | No | ½–⅔ cup | For moist crumb |
| Butter (Unsalted) | No | Yes | 1½–2 cups | Room temp, creamed fluffy |
| Confectioners’ Sugar | No | Yes | 4–6 cups | Gradual addition |
| Baking Soda/Powder | Yes | No | 1½–2 tsp each | Sifted evenly |
| Vanilla Extract | Yes | Yes | 2 tsp | Pure for depth |
| Heavy Cream | No | Yes | ¼–½ cup | Adjust consistency |
Essential Ingredients for the Cake

What makes a two-layer chocolate cake irresistibly moist and flavorful? It starts with the wet ingredients. You’ll need 2-3 large eggs to bind and structure the cake.
Incorporate ¾ to 1⅓ cups of milk or buttermilk to adjust the batter’s density and moisture. Add ⅓ to ½ cup of vegetable or canola oil for richness. Using sourdough discard can also add natural acidity that enhances moisture and tenderness in the batter.
For flavor depth, 2 teaspoons of vanilla extract are essential, while ⅔ to 1 cup of sour cream or mayonnaise boosts tanginess and moisture. Mayonnaise is often used in the batter to create a dense, rich texture.
Leavening agents like ¼ to 2 teaspoons baking soda and ¼ to 1½ teaspoons baking powder create a light crumb, supported by boiling water for enhanced moisture.
Dutch-processed cocoa powder delivers complex chocolate notes, with quantities varying from ¼ to 1 cup depending on desired intensity.
Preparing the Dry Ingredients
When you’re ready to get started, go ahead and pick out some all-purpose flour that falls within the recommended range. This will help give your cake a nicely balanced structure.
Next, when it comes to measuring the cocoa powder, take your time with it! You want to make sure that the rich chocolate flavor really shines through without being too overpowering. Adding ingredients like cream cheese alternatives can add moisture and richness if you want to experiment with texture and flavor.
Now, let’s talk about the leavening agents. You’ll want to combine the baking soda and baking powder just right. Getting these measurements spot on is key to achieving that perfect rise and texture in your cake layers. Happy baking!
If you have dietary needs, you can use gluten-free 1 to 1 flour as a substitute to keep the cake gluten-free while maintaining a similar texture.
Choosing Flour Types
When selecting flour for your two-layer chocolate cake, understanding the protein content and type is essential to achieving the desired texture and crumb.
Cake flour, with 6.5–8% protein, produces a tender, fine crumb and supports a light rise due to its high starch content.
Bleached cake flours like Softasilk yield taller layers, while unbleached blends create even texture.
All-purpose flour, at 11.7% protein, offers structure but results in a denser crumb; it pairs well with cocoa powder to moderate gluten development.
Pastry flour, at around 8% protein, provides soft, airy cakes with balanced moisture retention.
For optimal results, measure flour accurately to avoid toughness or dryness.
You can also blend cake and all-purpose flours 50/50 to balance tenderness and structure effectively.
Using fresh milled flour can enhance the cake’s moisture and flavor by retaining natural oils and nutrients often lost in processed flours.
Measuring Cocoa Powder
How you measure cocoa powder substantially impacts the texture and flavor balance of your two-layer chocolate cake. Use the spoon-and-level method: fluff the cocoa powder, spoon it lightly into a dry measuring cup without packing, then level it off with a flat edge.
Cocoa powder can plump up in the container; therefore, it is important to fluff with a spoon before measuring to ensure accuracy. Avoid scooping directly, which compacts the powder and leads to excess. A digital scale is best for precision.
Sift cocoa powder if the recipe calls for “sifted” to remove clumps and ensure even mixing. In baking, maintaining precise ingredient measurements with a digital scale is crucial for consistent results, especially when environmental factors affect ingredient density.
| Method | Tools Needed | Notes |
|---|---|---|
| Spoon-and-Level | Dry measuring cup, spatula | Prevents overmeasuring, best for volume |
| Fluff and Sift | Spoon, sifter | Removes clumps, ensures even texture |
| Weighing | Kitchen scale | Most accurate, accounts for density |
| Common Errors | Scooping, packing | Causes uneven texture and flavor imbalance |
Combining Leavening Agents
Why is properly combining leavening agents essential for your two-layer chocolate cake? It ensures even rise, texture, and crumb by activating chemical reactions uniformly.
Start by sifting flour, sugar, cocoa, baking soda, baking powder, salt, and optional espresso powder into your mixing bowl to prevent lumps and distribute leaveners evenly. Whisk these sifted dry ingredients thoroughly to blend them well before adding wet ingredients.
Using a tare function on a baking scale can help measure these ingredients precisely to maintain balance. A well-balanced blend of baking soda and baking powder not only promotes rise but also contributes to the cake’s moisture and texture.
Key tips for combining leavening agents:
Use 1½ tsp baking soda with acidic ingredients like buttermilk or coffee.
Add ¼–1 tsp baking powder as a secondary leavener for lift.
Whisk dry ingredients after sifting for uniformity.
Incorporate dry mix gradually into wet to prevent clumping.
Avoid overmixing to preserve leavening gas bubbles for optimal rise.
Mixing the Wet Ingredients
Where do you begin with mixing the wet ingredients for a two-layer chocolate cake? Start by gathering all wet elements at room temperature: 3 large eggs, 1⅓ cups whole milk, 2 teaspoons vanilla extract, and 1 cup buttermilk.
Use a large mixing bowl for combining. Whisk the eggs and vanilla on medium-high speed until combined, adding eggs two at a time for smooth incorporation. Gradually add the buttermilk, pulsing before mixing on low speed to maintain uniformity.
If your recipe calls for oil or melted butter, whisk it in at this stage. For cocoa blooming, prepare hot water separately, whisking it with cocoa until smooth and clump-free. Keep all wet ingredients well combined but avoid overmixing to preserve batter structure.
Ensuring all ingredients are at room temperature helps achieve better mixing and a more uniform batter.
Combining Wet and Dry Components

Starting with properly sifted and whisked dry ingredients sets the foundation for a smooth chocolate cake batter. Once your dry mixture is ready, add the wet ingredients to it—not the other way around—to reduce splashing and ensure even blending. Using a bowl with high sidewalls can help prevent mess during mixing.
Begin with well-sifted dry ingredients, then add wet ingredients to ensure a smooth, evenly blended batter.
Begin mixing on low speed or by hand to moisten the dry components, then increase to medium speed for about two minutes. Avoid over-beating to prevent tough cake texture.
Remember to scrape the bowl’s sides and bottom during mixing to fully incorporate all ingredients. Key points to follow:
- Sift and whisk flour, cocoa, baking soda, and salt thoroughly
- Add wet ingredients gradually to dry
- Mix initially on low speed, then medium for 2 minutes
- Scrape bowl frequently during mixing
- Expect a thin, smooth batter before baking
For best results, use Dutch-processed cocoa to achieve a richer chocolate flavor in your cake.
Preparing the Baking Pans
How you prepare your baking pans substantially impacts the texture and appearance of your two-layer chocolate cake. Use two 9-inch round pans for standard layers; 8-inch pans yield taller cakes.
Begin by greasing each pan with cooking spray or butter, then lightly dust with flour, tapping out excess. For optimal release, line the bottoms with parchment paper rounds, grease lightly, and dust again. This combination prevents sticking and ensures smooth cake removal.
After preparing, place each pan on a kitchen scale to weigh batter evenly, promoting uniform layer heights and minimizing doming. Proper preparation techniques can be as crucial as choosing the right ingredients for baking.
Proper pan prep and batter distribution are essential steps that set the foundation for a professional, evenly baked two-layer chocolate cake. According to the recipe from the back of the Swans Down Cake Flour box, using parchment paper and butter is a reliable method to prevent sticking and achieve an even bake.
Baking Time and Temperature

When should you set your oven to guarantee a perfectly baked two-layer chocolate cake?
Preheat your oven to 350°F (175°C) and position the rack in the center for even heat distribution.
If you’re using a convection oven, lower the temperature to 325°F and add 2-3 minutes to the baking time.
Bake 8-inch pans for 32-35 minutes, or 9-inch pans for 27-32 minutes, rotating pans halfway through to ensure uniform browning.
Preheat oven minimum 15 minutes.
Bake 8-inch pans: 32-35 minutes.
Rotate pans at 20 minutes mark.
Test doneness with a clean toothpick.
Adjust time 2-3 minutes if convection oven.
Maintain consistent temperature to ensure proper rise and avoid underbaking.
Using an oil-based batter helps keep the cake soft and moist after baking.
Cooling and Leveling the Cake Layers
Hey there! After you’ve baked those cake layers, it’s super important to let them cool all the way down to room temperature. Trust me, skipping this step can lead to breakage, and we definitely want to avoid that. Plus, cooling them properly makes it way easier to frost later on!
A general guideline is to remove from pan to speed cooling once baked. Using a wire rack is ideal because it promotes even cooling and prevents sogginess by allowing airflow around the layers, which helps maintain the cake texture.
So, grab a wire rack if you have one—it’s perfect for promoting even cooling. If you’re feeling a bit ambitious, you might even chill or freeze the layers for a little while. This helps firm them up, making leveling a breeze.
When you’re all set and ready to go, take a sharp knife or a cake leveler and trim the tops of your layers. You want to create flat, even surfaces so they stack nicely and give you that professional look. Happy baking!
Cooling Time Importance
Why does cooling your cake layers thoroughly matter so much? Proper cooling ensures your cake maintains structure and texture, preventing breakage and sogginess.
After baking, let your cake cool in the pan for 10-15 minutes. This sets the crumb and avoids tearing. Then, transfer it to a rack for about an hour to fully drop in temperature. A combination of cooling on the counter and refrigeration can shorten this time to around one hour, making the process more efficient cooling methods.
Key points to keep in mind:
Frosting hot layers causes melting and uneven finishes.
Steam trapped under icing leads to soggy textures.
Cooling layers firm up, making them easier to handle.
Accelerate with refrigeration after initial cooling for better moisture retention.
Fully cooled cakes store better and hold up during assembly.
Cooling is essential for a clean, stable, and delicious two-layer chocolate cake.
Techniques for Leveling
How do you achieve perfectly even cake layers for a flawless two-layer chocolate cake?
Start by chilling your cake overnight; this firms the texture, preventing crumbling during cutting. Freezing/thawing can be used prior to leveling, if desired. Freezing can also help preserve the texture and flavor of the cake layers when done properly.
Use a cake leveler like the durable Wilton model with an adjustable wire set to your desired height.
Position it gently and slice with a back-and-forth motion for ultra-precise even layers.
Alternatively, a serrated bread knife can work if you carefully score marks around the circumference at the target height using a ruler or blade.
Place the cake on a turntable to rotate smoothly while you slice, maintaining alignment with your marks.
Removing the domed top first ensures stability.
These techniques combine to give you perfectly flat, consistent layers ready for stacking and frosting. Leveling improves frosting finish and slice appearance.
Crafting the Perfect Chocolate Frosting
What makes chocolate frosting truly exceptional? It’s the balance of texture, flavor, and smoothness you achieve by following precise techniques.
Start by creaming room-temperature butter on medium-high speed for 3-7 minutes until light and fluffy. Whisk cocoa powder first to remove lumps, then gradually add confectioner’s sugar, beating well after each addition. The frosting should have a creamy, light, and smooth texture that holds its shape well for piping designs. Using adjustable speed settings while mixing can help achieve the perfect consistency.
Cream room-temperature butter until fluffy, whisk cocoa powder to remove lumps, then gradually beat in confectioner’s sugar.
Incorporate melted chocolate cooled to room temperature and vanilla extract, finishing with a high-speed whip for 2-3 minutes. Adjust consistency carefully with small amounts of heavy cream or sugar.
Key tips include:
- Use Dutch-processed cocoa for smooth flavor
- Add ¼ teaspoon salt to balance sweetness
- Prefer heavy cream over milk for richness
- Scrape bowl sides frequently during mixing
- Store frosting refrigerated for best texture and longevity
Assembling the Two-Layer Cake
First things first, you’ll want to chill your cake layers a bit. This helps firm them up so they’re easier to work with. Once they’re nice and cool, grab a serrated knife and level off any rounded tops. We want those surfaces flat and even for stacking! Use a cake turntable to make frosting the sides easier and smoother. Proper proofing techniques can also help ensure a stable and even cake structure.
Now, let’s get that first layer in place. Turn it top side down and set it on a sturdy cake board. To keep it from sliding around, put a little dab of frosting underneath—just enough to secure it.
When it’s time to add frosting between the layers, aim for an even spread of about ¾ to 1 cup. Use an offset spatula to make sure you cover all the edges. If you’re using a soft filling, don’t forget to create a frosting dam around the edges to keep everything in place!
Preparing Cake Layers
When assembling your two-layer chocolate cake, ensuring perfectly level cake layers is essential for a polished final look. Start by using a serrated knife or cake leveler to trim any domed tops. Measure and distribute batter evenly with a digital scale before baking. Preheating the oven to 350 degrees F helps ensure consistent baking results.
Reduce oven temperature by 25°F and extend baking time to promote flat tops. Cool or chill layers thoroughly to maintain shape during assembly.
Follow these steps to prepare your layers:
Spread a small amount of buttercream on the cake board to secure the base. Place the first cake layer top side down on the board. Evenly spread about ½ cup of buttercream as filling. Position the second layer top side down for a flat finish. Check levelness and alignment before stacking.
Applying Frosting Evenly
How can you guarantee a flawlessly even frosting application on your two-layer chocolate cake? Start by anchoring the bottom layer with a dollop of frosting on your cake board, centering it on a turntable. Using a revolving cake decorating stand allows you to smoothly rotate the cake as you frost, promoting an even application.
Measure equal frosting amounts, about ¾ to 2 cups per layer, and spread from the outer edge inward using an offset spatula, pushing excess toward edges.
Apply a thin crumb coat with short side-to-side strokes, then chill for 15–30 minutes to set. For the final layer, spread ½ cup frosting evenly on top, coat the sides uniformly, and wipe your spatula clean frequently.
Hold your offset spatula at a 25–45° angle, rotating the turntable smoothly while scraping at 90° to the cake for an even, polished finish.
Tips for Enhancing Flavor and Moisture
Why settle for ordinary when you can elevate your two-layer chocolate cake with simple yet effective techniques?
Enhancing flavor and moisture hinges on selecting quality ingredients and mastering baking methods. Use Dutch-processed cocoa for rich chocolate depth, and incorporate buttermilk or sour cream to boost moistness.
Optimize baking by rotating pans midway and testing doneness carefully. Cool cakes thoroughly before frosting to prevent melting. Seal moisture with generous buttercream layers.
Use coffee or boiling water to intensify chocolate notes without altering taste. Combine granulated and brown sugar for complexity and moisture retention.
Apply frosting only after complete cooling to avoid sliding. Underbake slightly to maintain moistness inside. Store covered at room temperature for up to 4 days to preserve freshness. For longer storage, the cake freezes well when wrapped properly, maintaining quality for up to three months in the freezer.
These tips ensure your cake is flavorful, moist, and professionally finished.
Frequently Asked Questions
Can I Use Gluten-Free Flour Instead of All-Purpose Flour?
Yes, you can use gluten-free flour instead of all-purpose flour by substituting it 1:1 with a gluten-free blend that contains xanthan gum or adding about ⅜ teaspoon if it doesn’t.
Choose high-quality blends like Cup4Cup or King Arthur for moist, tender results. Incorporate oil to improve absorption and avoid dryness.
Whisk dry ingredients thoroughly and add boiling water last for the best texture in your chocolate cake.
What’s the Best Way to Store Leftover Cake?
Think of your leftover cake as a treasure chest. Each slice is a jewel needing careful wrapping.
Wrap individual slices twice in plastic wrap, label if needed, then lay them flat on a tray in the freezer. This locks in moisture and flavor better than refrigeration.
When you’re ready, thaw slices at room temperature for 10-20 minutes, ensuring they regain their soft, original texture. This method keeps your cake fresh and delightful.
How Do I Prevent the Cake From Sticking to the Pan?
To prevent your cake from sticking, line the pan’s bottom with parchment paper cut precisely to fit.
Then, grease the sides using softened butter, not melted, to ensure even coverage.
Follow this with a light dusting of flour, tapping out excess.
Alternatively, use a cake-specific nonstick spray for thorough, even coating, especially in nooks.
For a reusable option, apply a thin layer of cake goop (shortening, oil, flour) for reliable release every time.
Can I Freeze the Cake Layers Before Frosting?
You absolutely can freeze the cake layers before frosting. It’s a game-changer for your baking schedule!
Just wrap each cooled layer tightly in two plastic wrap layers, then foil, and store in an airtight container or bag to prevent freezer burn.
Freeze up to one month. When ready, thaw partially wrapped at room temperature for 1-2 hours, then refrigerate overnight.
This method keeps layers moist, stable, and crumb-free, making frosting easier and smoother.
What Alternatives Are There for Buttermilk?
You can substitute buttermilk with acidified milk by adding 1 tablespoon of vinegar or lemon juice to 1 cup of milk and letting it sit for 5-15 minutes.
Alternatively, use 3/4 cup sour cream or plain Greek yogurt thinned with 1/4 cup milk.
Powdered buttermilk reconstituted with water also works.
For dairy-free options, mix coconut, soy, oat, or almond milk with acid.
These maintain acidity for proper leavening and flavor.
Craving More? Try These Cake Twists
Now that you’ve mastered this two-layer chocolate cake, you’re part of a tradition. Did you know chocolate cake ranks among the top three most popular desserts worldwide?
By carefully balancing ingredients and following precise steps, you guarantee each bite is moist and flavorful. Remember, attention to detail in preparation and frosting elevates your cake from good to exceptional.
Keep experimenting with flavors to make this classic recipe uniquely yours every time.