Sourdough Calzone Recipe: Crispy, Chewy, Bakery-Style
To make sourdough calzones, first prepare an active starter by mixing whole wheat flour and water.
Then feed daily until bubbly and doubled. Mix and knead your dough precisely, resting and fermenting at controlled temperatures for optimal texture.
Divide and refrigerate dough balls for up to two days. Choose balanced fillings like mozzarella with sautéed veggies or cooked meats.
Then shape and seal into airtight half-moons. Bake at high heat until golden and crisp.
Follow these steps to master technique and flavors fully.
Key Takeaways
- Prepare a sourdough starter by mixing whole wheat flour and warm water, feeding daily until bubbly and doubled in volume, around 7 days.
- Use a mix of all-purpose and whole wheat flour, knead dough for 10-15 minutes, then ferment at 74–76°F for 3-5 hours until doubled.
- Shape dough into 10-inch circles, fill half with mozzarella-based cheese blend and desired fillings, then fold and seal edges tightly.
- Bake calzones at 450°F on parchment with steam, brush tops with olive oil, then finish baking at 435°F for even browning and crisp crust.
- Serve cooled calzones with complementary dipping sauces like tomato marinara, garlic-infused tomato, or vegetable-forward options for best flavor pairing.
Sourdough Calzone Recipe Ingredients & Timing Table
| Step / Element | Amount / Target | Why it matters | Best tip |
|---|---|---|---|
| Starter (build) | 60g whole wheat flour + 60g warm water | Creates an active starter for great rise | Keep warm (around 75°F / 24°C) for steady bubbles. |
| Starter (daily feeding) | Keep 2 Tbsp, add 60g flour + 60g water | Strengthens fermentation | Use when bubbly and doubled. |
| Bulk fermentation | 3 hours at 74–76°F (23–24°C) | Builds flavor + structure | Look for light rise and scattered bubbles. |
| Proof (same-day option) | 5 hours at 21–24°C | Ensures soft, workable dough | Dough should feel puffy and doubled. |
| Portion & storage | 200g dough balls, refrigerate up to 2–3 days | Easy planning + deeper flavor | Pull out 3 hours before shaping. |
| Filling & sauce | Sauce about 1/4 cup per calzone | Prevents soggy calzones | Use low-moisture fillings; sauté/blot veggies. |
| Shape & seal | 10-inch circle, 1-inch border, 2–3 slits | Avoids leaks and blowouts | Pinch tightly; lightly wet edges for an airtight seal. |
| Bake | Preheat 250°C/480°F, bake 10 min, then 225°C/435°F 7–10 min | Crisp, golden crust | Use stone/steel + parchment; brush with olive oil. |
Get Your Sourdough Starter Ready for Perfect Dough

To get your sourdough starter ready for perfect dough, begin by mixing 60g whole wheat flour with 60g warm water in a large jar until you achieve a thick, pasty consistency.
Start your sourdough starter by blending 60g whole wheat flour with warm water to a thick paste.
Stir vigorously with a fork until smooth, then cover the jar securely. Place it in a controlled environment at 75°F (24°C) for the initial 24-hour rest to encourage yeast activity. Maintaining a consistent temperature is crucial for optimal yeast performance.
On Day 2, stir to aerate without feeding, then maintain daily feedings from Days 3 to 7, discarding all but 2 tablespoons before adding 60g flour and 60g water. It is important to remember that wild yeast present in flour and the environment will naturally start the fermentation process.
Use a flour blend of all-purpose and whole wheat for consistent results. Monitor for bubbling and doubling volume as indicators of readiness.
This precise routine ensures a stable, active starter critical for your sourdough calzone dough.
Mix and Knead the Dough for Ideal Texture
How you mix and knead your sourdough calzone dough directly impacts its texture and gluten development.
Begin by combining dry ingredients thoroughly before adding wet components. Using a digital kitchen scale ensures precise measurement of ingredients for consistent dough quality.
Use a stand mixer on low speed for 2–3 minutes, then increase to medium for 3–4 minutes until smooth.
Alternatively, apply the slap and fold technique or knead by hand for 10–15 minutes.
After initial mixing, let the dough rest 10 minutes before incorporating salt with half the water.
Mix on low for 2 minutes and medium for 4–5 more.
Transfer dough to a work surface and knead for 4–5 minutes until it loses stickiness and passes the windowpane test, demonstrating strong gluten structure.
Adjust flour sparingly to control stickiness, ensuring a smooth, elastic dough ready for fermentation.
To enhance the dough’s flavor and texture, proof yeast with sugar and warm water before mixing it with other liquids.
Proof and Store Your Calzone Dough Properly

To get the best out of your sourdough calzone dough, you’ll want to proof it until it’s doubled in size and feels nice and soft. This usually takes about 5 hours at room temperature, but if you’ve popped it in the fridge, you’re looking at around 3 hours instead.
During this time, remember that the dough should be soft and puffy by the end of the proofing phase to ensure optimal texture. Keep in mind that ambient temperature plays a crucial role in the activity of the starter and dough rise times.
When it comes to storage, it’s super easy! Just divide the dough into 200g balls. A little tip: make sure to oil your containers to keep everything from drying out. You can refrigerate the dough for up to 2 days, which not only helps develop flavor but also gives you some flexibility in your schedule. Additionally, you can freeze the dough balls individually in airtight containers for up to 2 weeks to extend storage options freezing dough.
Oh, and don’t forget to keep an eye on the ambient temperature—it can really affect your proofing times! Adjust as needed to ensure your dough is perfectly ready for shaping and baking. Happy cooking!
Optimal Proofing Times
When should you proof your calzone dough to achieve the ideal texture and flavor?
Begin with bulk fermentation at 74-76°F (23-24°C) for 3 hours until the dough rises moderately with scattered bubbles. This ensures a smooth texture without stretches and folds. It is important to use the correct ratio of ingredients, such as maintaining hydration at around 74% of flour to achieve optimal dough consistency. Using a digital scale can help precisely measure ingredients to maintain this balance.
For same-day use, proof the dough for 5 hours at 21-24°C, allowing it to double. After dividing into 200g balls, let them rise for 3 hours at room temperature on a floured tray, covered.
Alternatively, refrigerate dough balls for 1-3 days to extend fermentation and deepen flavor. Remove from the fridge 3 hours before shaping and baking.
Adjust proofing times according to ambient temperature. Warmer conditions shorten fermentation, while cooler temperatures require longer rests.
Precise timing optimizes gluten development and sourdough character for perfect calzones.
Refrigeration Storage Tips
Where should you store your calzone dough to maintain ideal fermentation and texture?
Store dough balls in airtight, lightly oiled plastic containers to minimize air exposure and prevent sticking. This method helps preserve the dough’s hydration and supports a healthy fermentation environment for better flavor development.
Before storage, divide dough into tight balls weighing 220-250g, coat them lightly with olive oil, and wrap tightly in plastic wrap.
Refrigerate at 34°F (1°C) for up to 3 days; this cold fermentation enhances flavor without over-fermenting. This slow fermentation process is similar to techniques used in Poolish and Biga pre-ferments, which improve dough complexity.
Label containers with dates for tracking.
When ready, remove dough 3 hours prior to shaping, allowing 30-60 minutes at room temperature (70-75°F) to relax gluten and regain pliability.
Avoid overhandling to preserve dough structure.
Proper refrigeration and handling ensure consistent texture and ideal proofing, critical for superior sourdough calzones. Using a leavened pizza dough is essential for making calzones, as it provides the right structure and texture for folding and baking.
Pick Your Favorite Fillings and Sauces for Sourdough Calzones
When it comes to making delicious sourdough calzones, the first step is choosing your favorite fillings. You can’t go wrong with classic options like gooey mozzarella and savory pepperoni. But if you’re leaning towards something a bit lighter, why not try some sautéed spinach and mushrooms?
They add a nice touch of flavor and nutrition! Many recipes use a mix of plain and wheat flours along with an unfed sourdough starter to create a crust that is both crusty and delicious sourdough dough. For consistent texture and ease, consider using adjustable thickness settings when preparing your dough.
Make sure to balance out your protein and vegetable choices. This is key for keeping your calzone nice and sturdy while also packing in tons of deliciousness. And don’t forget about the sauce! A good sauce can really elevate your calzone experience. Whether you prefer a hearty marinara, a rich creamy Alfredo, or a fresh and zesty pesto, picking the right sauce will definitely enhance every bite. Enjoy crafting your perfect calzone!
Classic Filling Combinations
How do you choose the perfect filling for your sourdough calzone? Focus on classic combinations that balance texture and flavor while preventing sogginess. Preheating your oven to 500 degrees F ensures a crisp and perfectly cooked crust. Using parchment paper can help prevent sticking and make baking easier.
Cheese blends like mozzarella, ricotta, and Parmesan provide a creamy, melty base. Incorporate vegetables such as sautéed mushrooms or peppers for freshness. Select sauces with controlled moisture, like thick marinara or pesto, to maintain crust integrity.
| Cheese Blend | Vegetables |
|---|---|
| Mozzarella & Ricotta | Sautéed Mushrooms |
| Parmesan & Romano | Spinach & Peppers |
| Cheddar & Mozzarella | Onions & Olives |
| Fresh Mozzarella & Ricotta | Broccoli & Corn |
| Grated Parmesan & Herbs | Sweet Peppers |
Pair these with firm, well-seasoned sauces for a classic, structurally sound calzone.
Vegetarian And Meat Options
Which fillings best suit your sourdough calzone depends on your flavor preferences and nutritional goals. For vegetarian options, choose nutrient-dense combinations like sautéed spinach, broccoli, and ricotta, or portobello mushrooms with kale and garlic-miso cream.
The dough typically includes 1/3 sprouted whole wheat flour, adding a wholesome texture and flavor. To maintain a tender, moist crumb in your dough, be sure to fold in dry ingredients just until combined.
Incorporate bell peppers, olives, and mixed herbs for added complexity. If you prefer meat, opt for pre-cooked sausage with red onion and green peppers or classic pepperoni paired with mozzarella and ricotta for creaminess.
For protein variety, consider salami, or anchovies, ensuring meats are cooked to prevent excess moisture. Always use mozzarella as the cheese base, supplementing with parmesan or cashew ricotta for texture and depth.
Sauté vegetables in olive oil with garlic, blot excess moisture, and layer ingredients strategically to maintain calzone integrity and optimal flavor balance. Grease or line your baking surface to prevent sticking and aid in even cooking.
Sauce Pairing Suggestions
When selecting sauces for your sourdough calzone, consider how each option interacts with your chosen fillings to achieve prime flavor balance and texture.
Proper sauce integration ensures the calzone seals correctly and prevents sogginess or spillage during baking. Use restrained quantities—about 1/4 cup per calzone—to maintain structure and flavor harmony. Adjusting hydration and fermentation times can help maintain dough integrity when combining sauces and fillings.
Classic tomato-based sauces like marinara amplify traditional fillings, while cheese-forward options offer creamy alternatives. Bold sauces introduce complexity for adventurous palates.
Marinara pairs with pepperoni and mozzarella for a timeless profile. Alfredo or ricotta blends create a creamy, cheese-centric interior.
Garlic-infused tomato sauce complements sautéed vegetables and spinach. Buffalo sauce suits shredded chicken with blue cheese for spicy variations.
Serve thicker sauces as dips alongside baked calzones for controlled flavor application. To prepare the dough efficiently, consider using a stand mixer which can simplify the mixing and kneading process and help maintain consistent dough temperature, especially important for high altitude baking.
Shape and Seal Your Sourdough Calzones Like a Pro
Although shaping and sealing sourdough calzones demands attention to detail, mastering these techniques ensures a professional finish and optimal texture.
Begin by dividing your fermented dough into equal portions, pre-shaping into tight balls, and resting under a damp towel. These portions are ideally formed from dough that has been refrigerated for 1–3 days to develop flavor and handleability. Proper fermentation timing during bulk fermentation improves dough strength and flavor.
Divide fermented dough into equal portions, shape tightly into balls, and rest under a damp towel.
Flatten each ball gently with your hands, avoiding rolling pins to preserve aeration. Stretch into an even 10-inch circle by rotating and lifting edges. Using gentle stretch-and-folds during bulk fermentation helps maintain dough elasticity crucial for shaping.
Place filling on one half, leaving a 1-inch border. Fold the unfilled side over the filling, creating a half-circle.
Seal edges by wetting fingers, pinching, and rolling the dough edge with a pinch-and-twist motion for an airtight closure.
Finally, add 2-3 slits on top to release steam during baking and brush with olive oil for an appealing crust. Baking at 450°F with steam promotes a crisp crust and good oven spring.
Bake Your Calzones to a Golden, Crispy Perfection

Achieving a golden, crispy calzone begins with properly preheating your oven and selecting the right baking surface.
Start by heating your oven to 250°C (480°F) with a pizza stone or baking steel to ensure even, high heat.
Place the calzones on parchment paper atop the preheated surface to avoid sticking and promote crisping.
Bake at full temperature for 10 minutes, then reduce to 225°C (435°F) for 7-10 minutes to finish cooking without burning.
Key techniques include:
- Brush calzone tops with olive oil and cut 2-3 slits for steam release.
- Rotate calzones periodically for uniform browning.
- Bake on the middle rack for balanced heat exposure.
- Check for a deep golden brown crust and hollow sound when tapped.
- Cool 5-10 minutes before slicing to set the structure.
Serve Your Calzones With Tasty Dipping Sauces
By pairing them with expertly crafted dipping sauces that complement their fillings. Choose from a traditional tomato sauce simmered to thick perfection, a quick marinara rich with herbs and garlic, or a New York Times-style marinara tuned for balanced heat and aroma.
Each sauce offers a distinct sensory experience that enhances your calzone’s appeal. The key to a great dipping sauce often lies in using simple pantry items like garlic and olive oil to build authentic Italian flavors.
| Sauce Type | Preparation Time | Flavor Notes |
|---|---|---|
| Traditional Tomato | 30-45 minutes | Rich, savory, umami |
| Quick Marinara | 10 minutes | Herbaceous, mildly spicy |
| NY Times-Style Marinara | 20 minutes | Balanced, customizable |
| Vegetable-Forward | Variable | Tangy, fresh, vibrant |
Serve warm for optimal taste and texture contrast.
Frequently Asked Questions
Can I Substitute Whole Wheat Flour for All-Purpose Flour?
Yes, you can substitute whole wheat flour for all-purpose flour, but expect denser dough and reduced rise due to bran cutting gluten strands.
Increase hydration by 2–3 teaspoons per cup to prevent dryness. Start with 25% substitution to maintain texture and flavor, gradually increasing to 50% with liquid adjustments.
Beyond that, you’ll need to modify water content markedly to accommodate whole wheat’s higher absorption and faster fermentation rates.
How Do I Store Leftover Calzones for Best Freshness?
To keep your leftover calzones fresh, store them in airtight containers to block air exposure and preserve moisture.
Wrap each calzone individually in aluminum foil before refrigerating, ensuring they cool completely first to prevent sogginess.
Lightly oil the container’s interior to avoid sticking.
For longer storage, flash-freeze calzones on a baking sheet, then transfer them to labeled freezer bags.
This method maintains texture and flavor effectively for several days refrigerated or up to six months frozen.
What Are Good Vegan Cheese Alternatives for Fillings?
You should use vegan mozzarella for its excellent melting properties, especially Violife brand, which mimics dairy mozzarella’s texture.
Combining vegan cheddar with mozzarella adds depth and flavor complexity. For a spicy twist, try vegan pepper jack.
Plant-based parmesan offers a sharp, grated alternative. Homemade cashew-based ricotta or tofu-based blends provide creamy, textured fillings.
These options ensure your calzone fillings melt evenly, maintaining a dairy-free, egg-free, and flavorful profile.
Can I Freeze Uncooked Calzones for Later Baking?
You can absolutely freeze uncooked calzones for later baking. Think of it as pressing pause on a culinary masterpiece.
Assemble them on wax paper-lined baking sheets, freeze for 2 hours, then transfer to airtight containers or freezer bags.
When ready, thaw in the fridge overnight and let them rest at room temperature before baking at 400°F.
This method preserves texture, prevents sogginess, and ensures your calzones bake evenly and taste fresh.
How Do Altitude Changes Affect Sourdough Calzone Baking?
Altitude changes speed up fermentation due to lower air pressure, so you’ll need to reduce your sourdough starter by up to 25% and shorten proofing times to avoid over-proofing.
Increase oven temperature by 15-25°F to set dough structure quickly and extend baking time to compensate for reduced heat transfer.
Also, raise hydration levels since flour absorbs more water in drier air. Cover your dough to prevent drying, and perform stretch-and-folds to strengthen gluten.
Build Your Signature Filling With This Sourdough Calzone Recipe
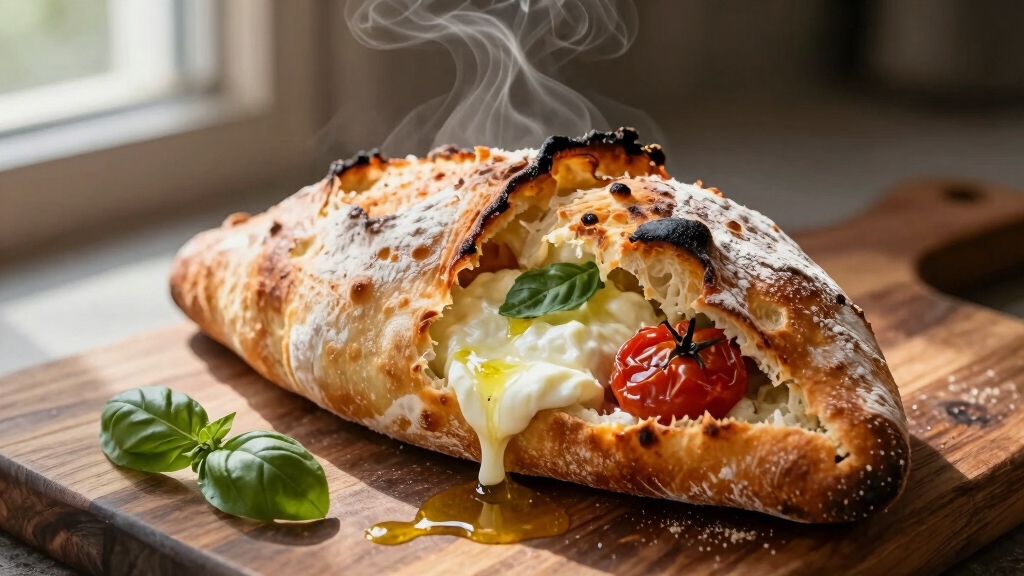
As you pull your golden sourdough calzone from the oven, think of it as a sealed treasure chest. It is crisp on the outside, holding a world of flavors inside.
Each step, from nurturing your starter to perfecting the crust, unfastens layers of texture and taste. Mastering this process means you’re not just baking; you’re crafting a symbol of patience and precision.
Turning simple ingredients into a culinary triumph every time.