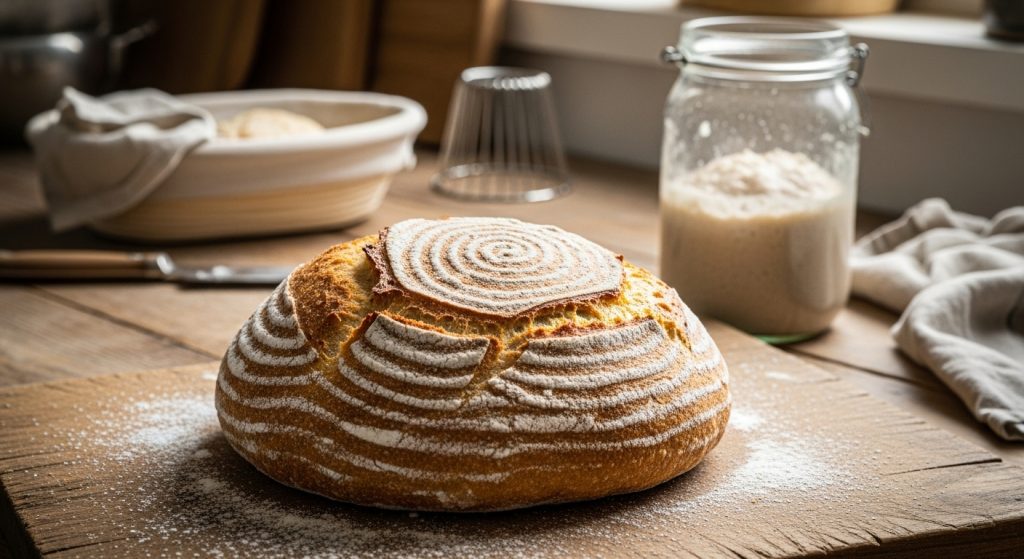
Overnight Sourdough Bread Recipe for Fluffy Loaves
To make overnight sourdough, start with an active starter using bread and whole wheat flours at about 75% hydration.
Mix flour and water, autolyse 30 minutes, then add starter and salt.
Use gentle stretch-and-folds every 30–60 minutes during bulk fermentation at 70–80°F overnight to develop gluten and flavor.
Shape, proof, and bake covered at 450°F, uncovering later for crust.
Mastering these steps guarantees balanced sourness and structure.
Explore the detailed techniques for perfect results.
Key Takeaways
- Mix bread and whole wheat flour with 70–75% filtered water, autolyse for 20–60 minutes before adding sourdough starter and salt.
- Use 50–90g active starter per 500g flour; perform 2–4 stretch-and-fold sets during bulk fermentation with 30–60 minute intervals.
- Bulk ferment overnight at 70–85°F until dough roughly doubles in size and passes the poke test, using a proofing basket to retain shape.
- Shape dough with envelope folds, rest 5–10 minutes, then final proof in a floured basket before baking.
- Bake covered at 450°F for 30 minutes, then uncovered for 10–15 minutes; internal temperature should reach 195–205°F for perfect crumb.
Key Steps & Ingredients for the Overnight Sourdough Bread Recipe
| Step | Ingredient / Action | Amount/Timing | Notes |
|---|---|---|---|
| Starter Prep | Fed Sourdough Starter | 50g | Use bubbly, active starter |
| Mix Dough | Bread Flour | 500g | Unbleached, high-quality flour |
| Water | 350g | Room temperature | |
| Salt | 10g | Fine sea salt preferred | |
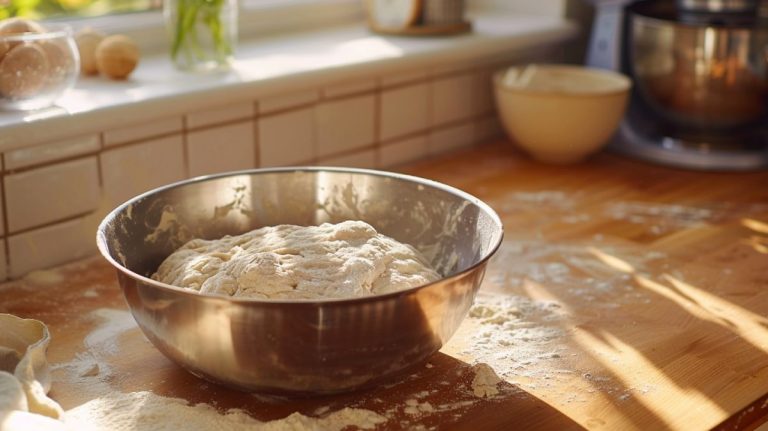
| Initial Mix | Combine all ingredients | Evening, 5-10 minutes | Create a shaggy dough |
| Bulk Ferment | Cover & let dough ferment | Overnight (8-12 hrs) | Dough should double in size |
| Morning Shaping | Stretch & fold, shape into loaf | Morning, 5 min | Handle gently for best crumb |
| Final Proof | Rest shaped loaf | 1-2 hours | On parchment or banneton |
| Bake | Preheat oven/Dutch oven | 25 min at 500°F lid on; 15-25 min at 450°F lid off | Bake until golden brown |
| Cool & Enjoy | Let bread cool | 1 hour | Slice to reveal airy crumb |
The Science Behind Your Sourdough Starter
Although it may seem simple, your sourdough starter is actually a dynamic ecosystem composed of wild yeasts and lactic acid bacteria (LAB) thriving in a flour-water mixture.
These microorganisms work synergistically: yeasts generate carbon dioxide, leavening your dough by forming bubbles, while LAB, primarily lactobacilli, produce lactic and acetic acids that define sourdough’s acidity and complex flavor. This fermentation process also helps break down phytic acid, improving the bread’s nutritional value and digestibility.
Your starter can host over 50 LAB species alongside diverse yeast strains, influencing fermentation speed, aroma, and texture.
The microbial diversity in your starter depends on the type of flour used, the carryover from previous feedings, and the temperature at which it is maintained.
A balanced microbial population yields a pleasant sourness and ideal dough rise.
Visibly, an active starter shows bubbles and a domed surface after feeding, signaling vigorous fermentation. Although baking destroys live probiotics, the sourdough fermentation process still supports gut health through its prebiotic content.
Understanding this microbial interplay enables you to maintain your starter’s vitality and achieve consistent sourdough bread quality.
Selecting the Right Ingredients and Equipment
When you select ingredients and equipment carefully, you set the foundation for successful sourdough bread baking. Use bread flour (~12% protein) for structure, adding whole wheat flour up to 50g for complexity. Investing in quality equipment supports long-term baking success and artisanal results.
Measure water precisely (70–75% hydration) using filtered, room-temperature water to promote fermentation. Add 10g fine sea salt directly to flour for flavor and fermentation control.
Your starter must be active and fed, ideally 50–90g per 500g flour, at peak activity. Using less starter results in longer fermentation and proofing times, which can enhance the tangy flavor and digestibility of your bread.
Essential tools include a kitchen scale, a 5–6 quart Dutch oven for crust, a glass or stainless steel bowl, a banneton or lined bowl for proofing, and a sharp blade for scoring. Professional oven mitts and scoring tools like a fancy lame improve safety and dough appearance during baking.
| Ingredient/Tool | Recommendation |
|---|---|
| Flour | Bread flour, consistent brand |
| Water | Filtered, 70–75% hydration |
| Salt | Fine sea salt, 2% flour wt. |
| Starter | Active, 50–90g per 500g flour |
| Equipment | Scale, Dutch oven, banneton |
Preparing the Dough With Autolyse
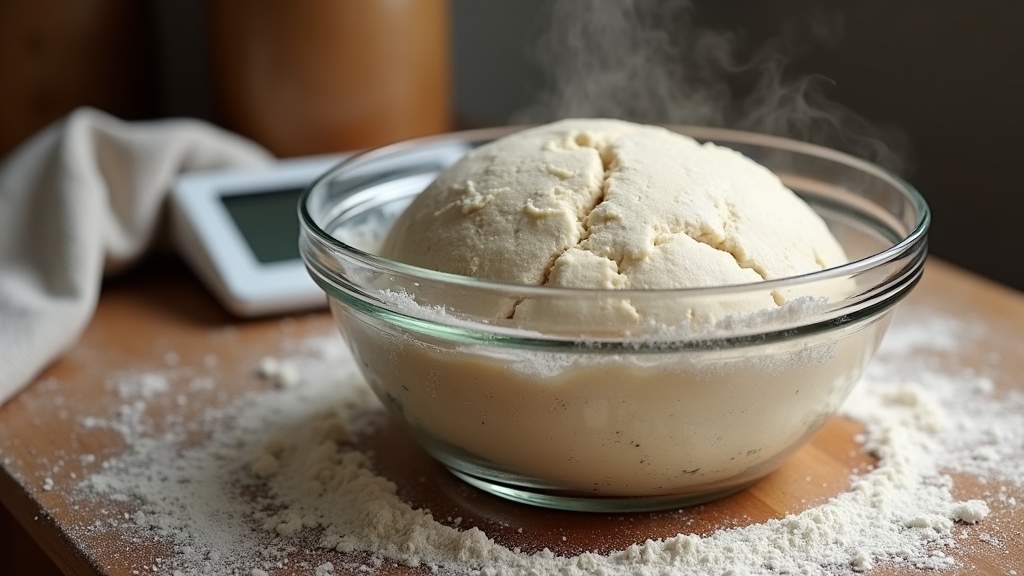
Since autolyse involves resting the mixture of flour and water before adding starter and salt, it initiates enzymatic processes that enhance gluten formation and dough extensibility without kneading.
During this 20 to 60-minute rest, protease enzymes break down proteins, improving dough stretchability, while amylase converts starches into sugars that later feed the yeast. This step also allows for flour hydration, which is crucial for optimal enzyme activity and dough development.
This spontaneous gluten network development reduces kneading needs and preserves carotenoid pigments, enriching flavor and color. Additionally, this technique supports better fermentation and improves the final bread’s texture and flavor.
You mix only flour and water initially, allowing full hydration and ideal enzyme activity without premature gluten tightening from salt.
Autolyse results in a smoother, less sticky dough that’s easier to handle and shape. It’s especially beneficial for high-hydration or whole grain flours, improving crumb tenderness, oven spring, and overall bread quality.
Techniques for Stretching and Folding
Mastering the stretch and fold technique allows you to strengthen the gluten network effectively without traditional kneading, improving dough elasticity and structure during bulk fermentation. Choosing the right serrated bread knife can also enhance your slicing experience once your loaf is baked.
Grasp a portion of dough with wet fingertips, stretch it upward without tearing, then fold it back over the dough’s center. Rotate the bowl 90 degrees and repeat, completing four folds per set. This technique can be performed in a bowl or on the countertop, providing a satisfying sensory experience for bakers.
Perform 2 to 4 sets at intervals to build strength and volume. This method gently aligns gluten strands, incorporates air, and handles high hydration doughs by developing strength while maintaining softness.
Adjust fold intensity based on dough strength and container shape. Keep hands wet to avoid sticking and monitor dough elasticity and jiggly texture as indicators.
Consistent stretching and folding enhance gas retention, crumb openness, and dough handling for superior sourdough quality. Additionally, tearing of the dough during folding indicates a need for more resting time between sets to allow gluten to relax and hydrate properly, especially for high-hydration doughs.
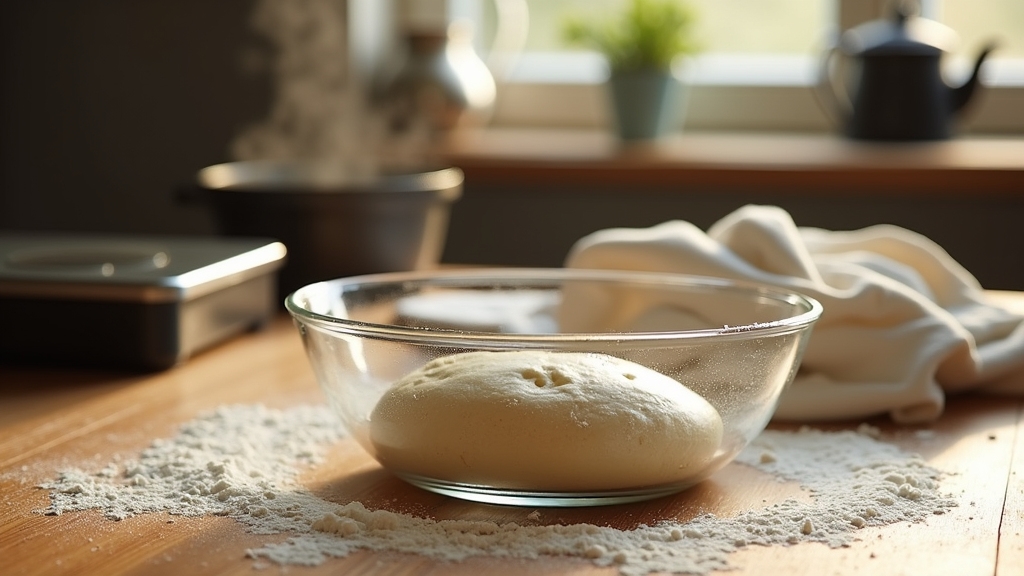
Managing Bulk Fermentation Overnight
When you’re managing bulk fermentation overnight, it’s super important to keep an eye on the temperature. You see, temperature really influences how fast the fermentation happens and how well the dough develops.
So, make sure you’re monitoring it carefully!
Keeping the dough at a consistent temperature helps maintain the activity of the wild yeast and bacteria in your sourdough starter.
Now, when it comes to judging whether your dough is ready, a good rule of thumb is to look for about a 50% increase in volume. That’s usually a solid indicator!
Just remember, timing can vary quite a bit depending on visual cues and the ambient conditions around you. You definitely don’t want to end up with under- or over-fermented dough, so keep a watchful eye!
Temperature Impact on Fermentation
Although temperature profoundly influences fermentation speed and dough development, managing bulk fermentation overnight requires careful regulation to prevent overproofing or underfermentation.
Ideal sourdough fermentation occurs between 74–86°F (23–30°C), with 76–80°F (24–27°C) best suited for balancing flavor and rise. Below 68°F (20°C), fermentation slows drastically, risking dense dough. Incorporating salt at 1–2% of flour weight can help regulate yeast activity and improve dough structure during varying fermentation temperatures.
Above 90°F (32°C), accelerated acid production weakens gluten and promotes overproofing. Yeast activity peaks in moderate temperatures but declines above 87°F due to acidity; lactic acid bacteria thrive warmer, impacting flavor and dough strength.
For overnight bulk fermentation, cooler temperatures around 65–70°F slow activity, extending time safely. You must adjust bulk fermentation rise targets depending on dough temperature: higher rise (~75%) below 70°F and lower (~30%) near 80°F to guarantee proper fermentation before refrigeration. Monitoring dough temperature helps gauge fermentation progress and optimize timing.
Timing and Dough Readiness
When managing bulk fermentation overnight, timing and dough readiness depend heavily on starter quantity, temperature, and visual cues.
Using about 10% starter with 5% prefermented flour at 65-70°F typically requires 10-12 hours, allowing the dough to develop flavor and structure without overproofing. Choosing the right proofing basket can help maintain optimal dough shape and moisture during this process.
Higher starter percentages shorten this time, so adjust accordingly to fit your schedule.
You’ll know the dough is ready when it roughly doubles in size and passes the poke test, an indentation that springs back slowly but not fully.
Visual indicators like puffiness and surface texture also signal progress.
Keep in mind, cooler temperatures slow fermentation, extending bulk time, while warmer conditions accelerate it.
Balancing these factors ensures your dough achieves ideal readiness for shaping and final proofing.
It is important to avoid over fermentation, which results in a runny, sticky dough that collapses and is difficult to shape.
Monitoring Dough Development
How can you effectively monitor dough development during an overnight bulk fermentation? Start by placing your dough in a marked, clear container to visually track its volume increase. Ideally, it should double in size. Using straight-sided containers or Cambro with marked levels helps clearly observe the dough’s volume increase, making it easier to know when it has reached the desired rise visual volume cues. This method is similar to monitoring the rise in layered bread compositions like the Turkey Focaccia Sandwich, where observing dough texture is essential.
Use the aliquot jar method by isolating a small dough portion to observe independent rise and fermentation activity.
Regularly inspect for a smooth surface with a bubbly, aerated appearance, signaling active fermentation, much like the fresh, airy texture found in focaccia bread that complements the sun-dried tomato focaccia base.
Gently test dough elasticity and strength by stretching it. Resistance indicates proper gluten development.
Maintain consistent temperatures between 70°F and 85°F using a bread proofer or refrigeration to control fermentation speed.
Measure dough temperature internally with a digital thermometer for accuracy.
This combination of visual cues, temperature control, and tactile feedback helps you avoid under- or over-proofing and ensures consistent dough readiness overnight.
Shaping Your Dough for Baking
Since shaping your dough is essential after bulk fermentation, you’ll use techniques like the envelope fold to create surface tension that holds your loaf’s form during baking.
Gently transfer the dough onto a lightly floured surface to prevent tearing. Stretch and fold the dough from four sides toward the center, forming a tight round boule.
After folding, flip the dough and let it rest for 5–10 minutes to relax gluten.
Then, cup your floured hands and rotate the dough in circular motions to tighten its shape.
Place the shaped dough seam side up in a floured proofing basket for its final rise.
Adjust shaping based on hydration and fermentation; tighter for under-fermented dough, gentler for over-fermented to preserve aeration and optimize oven spring.
Using a perforated bread pan can further enhance the crust and texture when baking your shaped loaf.
Baking Process With a Dutch Oven
Although baking sourdough bread in a Dutch oven requires careful preparation, it markedly enhances crust development and crumb texture.
Baking sourdough in a Dutch oven significantly improves crust and crumb quality with precise preparation.
First, preheat your oven to 450°F (230°C) without the Dutch oven inside. Then place the Dutch oven in to heat for 30–45 minutes. While preheating is common, note that preheating the Dutch oven is not necessary for good oven spring, but it can improve crust quality. Using a digital baking scale to weigh your dough can help ensure consistent results in your bread’s texture and rise.
Using parchment paper or a silicone sling, gently transfer your scored dough into the hot Dutch oven. Cover it and bake for 30 minutes to trap steam, promoting oven spring and crust formation.
Afterward, remove the lid and continue baking uncovered for 10–15 minutes to brown the crust.
Finally, bake the loaf directly on the oven rack for an additional 10 minutes, ensuring the internal temperature reaches 195–205°F for doneness.
- Preheat Dutch oven to 450°F for 30–45 minutes
- Bake covered 30 minutes, then uncovered 10–15 minutes
- Finish baking on rack 10 minutes, check internal temperature
Tips for Perfect Crust and Crumb
To get that perfect crumb in your bread, it’s all about keeping the right hydration levels. You want to strike a balance between how stretchy your dough is and its strength. Maintaining a consistent feeding schedule helps ensure your starter has the right acidity and activity for optimal bread texture.
A little tip? Make sure to do some stretch and folds during the bulk fermentation. This really helps to develop the gluten structure and trap in air, which is key for that lovely texture.
Now, let’s talk about baking. It’s super important to control your baking temperature just right. This will help promote that beautiful oven spring and give you a crust that’s nice and crisp with a great color. Adding extra steam early during baking can also help achieve a thinner, crisper crust.
Happy baking!
Optimal Hydration Levels
How does hydration level influence the texture and flavor of your sourdough bread? Hydration directly affects crumb openness, crust thickness, and flavor complexity.
Higher hydration (above 80%) produces an airy, open crumb and thin, crisp crust by enhancing starch gelatinization and gluten extensibility. This level of hydration typically results in a sticky dough that can be challenging to handle but rewards with excellent crumb structure. Medium hydration (65%-75%) balances handling ease with moderate crumb openness, ideal for beginners. Lower hydration (50%-60%) yields dense crumb and thick, chewy crust, better for structured breads.
Consider these hydration effects:
- Increased water content prolongs fermentation, deepening sour flavor.
- Higher hydration makes dough stickier, requiring wet hands or scrapers.
- Crust color sharpens with higher hydration due to intensified Maillard reactions.
Adjust hydration precisely, including starter water, to optimize your bread’s crust and crumb.
Proper Stretch and Folds
Managing hydration sets the stage for dough consistency, but developing its strength and structure requires proper stretch and folds. This technique is performed after initial dough preparation to improve dough structure and gluten development.
Perform 2–4 sets during bulk fermentation, spacing folds 30–60 minutes apart to allow gluten relaxation and prevent tearing.
Wet your hands to avoid dough sticking; gently lift and stretch the dough upward without forcing, then fold it over the center.
Rotate the bowl to repeat folds four times per set, evenly exercising the dough and distributing yeast and bacteria.
This technique strengthens the gluten network, promotes even fermentation, and incorporates air for an open crumb.
Avoid over-folding to prevent degassing or tightening gluten excessively.
Watch for increased resistance as a sign of gluten development.
Consistent, controlled stretch and folds ensure better oven spring, structural integrity, and a light, irregular crumb in your sourdough bread. After completing the folds, cover the dough and allow it to rest for 30 to 45 minutes to further aid gluten development.
Baking Temperature Techniques
Although baking temperature varies with equipment and recipe, controlling it precisely is vital for achieving ideal sourdough crust and crumb. Preheat your Dutch oven to about 450°F (232°C) to maximize ovenspring and crust formation.
Start baking covered for 20–30 minutes to trap steam, then uncover to deepen crust color and texture. Avoid exceeding 500°F, as excessive heat sets crust too quickly, limiting loaf volume. Using a Dutch oven helps trap steam effectively, creating a bakery-style crust and improving overall bread quality Dutch oven use.
Monitor internal bread temperature, aiming for 205–210°F (96–99°C) to ensure crumb is fully set.
Key temperature techniques include:
- Preheating baking surfaces (Dutch oven or stone) to 450°F for uniform heat retention.
- Maintaining covered baking initially to promote steam and crust expansion.
- Extending bake time at lower temperatures (around 400°F) to develop crust and crumb adequately.
Frequently Asked Questions
Can I Use All-Purpose Flour Instead of Bread Flour?
Yes, you can use all-purpose flour instead of bread flour, but you’ll need to adjust your recipe.
Since all-purpose flour has less protein, reduce water by 15-30g to avoid overly sticky dough.
Expect a tighter crumb and slightly faster fermentation, so monitor proofing times closely.
Your bread might rise less and be less chewy, but with careful handling and timing, you’ll still achieve a good sourdough loaf.
How Do I Store Leftover Sourdough Bread?
Store your leftover sourdough in a cool, dry place between 60-70°F, away from direct sunlight.
Wrap it in a cloth or linen bag to balance moisture and airflow, avoiding plastic bags that trap condensation and cause mold.
Keep it uncut if possible to maintain freshness. Consume within five days or freeze to preserve quality.
To revive stale bread, lightly moisten the crust and reheat at 300°F for 5-15 minutes.
What Causes Dense Bread Despite Proper Fermentation?
Even with proper fermentation, dense bread often results from insufficient gluten development. Up to 30% of bakers struggle with weak gluten networks.
You might be under-kneading or using low-protein flour, which can’t trap gas well. Adding heavy mix-ins or having low hydration also weakens gluten.
Additionally, imbalanced dough, such as too much flour or sugar, or baking errors like poor oven spring can compact the crumb. This makes your bread dense despite good fermentation.
Can I Add Seeds or Nuts to the Dough?
Yes, you can add seeds or nuts to your dough. Incorporate them after the autolyse phase to guarantee even distribution without affecting gluten development.
Limit their weight to around 10% of the dough to maintain structure. Toast or soak seeds like pumpkin or sesame beforehand to enhance flavor and texture.
Adding them boosts nutrition, aroma, and crunch without compromising fermentation or crumb if done correctly.
How Do I Know When My Starter Is Ready to Use?
You know your starter is ready when it doubles or triples in size within a few hours after feeding.
It shows visible bubbles throughout and has a light, airy texture.
It should emit a pleasant, slightly tangy aroma and pass the float test, meaning a small spoonful floats in water.
Consistent feeding, ideal temperature (75°F–80°F), and regular observation guarantee peak activity, signaling your starter is primed for baking.
Elevate Baking Skills with This Effortless Sourdough Recipe
Mastering your sourdough means melding method with mindfulness.
By managing your mixture meticulously from autolyse to overnight fermentation, you’ll shape a sensational, sturdy structure.
Stretch and fold with steady strength, then slide your dough into a sizzling Dutch oven for a superbly crisp crust and soft, springy crumb.
With these steps, you’ll savor success in sourdough baking, producing perfectly proofed, pleasantly tangy loaves that showcase your skill and patience.