O’charley’s Yeast Roll Recipe: Little Clouds of Comfort
To make O’Charley’s yeast rolls, start by activating dry yeast in warm milk with sugar until bubbly. Combine this with melted butter, eggs, flour, and salt, mixing until the dough feels slightly sticky.
Knead for about 10 minutes until smooth and elastic, then let it rise in a warm spot until doubled. Divide into equal portions, shape into balls, proof until puffy, bake at 375°F, and finish with a warm buttery glaze. Keep going to discover tips that perfect texture and flavor.
Key Takeaways
- Activate dry yeast in warm milk (110-115°F) with sugar until bubbly for proper fermentation.
- Mix activated yeast with melted butter, beaten egg, salt, and gradually add 4-5 cups flour to form sticky dough.
- Knead dough 8-10 minutes on a floured surface until smooth, elastic, and springy for soft, fluffy rolls.
- Let dough rise in a warm, draft-free place until doubled, then divide into 12 equal balls and proof again.
- Bake rolls at 375°F until golden, then brush with melted butter glaze immediately for a soft, glossy finish.
Complete Recipe Table for O’charley’s Yeast Roll
| Ingredients | Process |
|---|---|
| 1 packet (2¼ tsp) active dry yeast | Activate yeast in warm milk (110-115°F) with sugar until bubbly and foamy (5-10 minutes) |
| 1 cup warm milk | Warm milk to proper temperature – not too hot to kill yeast |
| ¼ cup granulated sugar | Add to warm milk with yeast to feed fermentation |
| ¼ to ½ cup melted butter | Mix with activated yeast mixture for richness and tenderness |
| 1 large egg, beaten | Combine with wet ingredients for structure and golden color |
| 4-5 cups all-purpose flour | Add gradually to achieve slightly sticky dough consistency |
| ¼ teaspoon salt | Mix with flour to enhance flavor and regulate yeast activity |
| Extra melted butter for glaze | Brush on warm rolls immediately after baking for signature finish |
Essential Ingredients for Authentic Yeast Rolls
When you want to recreate O’Charley’s yeast rolls at home, understanding the essential ingredients is key to capturing their signature texture and flavor. Start with all-purpose flour, about 4 to 5 cups, added gradually to achieve a slightly wet, sticky dough that ensures softness and proper rise.
Granulated sugar, around 1/4 cup, balances mild sweetness and feeds the yeast for fermentation. Incorporate 1/4 to 1/2 cup melted butter, which coats gluten strands, delivering tender crumbs and a rich taste. One large egg enriches the dough, improving structure and giving the rolls their golden crust.
Finally, add a pinch of salt—around 1/4 teaspoon—to enhance flavor and regulate yeast activity. To activate the yeast properly, it is important to mix it with about one-third of the warm milk and let it sit until it becomes bubbly and active.
Preparing the Yeast and Liquid Mixture
How do you guarantee your yeast rolls rise perfectly every time? Start by gently warming milk to 110-115°F, just right to activate yeast without killing it. Use a saucepan or microwave to avoid overheating. Maintaining the proper temperature is crucial because yeast activation depends on precise temperature control.
Then, combine this warm milk with yeast and a small amount of sugar—this jump-starts fermentation. Let the mixture rest in a warm, draft-free spot for 5 to 10 minutes until you see bubbles or foam, signaling active yeast. For best results, use dry active yeast measured precisely according to the recipe to ensure proper activation.
Remember, sugar feeds yeast, but too much can harm it. Avoid stirring aggressively to preserve bubbles. If no foam appears, your yeast may be inactive or the liquid temperature off, so restart.
Use fresh yeast and precise measurements to ensure consistent rise and that perfect fluffy texture in your rolls.
Combining Dry and Wet Ingredients

Although activating the yeast is essential, you’ll want to combine it with the wet ingredients—like melted butter and beaten eggs—before adding any flour. This step guarantees even yeast distribution and a cohesive dough base.
Next, gradually add the pre-mixed flour and salt in increments to control dough consistency and avoid overwhelming the yeast. Since the recipe calls for 3 cups of flour, choosing between all-purpose, self-rising, or bread flour can influence the dough’s texture and consistency, so select the type that best suits your preference for dough consistency.
| Ingredient | Role in Dough |
|---|---|
| Activated Yeast Mix | Initiates fermentation |
| Melted Butter | Adds richness, moisture |
| Beaten Eggs | Enhances structure, flavor |
| Flour & Salt | Builds dough framework |
Mix gently until dough becomes wet and sticky, signaling proper hydration for soft, fluffy rolls. Avoid over-mixing to keep rolls tender and ready for the rising stage.
Kneading the Dough to Perfection
Once your wet and dry ingredients are combined into a sticky dough, the next step is kneading—a hands-on process that transforms the mixture into a smooth, elastic ball.
Use the heel of your hand to push the dough away, then fold it back toward you, turning it a quarter each time.
Push dough away with your hand’s heel, fold it back, and turn a quarter each time for even kneading.
Shape your hand like a claw to scoop under and fold the dough, turning the surface 90 degrees between folds. Specialized kitchen tools can help maintain consistent dough handling if desired.
Keep a gentle but firm pressure and use your forearm to prevent fatigue.
Knead for about 8 to 10 minutes until the dough feels smooth, elastic, and springs back when pressed. Proper kneading results in softer, fluffier bread with better structure and rise.
Lightly flour your surface to avoid sticking, oil your hands if needed, and maintain a steady rhythm to develop gluten evenly without tearing the dough.
The Rising Process Explained
To get your yeast rolls just right, you’ll need to activate the yeast in warm water between 100°F and 110°F to kickstart fermentation effectively. This temperature range ensures the yeast becomes active without being damaged, which is crucial for the dough’s rise.
Then, let your dough rise in a warm, covered bowl until it roughly doubles in size, usually between 45 minutes and 2 hours depending on your yeast type. Monitoring this rising process carefully guarantees your rolls develop the perfect texture and flavor before baking. Using reusable bowl covers during the rising process can help maintain a consistent temperature and moisture level, enhancing dough quality.
Yeast Activation Timing
When you activate yeast for O’Charley’s yeast rolls, timing plays a crucial role in ensuring your dough rises perfectly. Yeast, a living organism, feeds on sugar and warm water to start fermentation, producing the carbon dioxide needed for that fluffy texture.
You’ll want to proof active dry yeast by mixing it with water between 100°F and 110°F plus a bit of sugar. Within 5 to 15 minutes, bubbles or foam should appear, signaling the yeast is alive and ready. This proofing step is essential because yeast activates in warm liquids, which kickstarts the fermentation process. Using the right temperature range is important, as too hot or too cold water can affect yeast viability and dough rising.
- Feel the anticipation as foam signals your dough’s potential.
- Enjoy the satisfaction of a perfectly risen, soft roll.
- Avoid disappointment by confirming your yeast’s activity early.
Optimal Dough Rising
After confirming your yeast is active and bubbly, the next step is guiding your dough through its rising phase, where the magic of fermentation truly unfolds.
Aim to keep your dough in a warm, stable environment between 75°F and 78°F to promote ideal yeast activity and flavor development. Avoid temperatures below 70°F, which slow rising, and above 90°F, which can kill yeast or cause off-flavors. Dry yeast is commonly used because of its convenience and longer shelf life compared to fresh yeast.
Cover your dough with a damp cloth or plastic wrap to maintain surface moisture, preventing crust formation that hinders expansion.
Typically, the first rise takes 1 to 3 hours, depending on dough richness and temperature, until it doubles in size.
Ensure your dough rests undisturbed in a draft-free spot, allowing yeast to metabolize sugars, produce carbon dioxide, and create that perfect, airy texture.
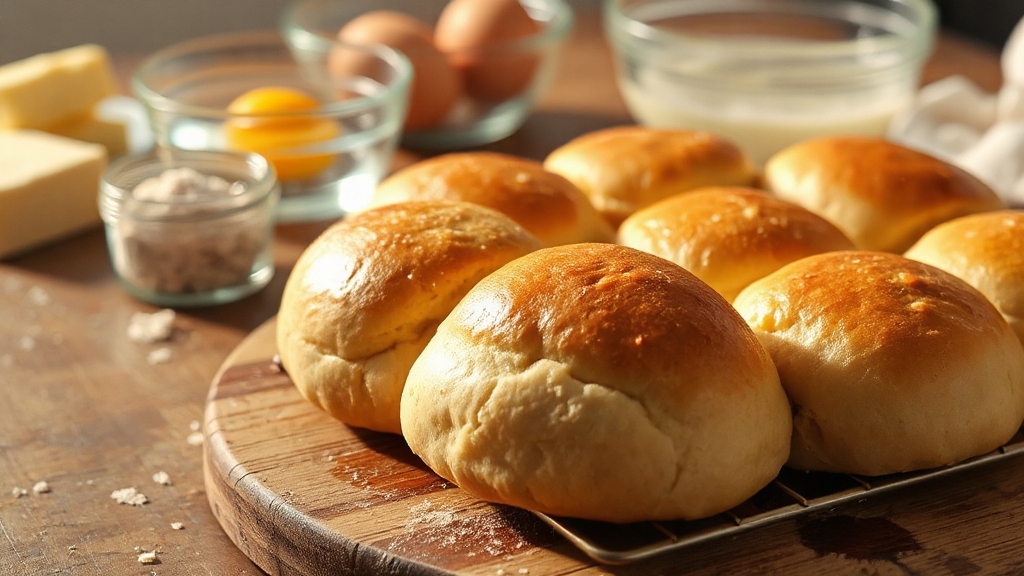
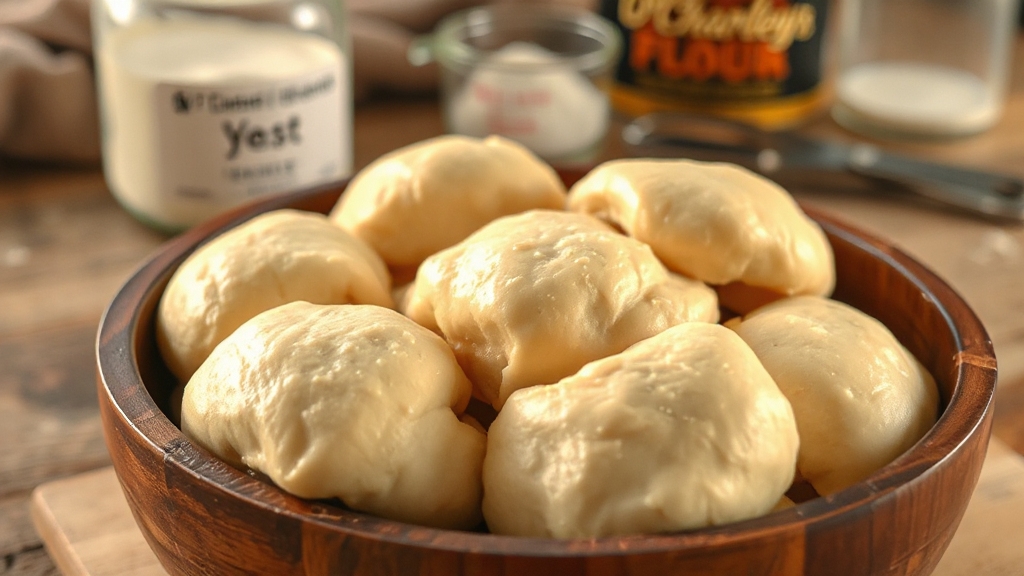
Shaping and Preparing Rolls for Baking
Although shaping and preparing rolls might seem straightforward, mastering these steps is essential for achieving uniform texture and an appealing appearance. Start by portioning your dough evenly using a kitchen scale or dough cutter to ensure consistent size and baking. Using a bread slicer with adjustable thickness can also help maintain uniformity when cutting dough portions.
Divide the total dough weight by 12 to get approximately 2-ounce rolls, then cut the dough into 12 equal pieces using a dough scraper for best results. Roll each piece gently into a tight ball on a lightly floured surface, cupping your hand and rolling in circular motions. Pinch the seams underneath to seal the roll and prevent cracking during proofing.
Place rolls on a parchment-lined sheet, spacing them to allow expansion, and cover during final proofing to keep surfaces moist. Using a non-slip surface or tray underneath can help keep the rolls stable during handling and proofing.
- Feel the satisfaction of smooth, crack-free rolls ready for the oven
- Enjoy the beauty of uniform, golden-brown tops every time
- Delight in the anticipation of soft, perfectly risen rolls at your table
Baking Tips for Soft, Fluffy Rolls
To achieve soft, fluffy yeast rolls, you’ll want to focus on precise dough hydration and ingredient balance that promote tenderness without stickiness. Aim for a 60-65% water-to-flour ratio and enrich your dough with whole milk or buttermilk, moderate sugar, and butter.
Using a kitchen scale ensures the most accurate ingredient measurement, which helps maintain consistency in your rolls. Selecting a mixer with sufficient motor power can help achieve thorough gluten development during kneading.
Knead thoroughly to develop gluten, trapping air for an airy crumb. Proof your dough in a warm, humid environment until it doubles, typically about 1-2 hours depending on yeast type.
Bake at 375°F, positioning the rack centrally for even heat, and watch for a golden brown crust without over-baking to maintain softness. Light egg washes enhance color and tenderness, while promptly wrapping cooled rolls preserves moisture, ensuring that fluffy texture you’re aiming for with every bite.
Adding the Signature Butter Glaze
You’ll start by melting unsalted butter, sometimes adding a pinch of sugar or salt to balance the flavor perfectly.
As soon as your rolls come out of the oven, brush the warm glaze generously to lock in moisture and create that signature soft crust.
This technique not only gives your rolls a shiny, irresistible surface but also infuses them with the rich, buttery taste O’Charley’s is known for.
Many recipes emphasize brushing the baked rolls with melted butter after baking to enhance both flavor and appearance, ensuring a fluffy, flavorful finish.
Butter Glaze Ingredients
When you brush the warm yeast rolls with a signature butter glaze, you instantly elevate their flavor and texture. The glaze’s base is melted butter, which adds rich moisture and a glossy finish.
You’ll blend in a touch of sugar or honey for that subtle, sweet note that defines O’Charley’s rolls. A pinch of salt balances the sweetness and enhances depth, while warm milk can smooth the glaze for easy spreading.
Sometimes, mild vanilla or almond extract adds a delicate aroma, making each bite more memorable. The glaze is best applied immediately after baking, while the rolls are still warm, to ensure the butter absorbs deeply for maximum flavor and softness immediately after baking.
- The comforting richness of melted butter envelops every roll
- The gentle sweetness sparks nostalgic warmth
- The subtle salt and extract notes deepen the flavor experience
Applying Glaze Techniques
Although glazing might seem straightforward, applying the signature butter glaze at the right moment and with the proper technique makes all the difference in achieving that iconic O’Charley’s yeast roll finish.
You’ll want to brush the glaze immediately after removing the rolls from the oven, while they’re still warm—around 190°F internal temperature—to guarantee ideal absorption and softness. This timing also helps to avoid sealing the crust too early, which can prevent the glaze from fully enhancing the roll’s appearance.
Using a soft pastry brush with synthetic bristles, similar to tools recommended for delicate cake decorating, ensures even application.
Use a soft pastry brush with synthetic bristles to evenly coat the top without pooling. The glaze should be melted butter, slightly warm and thin enough to spread smoothly but not watery.
Apply gentle, complete strokes over each roll’s surface, avoiding thick layers that soak in or drip off. This technique seals in moisture, adds a glossy sheen, and enhances both texture and presentation.
Glaze Flavor Impact
How does the signature butter glaze transform the flavor of O’Charley’s yeast rolls? It enriches every bite with a creamy, buttery depth that highlights the dough’s inherent richness.
The glaze adds a subtle sweetness, perfectly balancing the yeast’s mild tanginess while creating a luscious mouthfeel. This finishing touch is a hallmark of the homemade versions that closely mimic the restaurant quality. Using a non-stick surface when baking can help achieve an evenly glazed, golden crust.
Beyond flavor, it enhances aroma with a warm, nutty scent that invites you to savor the moment. Visually, the glaze gives the rolls a golden, glossy finish that signals freshness and indulgence.
When you add the signature butter glaze, you:
- Experience a comforting aroma that stirs appetite and warmth.
- Taste a perfectly balanced sweetness and buttery richness.
- See an inviting, shiny surface that makes every roll irresistible.
Frequently Asked Questions
Can I Substitute Milk With Non-Dairy Alternatives in the Recipe?
Yes, you can substitute milk with non-dairy alternatives when making yeast rolls. Just use warm plant milk, like soy or oat, which have protein and sugar levels closer to dairy.
If you pick thinner options like almond or rice milk, add a bit more fat and watch dough consistency, adding flour if needed.
Adjust sugar slightly if your non-dairy milk is unsweetened to help yeast activate properly.
This keeps texture and rise on point.
How Long Do O’charley’s Yeast Rolls Stay Fresh After Baking?
You’d think freshly baked yeast rolls could stay perfect forever, right? Well, in reality, they stay fresh about 5 to 7 days at room temperature if you store them properly in airtight containers.
In warmer, humid spots, it’s smarter to freeze them to avoid spoilage.
Refrigeration can stretch freshness up to a week but might change texture.
Always cool rolls fully before freezing to lock in that soft, delicious quality.
What Is the Best Way to Store Leftover Yeast Rolls?
To keep your leftover yeast rolls fresh, first let them cool completely on a rack to avoid sogginess.
Store them at room temperature in an airtight container or sealed plastic bag for up to two days—avoid the fridge, which dries them out.
For longer storage, wrap cooled rolls tightly and freeze them.
When ready, thaw at room temperature and warm in the oven or microwave for a soft, fresh taste.
Can I Freeze the Dough Before Baking the Rolls?
Yes, you can freeze yeast roll dough before baking, but keep in mind freezing slows yeast activity and weakens gluten.
Shape your rolls, freeze them airtight for up to two weeks, then thaw and let them rise 4-5 hours before baking.
Adding a bit more yeast compensates for yeast loss during freezing.
Patience during thawing helps your rolls rise better, though frozen dough might yield slightly denser rolls compared to fresh dough.
Are There Any Gluten-Free Versions of This Yeast Roll Recipe?
Imagine chasing the perfect airy roll without gluten’s magic thread—it’s a bit like painting with invisible colors. You won’t find an official gluten-free version of this yeast roll, but you can create one.
Swap wheat flour with gluten-free blends, add xanthan gum for elasticity, and tweak liquids and rising times. It takes patience, but with careful handling, you can bake soft, delightful rolls that echo the original’s warm, fluffy charm.
Warm Embrace in Every Bite—O’Charley’s Rolls at Home
As you pull these golden yeast rolls from the oven, think of them as little clouds of comfort—each bite a warm embrace from O’Charley’s kitchen. The soft crumb and buttery glaze symbolize the care and patience you’ve poured into every step, turning simple ingredients into a delightful experience.
Remember, just like these rolls, the best things in life need time, attention, and a touch of love to truly rise and shine.