No Discard Sourdough Starter Recipe: Zero Waste Baking
You’ll build a no-discard sourdough starter with just whole wheat or rye, filtered room-temperature water, a clean glass jar, and a scale.
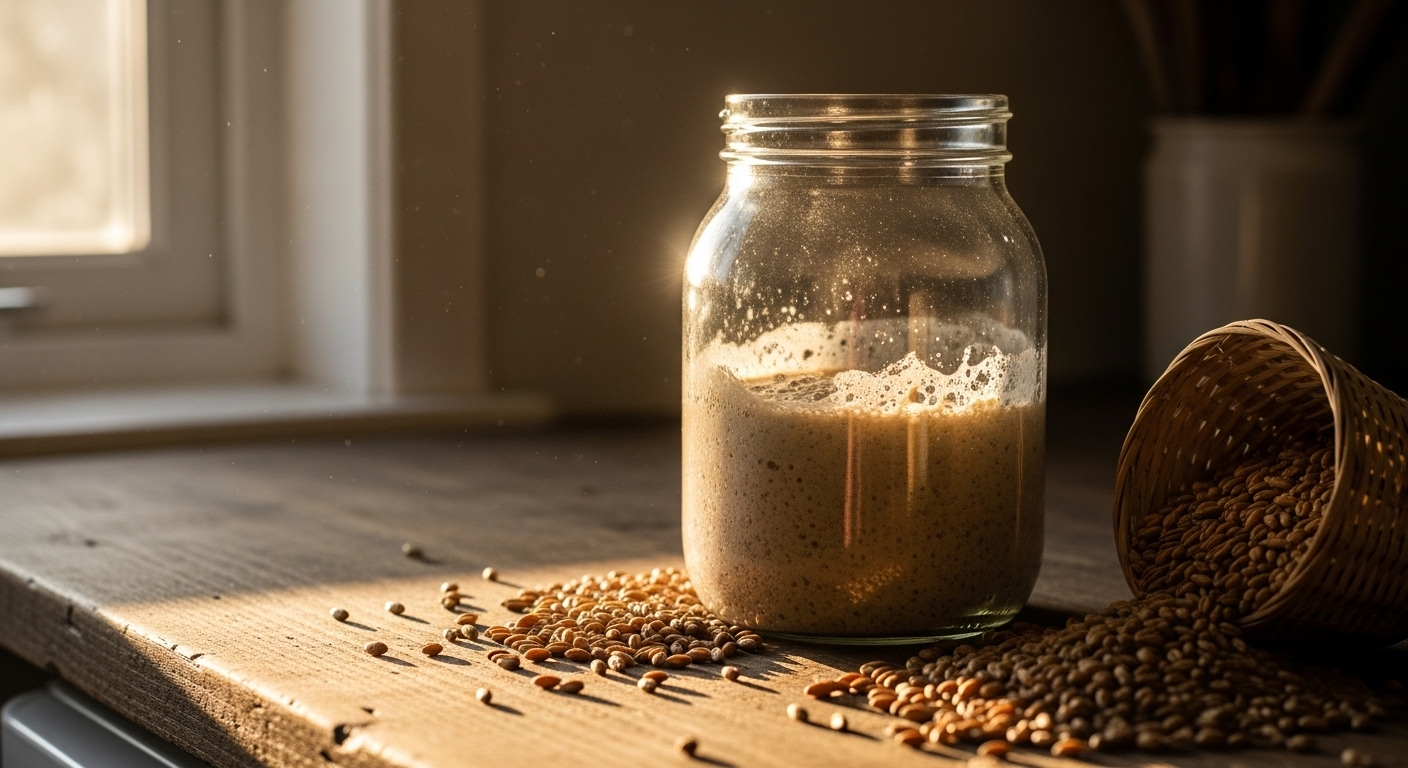
Weigh 25 g whole grain and 25 g water, stir to aerate, loosely cover, and mark the level; expect faint tang and small bubbles in 24 hours.
Keep about 20–25 g starter, feed 1:2:2 (20 g:40 g:40 g) at 100% hydration.
Refrigerate when idle and follow routine cues for vigor—keep going to learn practical schedules, troubleshooting, and storage.
Key Takeaways
- Start with 25 g whole wheat or rye and 25 g filtered water in a clean glass jar; stir and loosely cover.
- Keep about 20–25 g starter and feed using a 1:2:2 or 1:1:1 ratio (starter:water:flour) as needed.
- For a standard no-discard feed, use 20 g starter, 40 g flour, and 40 g water, stirred aerily.
- Store starter in the fridge when idle; feed every five days in cool storage or every 12–24 hours at room temperature.
- If starter smells alcoholic or shows thin hooch, remove hooch, reduce hydration slightly, and increase feeding frequency.
Step-by-Step No Discard Sourdough Starter Recipe
| Stage | Ingredients & Ratios | Action Steps | Key Sensory Cues |
|---|---|---|---|
| Day 1 – Mix | 25 g whole wheat or rye flour, 25 g water | Stir until smooth, loosely cover, and mark jar level | Faint tang, tiny bubbles in 24 hrs |
| Daily Feeding | Keep 20–25 g starter, feed 1:2:2 (20:40:40) | Mix well, cover, and leave at room temp or refrigerate | Bright tangy scent, domed rise, bubbles |
| Slow Feeding (Fridge) | Keep small, stiff starter (45–65% hydration) | Feed once, rest 1 hr, then refrigerate; refresh every 1–3 weeks | Dense texture, faint lactic tang |
| Troubleshooting | Fresh flour, filtered water, reduce hydration | Remove hooch, feed more often, increase warmth | Stronger bubbles, balanced aroma |
| Using in Baking | Starter + flour + water (ratios by recipe) | Mix into dough directly; allow 12+ hr bulk ferment | Bouncy, aromatic, well-risen dough |
What You’ll Need to Get Started?

Looking for a reliable place to begin? You’ll need only flour and water to start: choose fresh whole wheat or rye for a brisk, nutty aroma and faster fermentation. Use filtered, room-temperature water so the starter’s delicate tang isn’t suppressed by chlorine.
Measure by weight with a digital kitchen scale—precision matters; avoid cups. Select a clear, food-safe glass jar (750 ml–1 L) with a wide mouth so you can stir and watch the rise. Don’t use metal containers; a metal spoon is fine briefly.
Keep a long flexible spatula or spoon to mix and scrape, and mark the jar with an elastic band to record growth. Loosely cover the jar to allow airflow while keeping dust out.
A starter is essentially a live culture of wild yeast and bacteria that converts flour sugars into gases and acids. Maintaining regular feedings helps keep the starter balanced and prevents overly sour fermentation.
Mixing Your First Batch
How will you know when the mix is right?
You’ll see a smooth, homogenous batter—no dry streaks, no flour islands—glossy with hydration.
Weigh 25 g each of whole wheat (or rye) and filtered, room-temperature water into a clean glass jar.
Stir with a fork, scraping sides with a spatula, folding air in gently; you want incorporation without foam.
Loosely cover to admit breath but keep dust out, and mark the level with a rubber band.
Place the jar in a warm, draft-free spot out of direct sun.
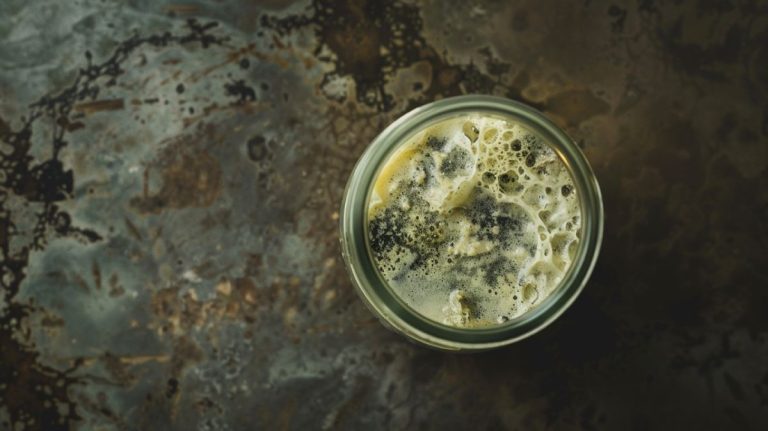
Smell for a faint, tangy scent and watch for tiny bubbles forming over 24 hours.
These tactile and olfactory cues tell you the starter’s off to a steady, traditional beginning, and after feeding it will typically double in size when ripe.
A little patience at this stage helps the wild yeast and bacteria establish balanced activity in your jar.
Daily No-Discard Feeding Schedule
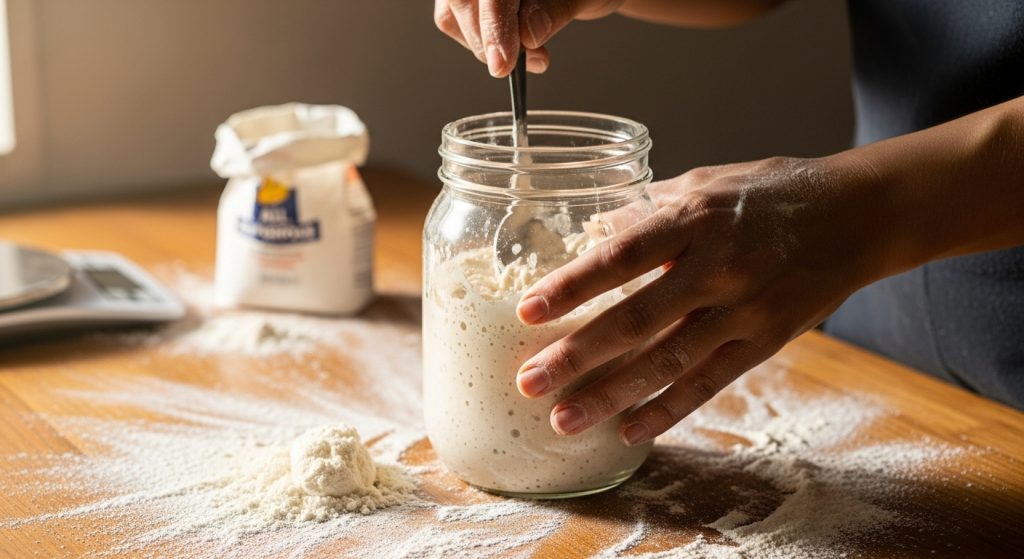
When will you feed your no-discard starter? You’ll tune feeding to temperature. Cooler storage lets you feed every five days, while room temperature needs feeding every 12–24 hours. If you refrigerate, revive your starter 8–12 hours before occasional bakes.
Feel the starter’s scent—bright and tangy. Watch for bubbles to swell and a domed rise. The Sourdough Home can help by keeping fermentation steady at chosen temperatures, acting as an incubator to stabilize fermentation. It can also create an ideal fermentation environment for predictable rises and timing.
Smell for bright, tangy notes; watch bubbles swell and the starter dome proudly before baking.
- Use a 1:3:3 ratio (starter:water:flour) for steady quantity and activity.
- Use a 1:1:1 ratio to maintain strength with less volume.
- Use higher ratios, like 1:2:2 or 1:6:6, to slow ripening and increase yield.
Mix until smooth, keep the jar sealed, and schedule feeds so the starter peaks just before you plan to bake. Adjust amounts to suit your weekly needs.
Troubleshooting Slow or Inactive Starters
Is your starter sluggish, barely bubbling, or topped with a thin layer of hooch?
Inspect its texture, smell, and bubbles. A thin, clear hooch or sharp off-odors indicate hunger or imbalance. To address this, reduce hydration slightly; a firmer paste typically produces stronger bubbles.
Also, remove excess hooch before feeding. Consider increasing feeding frequency to twice daily, using a smaller seed portion to refresh the microbes more quickly.
Switch to a robust, fresh flour and use filtered water to avoid chlorine’s dulling effect. Keeping the jar clean, maintaining warmer ambient temperatures, and monitoring feeding ratios to prevent an overly thin mix are also important. Using an unbleached parchment paper can help maintain a cleaner workspace when working with sticky starters.
If you notice mold or putrid smells, it’s best to discard the starter. For starters that are weak but salvageable, allow them to rest at room temperature after feedings.
You can expect steady, sensory improvements within a few days. Make sure to watch for the starter’s rise and fall to identify its peak activity.
Storing and Refreshing in the Refrigerator
Preservation is straightforward: feed a small, stiff jar of starter, let it sit at room temperature for about an hour to kick off activity, then seal it and slide it into the refrigerator.
Feed a small, stiff starter, rest an hour at room temperature, then seal and refrigerate for preservation.
The cool, slow fermentation will keep it stable for up to a few weeks. You’ll feel the weight of the glass, smell faint lactic tang, and notice a dense, tacky texture that resists spreading.
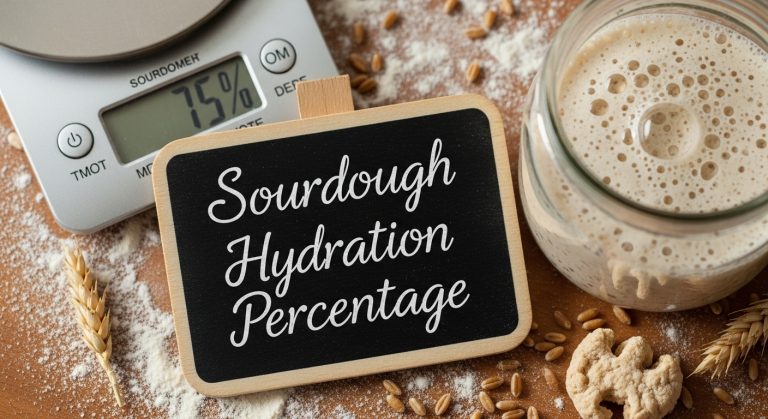
Use an airtight jar to prevent crusting and contamination. Prefer a 45–65% hydration for firmness and gentler acid. A kitchen scale with 1 gram precision helps you measure hydration accurately.
- Feed small (≈1 tablespoon) and stiff for longevity.
- Refrigerate up to 2–3 weeks; refresh every 1–3 weeks if idle.
- Discard any mold or rotten smells; safety first.
When refreshing, bring the jar to room temperature, feed, and wait until active. If you plan to store it longer than three weeks consider dehydration as a more reliable method for long-term preservation.
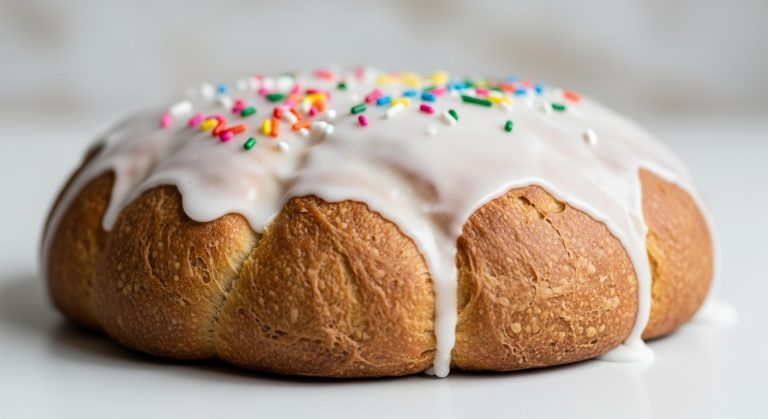
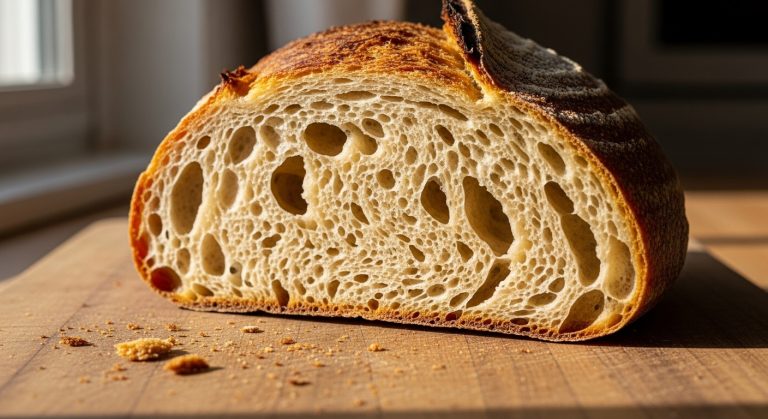
Using Your Starter in Baking
Pull a chilled jar from the fridge and you’ll notice its dense, slightly tacky texture and faint lactic tang—perfectly usable straight into dough. If you store about a tablespoon of starter in the fridge and feed only what you need for a recipe, the no-discard method lets you maintain a usable starter with practically zero waste no-discard.
Just expect to give the mix much more time to wake and ferment since the yeast and bacteria need to activate inside the dough rather than in a pre-feed. A well-chosen vessel like a heavy cast iron Dutch oven will help maintain even oven temperatures for better crust development during baking.
You’ll mix cold starter, water, and flour, then patience becomes your main ingredient. Bulk ferment often runs 12+ hours depending on temperature.
Adjust hydration subtly for feel, watch volume and scent rather than clocks, and build leaven from scraps when you need more lift.
| Stage | Sensory Cue | Action |
|---|---|---|
| Mix | Smooth, slightly tacky | Rest 30–60 min |
| Bulk | Gentle doming | Extend to 12+ h |
| Proof | Bouncy, aromatic | Bake immediately |
| Build leaven | Tangy scraps | Mix for dough |
Tips for Consistent, Waste-Free Maintenance
How do you keep a lively starter without creating waste? You’ll preserve a small, fragrant culture by measuring precisely and responding to baking needs. Keep about 20–25 g of starter, feed with equal-weight flour and water, and scale feeds to recipes so you never overproduce.
Refrigerate when idle. Pull it out the night before baking, feed, and let it double.
- Use 20g starter, 40g flour, and 40g water. Stir for an airy texture and return leftovers to the fridge.
- Feed with filtered 27°C water and mix an all-purpose/rye blend for depth and vigor.
- Bake with the taken portion as “discard,” or stir it back into the routine within two weeks.
Watch for rising, smell, and jar clarity to stay consistent. For routine maintenance, follow a daily or weekly schedule depending on storage and aim to keep feeds at 100% hydration. A stand mixer with a powerful motor can help when scaling up or handling very stiff doughs.
Frequently Asked Questions
Can I Use Gluten-Free Flours for a No-Discard Starter?
Yes, you can, but it’s trickier than with wheat. Imagine tending a delicate garden of herbs instead of oaks: you’ll nurse smaller, thirstier plants.
You’ll use nutrient-rich flours like buckwheat or teff, filtered water, warm steady temps, and precise weighings. Expect slower, less bubbly action, monitor smell and volume, and feed more often. If needed, blend flours or add a tiny commercial yeast boost to keep the culture lively.
How Long Before I Can Share Starter With Friends?
You can share your starter after about 5 to 7 days, once it’s reliably bubbly, doubles within 6–12 hours of feeding, and smells pleasantly tangy.
Trust your senses: look for elastic texture and even bubbles, avoid any off odors or mold, and wait at least one feeding after refrigeration. Portion about a tablespoon (25 g) into a clean jar, label it, and tell your friend to feed and monitor it the same way.
Will Yeast Supplements Speed up Starter Activity?
Supplements can speed up starter activity, though they’re not magic. You’ll notice livelier bubbling and a sweeter, tangier aroma as yeast metabolizes added B vitamins and minerals.
Feel the dough spring more quickly and sense warmer fermentation notes, but be meticulous: too much tips the delicate bacterial-yeast balance, producing off-flavors.
Keep temperatures steady, measure supplements sparingly, and observe texture and smell to maintain a traditional, reliable starter.
Can I Switch Feeding Schedule Between Mornings and Evenings?
Yes — you can switch feedings between mornings and evenings if you keep intervals consistent and let the starter ripen before the next feed.
Gradually shift times over days, watch rise, aroma and bubbling, and keep your flour:water ratios steady.
In cooler rooms lengthen intervals; in warmth shorten them.
Mark the starter’s peak so your schedule matches its activity, and adjust feeding amounts if you move from twice- to once-daily.
Is It Safe to Feed Starter With Milk or Fruit Juice?
Want a stable, reliably tangy starter? No — you shouldn’t regularly feed it milk or fruit juice. You’ll upset the delicate flour-water balance, invite unpredictable acids and sugars, and risk rancidity or off smells.
Stick to water for clean gluten development and steady microbial activity. If you’ve tried milk or juice, switch back slowly, discard appropriately, and watch for consistent rise, aroma, and texture before baking again.
Keeping Your No Discard Starter Strong and Happy
You’ve built a living, fragrant starter that hums with tangy promise; treat it like a small, noble pet and it’ll repay you with endless crusty loaves.
Keep routine feedings, notice the warm, yeasty scent and bubbly texture, and never toss — you’re honoring a centuries-old craft with modern thrift.
With patience and gentle attention, your kitchen will always smell of golden mornings, and your pantry will hold a tiny miracle that never goes to waste.