How to Make Sourdough Sandwich Bread: Easy Recipe
To make sourdough sandwich bread, start by mixing 500 g of all-purpose flour, 60 g of softened butter, 12 g of sugar, and 9 g of salt until crumbly. Add 50 g of active sourdough starter and warm water, mixing until the dough is sticky and elastic.
Let it rest for 30 minutes, then knead for 6-8 minutes until soft. Allow it to rise overnight until it doubles in size.
Preheat your oven to 375°F, score the loaf, and bake for 45-50 minutes until golden brown. You’ll experience the joy of creating your own delicious bread with just a few tips ahead.
Key Takeaways
- Combine 500 g all-purpose flour, 60 g softened butter, 12 g sugar, 9 g salt, and 50 g sourdough starter in a mixing bowl.
- Allow the dough to rest for 30 minutes during the autolyse phase to relax gluten before kneading.
- Let the dough rise at room temperature for 10-12 hours, ensuring it doubles in size for proper fermentation.
- Preheat the oven to 375°F (190°C) and score the dough before baking to facilitate expansion.
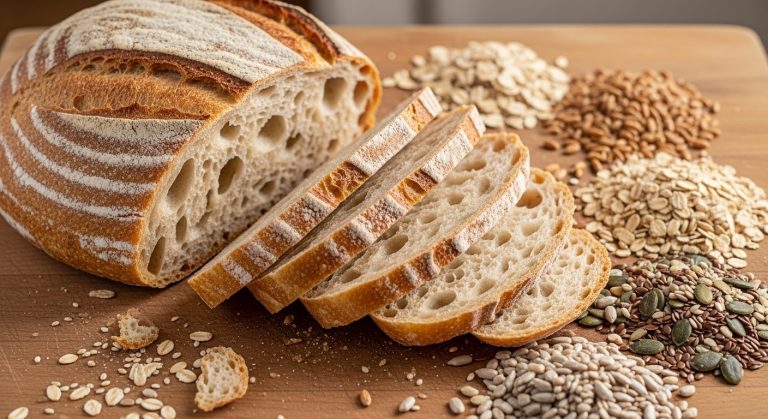
Ingredients and Equipment
To whip up delicious sourdough sandwich bread, you’ll need a few key ingredients and the right equipment to get started.
First, gather 500 g (4 cups) of all-purpose flour, which forms the backbone of your dough. You’ll also require 60 g (4 tbsp.) of softened unsalted butter to enrich the texture and 12 g (1 tbsp.) of sugar to support fermentation. Don’t forget 9 g of fine sea salt for flavor enhancement, along with 50 g (1/4 cup) of an active sourdough starter. Confirm your starter is bubbly and active; this is vital for a proper rise.
You can use a stand mixer for mixing and kneading or opt for hand kneading on a floured surface for 8-10 minutes. Make certain to have room-temperature water on hand, as it’s important for activating the yeast in your sourdough starter.
Finally, grab an 8.54-inch loaf pan for shaping and baking your bread, although a 9.5-inch pan will work too.
With these ingredients and equipment ready, you’re set for an exciting baking experience that will fill your kitchen with irresistible aromas!
Dough Preparation Techniques
Mastering dough preparation techniques is essential for achieving the perfect sourdough sandwich bread, so let’s plunge into the process step by step.
Begin by combining all-purpose flour, softened unsalted butter, sugar, and sea salt until the mixture feels crumbly—accurate measurements are key.
Next, add your active sourdough starter and warm water, mixing until the dough becomes slightly sticky and elastic; this is vital for proper gluten development.
Now, let the dough rest covered for 30 minutes—this autolyse phase relaxes the gluten, making it easier to work with later.
After the rest period, it’s time to knead the dough. Use a stand mixer with a dough hook for about 6-8 minutes, ensuring the dough becomes soft and supple. If it seems too sticky, adjust with a bit more flour.
Once kneaded, cover the dough and allow it to undergo a bulk rise overnight at room temperature for 10-12 hours. This long fermentation is essential, allowing the dough to double in size and develop those wonderful flavors and textures necessary for a soft sourdough sandwich.
Baking Process
How do you guarantee your sourdough sandwich bread bakes to perfection?
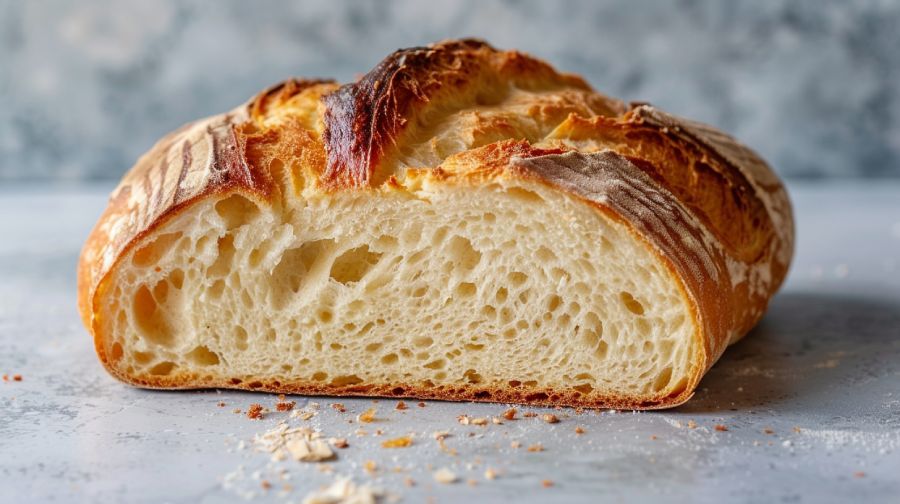
Start by preheating your oven to 375°F (190°C). Once your bread is ready, place the sourdough loaf in the pan and bake for 45-50 minutes. Keep an eye out for a golden brown crust and check the internal temperature, which should reach between 190°F to 205°F for ideal doneness.
To enhance the crust, score the top of the loaf before baking. This allows for proper rise and helps maintain its shape. If you prefer a softer crust, you can opt for a loaf pan, which keeps moisture in and yields a tender exterior.
After baking, let the bread cool in the pan for at least 10 minutes. This step is essential for maintaining the loaf’s structure. Once that time has passed, transfer your bread to a wire rack and allow it to cool completely for at least an hour.
This cooling time is crucial for perfect slicing. Enjoy your delicious sourdough sandwich bread, knowing you’ve mastered the baking process!
Tips and Variations
With your sourdough sandwich bread baked to perfection, it’s time to explore some tips and variations that can elevate your creation even further.
For a slightly sweeter flavor, consider adding honey or sugar to the dough. If you opt for 1/4 cup of honey, be sure to adjust the flour to maintain proper hydration. You can also experiment with flour varieties; replacing up to 20% of all-purpose flour with whole wheat flour will add nutrition and a delightful flavor without compromising texture.
To create a unique twist, try incorporating spices like cinnamon or mix-ins such as raisins for a delicious sourdough cinnamon-raisin variation. If you’re looking for a vegan option, simply substitute the unsalted butter with coconut oil or a plant-based butter alternative to achieve a similar consistency.
Don’t forget to enhance the crust‘s appearance and flavor! Apply an egg wash before baking or sprinkle toppings like sesame seeds or Everything Bagel seasoning to make your loaf truly stand out.
Each of these tips will help you craft a sourdough sandwich bread that’s not only delicious but also uniquely yours.
Common Issues and Solutions
When baking sourdough sandwich bread, you might encounter a few common issues that can affect your results.
It’s essential to recognize signs of dense loaves, over-proofing, and crust cracking to guarantee your bread turns out perfectly every time.
Let’s tackle these challenges head-on with practical solutions that will elevate your baking skills.
Dense Loaf Troubleshooting
Identifying the root causes of a dense sourdough loaf is essential for perfecting your bread-making skills and achieving that light, airy texture you desire. One common issue is under-proofing. Make sure your dough rises sufficiently during the first rise, ideally doubling in size.
If your sourdough starter is inactive or poorly maintained, it can lead to insufficient fermentation. Always use a bubbly starter that’s been fed within 8-12 hours before you bake.
Another factor is the texture of your dough. If you find it too sticky, avoid adding excess flour, which can dry it out. Measure ingredients accurately and adjust flour gradually.
Over-kneading can also break down gluten structure, resulting in a dense texture. Knead your dough just until it’s smooth and elastic, usually around 6-8 minutes in a stand mixer.
Over proofing and Underproofing Effects
Understanding the effects of overproofing and underproofing is essential for achieving a perfectly risen sourdough sandwich bread that boasts a light and airy texture. Here’s what you need to know:
Overproofing: This occurs when your dough rises too long, resulting in a dense loaf. The gluten weakens, and the loaf may collapse during baking.
Signs of Overproofing: Look for overly sticky dough, a flat appearance, or a sour smell.
Underproofing: When your dough hasn’t risen enough, it can lead to a tight crumb and a loaf that lacks volume and oven spring.
Signs of Underproofing: Typically, underproofed dough feels stiff and doesn’t expand properly.
To prevent overproofing, closely monitor your dough’s volume and perform the poke test—if the indentation springs back slowly, it’s ready; if it doesn’t spring back at all, it’s likely overproofed.
For underproofed dough, allow it to rise longer in a warm environment. If your dough is over-proofed, reshaping and giving it a short second rise can help restore some structure before baking.
Keep these tips in mind for perfect sourdough!
Crust Cracking Solutions
To achieve a beautifully crusted sourdough sandwich bread without unsightly cracks, address common issues with hydration, proofing, and baking techniques.
First, verify your dough has the right moisture level. Adjust the water content based on humidity to prevent cracks in the crust. A high-hydration dough can benefit from a small amount of fat, like olive oil, which improves crust flexibility and reduces cracking.
Next, monitor your dough closely to avoid over-proofing or under-proofing. Keep an eye on the volume and rise time to verify it’s properly prepared before baking. This vigilance will help you achieve an even crumb and avoid unsightly fissures.
When you’re ready to bake, preheat your oven to the appropriate temperature. A very hot oven can cause rapid crust formation, leading to cracks. To combat this, use the steam method to create a moist environment during the initial bake.
Finally, don’t forget to score the loaf before placing it in the oven. This allows steam to escape and helps control crust expansion, further reducing the likelihood of cracks during baking.
Follow these steps, and you’ll enjoy perfect sourdough bread every time!
Benefits of Homemade Sourdough Bread
Homemade sourdough bread offers unparalleled control over ingredients, ensuring you enjoy a healthier loaf free from unnecessary additives and preservatives. By choosing to bake at home, you embrace a richer experience that benefits both your body and mind.
Here are four key benefits of homemade sourdough:
- Control Over Ingredients: You decide what goes into your bread, resulting in fewer additives and preservatives.
- Fermentation Process: The natural fermentation enhances digestibility and flavor, making it a healthier choice for many.
- Cost-Effective: Baking sourdough at home can save you money, often providing a higher-quality product than what you’d find in bakeries.
- Personalized Taste Experience: You can customize the flavor by adjusting the fermentation time, giving you a unique loaf every time.
Engaging in sourdough baking promotes mindfulness and creativity. Each loaf isn’t just bread; it’s a reflection of your effort and intention.
Frequently Asked Questions
Is Sourdough Bread Good for Sandwiches?
Sourdough bread’s tangy flavor and chewy texture elevate your sandwiches, making each bite a delight. Its sturdy crust and natural fermentation also enhance digestibility, ensuring your meal’s not just tasty but healthier too.
What Is the Difference Between Sourdough Bread and Sourdough Sandwich Bread?
Imagine the difference between a cozy cottage and a sleek modern home. Sourdough bread boasts a rustic crust and chewy crumb, while sourdough sandwich bread offers a soft, tender texture, perfect for everyday sandwiches.
How Do You Roll Sourdough for Sandwich Bread?
To roll your sourdough for sandwich bread, gently flatten the dough, then tightly roll it from one end, tucking the edges. This guarantees a smooth loaf, essential for achieving that perfect texture and rise.
How Do You Cut Sourdough for a Sandwich?
When you’re ready to cut your sourdough, use a serrated knife for clean slices. Confirm the bread’s fully cooled, and aim for 1/2 inch thickness to create perfect, sturdy slices for your sandwiches.
You’re In for a Treat: The Perfect Sourdough Sandwich Bread Awaits
Now that you’ve mastered the art of sourdough sandwich bread, you’re ready to savor the fruits of your labor.
With each slice, you’re not just enjoying a meal; you’re indulging in a piece of culinary craftsmanship. The crusty exterior and soft, tangy interior will elevate any sandwich to new heights.
So roll up your sleeves, embrace the process, and let your kitchen become a haven for delicious, homemade joy. Your taste buds will thank you.