How to Make Sourdough Bread Bowls: Bake, Score and Fill
Mix unbleached all-purpose flour, active sourdough starter, sea salt, and warm water to make sourdough bread bowls. Let the dough rest for 30 minutes, then stretch and fold it to develop gluten.
Shape the dough into tight balls and refrigerate for 12-15 hours for enhanced flavor. Preheat your oven to 500°F, creating steam for a crispy crust.
Score the tops and bake roughly 35 minutes, adjusting the temperature to finish. Once cooled, hollow out the centers to fill them with your favorite soups or dips. There’s plenty more to explore about perfecting this process.
Key Takeaways
- Use unbleached all-purpose flour, active sourdough starter, sea salt, and water for the dough base.
- Allow the shaped dough to cold ferment in the refrigerator for 12-15 hours for enhanced flavor.
- Preheat the oven to 500°F, creating steam by placing a pan with rolled towels on the bottom rack.
- Score the tops of the dough before baking to control expansion and prevent blowouts.
Essential Ingredients and Tools
To create delicious sourdough bread bowls, you’ll need a few essential ingredients and tools that make the process both simple and rewarding.
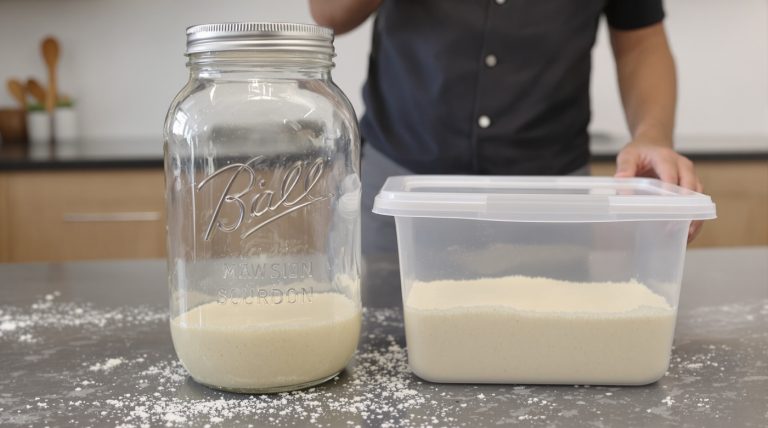
First, gather unbleached all-purpose flour, as it provides the perfect base for your dough. You’ll also need an active sourdough starter, which should be fed 4-12 hours before you start to guarantee it’s bubbly and doubled in size. Don’t forget sea salt to enhance the flavor and water to bring it all together.
For the best results, invest in a kitchen scale to measure your ingredients accurately, especially the flour, which is vital for achieving the right dough consistency.
Once your dough is mixed, you’ll need a warm spot for proofing; small bowls lined with tea towels are ideal for maintaining the dough’s structure while it rises.
When it’s time to bake, prepare your baking sheets with parchment paper. This prevents sticking and makes transferring the dough easier.
Equip yourself with these ingredients and tools, and you’ll be well on your way to making scrumptious sourdough bread bowls that are sure to impress!
Preparation and Shaping
Creating the perfect sourdough bread bowls starts with a well-prepared dough that balances hydration and gluten development for a light, airy texture.
Begin by mixing warm water, active sourdough starter, unbleached all-purpose flour, and salt in a large bowl. Use your hands to combine the ingredients for about five minutes until they’re well incorporated. After mixing, let the dough rest for 30 minutes, covered, allowing the flour to hydrate fully.
Next, perform six rounds of stretch and fold to develop the gluten structure, which is essential for your bread bowl’s shape. Once the dough is ready, divide it into eight equal portions, each weighing about 240g, and shape them into tight balls. This helps maintain their form during proofing and baking.
For proofing, place the shaped dough in floured bowls or containers and refrigerate them for 12-15 hours. This cold fermentation enhances flavor and texture.
Baking Process
The baking process is essential for transforming your carefully shaped sourdough dough into golden, crusty bread bowls that are both visually appealing and delicious.
Start by preheating your oven to 500°F. This high temperature is critical for developing that perfect crust. After 15 minutes, reduce the temperature to 425°F to guarantee a thorough bake without burning.
To create steam in the oven, place a pan filled with rolled towels or pie weights on the bottom rack before baking. This steam helps achieve a crispy exterior.
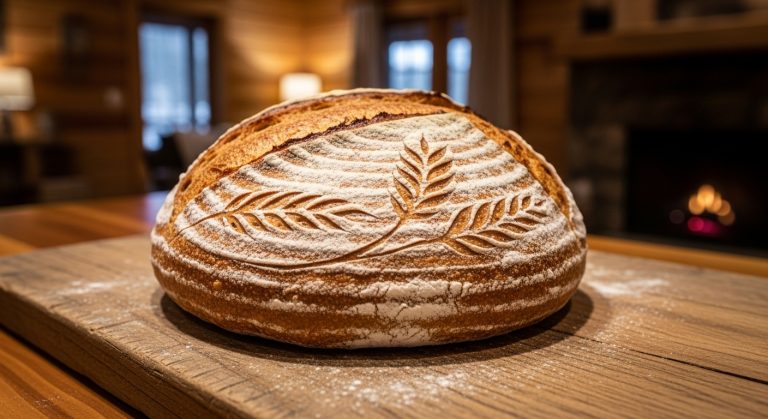
Before you slide your sourdough bread bowls into the oven, score the tops with a sharp knife; this controls expansion and adds an attractive pattern.
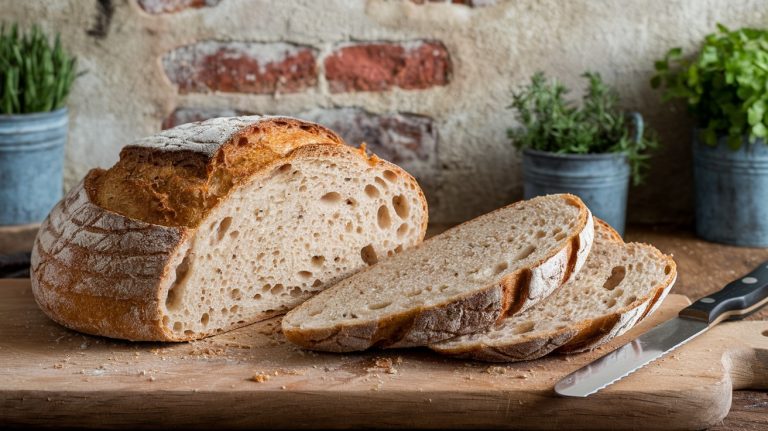
Bake the bread bowls for a total of approximately 35 minutes. The initial high temperature followed by a lower one produces a beautifully textured crust.
Once baked, it’s essential to let them cool completely. This cooling period allows the interior to set properly, preventing a gummy texture when you start hollowing them out.
Enjoy the delightful aroma as your bread bowls take shape, ready to hold your favorite soups or dips!
Common Issues and Success Tips
When making sourdough bread bowls, you might run into a few common challenges that can affect your results.
From handling the dough to managing proofing times, understanding these potential pitfalls can help you achieve that perfect texture and shape.
Let’s explore some practical tips to guarantee your bread bowls turn out delicious every time.
Common Baking Challenges
Baking sourdough bread bowls can present several challenges, but with a few key tips, you can navigate common issues and achieve delicious results.
One of the main baking challenges is over-fermentation. You want your dough to rise adequately—typically 50-75% during bulk fermentation—without becoming weak and unmanageable. Use accurate measurements to achieve the right dough consistency; a kitchen scale helps guarantee you don’t miscalculate ingredient quantities.
Another potential issue is blowouts during baking. This often happens due to excessive steam or over-proofing, so keep an eye on your dough and make certain to score it deeply. Proper spacing between your dough pieces on the baking sheet can help prevent misshaping and allow for even baking.
Once your sourdough bread bowls are out of the oven, resist the temptation to dig in right away. Allow them to cool completely before hollowing out the interiors. This vital step guarantees the crumb sets properly, so you won’t end up with gummy centers.
With these tips in mind, you’ll be well on your way to creating beautiful and delicious sourdough bread bowls!
Dough Handling Tips
Handling your dough with care can greatly enhance your sourdough bread bowls, ensuring they turn out light and airy rather than dense or gummy.
Start by making sure your sourdough starter is active and bubbly; this is essential for proper fermentation. During bulk fermentation, perform three sets of stretches and folds every 30 minutes. This technique strengthens the gluten structure without the need for traditional kneading, allowing your dough to develop beautifully.
As you approach shaping, use a well-floured surface—rice flour works wonders—to prevent sticking. Minimize handling to preserve those precious gas bubbles that contribute to a lighter crumb.
Pay close attention to your proofing times; each dough reacts differently based on ambient conditions. If you suspect your dough has over-proofed, don’t panic! Gently deflate it and reshape it, then let it rise again briefly to regain strength.
Proofing and Fermentation Issues
Achieving the perfect rise in your sourdough bread bowls hinges on understanding proofing and fermentation, as even slight miscalculations can lead to disappointing results. To help you navigate these processes, here are some common issues and success tips:
- Monitor the Dough Temperature: Warm environments speed up fermentation, risking over-proofing. Keep an eye on your dough rise, and if it’s rising too quickly, adjust the temperature.
- Aim for Double Size: Your dough should ideally double in size during bulk fermentation. If it doesn’t, you may need to tweak proofing times based on ambient conditions like humidity and temperature.
- Avoid Over-proofing: Over-proofing can cause structural issues, leading to a collapsed bread bowl. Make certain to shape and rest your dough properly to maintain gas and bubbles.
- Consider Cold Fermentation: Using cold fermentation for up to 48 hours can enhance flavor, but always verify your dough is adequately shaped before refrigerating.
Serving Suggestions and Pairings
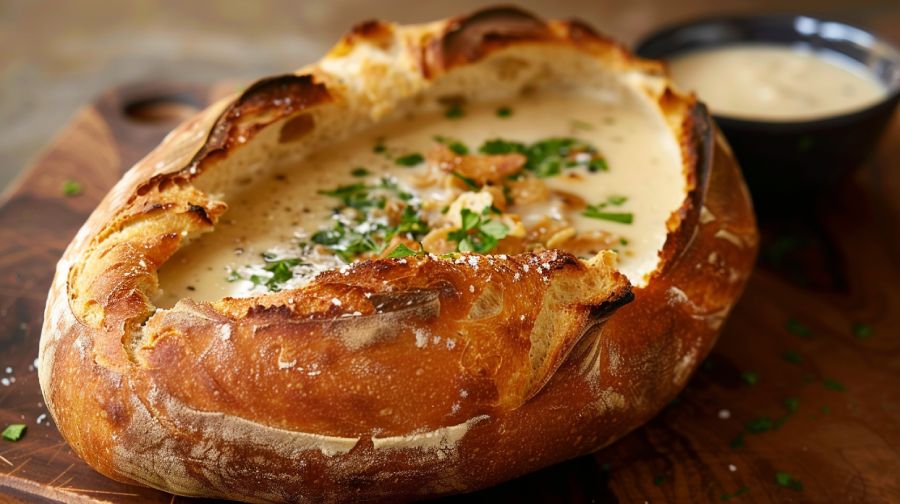
When it comes to serving suggestions, these delightful sourdough bread bowls shine with hearty soups like clam chowder or chili, making every bite a warm, comforting experience. Their sturdy structure holds up beautifully against thick liquids, ensuring you enjoy every drop of your creamy soup without any mess.
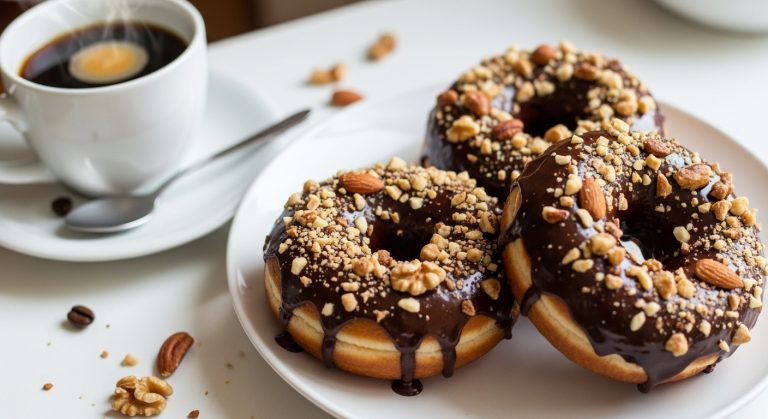
For a fun twist, try filling your bread bowls with creamy dips like spinach artichoke or buffalo chicken dip. These options are perfect for parties and gatherings, adding a touch of excitement to your spread. Pair your sourdough bread bowls with a fresh side salad to create a light, crunchy contrast against the warm, soft bread.
To elevate the flavor experience, top your filled bowls with shredded cheese, fresh herbs, or croutons. This not only enhances the taste but also adds visual appeal to your presentation.
And don’t forget about the leftover bread you scoop out! Use it for dipping into your soup or transforming it into a delicious bruschetta base, minimizing waste while maximizing enjoyment.
With these serving suggestions, your sourdough bread bowls will be a hit at any meal or gathering!
Frequently Asked Questions
What Kind of Bowl Is Best for Making Sourdough Bread?
For making sourdough bread, you’ll want a sturdy ceramic or glass bowl. These materials retain heat, ensuring even fermentation. A well-floured proofing container also prevents sticking, making your baking experience smoother and more enjoyable.
Do You Need a Special Bowl for Sourdough?
You don’t need a special bowl for sourdough. Any standard mixing bowl works perfectly for dough preparation. Just make certain you have something to proof your dough, like a small bowl or floured basket.
How to Cut a Sourdough Bread Bowl?
To cut a sourdough bread bowl, use a serrated knife to slice the top off in a circular motion. Hollow out the inside gently, ensuring you keep the sides sturdy for holding your soup.
How Do You Shape Sourdough in a Bowl?
To shape sourdough in a bowl, divide your dough into equal portions, form tight balls by tucking edges, then place them seam side down in a floured bowl to rise for ideal structure.
Elevate Every Meal: The Magic of Sourdough Bread Bowls
Whether serving up a hearty soup or a fresh salad, sourdough bread bowls elevate any meal.
Did you know that homemade sourdough can contain ten times more beneficial bacteria than store-bought bread? This means you’re not only enjoying a delicious dish but also nourishing your gut.
So roll up your sleeves, embrace the art of fermentation, and impress your friends and family with these delightful, edible bowls that are as good for your health as they are for your palate.