How to Make Chocolate Spoons With a Mould: Easy DIY Guide
Choose a flexible, food-grade silicone mold sized about 2.5 x 9.6 cm for easy release.
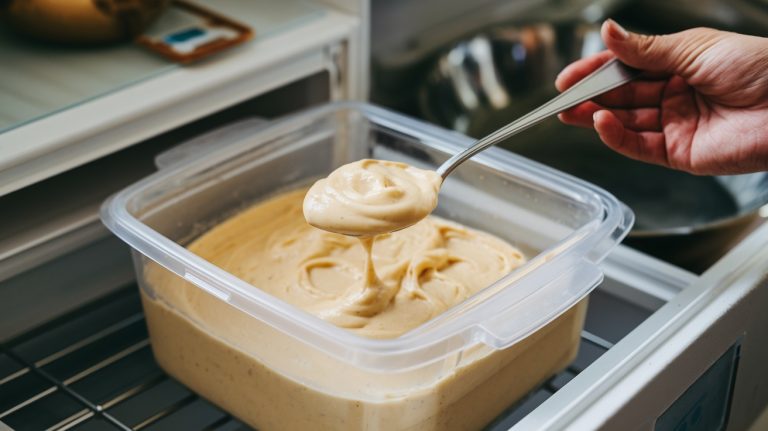
Temper quality couverture chocolate carefully, heating to 40–45°C, cooling to 27–29°C, then reheating slightly.
Pour the tempered chocolate steadily into the mold, tapping gently to release air bubbles and fill details.
Let the spoons set at room temperature or chill briefly, avoiding the freezer for shine.
Finish by decorating with edible glitter or sprinkles.
Learn how to elevate your chocolate spoons with expert tips and presentations.
Key Takeaways
- Select a flexible, food-grade silicone mold approximately 2.5 cm × 9.6 cm × 1.4 cm for easy demolding and detailed spoon shapes.
- Temper couverture chocolate by melting to 40–45°C, cooling to 27–29°C, then reheating to 31–32°C for glossy, firm spoons.
- Pour tempered chocolate into the mold slowly using a piping bag, tap gently to remove air bubbles, and remove excess for hollow spoons.
- Maintain mold and chocolate temperature between 79–85°F during pouring to ensure smooth filling and prevent bloom or dull finish.
- Allow spoons to set fully at cool room temperature or refrigerate briefly, then gently flex the mold to release perfect chocolate spoons.
Essential Chocolate Spoon Mould Recipe
| Component | Details | Purpose |
|---|---|---|
| Main Ingredient | 200-300g high-quality couverture chocolate (dark, milk, or white) | Provides smooth melting and glossy finish |
| Mold Type | Food-grade silicone mold (2.5 x 9.6 x 1.4 cm) | Ensures easy release and professional shape |
| Equipment | Double boiler or microwave-safe bowl, instant-read thermometer, spatula | Controls temperature for proper tempering |
| Tempering Range | Dark: 40-45°C (melt), 27-29°C (cool), 31-32°C (reheat) | Creates stable crystal structure and snap |
| Tempering Range | Milk/White: 38-40°C (melt), 26-27°C (cool), 29-30°C (reheat) | Prevents bloom and dullness |
| Setting Time | 1-2 hours at room temperature (65-75°F) or 30-60 minutes refrigerated | Develops firm texture and shine |
| Decorations | Edible glitter, sprinkles, crushed candy canes, mini marshmallows | Adds visual appeal and customization |
| Storage | Airtight container at 60-70°F, away from moisture | Preserves freshness for 2 weeks to 3 months |
| Yield | 6-12 chocolate spoons depending on mold size | Perfect for gifts or party favors |
Choosing the Right Mold for Chocolate Spoons
When you set out to make chocolate spoons, choosing the right mold plays a crucial role in achieving a smooth release and a professional finish.
Silicone molds, flexible and heat-resistant up to 446°F, offer easy demolding and dishwasher safety. They’re ideal for beginners and versatile shapes. Their non-stick, food-grade properties make them suitable for freezing and heating, enhancing custom shape possibilities. Additionally, silicone molds enable consistent results much like those found with artisan-quality baking tools.
Polycarbonate molds deliver a glossy, sharp-edged appearance with excellent durability. They’re favored by professionals for intricate designs, though they require careful tempering and cleaning.
PET plastic molds are lightweight and affordable but are less durable and prone to warping under heat.
Metal molds handle heat well but are rigid and less suited for spoon shapes due to difficult release.
Consider flexibility, temperature resistance, non-stick surfaces, and size—around 2.5cm by 9.6cm by 1.4cm—for best results in chocolate spoon crafting.
Preparing and Melting the Chocolate
When you’re ready to dive into chocolate making, the first step is to pick out some high-quality couverture chocolate. Trust me, it’s worth it! This type of chocolate melts smoothly and gives you that luxurious texture you want.
Now, when it comes to melting, you’ll want to do it gently. You can use a double boiler, which is a classic method, or if you prefer, just go for the microwave. Just make sure to use controlled intervals so you can keep the temperatures just right.
Double boilers are especially useful because their indirect heat transfer prevents scorching and keeps the chocolate smooth. Remember to never heat bittersweet or semisweet chocolate above 120°F and milk or white chocolate above 110°F to avoid burning.
Once your chocolate is melted and looking all nice and glossy, it’s time to temper it. This step is crucial! Tempering helps give your chocolate that beautiful shiny finish and that satisfying crisp snap when you break it. Your spoons will look and taste amazing!
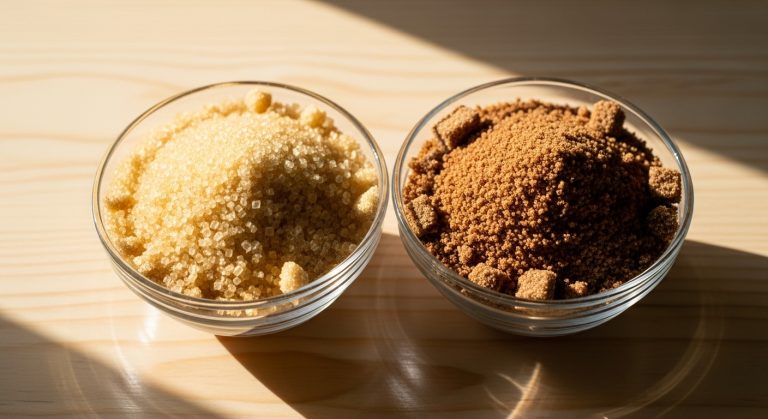
Choosing Chocolate Types
Selecting the right type of chocolate plays a pivotal role in crafting perfectly moulded chocolate spoons, as it directly affects melting behavior, texture, and final appearance.
You’ll want to take into account quality, cocoa content, and fat composition to achieve the ideal balance between smooth melting and firm setting. European-style chocolates with higher butterfat content often yield richer flavor and better texture in moulded confections.
Keep these points in mind when choosing chocolate:
Bittersweet and semi-sweet chocolates offer firmness and balanced sweetness, ideal for detailed moulds.
Milk chocolate provides a creamier flavor but softer texture, less suitable for intricate designs.
White chocolate lacks cocoa solids but relies on cocoa butter for smoothness and sweetness.
Compound chocolates melt easily but may result in waxier spoons lacking glossy finish. Compound chocolate is recommended for confections like lollipops and dipped treats, but pure chocolate is preferred for moulded items requiring a shiny finish.
Opt for high-quality brands with high cocoa butter content for the best results.
Melting Techniques
Although melting chocolate requires careful attention to temperature and technique, mastering this step guarantees smooth, glossy chocolate spoons with perfect texture.
You can use a double boiler by placing chopped chocolate in a heat-safe bowl over simmering water. Ensure the bowl doesn’t touch the water and stir occasionally to avoid burning. This method has a very low scorching potential, making it effective and safe for delicate chocolates. Using a thermometer to monitor the temperature helps prevent overheating and maintains chocolate quality.
Alternatively, microwave the chocolate in 30-second intervals, stirring after each, stopping when about 80% melted to let residual heat finish the job. Quick response digital thermometers are ideal for checking temperatures accurately during this process.
Direct heat melting is faster but riskier, needing constant stirring and low heat, especially for milk and white chocolate.
For larger quantities, a specialized melting pot offers controlled heat and consistent stirring. Always use dry utensils, monitor temperatures with a thermometer, and avoid overheating to prevent seizing and maintain chocolate’s silky finish.
Tempering for Shine
When you temper chocolate, you carefully control its temperature to align the cocoa butter crystals into a stable structure, ensuring a glossy finish and firm snap.
Start by chopping your chocolate uniformly to promote even melting. Use a thermometer to melt dark chocolate between 40-45°C (104-113°F), then cool it rapidly to 27-29°C (80-84°F) to form stable crystals. Proper utensils and temperature control are essential for each step to achieve perfect tempering essential tools. Using a digital instant-read thermometer with a fast response time helps maintain precise temperature control.
Reheat slightly to 31-32°C (88-90°F) before molding. Remember these key points:
Use dry utensils to prevent seizing. Stir gently throughout heating and cooling.
Add seed chocolate pieces during cooling for crystal formation. Avoid exceeding maximum temperatures to preserve crystal integrity.
This method guarantees your chocolate spoons will release cleanly from molds with a brilliant shine and smooth texture.
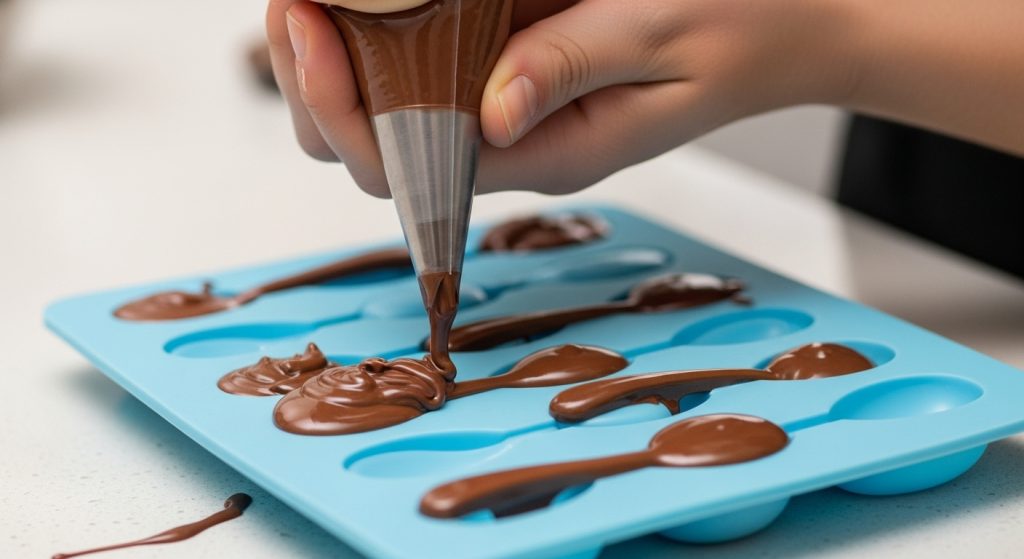
Techniques for Pouring Chocolate Into the Mold
Pouring chocolate into a mold requires steady hands and careful attention to temperature to achieve smooth, flawless results.
Use a piping bag or squeeze bottle to fill each cavity precisely, minimizing spills.
Pour in a thin, steady stream from a slight height, letting gravity guide chocolate into every crevice without stirring. Using tools with precise control helps reduce waste and ensures even coverage.
Maintain the mold at 79°F–81°F for milk or white chocolate, and 83°F–85°F for dark, guaranteeing the chocolate is properly tempered between 88°F and 90°F.
Leave a small gap at the top to prevent overflow and guarantee clean edges.
For hollow spoons, fill the mold, then invert to remove excess chocolate.
Always pour slowly into one spot to avoid disrupting the mold, and use a thermometer to monitor temperatures consistently throughout.
Before pouring, ensure the mold is clean and dry to remove any dust or residue that might affect the chocolate’s finish, promoting an easier release from the mold surface.
Removing Air Bubbles and Achieving Smooth Surfaces

After filling the mold with chocolate, your next focus should be on eliminating air bubbles and perfecting the surface texture.
Start by gently tapping the mold 5-6 times on your work surface to help trapped air rise and escape. Using molds made from food-grade silicone ensures safe and consistent results.
Next, place the mold on a vibrating platform for 30-45 seconds to dislodge stubborn bubbles, especially in detailed sections.
Tilt the mold slightly while tapping to encourage bubble migration.
Then use a clean pastry brush to push chocolate into intricate mold areas, reducing air pockets and enhancing smoothness. It is also crucial to work with chocolate at the correct temperature range to avoid damage and ensure smooth filling.
- Tap the mold gently on the surface.
- Use vibration to free trapped air bubbles.
- Tilt the mold while tapping.
- Brush chocolate into detailed areas.
These steps guarantee a flawless, smooth finish on your chocolate spoons.
Cooling and Setting Chocolate Spoons Properly
Although cooling might seem straightforward, setting chocolate spoons properly requires careful temperature control and timing to preserve their texture, shine, and snap.
Ideally, cool spoons at room temperature (65–75°F) for 1–2 hours to develop a glossy finish and firm structure. If time is limited, chill in the refrigerator for 30–60 minutes, but avoid rapid freezer cooling to prevent condensation and bloom.
Using a 3D-printed mold lined with plastic wrap or foil helps ensure easy release and food safety during cooling. Additionally, warming chocolate slightly, similar to how some oils require warming to prevent crystallization, can help maintain smooth texture.
Make certain chocolate reaches a firm, non-sticky state with a slight sheen, indicating correct beta crystal formation. Avoid drafts and high humidity to prevent surface imperfections.
When layering, let each coat partially set before adding the next to maintain spoon strength and smoothness. Proper cooling produces spoons that release cleanly from moulds and deliver that satisfying snap, confirming peak tempering and crystallization. Using flavor-enhancing oils like concentrated anise oil in complementary recipes can elevate your chocolate creations.
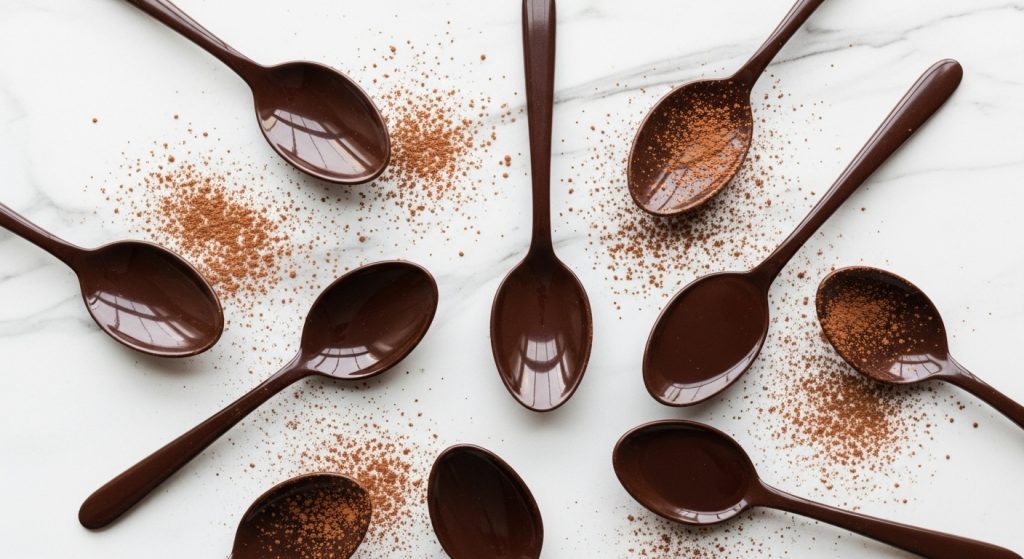
Decorating and Customizing Your Chocolate Spoons

Sure! Here’s a more conversational version of your text:
Want to take your chocolate spoons to the next level? How about adding some edible glitter? It really gives them that shimmering, eye-catching finish that’s hard to resist!
Plus, you can get creative with different types of chocolate—white, milk, or dark. Mixing and matching can create some gorgeous contrasts and unique flavors. Using silicone spoon molds makes it easy to create smooth, professional shapes and even try striped or layered effects. For best results, consider the importance of temperature control to ensure the chocolate sets perfectly.
Oh, and here’s a little tip: if you’re using any decorative elements, make sure to use melted chocolate as an adhesive. Just work quickly before the base sets, and you’ll have those decorations firmly in place. Happy decorating!
Edible Glitter Effects
Frequently, adding edible glitter transforms simple chocolate spoons into stunning, customizable treats that catch the eye with their sparkling appeal. To achieve this, you’ll want to use only FDA-compliant edible glitter made from safe ingredients like gum arabic or sugar-based substances.
It is important to verify that the glitter is labeled as edible rather than just non-toxic to ensure safety. Applying natural food colorings alongside edible glitter can enhance both the visual appeal and health benefits of your chocolate spoons due to their plant-based pigments.
Apply glitter right after pouring or dipping the chocolate, while it’s still wet, for the best adhesion. Here are effective application methods to enhance your chocolate spoons:
Sprinkle fine shimmer dusts onto the wet chocolate or inside molds before setting.
Pinch and scatter chunkier glitters or metallic stars by hand for textured accents.
Use a thin layer of piping gel to help glitter stick on pre-set chocolate.
Employ a small food-safe brush for precise glitter placement on handles or spoon bowls.
These techniques guarantee your chocolate spoons dazzle beautifully and remain food-safe.
Chocolate Types Variety
Choosing the right type of chocolate is essential when decorating and customizing your chocolate spoons, as each variety offers distinct flavors, textures, and melting behaviors.
Dark chocolate delivers a rich, intense taste, perfect for bold spoons. Milk chocolate provides a creamy sweetness favored for stirring hot drinks.
White chocolate excels in creating contrast and decorative patterns, despite requiring careful handling due to its sugar content. Colored candy melts offer vibrant, easy-to-use alternatives, though they lack authentic chocolate flavor.
Melting wafers, like Guittard, melt smoothly and set with a glossy finish, ideal for molding. They are often preferred because they provide a smooth, creamy melt that sets beautifully and quickly. Combining chocolates lets you craft marbled effects and layered flavors.
Selecting chocolates with good melting and setting properties guarantees your decorations adhere well, producing crisp, visually appealing spoons that hold up during packaging and use.
Attaching Decorative Elements
Enhance your chocolate spoons by skillfully attaching decorative elements that elevate both texture and visual appeal.
Apply decorations while the chocolate is still wet to ensure they stick firmly. Gently press larger pieces to prevent them from falling off after cooling.
Use tools like tweezers for precise placement, and drizzle extra melted chocolate to secure and embellish decorations. Work on parchment paper to avoid sticking and ease handling.
Here are effective decoration tips:
Add mini marshmallows, crushed candy canes, or edible pearls for varied texture and elegance.
Sprinkle edible glitter or metallic crunchies for a festive sparkle.
Use colored drizzles or sprinkles to match themes or occasions.
Consider having children decorate the spoons after the chocolate has cooled slightly to reduce mess and risk, making it a fun kitchen activity with age-appropriate tasks.
Allow spoons to fully set in a cool place before packaging or gifting.
Creative Uses and Serving Ideas for Chocolate Spoons
When serving chocolate spoons, you can transform simple beverages and desserts into memorable experiences by incorporating creative uses and thoughtful presentation.
Stir them into coffee or hot chocolate to infuse rich flavor, or use them as elegant garnishes for cakes and cupcakes. Decorating spoons with sprinkles, nuts, or edible glitter adds visual appeal. Using mini plastic bowls to organize assorted toppings can simplify decorating and enhance presentation.
Packaging them individually makes perfect party favors or gifts.
| Use Case | Serving Idea |
|---|---|
| Hot Beverages | Stir spoons into coffee or hot milk |
| Decorative Garnish | Pair with cakes or cupcakes |
| Party Favors | Package individually in clear wrap |
| DIY Stations | Provide toppings for customization |
| Gift Sets | Include in hot chocolate kits |
These ideas elevate your chocolate spoons beyond stirring tools to interactive, gourmet delights.
Tips for Avoiding Common Challenges in Chocolate Spoon Making
Although making chocolate spoons may seem straightforward, several common challenges can compromise their quality and appearance.
To guarantee flawless results, focus on precise tempering, mold preparation, moisture control, and handling techniques. Here’s how you can avoid pitfalls:
Temper chocolate carefully using a thermometer and avoid overheating to prevent grainy texture and dull finish.
Clean and polish molds thoroughly, and never touch cavities with bare hands to maintain shine and prevent spotting.
Keep all tools and molds dry; moisture causes chocolate to seize or bloom, ruining the surface.
Adjust chocolate viscosity properly and use vibration to fill molds evenly, eliminating air bubbles and surface imperfections. Increasing vibration and blower velocity can help remove air when coating viscosity is too high, but be cautious to avoid excessive vibration that thins the shell and risks breakage of pieces (vibration and blower velocity).
Frequently Asked Questions
Can I Reuse Chocolate Spoons After Melting Them Down?
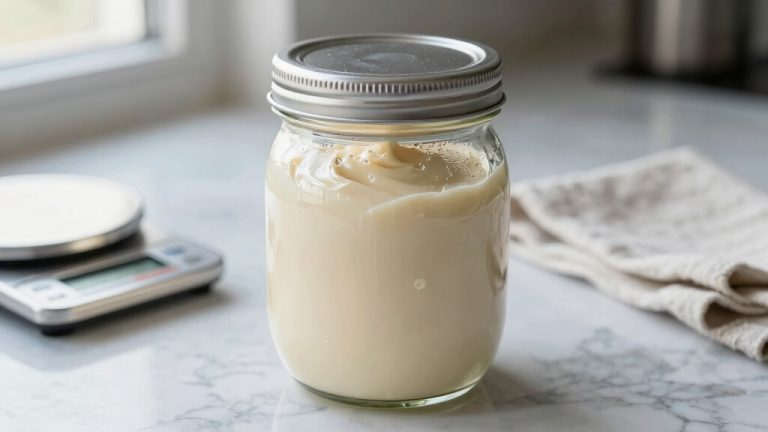
Yes, you can reuse chocolate spoons after melting them down if you store the melted chocolate properly. Keep it in an airtight container at room temperature, away from heat and moisture.
Remember to re-temper the chocolate when reheating to maintain texture and gloss. Limit remelting cycles to preserve quality, and always check for off smells or mold before reuse.
This helps make certain your chocolate stays safe and delicious for your next batch.
How Long Do Homemade Chocolate Spoons Typically Last?
Homemade chocolate spoons typically last between 2 weeks and 3 months, depending on ingredients and storage.
If you use dairy-based chocolate, expect about 2-3 weeks’ freshness. Dark chocolate spoons can last longer, up to 3 months or more when stored properly in a cool, dry place around 60-70°F.
Keep them airtight to prevent moisture and flavor loss. Avoid refrigeration unless necessary, as humidity can degrade texture and taste.
Is It Possible to Make Chocolate Spoons Without Tempering?
You can definitely make chocolate spoons without tempering.
Imagine a home baker quickly melting chocolate, pouring it into molds, and chilling it, resulting in spoons with a softer texture and matte finish.
While these spoons lack the glossy sheen and snap of tempered ones, they’re perfect for casual use or decoration.
Just remember, untempered spoons may melt easily and show fat bloom, so handle and store them carefully for best results.
What’s the Best Way to Clean Silicone Chocolate Molds?
The best way to clean silicone chocolate molds is to wash them promptly with warm, soapy water using mild, unscented dish soap.
Soak stubborn residues for 15–30 minutes, then gently scrub with a soft sponge.
Rinse thoroughly under warm water to remove soap completely.
Let your molds air dry fully before storing to prevent mildew.
Avoid abrasive scrubbers and harsh chemicals to preserve mold integrity and guarantee long-lasting performance.
Can I Add Liquid Flavorings Directly to the Melted Chocolate?
Imagine your melted chocolate as a delicate dance partner. Too much water in your flavorings and the dance falls apart, turning grainy and stiff.
You shouldn’t add liquid flavorings directly because they cause chocolate to seize. Instead, use oil-based flavoring oils designed for chocolate; they blend smoothly without ruining texture.
Add them sparingly after tempering, and your chocolate will maintain its glossy, silky finish and perfect consistency.
Transform Simple Moments Into Sweet Memories
By choosing the right mold, melting chocolate perfectly, pouring with care, and cooling patiently, you set the foundation for flawless chocolate spoons.
By removing air bubbles, smoothing surfaces, and adding your personal touch, you transform simple treats into delightful creations.
By embracing creativity, avoiding common pitfalls, and sharing your spoons with others, you turn a craft into an experience.
Follow these steps, and you’ll master the art of chocolate spoon making with confidence and style.