How to Bake Mini Sourdough Loaves with a Crackling Crust?
Start by feeding your bubbly starter with equal parts flour and water for 4-6 hours. Mix it into water, then add flour and salt, forming a shaggy dough.
Divide and gently shape equal mini loaves, preserving softness. Proof cold for 8-48 hours to develop flavor. Score each loaf with a sharp blade, then bake in a hot Dutch oven with steam for a crisp crust. Perfect your technique, and you’ll reveal even more baking secrets ahead.
Key Takeaways
- Prepare a bubbly, active starter and mix with flour, water, and salt for a shaggy dough, using autolyse for better gluten development.
- Divide dough into equal portions using a scale and shape mini loaves with tight rounds or batards, preserving gas bubbles for rise.
- Cold proof mini loaves in the refrigerator for 8-48 hours to enhance flavor, using rice flour-dusted baskets to prevent sticking.
- Score loaves with a sharp blade at a 30°-45° angle, then bake in a preheated Dutch oven at 450°F covered, uncovering for crust color.
- Cool baked mini loaves on a wire rack, store in breathable bags for freshness, and refresh crust by lightly misting and reheating in a 350°F oven.
Essential Ingredients and Process
| Ingredients | Process |
|---|---|
| Active sourdough starter (fed with equal parts flour and water) | Feed starter with 1:1:1 ratio (50g starter, 50g flour, 50g water). Wait 4-6 hours until it doubles in size and becomes bubbly |
| Bread flour or all-purpose flour | Mix into room-temperature water after adding starter. For better results, try autolyse: mix flour and water first, rest 30 minutes |
| Room-temperature water | Break up the peaked starter in water before adding flour |
| Salt | Add after autolyse period with starter to create shaggy dough |
| Rice flour (for dusting) | Dust loaves before scoring to prevent blade sticking |
Preparing the Dough and Starter
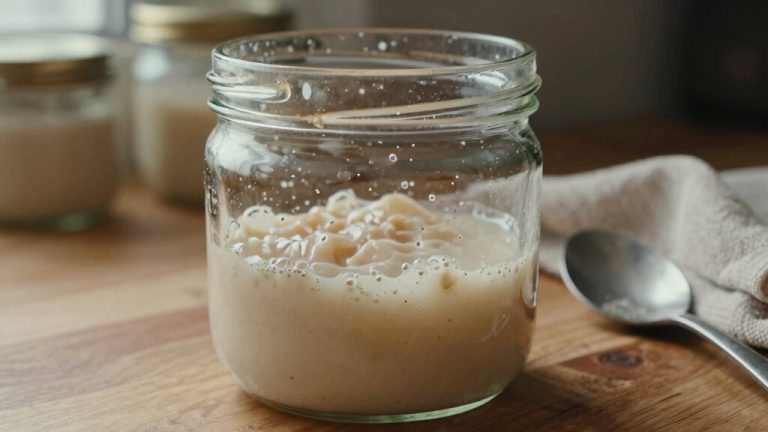
Before you start mixing your dough, you’ll need to guarantee your sourdough starter is lively and ready to work its magic. Feed it with equal parts flour and water by weight—say, 50g each—and wait for it to double in size, bubbling energetically. This usually takes 4-6 hours at a 1:1:1 feeding ratio.
Ensure your sourdough starter is bubbly and doubled after feeding equal parts flour and water before mixing dough.
Temperature and feeding amount influence rise time, so adjust accordingly. Once your starter’s peaked, mix it into room-temperature water to break it up before adding flour and salt. Using a Dutch oven with even heat distribution can significantly enhance the baking results of your sourdough loaves.
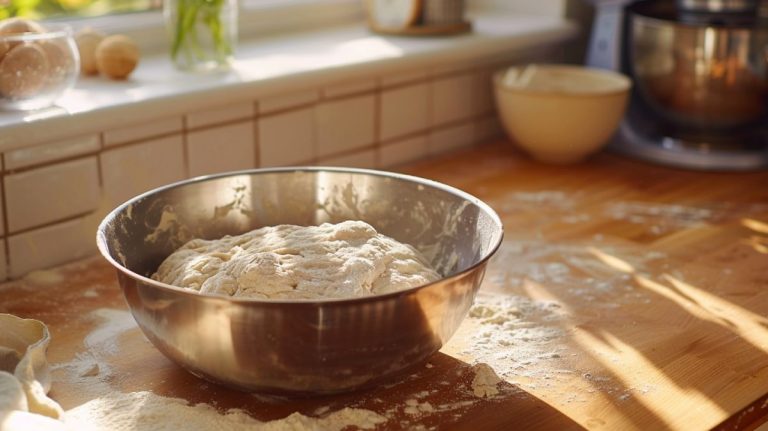
For better gluten development, try autolyse: mix flour and water first, rest for 30 minutes, then add starter and salt. Combine everything until the dough looks shaggy, then cover loosely to rest. Using a kitchen scale for precise measurement of ingredients and starter is essential for consistent results.
Dividing and Shaping the Mini Loaves
When your dough has risen and feels airy yet resilient, it’s time to divide it into equal portions for your mini loaves. Lightly flour your surface to prevent sticking, then use a sharp bench scraper to make clean, straight cuts—this preserves the dough’s delicate gluten network and gas bubbles.
Proper fermentation is critical; if the dough is over-fermented, it may collapse when cut, so ensure it has not passed its peak before dividing. Proper fermentation Achieving the right gluten development is essential for the dough’s structure during shaping.
Weigh each piece for uniformity, handling them gently to keep that precious air inside.
Next, shape each portion into tight rounds by tucking edges underneath and rolling against the surface, creating surface tension essential for oven spring. For batards, flatten slightly and fold edges toward the center, sealing seams underneath with a bench scraper.
Remove excess flour before shaping to ensure a smooth crust. Seal seams firmly to prevent opening, and keep flour minimal to maintain a tacky surface that promotes a beautiful rise.
Proofing and Refrigeration Techniques
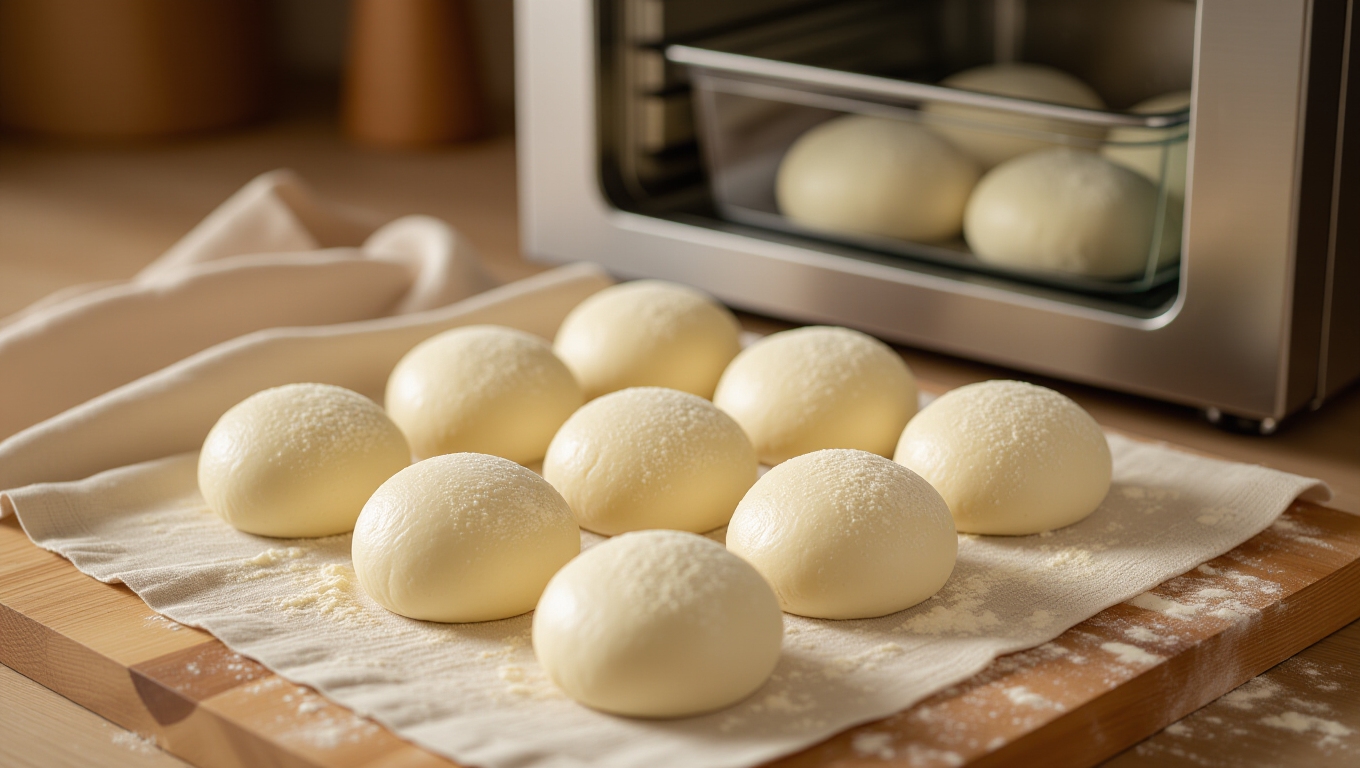
Though proofing might seem like a waiting game, mastering the timing and temperature during this stage is essential to developing the signature tang and texture of your mini sourdough loaves. Cold proofing in the refrigerator between 8 to 48 hours slows fermentation, deepening flavor and improving crust quality. Cover your pans loosely to avoid drying yet prevent sogginess.
Handle dough gently to preserve gas bubbles, and remove loaves from the fridge just before baking to guarantee ideal rise. Using a proofing basket generously dusted with rice flour helps prevent sticking and maintains the dough’s shape during refrigeration. The fermentation process in sourdough baking also helps lower the glycemic index, making your bread a healthier choice.
| Proofing Temperature | Duration |
|---|---|
| 39°F (4°C) | 8 to 48 hours |
| Room temp (~70°F) | 1 to 4 hours |
| Warm (~80°F) | 1 to 2 hours |
| Minimum cold proof | 5 hours (flavor) |
| Max cold proof | 48 hours (avoid) |
Scoring and Oven Setup
Since scoring directly influences both the appearance and baking performance of your mini sourdough loaves, choosing the right tools and mastering your technique is vital.
Use a sharp blade—like a bread lame or razor—to make clean, fluid cuts. Dust your loaf with rice flour to prevent sticking and preserve light score lines. Score straight from the fridge, holding your blade at a 30° to 45° angle for perfect ear formation. Scoring creates weak points in the dough for steam to escape, preventing blowouts during baking. Using a precise kitchen scale can help you measure and maintain consistent dough weights before scoring.
Aim for ¼ to ½ inch depth, adjusting for expansion or artistic patterns.
For oven setup, preheat your Dutch oven thoroughly to ensure immediate oven spring. Place dough on parchment for easy transfer, add steam by covering or using a water tray, and bake promptly after scoring to keep dough tension intact. Maintaining exact ingredient proportions using a digital baking scale enhances dough consistency and final loaf quality.
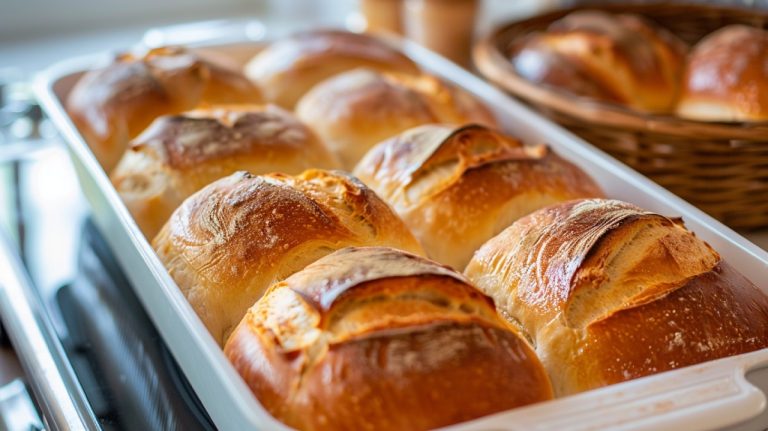
Baking Process and Timing
Although the baking process demands careful temperature control, you’ll find that starting your mini sourdough loaves in a blazing hot oven—around 500°F (260°C)—is key to revealing that explosive oven spring and developing a deeply caramelized crust.
After 15 minutes, lower the heat to 425°F (220°C) to finish baking without burning. This temperature control also helps maintain the nutritional benefits of the sourdough fermentation. If using a Dutch oven, preheat it for an hour at 450°F (230°C), bake covered 30 minutes, then uncovered at 410°F (210°C) for 10–15 minutes.
To develop a crusty exterior, be sure to create steam during baking using towels, water in a dish, or spray bottles. Cool loaves completely on a wire rack to preserve crust texture.
| Stage | Temperature | Duration |
|---|---|---|
| Initial bake | 500°F (260°C) | 15 minutes |
| Lower temp bake | 425°F (220°C) | 15–20 minutes |
| Dutch oven covered | 450°F (230°C) | 30 minutes |
| Dutch oven uncovered | 410°F (210°C) | 10–15 minutes |
Storing and Maintaining Freshness
You want to store your mini sourdough loaves in breathable bags or a bread box at room temperature to keep the crust crisp and the crumb moist. Using cloth bags or kitchen towels allows the bread to breathe while slowing moisture loss.
Avoid refrigeration, as it dries out the bread quickly, but freezing wrapped loaves can extend freshness for months. Monitoring the internal temperature of your bread with an instant-read thermometer ensures it is fully baked and safe to store.
When the crust softens, revive it by lightly misting the loaf and warming it in the oven to restore that perfect crunch and texture.
Optimal Storage Methods
When storing your mini sourdough loaves, maintaining the ideal environment is essential to preserving their signature crust and moist crumb. Keep them at room temperature, ideally between 60-70°F, in a cool, dry spot away from direct sunlight.
Avoid refrigeration—it dries out the bread quickly. Cooling the bread completely before storage is crucial as moisture loss begins immediately once the bread starts to cool. Temperature control during storage also influences the preservation of the bread’s microbial health, which impacts freshness and flavor.
Use breathable packaging like linen bags inside a bread box to balance moisture retention and air circulation, preventing sogginess and mold. For short-term storage (up to four days), let loaves cool fully, then wrap them just before storing.
Freeze longer-term by wrapping cooled loaves tightly in plastic wrap and placing them in airtight freezer bags, labeling with the date. Monitor daily, discard moldy bread, and slice only before eating to keep freshness alive.
Crust Refresh Techniques
Since the hallmark crunch of a mini sourdough loaf can dull within days, mastering crust refresh techniques becomes essential to enjoy that fresh-baked texture again.
Lightly spritz your loaf with cold water—just enough to cover the crust without soaking it. This creates steam inside a fully preheated 350°F oven, crispening the crust like fresh baking.
Place the loaf directly on the oven rack for 5-15 minutes, depending on size, to maximize airflow and restore crunch. Avoid over-saturating, which leads to sogginess or chewiness. Maintaining stable temperatures and proper airflow helps in preserving the crust’s texture during reheating, reflecting principles used in starter management.
For frozen bread, thaw completely before refreshing. After freezing, bread should be sealed with a vacuum or airtight bag to prevent freezer burn.
Adding a tray of water in the oven can enhance steam, preserving interior softness while reviving crust crunch.
Refresh within 3-5 days, and limit reheating frequency to maintain ideal flavor and texture.
Frequently Asked Questions
Can I Use Whole Wheat Flour Instead of All-Purpose Flour?
You can definitely use whole wheat flour instead of all-purpose, but you’ll need to adjust your hydration by 5% to 15% more water since whole wheat absorbs more. Expect stickier dough and denser loaves with a nuttier flavor.
Handle the dough gently to protect gluten strands. Also, ferment faster to avoid over-proofing.
Embrace the richer nutrients and heartier texture—you’ll love the wholesome, flavorful bread you create.
How Do I Adjust Baking for High-Altitude Locations?
At high altitudes, you’ll want to increase your oven temperature by about 25°F to counteract lower air pressure and faster moisture loss.
Alternatively, extend baking time without changing temperature to ensure thorough cooking. Don’t do both at once.
Boost dough hydration to combat dryness, reduce starter by 25% to prevent over-proofing, and use cooler water.
Keep an eye on your loaf to avoid over-browning, and check internal temperature for perfect doneness.
What Are Common Signs of an Inactive Sourdough Starter?
You’ll know your sourdough starter is inactive if it stays flat and lifeless after feeding, showing no bubbles or rise within 4–8 hours.
Watch for a layer of hooch—a dark, harmless liquid indicating hunger—but if you see fuzzy mold or colors like orange, pink, or green, discard it.
A strong rotten smell means spoilage, too.
Patience helps with sluggish starters, but mold or foul odors are definite no-go signs.
Can I Add Seeds or Nuts to the Dough?
Did you know soaking seeds for 12 hours can reduce burning and improve hydration?
You can definitely add seeds or nuts to your dough! They boost flavor, texture, and nutrition, but be careful not to add too much—they can weigh down the dough and affect gluten development, leading to a denser crumb.
Add them gently after initial mixing, and consider soaking seeds beforehand to keep your loaf moist and flavorful without compromising rise or crust quality.
How to Prevent Mini Loaves From Sticking to the Pans?
To prevent your mini loaves from sticking, start by greasing your pans thoroughly with butter or oil, covering every corner.
Line them with parchment paper, letting the edges hang over for easy lifting.
Shape your dough with good surface tension to reduce sticking, and avoid overproofing.
After baking, cool the loaves 10-15 minutes before gently loosening edges with a plastic spatula.
These steps guarantee clean, intact bread release every time.
Golden Mini Sourdough: A Labor of Love in Every Loaf
Now, imagine pulling golden mini sourdough loaves from your oven—the crust crackling like a crisp autumn leaf under your fingers. You’ve nurtured the dough from starter to rise, shaped each loaf with care, and timed every step perfectly.
These small loaves aren’t just bread; they’re a labor of love, a taste of patience and craft. Keep practicing, and soon your kitchen will smell like warm, rustic comfort every day.