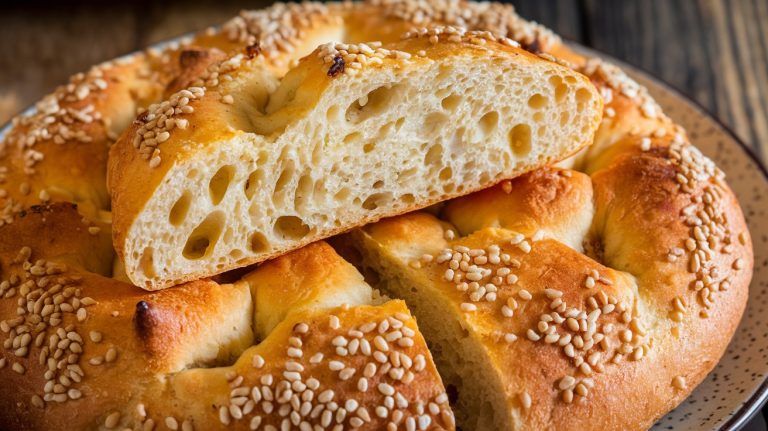
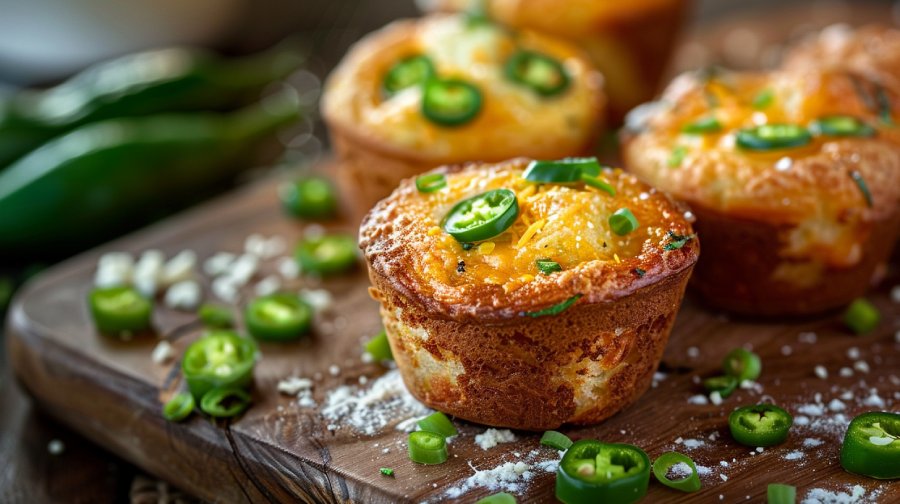
Easy Jalapeno Cheddar Mini Muffin Loaf Recipe: Easy Steps
To make easy Jalapeno Cheddar Mini Muffin Loaves, you’ll need flour, buttermilk, fresh jalapeños, cheddar cheese, and butter for a blend of spicy and savory flavors. Combine warm water, honey, and yeast, then mix with flour, salt, cheese, and jalapeños to form a sticky dough.
Let it rise for 12-18 hours to develop flavor, then fill greased mini loaf pans and bake. Cool on a rack before serving. Enjoy with butter, soups, or salads. Experiment with variations like adding bacon bits or herbs for unique twist. Ready to perfect this delicious creation?
Key Takeaways
- Mix warm water, honey, and active dry yeast to start the dough.
- Gently combine flour, salt, cheddar cheese, and jalapeños with activated yeast mixture.
- Ensure the dough is sticky for a tender crumb and crispy crust.
- Fill greased mini loaf pans with dough and bake in a preheated oven.
- Cool the mini muffin loaves on a rack before serving or storing.
Ingredients
To make these delectable jalapeno cheddar mini muffin loaves, you’ll need a handful of staple ingredients including flour, buttermilk, jalapenos, cheddar cheese, and butter. These ingredients come together to create a delightful fusion of spicy and savory flavors in each bite. The flour serves as the base, providing structure to the loaves, while the buttermilk adds a subtle tanginess and helps maintain their moisture.
Fresh jalapenos bring a spicy kick, perfectly balanced by the creamy, melted cheddar cheese. This combination ensures that each mini loaf bursts with flavor. Butter, a crucial ingredient, contributes to the rich, tender crumb and enhances the overall taste.
Using a muffin tin is a brilliant idea for this recipe. It simplifies the baking process and guarantees even cooking for each mini loaf. Plus, the individual servings make these mini muffin loaves perfect for sharing or enjoying on your own without any waste.
The spicy flavor from the jalapenos and the sharpness of the cheddar cheese create a mouthwatering experience that’s hard to resist. With these simple ingredients, you’re set to bake a batch of flavorful, spicy, and cheesy mini loaves that everyone will love.
Dough Preparation
Start by combining warm water, honey, and active dry yeast in a bowl, allowing the yeast to activate and kickstart the dough rising process. This step is pivotal as the active dry yeast will create the necessary bubbles and air pockets in your bread dough, ensuring a light and airy texture.
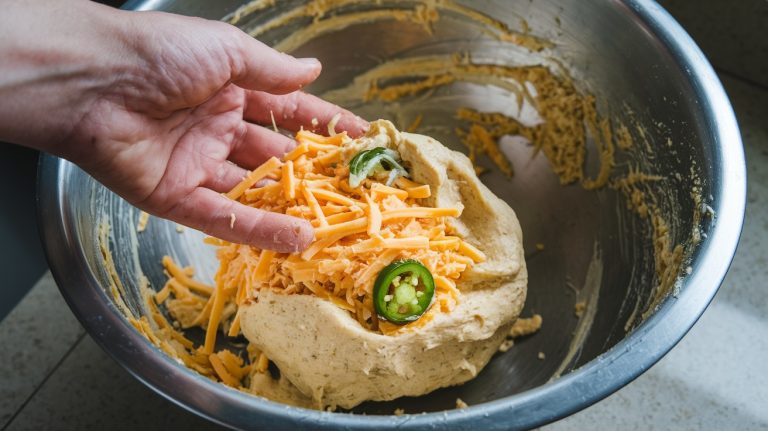
Next, you’ll add flour, salt, shredded cheddar cheese, and diced jalapenos. These ingredients come together to form a flavorful dough mixture that promises a delightful taste in every bite. The cheddar cheese melts to provide a rich, savory flavor, while the diced jalapenos add a spicy kick that balances perfectly.
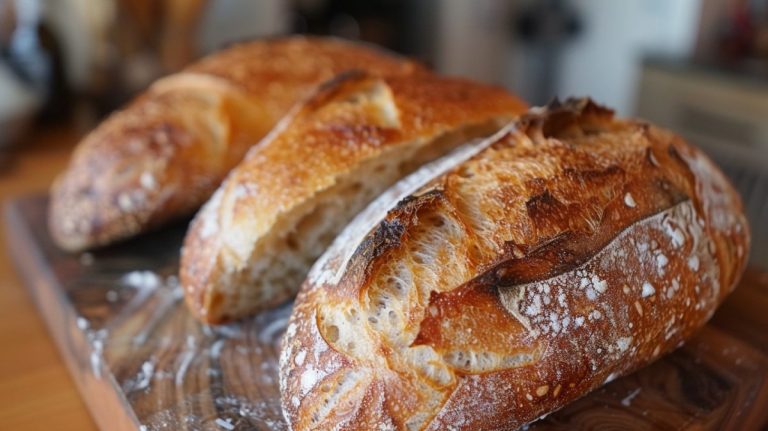
Mix everything until a sticky dough forms. Don’t worry if the consistency seems wetter than usual; this no-knead dough is designed to be sticky, which ultimately contributes to a tender crumb and a crispy crust.
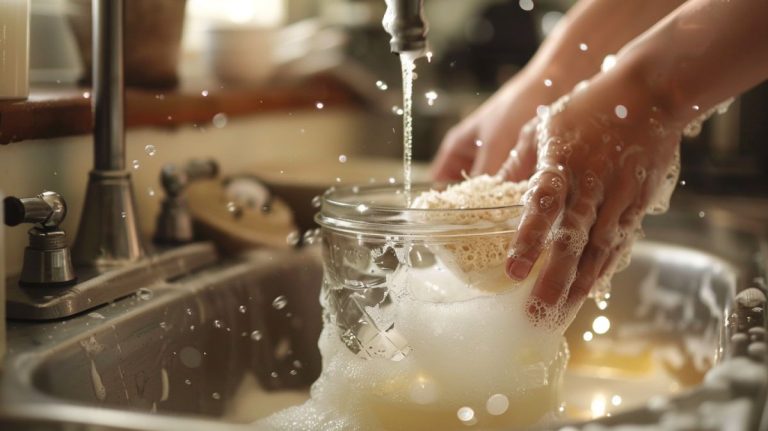
Cover the bowl with plastic wrap or a damp cloth and let it sit at room temperature for a rise time of 12-18 hours. This extended rise time allows for significant flavor development, transforming the simple ingredients into a complex, delicious bread.
Mixing the Dough
Gently mix the yeast mixture to make certain it’s fully activated before you start incorporating the flour, salt, cheddar cheese, and diced jalapenos. As you blend these ingredients, you’ll notice the dough becoming quite sticky. This is precisely what you want, so resist the urge to add more flour. The sticky dough is crucial to achieving that light and airy texture that makes this mini muffin loaf irresistible.
While stirring, make sure that your mix-ins, like the cheddar cheese and jalapenos, are evenly distributed throughout the dough. This guarantees that every bite bursts with flavor.
- Cheddar Cheese: The shredded cheddar cheese should be finely grated to blend seamlessly into the dough.
- Diced Jalapenos: Ensure the jalapenos are diced small enough to distribute evenly, providing a consistent heat.
- Mix-ins: Both the cheese and jalapenos should be mixed thoroughly to avoid any clumps and ensure an even flavor profile.
Keep stirring until all the ingredients are well combined. The dough will remain sticky, which is perfect. This no-knead, no-shape, no-refrigeration method makes the process simple and straightforward, yet the results are absolutely delicious.
Adding Mix-Ins
When it’s time to add your mix-ins, make sure the diced jalapenos and finely shredded cheddar cheese are evenly dispersed throughout the dough to guarantee every bite is packed with flavor. This step is essential, as it secures the bread has a consistent taste and texture. By evenly distributing the mix-ins, you’ll create a harmonious blend of spice from the jalapenos and creamy richness from the cheddar, elevating the bread to a new level of deliciousness.
Incorporating mix-ins like these not only adds flavor but also enhances the texture of your mini muffin loaf. The jalapenos bring a subtle crunch and spicy kick, while the cheddar melts into pockets of gooey goodness. Here’s a quick look at some mix-in ideas and their effects:
| Mix-In | Impact on Bread |
|---|---|
| Infuse the dough with aromatic flavors | Adds spice and a slight crunch |
| Shredded Cheddar | Melts into creamy, flavorful pockets |
| Cooked Bacon | Adds a smoky, savory element |
| Fresh Herbs | Infuses the dough with aromatic flavors |
| Seeds | Adds a nutty texture and taste |
Experimenting with different mix-ins allows you to customize the bread to your personal taste preferences. Whether you stick with jalapenos and cheddar or try something new, each variation brings a unique flavor and texture to your mini muffin loaf.
Proofing the Dough
Now that you’ve mixed in the jalapeno and cheddar, it’s time to let the dough rise. Make sure your yeast is activated properly by using warm water, around 110°F, and find a cozy spot for best proofing.
Keep an eye on the dough as proofing times can vary, ensuring it rises to the ideal airy texture.
Yeast Activation Tips
To guarantee your dough rises perfectly, start by activating the dry yeast in warm water between 95°F and 110°F. This temperature range is essential for proper fermentation, making sure that the yeast becomes active and starts working its magic.
Add a teaspoon of honey to the mixture to give the yeast extra food, promoting a robust activation process. After combining the yeast, warm water, and honey, let the mixture sit for about 5-10 minutes. You’ll know the yeast is activated when it turns foamy, a sure sign that it’s ready to help your dough rise and develop rich flavors.
Here are some tips to guarantee successful yeast activation:
- Warm Water Temperature: Use a thermometer to verify your water is between 95°F and 110°F. Too hot or too cold, and the yeast won’t activate properly.
- Honey Addition: A touch of honey not only nourishes the yeast but also adds a subtle sweetness to your bread.
- Foamy Confirmation: If your yeast mixture doesn’t become foamy after 10 minutes, it might be expired or the water temperature could be off. Start over to guarantee proper dough rise and flavor development.
Optimal Proofing Temperature
Maintaining a prime proofing temperature between 75°F to 85°F secures your dough rises with ideal texture and flavor. This temperature range secures that fermentation proceeds at a steady pace, allowing the dough to develop a rich, complex taste.
If the proofing temperature is too high, the fermentation process speeds up, potentially compromising flavor development. Conversely, lower temperatures slow down fermentation, enhancing flavor but prolonging the dough rise.
Consistency is key. Keep the proofing temperature stable to achieve predictable outcomes in both texture and flavor. Using your oven as a proofing box can help maintain this consistent environment. Simply preheat your oven to its lowest setting for a few minutes, then turn it off. Place the dough inside, making sure the oven temperature doesn’t exceed 85°F.
Monitoring the proofing temperature is essential. Use a thermometer to check the environment where your dough is resting. This careful attention secures that your Jalapeno Cheddar Mini Muffin Loaves rise perfectly, yielding a light, airy texture and robust flavor.
Proofing Time Adjustments
Adjusting proofing time is important for achieving the ideal balance of flavor, texture, and rise in your Jalapeno Cheddar Mini Muffin Loaves. Proofing time can be influenced by room temperature—warmer conditions make the dough rise faster, while cooler settings slow it down. Finding the best balance guarantees that your loaves have well-developed flavors and a pleasing texture.
Longer proofing times are advantageous for flavor development and strengthening the gluten structure. However, you must monitor the dough closely to avoid over-proofing, which can result in a collapsed loaf with a dense texture. Conversely, shorter proofing periods might lead to loaves with less flavor and a firmer bite.
Adjust proofing time based on room temperature to control the rise speed.
Monitor dough to prevent over-proofing and ensure an ideal balance of flavor and texture.
Experiment with different proofing times to discover what works best for your specific environment.
Baking Instructions
Start by preheating your oven to 375°F and preparing a mini muffin tin by either greasing it or lining it with cupcake liners. This guarantees that your jalapeno cheddar mini muffin loaves will pop out easily once baked.
In one bowl, mix the dry ingredients: flour, baking powder, salt, and a touch of sugar. In another bowl, whisk together the wet ingredients: milk, egg, melted butter, diced spicy jalapenos, and shredded cheddar cheese. Combining the wet and dry mixtures, stir until just mixed. Be careful not to overmix, as this could make the muffins dense.
Spoon the batter into the prepared muffin tin, filling each cup about three-quarters full. Place the tin in the preheated oven and bake the bread for approximately 12-15 minutes. You’ll know the muffins are done when they turn golden brown and a toothpick inserted in the center comes out clean.
Once baked, allow the mini muffin loaves to cool in the tin for a few minutes. Then, transfer them to a cooling rack to let them rest and cool completely. This step is essential to guarantee the perfect texture and flavor of your delightful mini loaves.
Cooling and Serving
Once your jalapeno cheddar mini muffin loaf is out of the oven, let it cool in the pan for about 10 minutes to settle.
Then, transfer it to a wire rack to avoid a soggy bottom and achieve the perfect texture.
Serve it warm or at room temperature, either on its own or paired with butter, soups, or salads for a delightful treat.
Optimal Cooling Practices
To achieve the best texture and flavor, let the mini muffin loaf cool in the pan for 5-10 minutes before transferring it to a wire rack. This initial cooling period allows the loaf to set slightly, making it easier to handle.
Once you’ve waited those critical minutes, carefully move the loaf to a wire rack to cool completely. Proper cooling is essential to prevent sogginess and to guarantee an even texture and flavor distribution throughout the loaf.
When you transfer the mini muffin loaf to a wire rack, you allow air to circulate around the entire loaf, preventing moisture from building up on the bottom. This step is essential for maintaining the loaf’s integrity and flavor.
Here are a few reasons why proper cooling is important:
- Even Texture: Cooling completely on a wire rack helps the loaf maintain a consistent texture, preventing any part from becoming too dense or too crumbly.
- Flavor Distribution: Allowing the loaf to cool properly ensures that the flavors meld together, giving you a more harmonious taste with every bite.
- Prevent Sogginess: Proper cooling prevents moisture from getting trapped, which can make the loaf soggy and less enjoyable.
Make sure the mini muffin loaf is fully cooled before you think about serving it.
Serving Suggestions
Ensure the mini muffin loaf has cooled completely on a wire rack before you indulge in its delightful flavors. This step is essential, not only for achieving the best texture and flavor but also to prevent the cheese from burning your hands or mouth.
Once cooled, you can slice the loaf and explore a variety of serving suggestions.
For an irresistible experience, consider pairing options like honey butter or a creamy spinach dip. These additions complement the spicy and cheesy profile of the loaf, elevating it to a whole new level of deliciousness.
If you’re thinking of side dish ideas, this mini muffin loaf shines alongside soups and salads, making it a versatile addition to any meal. It also stands alone beautifully as a tasty snack, perfect for any time of day.
To preserve the delightful flavors and freshness, be sure to refrigerate leftovers in an airtight container. This way, you maintain the bread’s quality for several days, allowing you to enjoy it whenever the craving strikes.
Storage Tips
Proper storage can keep your jalapeño cheddar mini muffin loaves fresh and delicious for days. To start, store leftover loaves in an airtight container at room temperature, making sure they stay moist while maintaining their delightful flavor and texture for up to two days.
If you need them to last a bit longer, wrap the mini muffin loaves tightly in plastic wrap and place them in the refrigerator. This method keeps them fresh for up to a week.
For extended storage, consider freezing your jalapeño cheddar mini muffin loaves. Place them in a freezer-safe bag or container, and they’ll stay good for up to three months.
Here are some essential storage tips to keep in mind:
- Room Temperature: Use an airtight container for up to 2 days.
- Refrigerator: Wrap tightly in plastic wrap for freshness up to a week.
- Freezer: Store in a freezer-safe bag or container for up to 3 months.
When you’re ready to enjoy your frozen loaves, thaw them in the refrigerator overnight. Then, warm them in the oven at 350°F for a few minutes.
Avoid storing the mini muffin loaves in direct sunlight or near heat sources, as this can affect their texture and flavor. Proper storage guarantees your loaves remain a tasty treat whenever you crave them.
Flavor Variations
Enhancing your jalapeño cheddar mini muffin loaves with different mix-ins and ingredients can transform this savory treat into a versatile and exciting culinary delight. To customize your jalapeño cheddar bread, you can start by incorporating mix-ins like crispy bacon bits, diced onions, or roasted garlic. These savory additions boost flavor and add texture to each mini muffin loaf.
Experimenting with cheese options is another way to create unique flavor variations. Try swapping out cheddar for pepper jack, smoked gouda, or even feta for a delightful twist. If you crave an extra kick, enhance the heat level by adding more jalapeños, sriracha, or crushed red pepper flakes.
For those who love a sweet and savory combination, mixing in dried cranberries, honey, or maple syrup with the cheddar and jalapeños offers a tantalizing contrast. Additionally, herb-infused variations can elevate your mini muffin loaf. Fresh or dried rosemary, thyme, or basil can provide added depth and complexity to the flavor profile.
Serving Suggestions
When it comes to serving jalapeño cheddar mini muffin loaves, their versatility makes them perfect for a variety of occasions and pairings. These bite-sized delights can easily transform into a fun and delicious appetizer or snack for your next party. Pair them with a creamy dip like garlic aioli or ranch dressing to elevate their flavor profile.
For a more substantial meal, serve the mini muffin loaves alongside a warm bowl of soup or a crisp, fresh salad. Their cheesy, spicy goodness complements a variety of dishes, making them a versatile addition to any meal.
Perfect for casual gatherings, picnics, or even a cozy family dinner, these mini loaves are easy to eat and share. Customize the serving size by cutting each mini muffin loaf into smaller slices, ensuring everyone gets a taste.
Here are some ideas to get you started:
- Pair with a cream dip like garlic aioli or ranch for an irresistible appetizer.
- Serve as a snack alongside a bowl of soup or a fresh salad.
- Bring to parties or picnics as a bite-sized, easy-to-eat treat.
With these serving suggestions, you’ll find endless ways to enjoy your jalapeño cheddar mini muffin loaves.
Frequently Asked Questions
Does Jalapeno Cheese Bread Need to Be Refrigerated?
You don’t need to refrigerate jalapeño cheese bread right away. However, after a day or two, wrap it tightly and refrigerate to keep it fresh longer. Reheat in the oven to enjoy its revived flavors.
What Goes With Cheddar Jalapeño Bread?
Picture a symphony of flavors as you pair cheddar jalapeño bread with tomato bisque, chili, or broccoli cheddar soup. It’s perfect for charcuterie boards, mini sandwiches, or toasted with a poached egg and avocado for breakfast.
Is It Better to Use Fresh or Pickled Jalapenos in Sourdough Bread?
For sourdough bread, pickled jalapeños are usually better due to their tangy flavor and softened texture. However, fresh jalapeños, when blanched or roasted, add a robust taste. Try both to find your favorite!
How to Store Cheddar Sourdough?
When it comes to storing cheddar sourdough, don’t let it go stale. Keep it in a paper bag or bread box for 2-3 days, refrigerate wrapped for a week, or freeze for up to 3 months.
Delight Your Senses and Impress Your Guests!
Don’t worry if you’re not an experienced baker—this jalapeño cheddar mini muffin loaf recipe is foolproof!
With no need for shaping or refrigeration, you’ll have fresh, flavorful bread on the table in no time.
Imagine the aroma of melted cheddar and spicy jalapeños wafting through your kitchen.
Ready to impress your friends and family? Give this easy recipe a try, and watch their faces light up with delight.
You’ve got this!